If you want to use specific features of ApsaraMQ for RocketMQ, such as ordered messages and transactional messages, in cloud applications, you can use data inbound or outbound rules to exchange data between ApsaraMQ for MQTT and ApsaraMQ for RocketMQ. This topic describes how to export data from ApsaraMQ for MQTT to ApsaraMQ for RocketMQ.
Background information
ApsaraMQ for MQTT supports cloud SDKs. You can connect cloud applications to ApsaraMQ for MQTT brokers to send and receive messages by using cloud SDKs. For information about how to use cloud SDKs, see Overview.
ApsaraMQ for MQTT also supports data exchange between ApsaraMQ for MQTT and other Alibaba Cloud services. Currently, you can exchange data only between ApsaraMQ for MQTT and ApsaraMQ for RocketMQ.
This topic describes how to export data from ApsaraMQ for MQTT to ApsaraMQ for RocketMQ over the Internet by using the SDK for Java.
In this scenario, you can use third-party open source SDKs for multiple programming languages to send and receive messages. For more information, see Download the SDK.

Network access
ApsaraMQ for MQTT provides Public Endpoint and VPC Endpoint.
Public Endpoint is an IP address that is used to access ApsaraMQ for MQTT over the Internet. In most cases, public endpoints are used in the IoT and mobile Internet scenarios.
VPC Endpoint is an IP address that is used to access ApsaraMQ for MQTT in a private virtual cloud (VPC). In most cases, VPC endpoints are used by cloud applications to connect to ApsaraMQ for MQTT.
If you want to use an endpoint to connect a client to ApsaraMQ for MQTT, use the domain name instead of the IP address because the IP address dynamically changes. The ApsaraMQ for MQTT technical team is not liable for faults and direct or indirect losses in the following scenarios:
You use an IP address to access your client to ApsaraMQ for MQTT. After the technical team of ApsaraMQ for MQTT updates the domain name resolution, the original IP address becomes invalid.
A firewall policy on IP addresses is set in the network in which your client is running. After the technical team of ApsaraMQ for MQTT updates the domain name resolution, new IP addresses are blocked due to the firewall policy.
Prerequisites
The integrated development environment (IDE) is installed. For more information, see IDE. You can use IntelliJ IDEA or Eclipse. In the example, IntelliJ IDEA is used.
Java 8 or 11 is installed. For more information, see Java Downloads.
An ApsaraMQ for MQTT instance is created, and a topic and a group are created on the instance. For more information, see Create resources.
An ApsaraMQ for RocketMQ instance is created, and a topic and a group are created on the instance. For more information, see Step 2: Create resources.
You can use the data outbound rules of ApsaraMQ for MQTT to export data only to ApsaraMQ for RocketMQ 4.x instances.
You cannot use the data outbound rules of ApsaraMQ for MQTT across regions. When you create a data outbound rule, make sure that the ApsaraMQ for MQTT and ApsaraMQ for RocketMQ resources reside in the same region.
1. Create a data outbound rule
Log on to the ApsaraMQ for MQTT console. In the left-side navigation pane, click Instances.
In the top navigation bar, select the region where the instance that you want to manage resides. On the Instances page, click the instance name to go to the Instance Details page.
In the left-side navigation pane, click Rules. In the upper-left corner of the Rules page, click Create Rule.
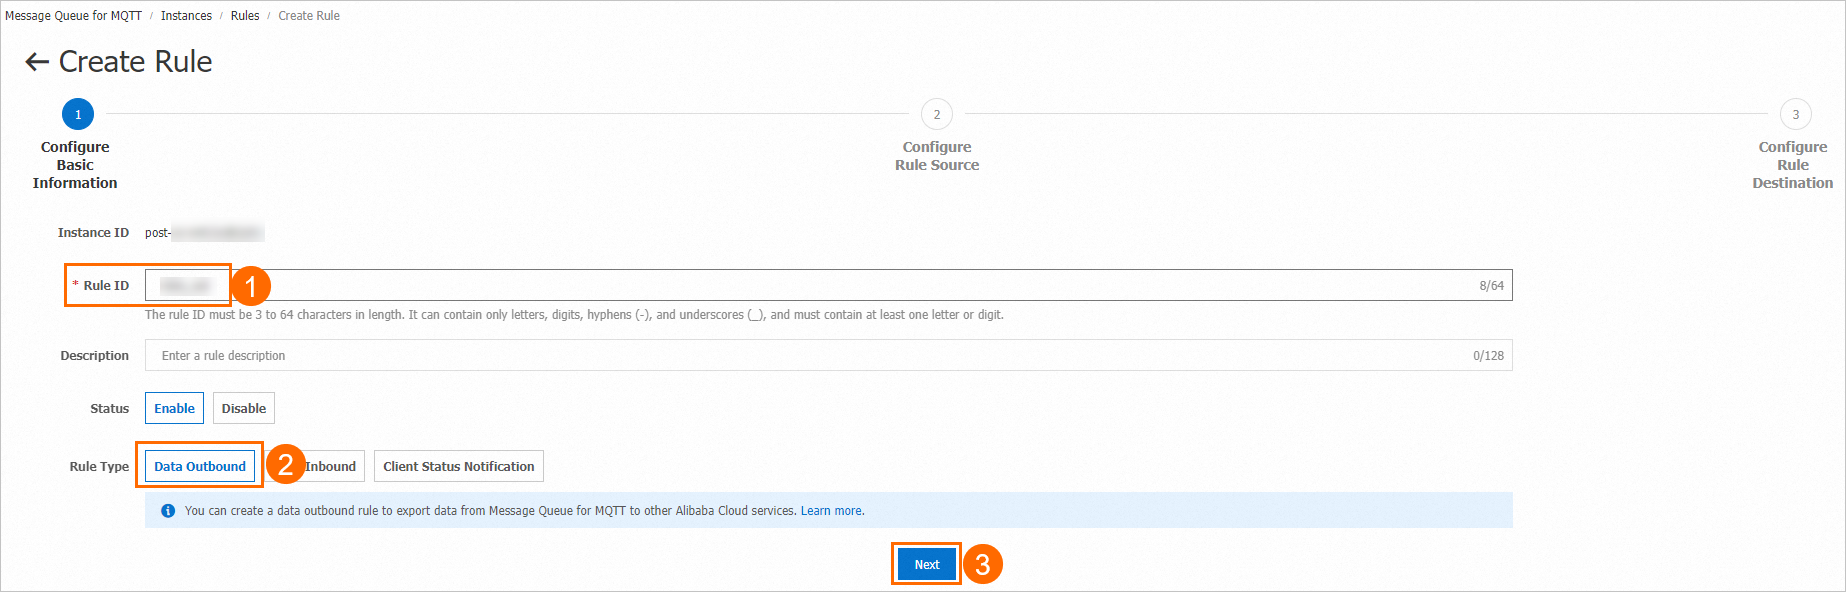
In the Create Rule wizard, perform the following steps:
In the Configure Basic Information step, enter a rule ID and select Data Outbound for the Rule Type parameter.
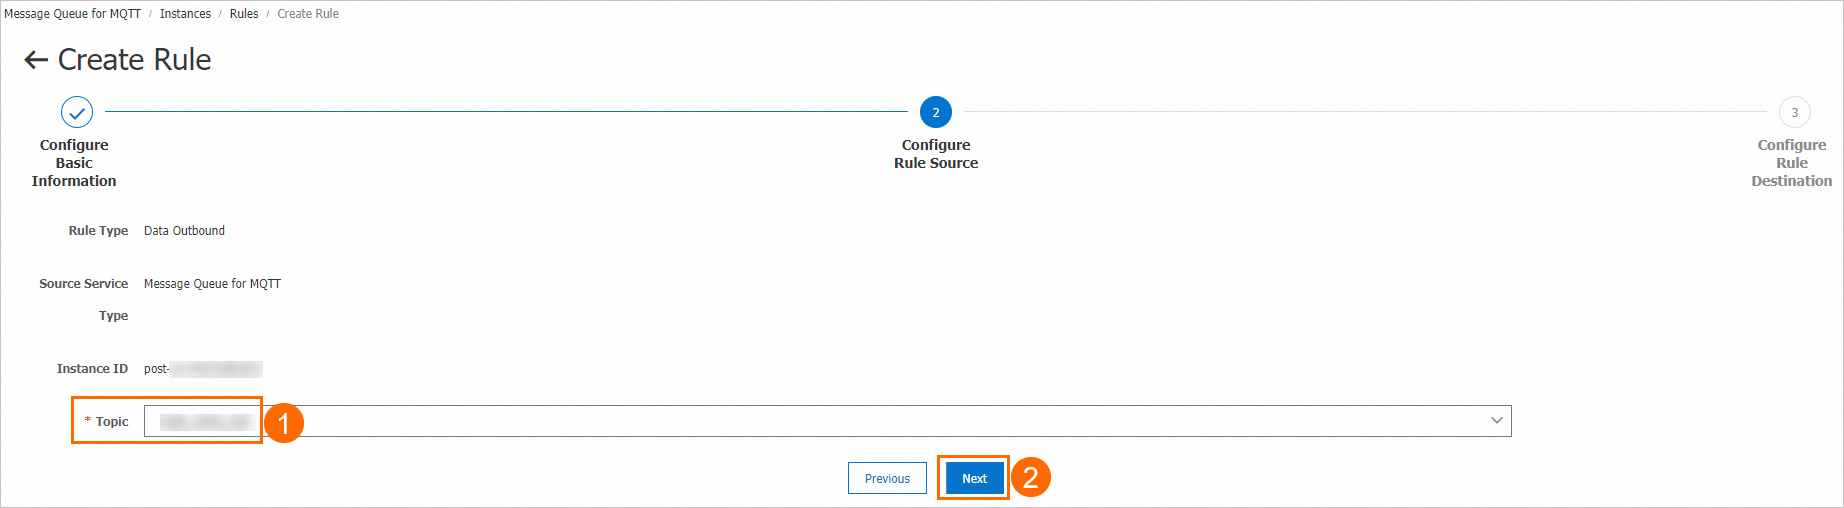
In the Configure Rule Source step, select a created topic on the ApsaraMQ for MQTT instance.
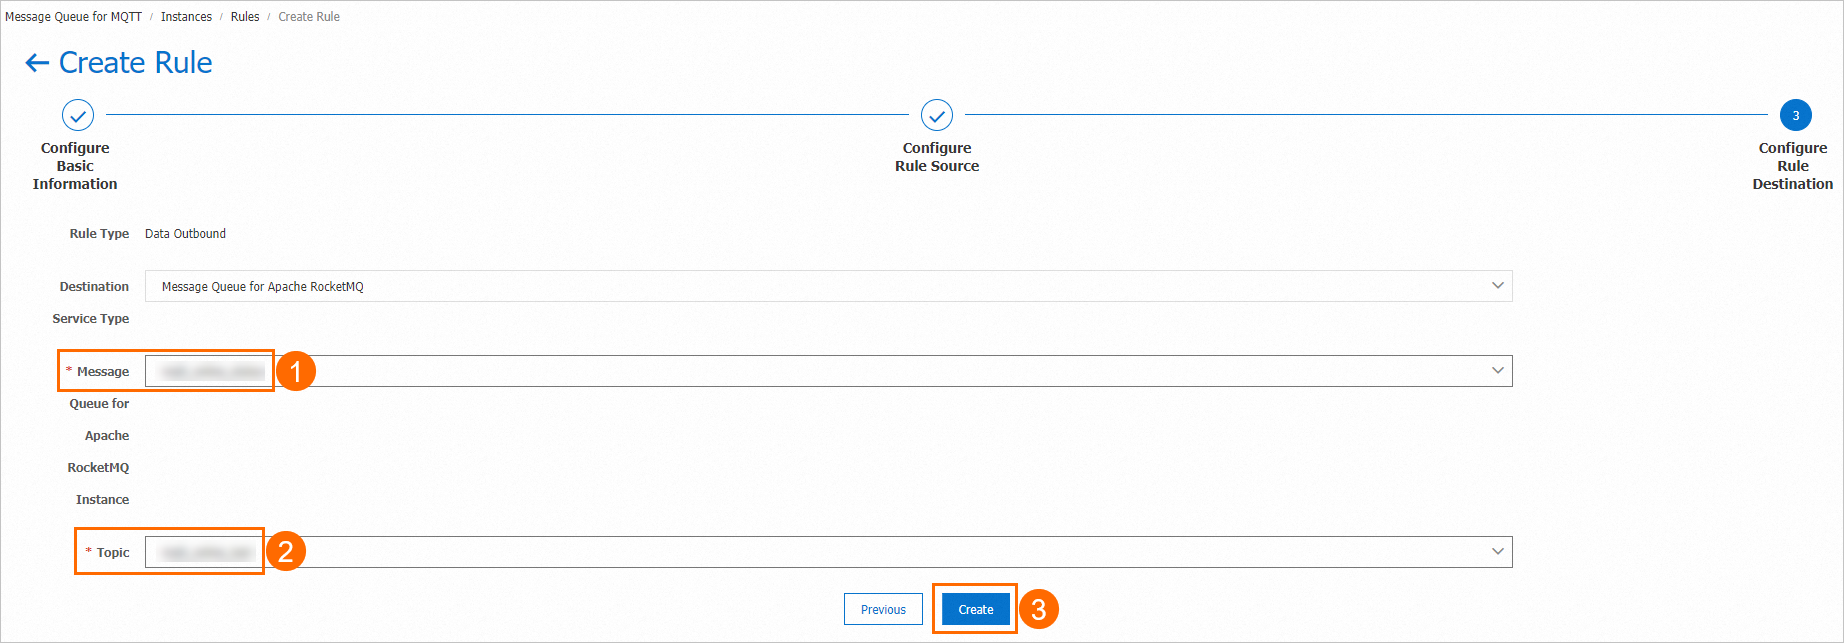
In the Configure Rule Destination step, select a created ApsaraMQ for RocketMQ instance and a created topic on the instance.
2. Prepare the test code
2.1 Download the sample code
Download the mqtt-java-demo demo project and decompress the demo project package to a folder on your on-premises machine.
In the decompressed demo project, find the lmq-java-demo folder, import the folder to IntelliJ IDEA, and then confirm whether the following dependencies are included in the pom.xml file:
<dependencies>
    <dependency>
        <groupId>org.bouncycastle</groupId>
        <artifactId>bcprov-jdk15on</artifactId>
        <version>1.70</version>
    </dependency>
    <dependency>
        <groupId>commons-codec</groupId>
        <artifactId>commons-codec</artifactId>
        <version>1.10</version>
    </dependency>
    <dependency>
        <groupId>org.eclipse.paho</groupId>
        <artifactId>org.eclipse.paho.client.mqttv3</artifactId>
        <version>1.2.2</version>
    </dependency>
    <dependency>
        <groupId>org.apache.httpcomponents</groupId>
        <artifactId>httpclient</artifactId>
        <version>4.5.2</version>
    </dependency>
    <dependency>
        <groupId>com.alibaba</groupId>
        <artifactId>fastjson</artifactId>
        <version>1.2.83</version>
    </dependency>
    <dependency>
        <groupId>com.aliyun.openservices</groupId>
        <artifactId>ons-client</artifactId>
        <version>1.8.5.Final</version>
    </dependency>
    <dependency>
        <groupId>com.aliyun</groupId>
        <artifactId>aliyun-java-sdk-onsmqtt</artifactId>
        <version>1.0.3</version>
    </dependency>
    <dependency>
        <groupId>com.aliyun</groupId>
        <artifactId>aliyun-java-sdk-core</artifactId>
        <version>4.5.0</version>
    </dependency>
</dependencies>
Configure access credentials.
Obtain an AccessKey pair. For information about how to obtain an AccessKey pair, see Create an AccessKey pair.
Configure the environment variables. The environment variable name of the AccessKey ID that is used to access ApsaraMQ for MQTT is MQTT_AK_ENV, and the environment variable name of the AccessKey secret that is used to access ApsaraMQ for MQTT is MQTT_SK_ENV. For information about how to configure environment variables, see Configure an access credential.
2.2 Configure the code for messaging
The MQ4IoTSendMessageToRocketMQ.java class contains the code for sending messages by using ApsaraMQ for MQTT and receiving messages by using ApsaraMQ for RocketMQ. You must specify the parameters for ApsaraMQ for MQTT and ApsaraMQ for RocketMQ resources based on the comments in the code.
3. Verify the result
You can execute the main function in the MQ4IoTSendMessageToRocketMQ.java class and then use one of the following methods to verify the sending and consumption of a message.
Use code
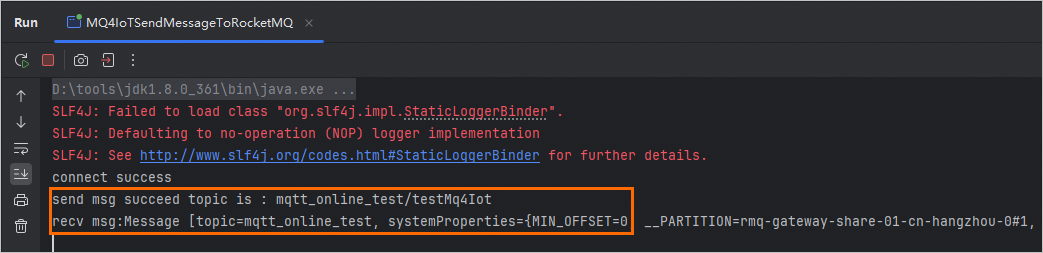
If code similar to the code in the following figure is displayed, the message is sent by ApsaraMQ for MQTT and consumed by ApsaraMQ for RocketMQ.
Use the console
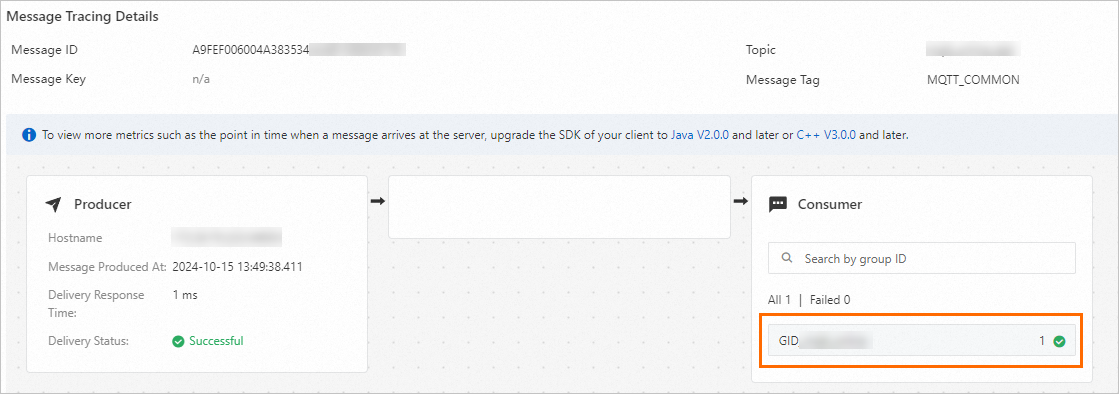
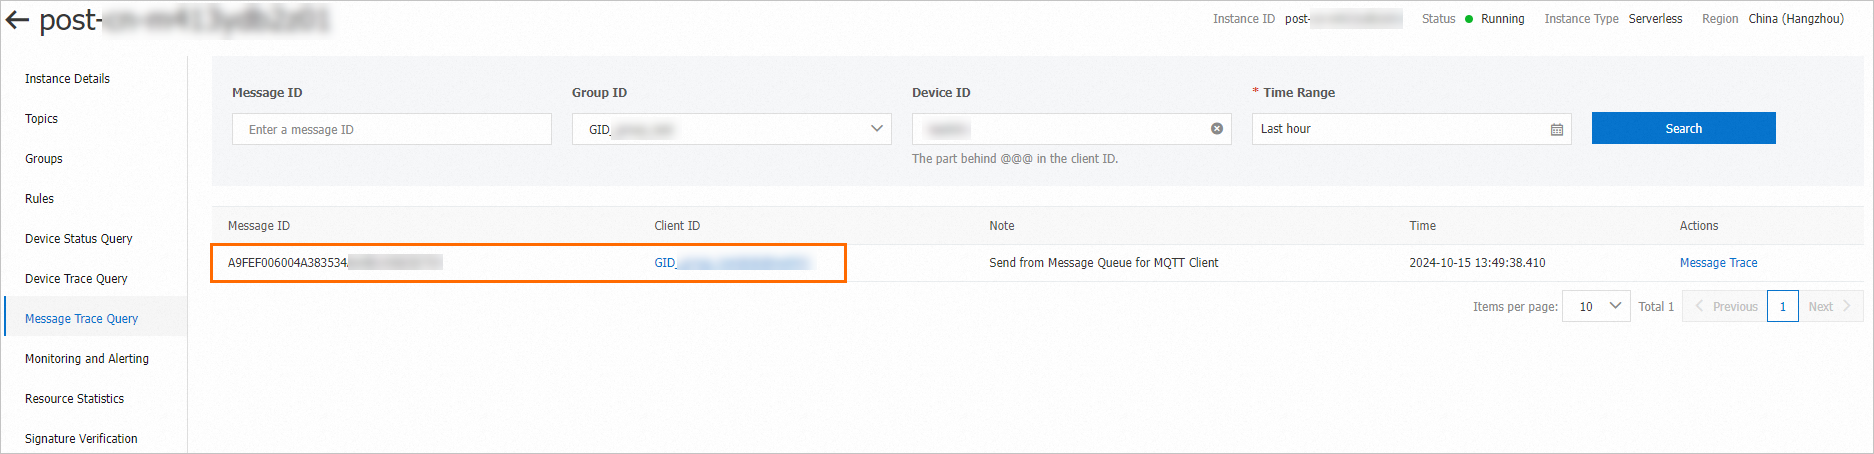
Check whether the message is sent. Go to the instance details page in the ApsaraMQ for MQTT console and then click Message Trace Query in the left-side navigation pane. On the Message Trace Query page, check whether the message is sent by using the group ID and device ID.
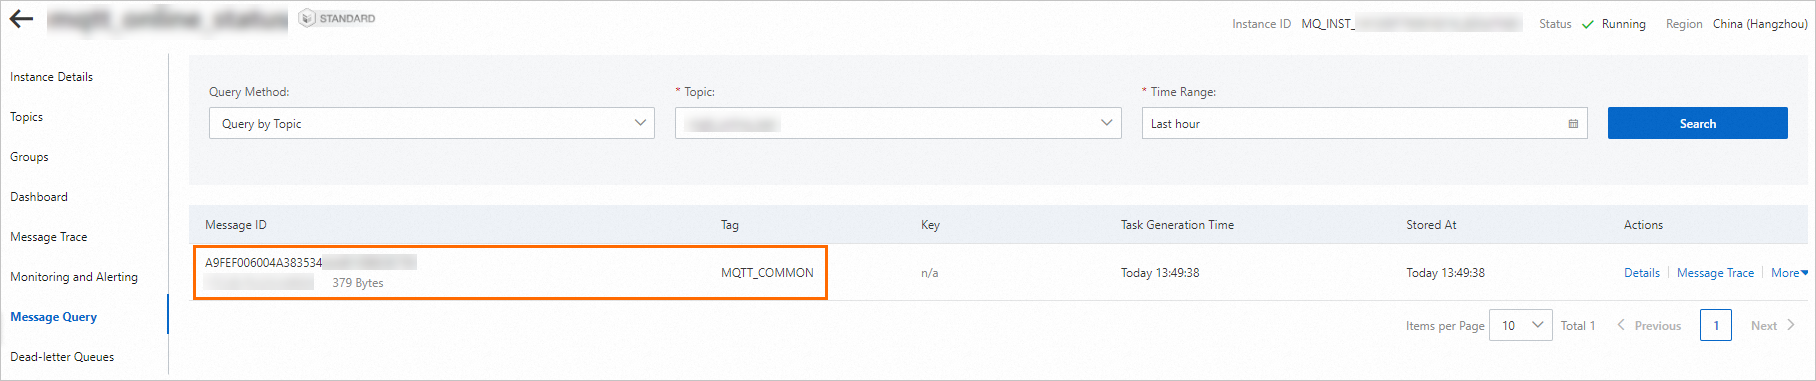
Check whether the message is consumed. Go to the instance details page in the ApsaraMQ for RocketMQ console and then click Message Query in the left-side navigation pane. On the Message Query page, check whether the message is forwarded to ApsaraMQ for RocketMQ based on the topic, as shown in the following figure.
Click Message Trace in the Actions column of the queried message. If information similar to the information in the following figure is displayed, the message is consumed.