WebSocket is a communications protocol that is widely adopted for data transmission. Link IoT Edge offers WebSocket drivers that allow you to easily connect IoT devices. Link IoT Edge offers various WebSocket drivers based on the gateway CPU architecture. You can use the IoT Platform console to deploy WebSocket drivers to gateways.
If you want to use WebSocket drivers to connect devices, you must ensure the compliance with the WebSocket protocol for Link IoT Edge. For more information, see Link IoT Edge device connection protocol (WebSocket).
You can establish direct connections between WebSocket drivers and WebSocket devices.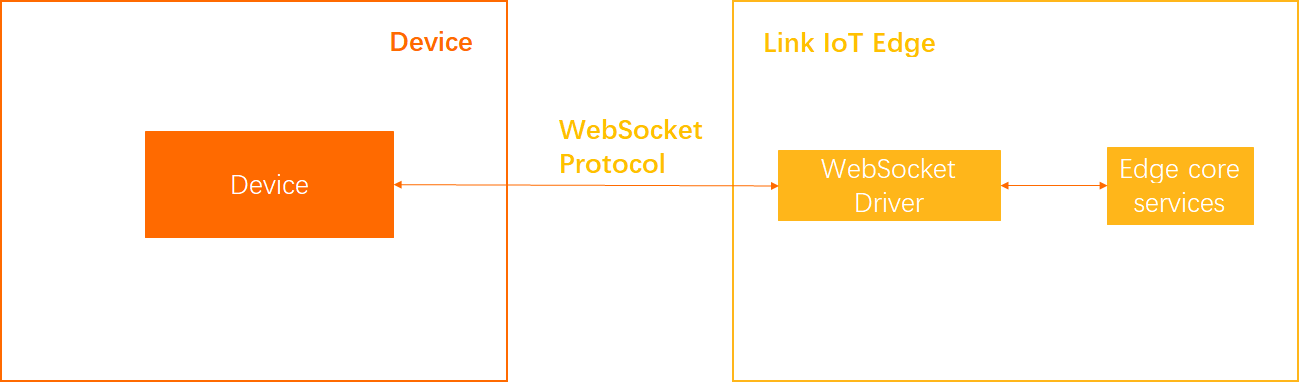
You can also use gateways to connect WebSocket drivers and WebSocket devices.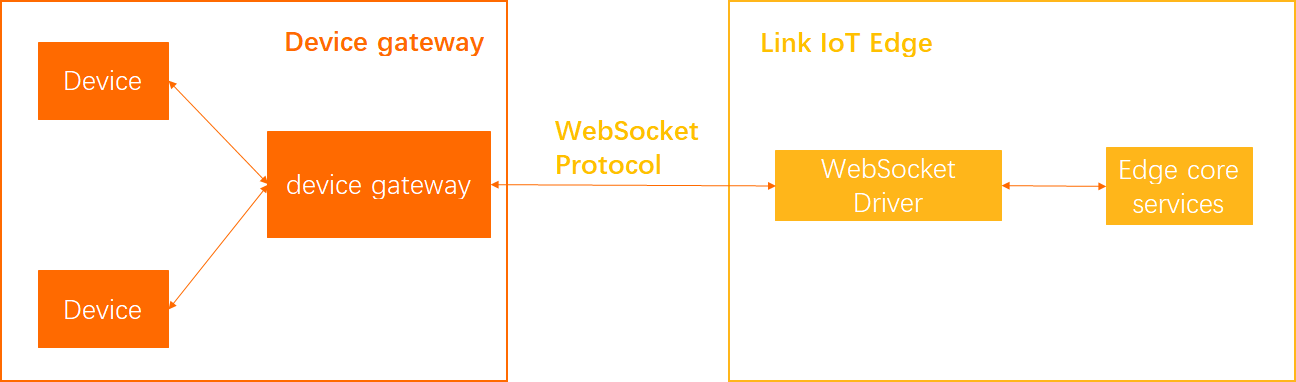
This topic provides an example of how to use WebSocket drivers. The procedure is described as follows.
Before using WebSocket drivers, make sure that you have created edge instances and published gateways based on the instructions provided in Set up an environment.
Step 1: Assign a driver
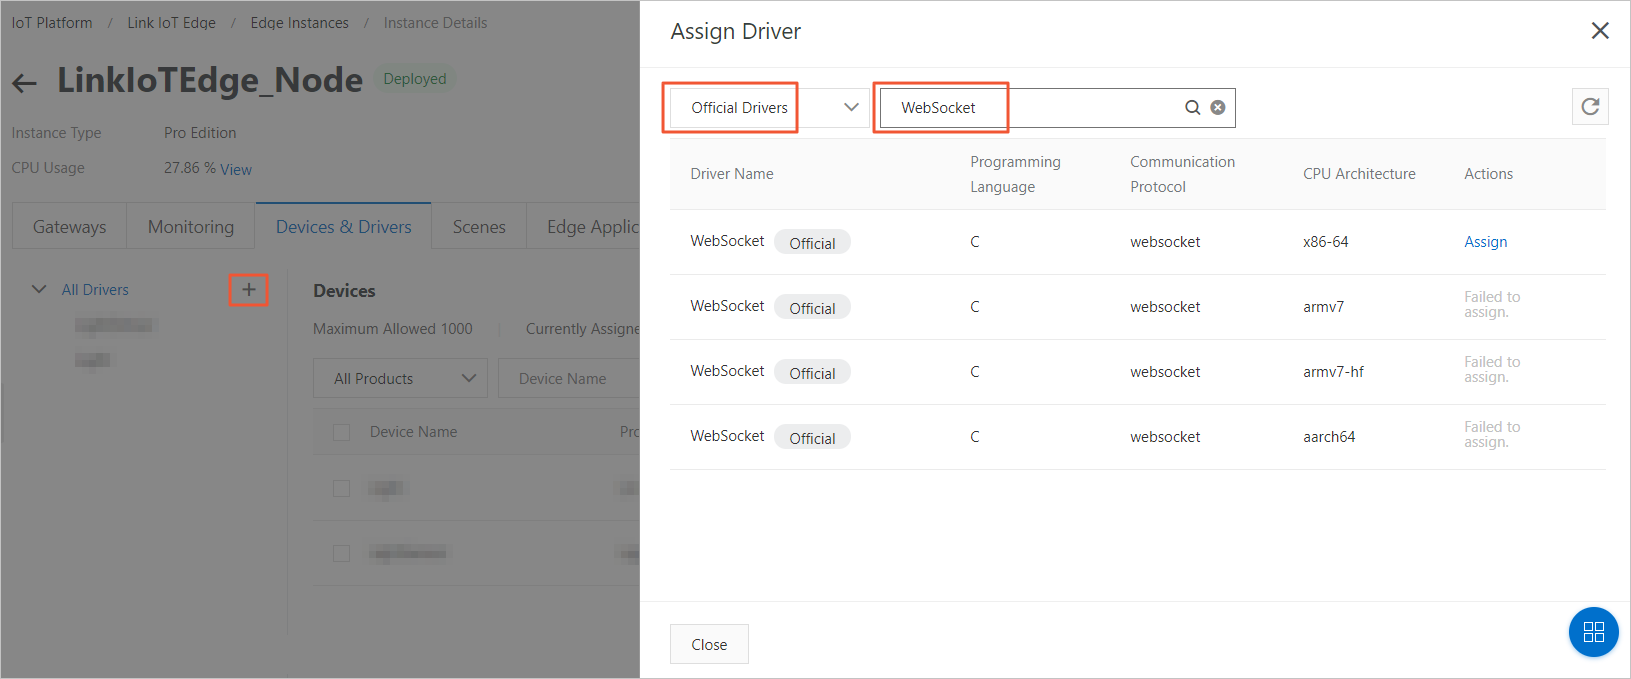
- In the left-side navigation pane, click Edge Instances. On the Edge Instances page, find the edge instance that you want to use and click View in the Actions column.
- On the Instance Details page, click the Devices & Drivers tab and click the
+icon next to All Drivers. In the Assign Driver dialog box, select Official Drivers from the drop-down list. Find the required WebSocket driver based on the gateway CPU architecture, and click Assign in the Actions column. Then, click Close.
Step 2: Configure the driver
On the Devices & Drivers tab, click the WebSocket driver that has been assigned to the edge instance, and click Driver Configurations next to Devices.
On the page that appears, specify the parameters as prompted, and click OK.
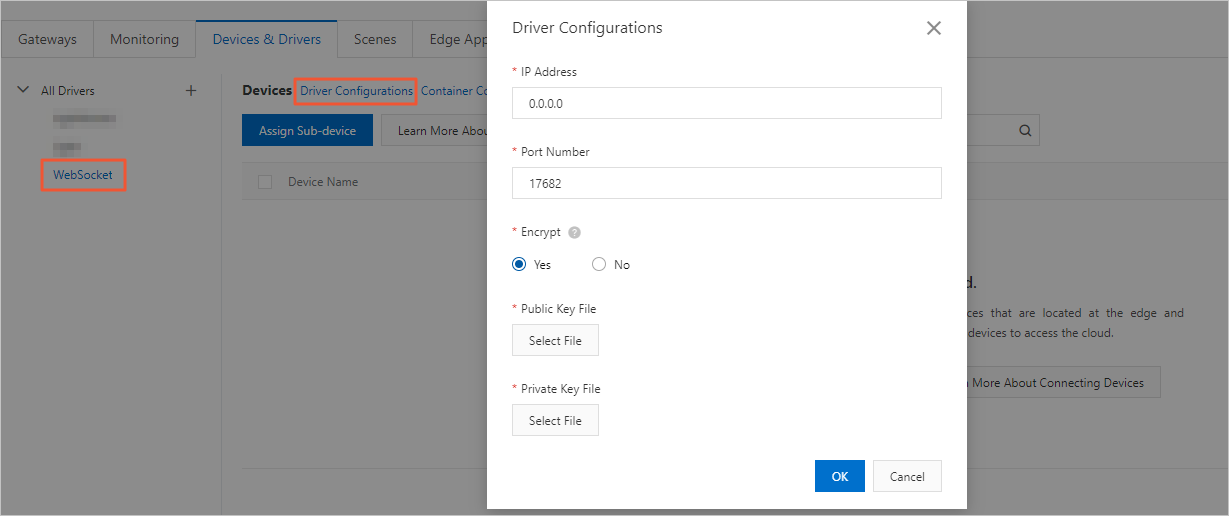
Table 1. Parameters Parameter
Description
IP Address
The listening IP address of the WebSocket driver. The default value is the IP address of the machine where the driver resides.
Port Number
The listening port number of the WebSocket driver. The value ranges from 1 to 65535. The default value is 17682.
Encrypt
Specifies whether to enable Transport Layer Security (TLS) encryption. By default, TLS encryption is disabled. If you select Yes, you must upload certificate files for public and private keys.
Public Key File: Upload a certificate file for the public key. The certificate file must use the .cer format.
Private Key File: Upload a certificate file for the private key. The certificate file must use the .pvk format.
- Optional. On the right side of Devices, click Container Configurations. On the Container Configurations page, configure the container for the driver based on the parameters that are described in the following table. Click Save. Note You can configure the container only when the Instance Type parameter of the edge instance is set to Pro Edition.
Parameter
Description
Host Mode
Specifies whether to isolate the container network from the host network. Valid values:
Yes: The container network is the same as the host network.
No: The container network is isolated from the host network. If you select this option, you must set the Network Port Mapping parameter.
Network Port Mapping
The mappings between host network ports and container network ports. This parameter is available only when you set the Host Mode parameter to No. The network where the function runs is isolated from the host network. You can map the listening port of the function in the container to a host network port. This allows client programs on various hosts to access the services that are provided by the function. You can specify a maximum of 10 entries.
For example, the
fc-http-serverfunction runs in a host container, and provides services by using Port 80. The client programs on other hosts cannot access thefc-http-serverfunction by accessing Port 80 on the current host. To enable the client programs on other hosts to access thefc-http-serverfunction, you must map Port 80 in the container where the function runs to a host network port, such as Port 8080. Then, the client programs on other hosts can accessIP address:port 8080on the host network, and use the services provided by thefc-http-serverfunction.Privilege Mode
Specifies whether to enable the privilege mode. Root users of containers can access host services only as regular users. If you need to change the system time or run the mount command in containers, you must be granted the required root permissions. In this scenario, you must enable the privilege mode for the containers.
NoteIf you enable the privilege mode, applications and programs in the containers are granted the host root permissions, and all the host devices are mapped to the containers. Therefore, you do not need to set the Device Mapping parameter.
Device Mapping
The device mappings. This parameter is available only when you set the Privilege Mode parameter to No. The network where the device management system resides is isolated from the host network. To enable a function to access a host device such as a serial port, you must map the device to the container where the function runs. You can specify a maximum of 10 entries.
Volume Mapping
The volume mappings. The network where the file system resides is isolated from the host network. To enable a function to access a host file, you must map the file to the container where the function runs. You can specify a maximum of 10 entries.
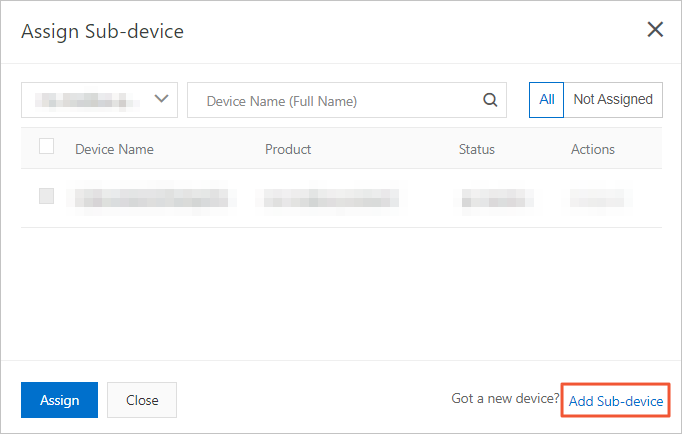
Step 3: Assign a sub-device
In the Devices section, click Assign Sub-device. In the WebSocket driver settings, assign a device to the edge instance.
You can select an existing WebSocket device or create a new device. To create a device, follow these steps:
On the Assign Sub-device page that appears on the right side of the console, click Add Sub-device.
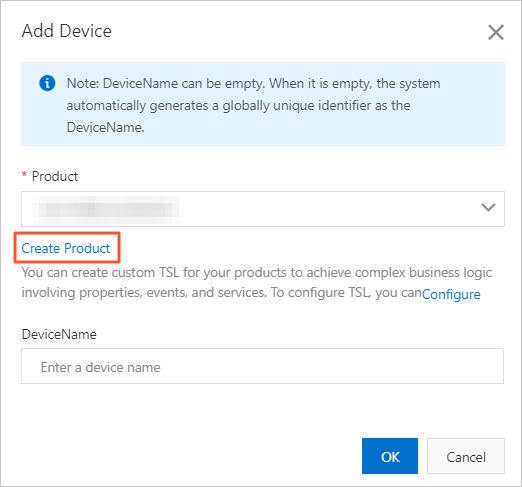
In the Add Device dialog box, click Create Product to create a product to which the WebSocket device belongs.
In the Create Product dialog box, specify the required parameters, and click OK.
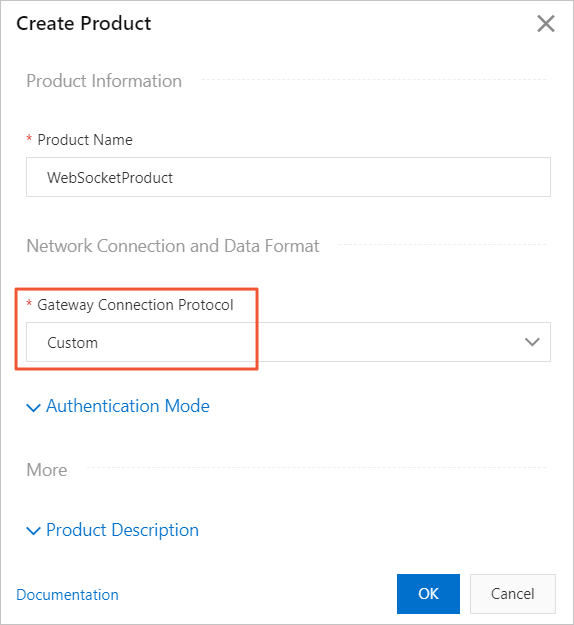
Table 2. Parameters Parameter
Description
Product Name
The name of the product. The product name must be unique for the current account. The product name must be 4 to 30 characters in length, and can contain letters, digits, underscores (_), hyphens (-), at signs (@), and parentheses ().
Gateway Connection Protocol
The protocol that is used by the gateway. In this example, Custom is selected.
Authentication Mode
The authentication method. Select an authentication method that is suitable for your devices. For more information, see Overview.
Product Description
Optional. The description of the product.
In the Add Device dialog box, add a WebSocket device. In this step, specify a value for the DeviceName parameter, and then click OK.
Assign the WebSocket device to the edge instance.
After the WebSocket device is assigned to the edge instance, click Device Configurations in the Actions column. In the dialog box that appears, configure the device settings to connect the device to the WebSocket driver.
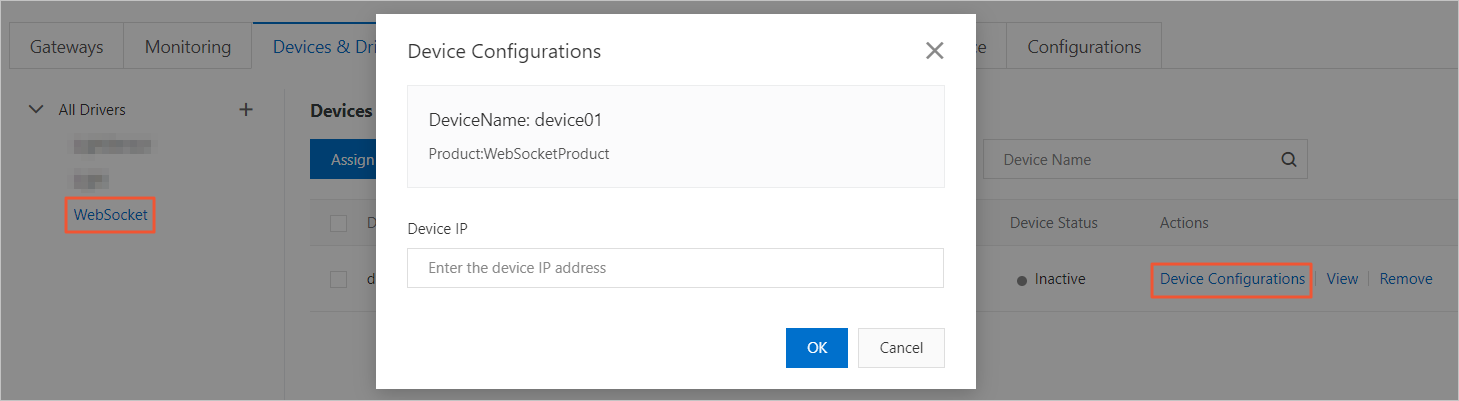
The Device IP parameter is optional. This parameter indicates the IP address of the device or the gateway that is connected to the device.
NoteIf you specify this parameter, Link IoT Edge connects only the devices from the specified IP address.
Step 4: Deploy the edge instance
In the upper-right corner of the Instance Details page, click Deploy to deploy the edge instance.