You can compile a program in an on-premises Java environment by using Maven or Serverless Devs, package the program into a ZIP package or JAR package, and then upload the code package in the Function Compute console or by using Serverless Devs. After that, you can test your function to ensure that your code runs as expected.
Dependency libraries of a Java runtime
To create and deploy a code package, you must compile and package the function code and dependency libraries together as a ZIP file or a JAR file.
Function Compute provides the following dependency libraries for a Java runtime:
com.aliyun:fc-java-core: defines information such as the handler interface and the context object used in a request handler.
com.aliyun:fc-java-events: provides the event types of common event sources.
You can use the Maven central repository to obtain the preceding dependencies. After you obtain the preceding dependency libraries, add them to the pom.xml file. The following sample code provides an example:
<!-- https://mvnrepository.com/artifact/com.aliyun.fc.runtime/fc-java-core -->
<dependency>
    <groupId>com.aliyun.fc.runtime</groupId>
    <artifactId>fc-java-core</artifactId>
    <version>1.4.1</version>
</dependency>

<!-- https://mvnrepository.com/artifact/com.aliyun.fc.runtime/fc-java-event -->
<dependency>
    <groupId>com.aliyun.fc.runtime</groupId>
    <artifactId>fc-java-event</artifactId>
    <version>1.2.0</version>
</dependency>If the dependency package is too large, you can package the dependencies into a layer to reduce the size of the code package. For more information, see Create a custom layer.
Compile and deploy code packages by using Maven
Prerequisites
Java and Maven are installed. For more information about Java, visit the Java official website. For more information about Maven, see Installing Apache Maven.
Procedure
Create a Java project. The following sample code provides the path of the App.java file:
src/main/java/example/App.javaAdd the following sample code to the App.java file: For the detailed sample code, see Handlers or Context.
package example;

import com.aliyun.fc.runtime.Context;
import com.aliyun.fc.runtime.StreamRequestHandler;

import java.io.IOException;
import java.io.InputStream;
import java.io.OutputStream;

public class App implements StreamRequestHandler {

    @Override
    public void handleRequest(InputStream inputStream, OutputStream outputStream, Context context) throws IOException {
        outputStream.write(new String("hello world").getBytes());
    }
}
In the pom.xml file, configure
build. Sample code:<build> <plugins> <plugin> <groupId>org.apache.maven.plugins</groupId> <artifactId>maven-shade-plugin</artifactId> <version>3.2.1</version> <executions> <execution> <phase>package</phase> <goals> <goal>shade</goal> </goals> <configuration> <filters> <filter> <artifact>*:*</artifact> <excludes> <exclude>META-INF/*.SF</exclude> <exclude>META-INF/*.DSA</exclude> <exclude>META-INF/*.RSA</exclude> </excludes> </filter> </filters> </configuration> </execution> </executions> </plugin> </plugins> </build>NoteYou can use Apache Maven Shade or Apache Maven Assembly. The preceding example uses Apache Maven Shade as an example.
Open the CLI, switch to the root directory of the project, and then run the
mvn clean packagecommand to perform packaging.Sample code:
[INFO] Scanning for projects...
 ...  ....   ....
[INFO] --------------------------< example:example >---------------------------
[INFO] Building java-example 1.0-SNAPSHOT
[INFO] --------------------------------[ jar ]---------------------------------
 ...  ....   ....
[INFO] ------------------------------------------------------------------------
[INFO] BUILD SUCCESS
[INFO] ------------------------------------------------------------------------
[INFO] Total time:  11.681 s
[INFO] Finished at: 2020-03-26T15:55:05+08:00
[INFO] ------------------------------------------------------------------------
If the compilation fails, modify the code based on the error message.
If the compilation is successful, the compiled JAR file is located in the target directory in the project folder and is named HelloFCJava-1.0-SNAPSHOT.jar according to the artifactId and version fields in pom.xml.
ImportantFor macOS and Linux operating systems, make sure that the code file is readable and executable before compression.
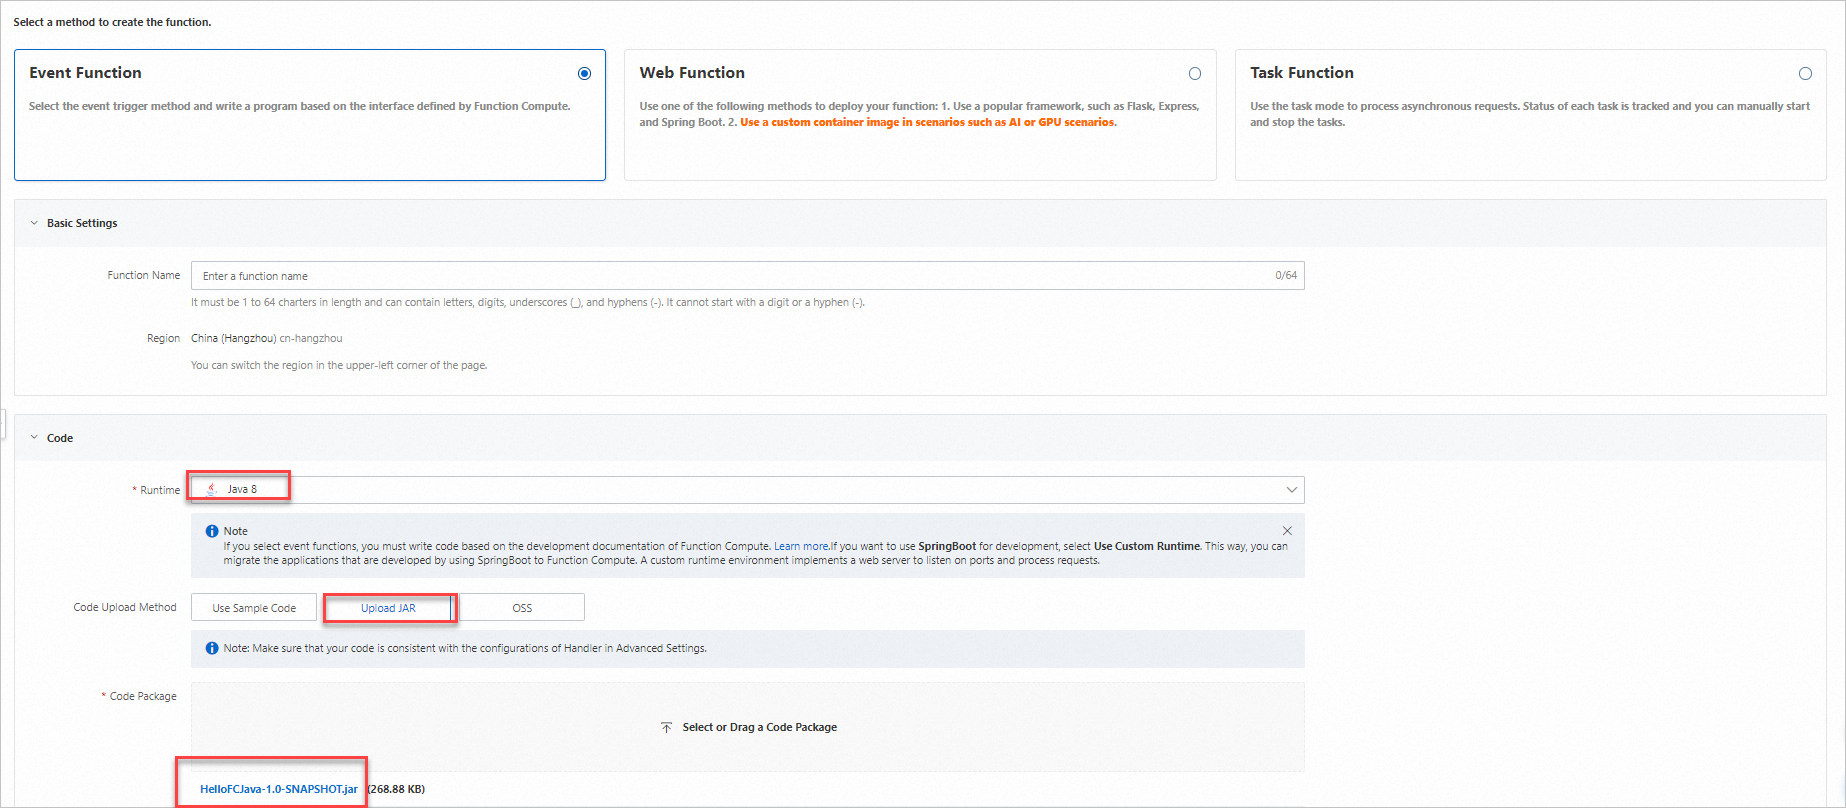
Log on to the Function Compute console and upload the code package.
On the Configurations tab of the Function Details page, check the value of Handler. A handler must follow the
[Package name].[Class name]::[Method name]format. For example, if the package name is example, the class name is App, and the method name is handleRequest, the request handler can be configured asexample.App::handleRequest. You can click Modify to modify the handler if it is not valid.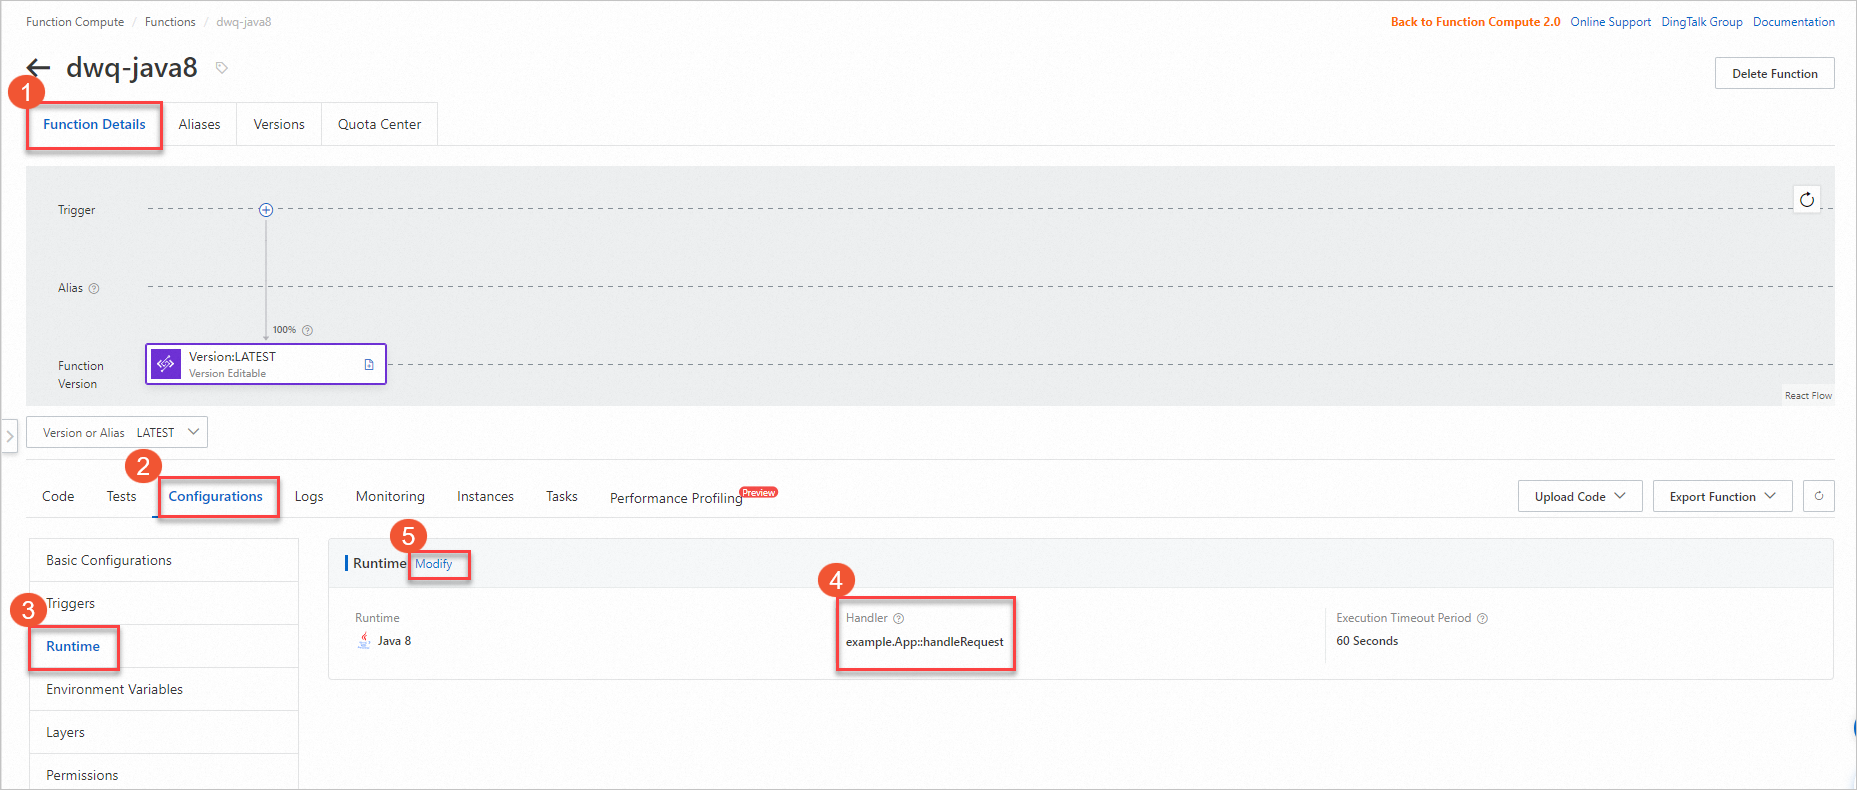
On the Code tab, click Test Function to test the function.

Compile and deploy a code package by using Serverless Devs
Prerequisites
Serverless Devs and dependencies are installed. For more information, see Install Serverless Devs and dependencies.
Serverless Devs is configured. For more information, see Configure Serverless Devs.
Java Development Kit (JDK) is installed. You can download JDK from Java Downloads.
Maven is installed. You can download Maven from Download.
Procedure
Run the following command to initialize your project:
s initConfigure Alibaba Cloud as the cloud vendor, a template, a runtime, and the region in which the application is deployed, and function name.
Run the following command to go to the project directory:
cd start-fc-event-java8The following code snippet shows the directory structure:
start-fc-event-java8
├── src
│   └── main
│       └── java
│ └── example
│ └── App.java
├── pom.xml
├── readme
└── s.yaml
Run the following command to deploy the project:
s deployWhen you run this command, the
pre-deploycommand is run first. When thepre-deploycommand is run, themvn packagecommand is used to perform compilation and packaging. The code package is uploaded and deployed after that. Sample command output:[2022-04-07 12:00:09] [INFO] [S-CORE] - Start the pre-action [2022-04-07 12:00:09] [INFO] [S-CORE] - Action: mvn package [INFO] Scanning for projects... [INFO] [INFO] ------------------------< example:HelloFCJava >------------------------- [INFO] Building HelloFCJava 1.0-SNAPSHOT [INFO] --------------------------------[ jar ]--------------------------------- ...... [INFO] ------------------------------------------------------------------------ [INFO] BUILD SUCCESS [INFO] ------------------------------------------------------------------------ [INFO] Total time: 3.617 s [INFO] Finished at: 2022-04-07T20:00:14+08:00 [INFO] ------------------------------------------------------------------------ [2022-04-07 12:00:14] [INFO] [S-CORE] - End the pre-action Checking Service, Function (0.64s) Creating Service, Function (0.71s) Tips for next step ====================== * Display information of the deployed resource: s info * Display metrics: s metrics * Display logs: s logs * Invoke remote function: s invoke * Remove Service: s remove service * Remove Function: s remove function * Remove Trigger: s remove trigger * Remove CustomDomain: s remove domain helloworld: region: cn-hangzhou service: name: hello-world-service function: name: start-fc-event-java8 runtime: java8 handler: example.App::handleRequest memorySize: 128 timeout: 60Run the
s invokecommand to perform testing.Sample command output:
➜ start-fc-event-java8 s invoke
========= FC invoke Logs begin =========
FC Initialize Start RequestId: b246c3bf-06bc-49e5-92b8-xxxxxxxx
FC Initialize End RequestId: b246c3bf-06bc-49e5-92b8-xxxxxxxx
FC Invoke Start RequestId: b246c3bf-06bc-49e5-92b8-xxxxxxxx
FC Invoke End RequestId: b246c3bf-06bc-49e5-92b8-xxxxxxxx

Duration: 7.27 ms, Billed Duration: 8 ms, Memory Size: 128 MB, Max Memory Used: 65.75 MB
========= FC invoke Logs end =========

FC Invoke Result:
hello world


End of method: invoke