When a new application version introduces errors during or after deployment, roll back the application to restore the previous working state. Enterprise Distributed Application Service (EDAS) supports two rollback methods: canceling an in-progress update and deploying a historical version after an update completes.
Rollback methods
| Method | When to use | What happens |
|---|---|---|
| Cancel an in-progress update | A phased release is underway and the new version fails verification in a batch. | EDAS terminates the update and reverts all instances to the previous version. |
| Deploy a historical version | Issues surface after the update completes. | EDAS deploys a selected previous version to replace the current one. |
Note: EDAS also performs automatic rollback when an update fails due to exceptions such as an unavailable deployment package or a health check failure. In these cases, EDAS terminates the update and reverts the application without manual intervention.
Cancel an in-progress update
This procedure uses a manual phased release as an example. In a manual phased release, you control each batch: after a batch completes, verify the new version before proceeding to the next batch or rolling back.
Before you begin, make sure a phased release is in progress. For setup instructions, see Use the EDAS console to implement phased releases of applications in Kubernetes clusters.
Log on to the EDAS console.
In the left-side navigation pane, choose Application Management > Applications.
In the top navigation bar, select a region. In the upper part of the page, select a microservices namespace from the Microservice Namespace drop-down list, and then click the name of the target application.
In the left-side navigation pane, click Change List.
In the upper-right corner of the Change List page, click Rollback.
In the dialog box that appears, click OK.
Verify the rollback
After you confirm the rollback, EDAS terminates the update and reverts the application to the previous version. To verify:
On the Change List page, check the Execution Status column. A value of Succeeded indicates the rollback is complete.
Confirm that your application functions as expected by checking service availability, logs, or health check status.
Deploy a historical version
If issues appear after a completed update, deploy a previously working version to replace the current one.
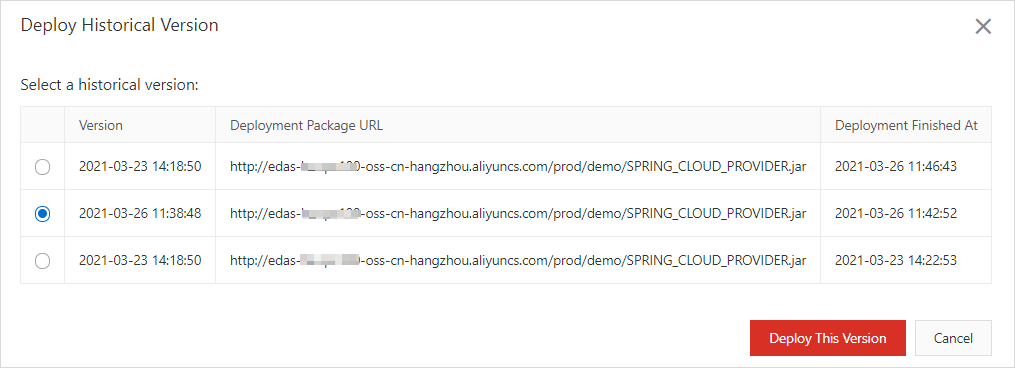
On the Application Overview page, choose Deploy > Deploy Historical Version.
In the Deploy Historical Version dialog box, select the version to deploy and click Deploy This Version.
In the left-side navigation pane, click Change List to monitor the deployment.
Verify the deployment
After you select a historical version, EDAS begins deploying it. To verify:
On the Change List page, check the Execution Status column. A value of Succeeded indicates the historical version is deployed.
Confirm that your application functions as expected by checking service availability, logs, or health check status.
What to do next
To update the application after the issue is resolved, see Deploy an application in a Kubernetes cluster.
To set up controlled batch deployments, see Use the EDAS console to implement phased releases of applications in Kubernetes clusters.