All Products
Search
Document Center

Elasticsearch:Use Terraform to manage Alibaba Cloud Elasticsearch clusters

Last Updated:Apr 25, 2024

Terraform allows you to use code to allocate resources such as physical machines. You can use Terraform to write a configuration file to purchase a cloud server or apply for resources such as resources of Alibaba Cloud Elasticsearch or Object Storage Service (OSS). This topic describes how to use Terraform to manage your Alibaba Cloud Elasticsearch clusters, such as creating, updating, viewing, or deleting a cluster.

Background Information

You can install and configure Terraform by using the following methods:

Install and configure Terraform

  1. Download the software package that is suitable for your OS from the official Terraform website.

    In this example, Terraform for Linux is used. If you do not have a Linux OS, you can purchase an Alibaba Cloud Elastic Compute Service (ECS) instance. For more information, see Step 1: Create an ECS instance.

  2. Decompress the package to the /usr/local/bin directory.

    If you want to decompress the package to another directory, define a global path for the package by using one of the following methods:

  3. Run the terraform command to verify the path.

    If the command is successfully run, the result shown in the following figure is returned.运行terraform

  4. Create a RAM user and grant permissions to the user.

    For higher flexibility and security in permission management, we recommend that you create a RAM user and grant the required permissions to the RAM user.

    1. Log on to the RAM console.

    2. Create a RAM user named Terraform and an AccessKey pair for the user.

      For more information, see Create a RAM user.

      Important

      We recommend that you do not use the AccessKey pair of your Alibaba Cloud account to configure Terraform.

    3. Grant the required permissions to the RAM user.

      In this example, the AliyunElasticsearchFullAccess and AliyunVPCFullAccess policies are attached to the RAM user Terraform. For more information, see Grant permissions to a RAM user.

  5. Create a test directory.

    You must create an independent directory for each Terraform project. In this example, a test directory named terraform-test is created.

    mkdir terraform-test
  6. Go to the terraform-test directory.

    cd terraform-test
  7. Create a configuration file and configure identity authentication information.

    Terraform reads all *.tf and *.tfvars files in the directory when it is running. You can write different configurations to these files base on your business requirements. The following table lists the frequently used configuration files.

    Configuration file

    Description

    provider.tf

    Used to configure providers.

    terraform.tfvars

    Used to configure the variables required to configure providers.

    varable.tf

    Used to configure universal variables.

    resource.tf

    Used to define resources.

    data.tf

    Used to define package files.

    output.tf

    Used to define output files.

    For example, when you create the provider.tf file, you can use vim provider.tf to open the file and configure identity authentication information in the following format:

    provider "alicloud" {
        region      = "cn-hangzhou"
        access_key  = "LTA**********NO2"
        secret_key   = "MOk8x0*********************wwff"
        }

    For more information, see alicloud_elasticsearch_instance.

  8. Run the mkdir -p plugh command to create a folder named plugh in the current directory. Then, download a provider package and decompress the package to the plugh folder.

  9. Initialize the working directory and use -plugin-dir to specify the path that is used to store the provider.

    terraform init -plugin-dir=./plugh/

    If the Terraform has been successfully initialized message is returned, the working directory is initialized.

    Important

    After you create a working directory and a configuration file for a Terraform project, you must initialize the working directory.

Use Terraform to create an Elasticsearch cluster

  1. Create a configuration file named elastic.tf in the test directory.

  2. Configure the elastic.tf file to create a multi-zone Elasticsearch V6.7 cluster of Standard Edition. You can refer to the following script to configure the file:

    resource "alicloud_elasticsearch_instance" "instance" {
      description          = "testInstanceName"
      instance_charge_type = "PostPaid"
      data_node_amount     = "2"
      data_node_spec       = "elasticsearch.sn2ne.large"
      data_node_disk_size  = "20"
      data_node_disk_type  = "cloud_ssd"
      vswitch_id           = "vsw-bp1f7r0ma00pf9h2l****"
      password             = "es_password"
      version              = "6.7_with_X-Pack"
      master_node_spec     = "elasticsearch.sn2ne.large"
      zone_count           = "1"
    }

    The following table describes the parameters supported by providers.

    Parameter

    Required

    Description

    description

    No

    The description of the cluster name.

    instance_charge_type

    No

    The billing method of the cluster. Valid values:

    • PostPaid (default): pay-as-you-go

    • PrePaid: subscription

    period

    No

    The billing cycle of the cluster. Unit: months. This parameter is valid only when instance_charge_type is set to PrePaid. Valid values: 1, 2, 3, 4, 5, 6, 7, 8, 9, 12, 24, and 36. Default value: 1.

    data_node_amount

    Yes

    The number of data nodes in the cluster. Valid values: 2 to 50.

    data_node_spec

    Yes

    The specifications of each data node.

    data_node_disk_size

    Yes

    The disk space. Unit: GiB. Different types of disks provide different storage space:

    • cloud_ssd: If the disk type is the standard SSD (cloud_ssd), the maximum value of this parameter is 2048, which indicates 2 TiB of storage space.

    • cloud_efficiency: If the disk type is the ultra disk (cloud_efficiency), the maximum value of this parameter is 5120, which indicates 5 TiB of storage space. Ultra disks are cost-effective and can be used in scenarios such as logging and analyzing large volumes of data. If you want to specify a size greater than 2,048 GiB for an ultra disk, you can set this parameter only to 2560, 3072, 3584, 4096, 4608, or 5120.

    data_node_disk_type

    Yes

    The disk type. Valid values:

    • cloud_ssd: standard SSD

    • cloud_efficiency: ultra disk

    vswitch_id

    Yes

    The ID of the vSwitch.

    password

    No

    The password that is used to access the cluster. It must be 8 to 32 characters in length and can contain letters, digits, and special characters. The following special characters are allowed: ! @ # $ % ^ & * ( ) _ + - =

    kms_encrypted_password

    No

    The encrypted password of Key Management Service (KMS). You do not need to configure this parameter if you configure password. You must configure either password or kms_encrypted_password.

    kms_encryption_context

    No

    The KMS encryption context. This parameter is valid only when kms_encrypted_password is configured. This parameter is used to decrypt the cluster that is created or updated with kms_encrypted_password. For more information, see Encryption context.

    version

    Yes

    The version of the cluster. Valid values:

    • 5.5.3_with_X-Pack: 5.5.3

    • 6.3_with_X-Pack: 6.3.0

    • 6.7_with_X-Pack: 6.7.0

    Note

    You cannot use Terraform to create clusters in the cloud-native control architecture.

    private_whitelist

    No

    The IP address whitelist for access to the cluster over a virtual private cloud (VPC).

    kibana_whitelist

    No

    The IP address whitelist for access to the Kibana console.

    master_node_spec

    No

    The specifications of each dedicated master node.

    advancedDedicateMaster

    No

    Specifies whether to create dedicated master nodes. Valid values:

    • true: creates dedicated master nodes. If the cluster is deployed across zones and dedicated master nodes are enabled for the cluster, you must set this parameter to true.

    • false (default): does not create dedicated master nodes.

    zone_count

    No

    The number of zones. Valid values: 1 to 3. The value of data_node_amount must be a multiple of the value of this parameter.

    For more information, see alicloud_elasticsearch_instance.

    Important
    • kms_encrypted_password and kms_encryption_context are available only for providers of V1.57.1 or later. zone_count is available only for providers of V1.44.0 or later.

    • If you want to purchase nodes other than data nodes, call the CreateInstance operation to create an Elasticsearch cluster for which you want to purchase nodes other than data nodes. For example, if you want to create a multi-zone cluster that contains dedicated master nodes, add advancedDedicateMaster="true" to the script.

  3. Run the terraform plan command to view the operations that will be performed.

    If the command is successfully run, the following result is returned:

    Refreshing Terraform state in-memory prior to plan...
    The refreshed state will be used to calculate this plan, but will not be
    persisted to local or remote state storage.
    ------------------------------------------------------------------------
    An execution plan has been generated and is shown below.
    Resource actions are indicated with the following symbols:
      + create
    
    Terraform will perform the following actions:
      # alicloud_elasticsearch_instance.instance will be created
      + resource "alicloud_elasticsearch_instance" "instance" {
          + description          = "testInstanceName"
          + data_node_amount     = 2
          + data_node_disk_size  = 20
          + data_node_disk_type  = "cloud_ssd"
          + data_node_spec       = "elasticsearch.sn2ne.large"
          + domain               = (known after apply)
          + id                   = (known after apply)
          + instance_charge_type = "PostPaid"
          + kibana_domain        = (known after apply)
          + kibana_port          = (known after apply)
          + kibana_whitelist     = (known after apply)
          + master_node_spec     = "elasticsearch.sn2ne.large"
          + password             = (sensitive value)
          + port                 = (known after apply)
          + private_whitelist    = (known after apply)
          + public_whitelist     = (known after apply)
          + status               = (known after apply)
          + version              = "6.7_with_X-Pack"
          + vswitch_id           = "vsw-bp1f7r0ma00pf9h2l****"
          + zone_count           = 1
        }
    
    Plan: 1 to add, 0 to change, 0 to destroy.
    ------------------------------------------------------------------------
    Note: You didn't specify an "-out" parameter to save this plan, so Terraform
    can't guarantee that exactly these actions will be performed if
    "terraform apply" is subsequently run.
  4. Run the terraform apply command to run the configuration file in the working directory and enter yes.

    If the command is successfully run, the following result is returned:

    Plan: 1 to add, 0 to change, 0 to destroy.
    Do you want to perform these actions?
      Terraform will perform the actions described above.
      Only 'yes' will be accepted to approve.
      Enter a value: yes
     alicloud_elasticsearch_instance.instance: Creating...
     alicloud_elasticsearch_instance.instance: Still creating... [10s elapsed]
    alicloud_elasticsearch_instance.instance: Still creating... [20s elapsed]
     ...............
     Apply complete! Resources: 1 added, 0 changed, 0 destroyed.
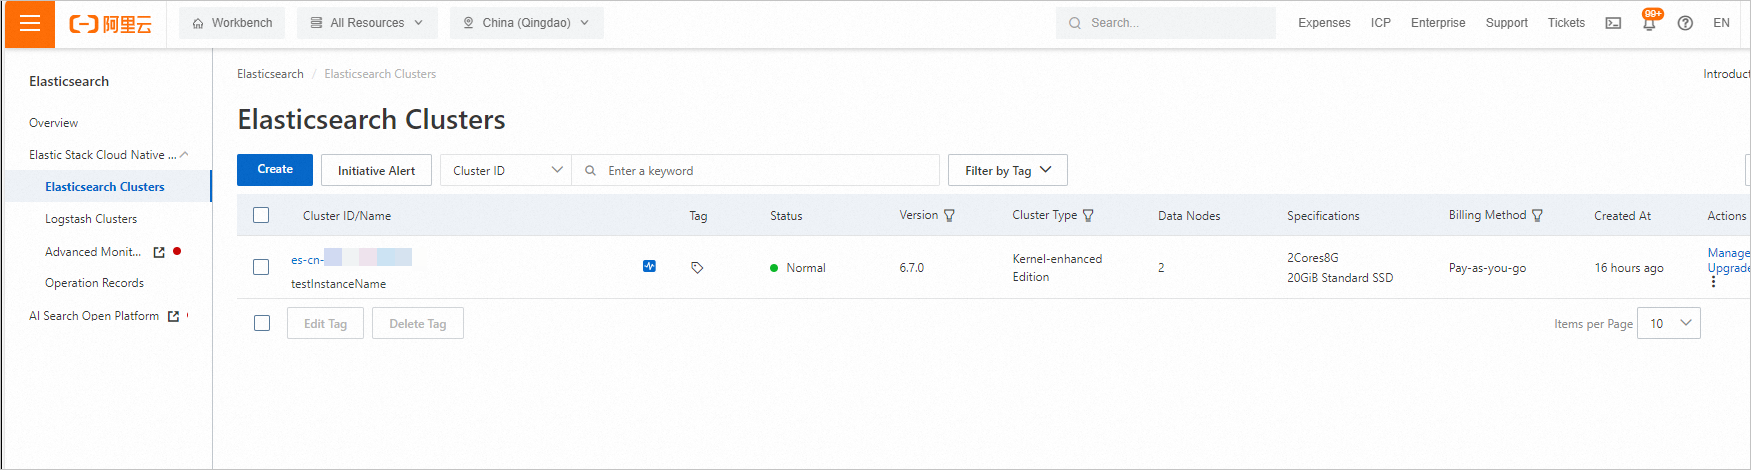
  5. Log on to the Elasticsearch console and view the newly created Elasticsearch cluster.

    创建成功的ES集群

Use Terraform to modify the configurations of an Elasticsearch cluster

  1. Go to the test directory and modify the elastic.tf configuration file.

    For example, change the value of data_node_disk_size to 50.

    resource "alicloud_elasticsearch_instance" "instance" {
      instance_charge_type = "PostPaid"
      data_node_amount     = "2"
      data_node_spec       = "elasticsearch.sn2ne.large"
      data_node_disk_size  = "50"
      data_node_disk_type  = "cloud_ssd"
      vswitch_id           = "vsw-bp1f7r0ma00pf9h2l****"
      password             = "es_password"
      version              = "6.7_with_X-Pack"
      master_node_spec     = "elasticsearch.sn2ne.large"
      zone_count           = "1"
    }
    Important
    • After a cluster is created, you cannot change the value of version.

    • You can modify only one configuration item in a request. For example, if you modify both data_node_spec and data_node_disk_size, the system reports an error.

  2. Run the terraform plan command to view cluster configurations.

  3. Run the terraform apply command. Wait until the configuration modification is complete.

Import an Elasticsearch cluster into Terraform

If your Elasticsearch cluster is not created by using Terraform, you can run commands to import the cluster into the state directory of Terraform.

  1. Create a file named main.tf in the test directory.

    vim main.tf
  2. Declare the cluster that you want to import into the state directory and specify the storage path of the cluster.

    resource "alicloud_elasticsearch_instance" "test" {}
  3. Import the cluster.

    terraform import alicloud_elasticsearch_instance.test  es-cn-0pp1f1y5g000h****

    If the command is successfully run, the following result is returned:

    alicloud_elasticsearch_instance.test: Importing from ID "es-cn-0pp1f1y5g000h****"...
    alicloud_elasticsearch_instance.test: Import prepared!
      Prepared alicloud_elasticsearch_instance for import
    alicloud_elasticsearch_instance.test: Refreshing state... [id=es-cn-0pp1f1y5g000h****]
    
    Import successful!
    
    The resources that were imported are shown above. These resources are now in
    your Terraform state and will henceforth be managed by Terraform.
    Note

    For information about how to import and manage existing clusters, see Manage existing cloud resources.

View all Elasticsearch clusters managed by Terraform

Run the terraform show command to view all managed clusters and their attribute values in the state directory.

# alicloud_elasticsearch_instance.instance:
resource "alicloud_elasticsearch_instance" "instance" {
    data_node_amount     = 2
    data_node_disk_size  = 20
    data_node_disk_type  = "cloud_ssd"
    data_node_spec       = "elasticsearch.sn2ne.large"
    domain               = "es-cn-dssf9op81lz4q****.elasticsearch.aliyuncs.com"
    id                   = "es-cn-dssf9op81lz4q****"
    instance_charge_type = "PostPaid"
    kibana_domain        = "es-cn-dssf9op81lz4q****.kibana.elasticsearch.aliyuncs.com"
    kibana_port          = 5601
    kibana_whitelist     = []
    master_node_spec     = "elasticsearch.sn2ne.large"
    password             = (sensitive value)
    port                 = 9200
    private_whitelist    = []
    public_whitelist     = []
    status               = "active"
    version              = "6.7.0_with_X-Pack"
    vswitch_id           = "vsw-bp1f7r0ma00pf9h2l****"
    zone_count           = 1
}

# alicloud_elasticsearch_instance.test:
resource "alicloud_elasticsearch_instance" "test" {
    data_node_amount     = 3
    data_node_disk_size  = 51
    data_node_disk_type  = "cloud_ssd"
    data_node_spec       = "elasticsearch.r5.large"
    domain               = "es-cn-0pp1f1y5g000h****.elasticsearch.aliyuncs.com"
    id                   = "es-cn-0pp1f1y5g000h****"
    instance_charge_type = "PostPaid"
    kibana_domain        = "es-cn-0pp1f1y5g000h****.kibana.elasticsearch.aliyuncs.com"
    kibana_port          = 5601
    kibana_whitelist     = []
    port                 = 9200
    private_whitelist    = []
    public_whitelist     = []
    status               = "active"
    version              = "6.7.0_with_X-Pack"
    vswitch_id           = "vsw-bp1f7r0ma00pf9h2l****"
    zone_count           = 1

    timeouts {}
}

Use Terraform to delete an Elasticsearch cluster

Warning

After a cluster is deleted, it cannot be recovered, and all data stored on the cluster is deleted.

Go to the test directory, run the terraform destroy command, and then enter yes to delete the cluster.

# terraform destroy
alicloud_elasticsearch_instance.instance: Refreshing state... [id=es-cn-v3x49h5397fau****]

An execution plan has been generated and is shown below.
Resource actions are indicated with the following symbols:
  - destroy

Terraform will perform the following actions:

  # alicloud_elasticsearch_instance.instance will be destroyed
  - resource "alicloud_elasticsearch_instance" "instance" {
      - data_node_amount     = 2 -> null
      - data_node_disk_size  = 20 -> null
      - data_node_disk_type  = "cloud_ssd" -> null
      - data_node_spec       = "elasticsearch.sn2ne.large" -> null
      - domain               = "es-cn-v3x49h5397fau****.elasticsearch.aliyuncs.com" -> null
      - id                   = "es-cn-v3x49h5397fau****" -> null
      - instance_charge_type = "PostPaid" -> null
      - kibana_domain        = "es-cn-v3x49h5397fau****.kibana.elasticsearch.aliyuncs.com" -> null
      - kibana_port          = 5601 -> null
      - kibana_whitelist     = [] -> null
      - master_node_spec     = "elasticsearch.sn2ne.large" -> null
      - password             = (sensitive value)
      - port                 = 9200 -> null
      - private_whitelist    = [] -> null
      - public_whitelist     = [] -> null
      - status               = "active" -> null
      - version              = "6.7.0_with_X-Pack" -> null
      - vswitch_id           = "vsw-bp1f7r0ma00pf9h2l****" -> null
      - zone_count           = 1 -> null
    }

Plan: 0 to add, 0 to change, 1 to destroy.

Do you really want to destroy all resources?
  Terraform will destroy all your managed infrastructure, as shown above.
  There is no undo. Only 'yes' will be accepted to confirm.

  Enter a value: yes

alicloud_elasticsearch_instance.instance: Destroying... [id=es-cn-v3x49h5397fau****]
alicloud_elasticsearch_instance.instance: Still destroying... [id=es-cn-v3x49h5397fau****, 10s elapsed]
alicloud_elasticsearch_instance.instance: Still destroying... [id=es-cn-v3x49h5397fau****, 20s elapsed]
alicloud_elasticsearch_instance.instance: Still destroying... [id=es-cn-v3x49h5397fau****, 30s elapsed]
alicloud_elasticsearch_instance.instance: Still destroying... [id=es-cn-v3x49h5397fau****, 40s elapsed]
alicloud_elasticsearch_instance.instance: Still destroying... [id=es-cn-v3x49h5397fau****, 50s elapsed]
alicloud_elasticsearch_instance.instance: Still destroying... [id=es-cn-v3x49h5397fau****, 1m0s elapsed]
alicloud_elasticsearch_instance.instance: Still destroying... [id=es-cn-v3x49h5397fau****, 1m10s elapsed]
alicloud_elasticsearch_instance.instance: Still destroying... [id=es-cn-v3x49h5397fau****, 1m20s elapsed]
alicloud_elasticsearch_instance.instance: Still destroying... [id=es-cn-v3x49h5397fau****, 1m30s elapsed]
alicloud_elasticsearch_instance.instance: Still destroying... [id=es-cn-v3x49h5397fau****, 1m40s elapsed]
alicloud_elasticsearch_instance.instance: Still destroying... [id=es-cn-v3x49h5397fau****, 1m50s elapsed]
alicloud_elasticsearch_instance.instance: Still destroying... [id=es-cn-v3x49h5397fau****, 2m0s elapsed]
alicloud_elasticsearch_instance.instance: Still destroying... [id=es-cn-v3x49h5397fau****, 2m10s elapsed]
alicloud_elasticsearch_instance.instance: Still destroying... [id=es-cn-v3x49h5397fau****, 2m20s elapsed]
alicloud_elasticsearch_instance.instance: Still destroying... [id=es-cn-v3x49h5397fau****, 2m30s elapsed]
alicloud_elasticsearch_instance.instance: Still destroying... [id=es-cn-v3x49h5397fau****, 2m40s elapsed]
alicloud_elasticsearch_instance.instance: Destruction complete after 10m2s

Destroy complete! Resources: 1 destroyed.