Problem description
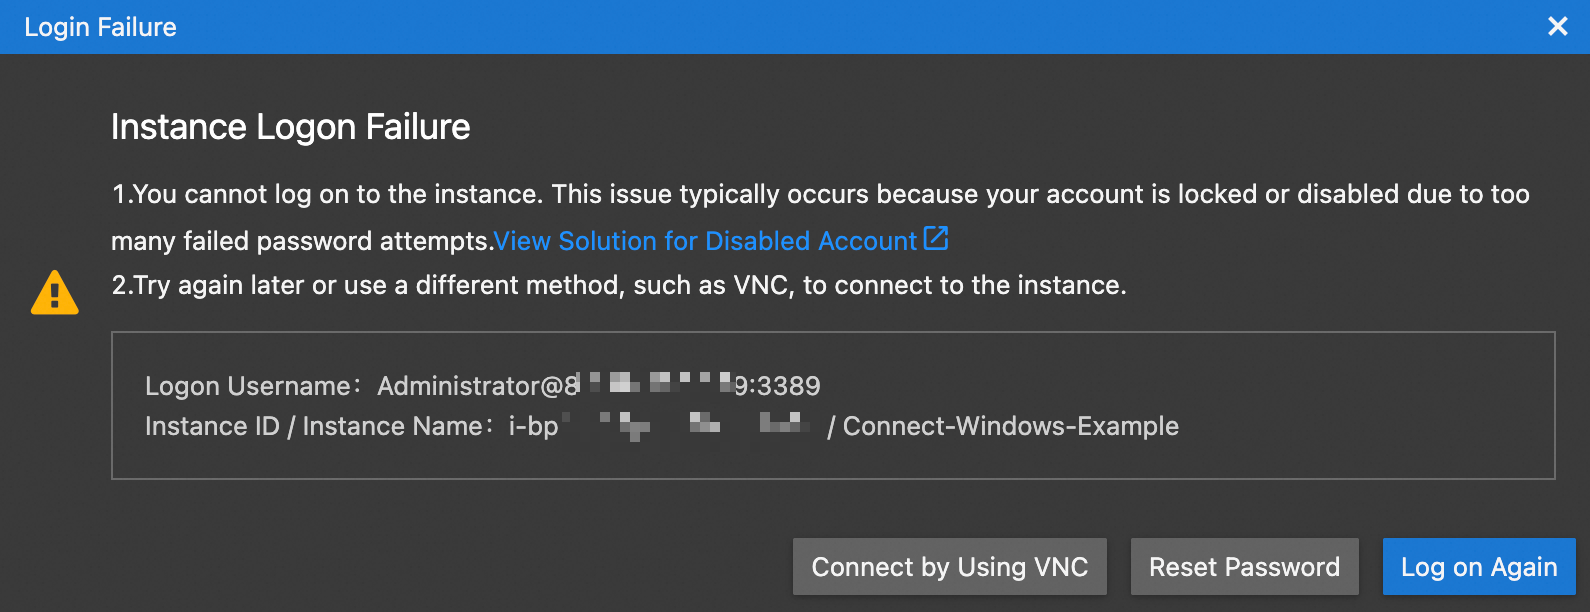
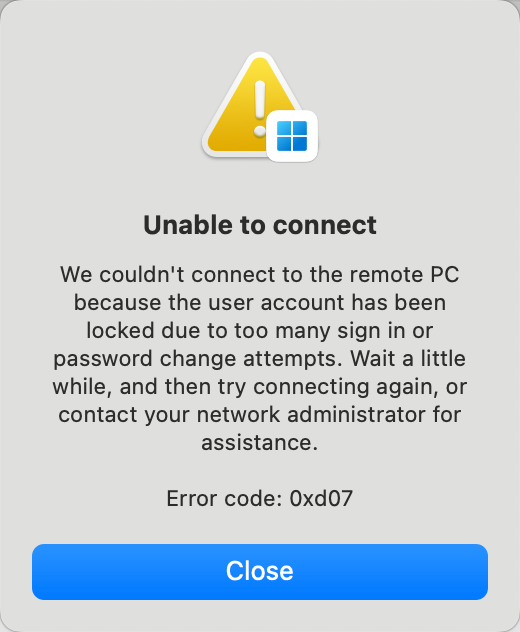
When you connect to a Windows instance using Remote Desktop, Workbench, or the Windows APP, the following error message appears: The user account has been locked because there were too many logon attempts or password change attempts.
Remote Desktop

Workbench
Windows APP
Cause
This error indicates that the Windows security policy has automatically locked the user account. This is a protective measure triggered by one of the following reasons:
Too many failed login attempts: The number of incorrect password entries has exceeded the system's "account lockout threshold".
Suspected brute-force attack: If your instance's RDP port (default: 3389) is exposed to the public Internet, it is likely being targeted by brute-force attacks, which can trigger the account lockout. This is a security risk that requires immediate investigation.
Procedure
Step 1: Isolate the instance and block RDP access
To prevent further attacks while you unlock the account, immediately block all external sign-in attempts.
Go to ECS console - Instance. In the top navigation bar, select the target region and resource group.
Click the ID of the target instance to open its details page.
Click the tab, and then click a Security Group ID to open its details page.
Disable the rule that allows RDP access for your security group.
Delete all inbound rules that allow access to the RDP port (default is
3389), or change their Allow to Deny.ImportantBefore you make changes, record the original security group settings so you can restore them later.
Step 2: Log on via VNC to unlock the account
The account is automatically unlocked after one successful sign-in via VNC.
On the instance details page, click . In the VNC section, click Sign in now.
Log on to the Windows system.
In the VNC window, click in the upper-left corner to unlock the system.
Select a user account (Administrator by default), enter the instance password, and log on to the Windows system.
If you have not set a password or have forgotten it, click All Actions > Reset Instance Password on the instance details page.
Step 3: Restore RDP access
Allow only trusted IP addresses to access the instance using RDP. If your local machine uses a dynamic IP address, use the Workbench terminal or the Alibaba Cloud Client to connect to your ECS instance. These tools can configure the necessary security group rules for you with a single click, eliminating the need for manual modifications.
Identify allowed IP addresses or CIDR blocks.
Visit
https://cip.ccin your browser to get your local machine's public IP address. You can use this IP address for security group configuration.Manually modify the security group rule.
On the Inbound tab of the security group details page, click Add Rule. Configure a rule to allow only specific public IP addresses or CIDR blocks to connect to the instance using RDP.
Action
Priority
Protocol
Destination (Current instance)
Source
Allow
1
Custom TCP
RDP (3389)
The default port is 3389. If you have changed the port, update this value accordingly.
Set this to the planned public IP address or CIDR block.
ImportantNever set the source to
0.0.0.0/0. Exposing the RDP port to the public internet makes your instance highly vulnerable to brute-force attacks, which can cause repeated account lockouts.
Step 4: Verify the RDP connection
Use a Remote Desktop client to connect to the instance and verify that you can log on successfully.
Security recommendations
Change the default RDP port: Instead of using the well-known port
3389, configure RDP on a custom port to evade automated scanners.Enforce a strong password policy: Require complex passwords and rotate them periodically to defend against brute-force attacks.