Cloud Assistant Agent is a program that runs Cloud Assistant commands on Elastic Compute Service (ECS) instances. This topic describes how to use Cloud Assistant Agent to install OpenSSH on a Windows ECS instance.
Prerequisites
Cloud Assistant Agent is installed on the Windows ECS instance on which you want to install OpenSSH. For more information, see Install Cloud Assistant Agent.
A public IP address is automatically assigned to the ECS instance. Alternatively, an elastic IP address (EIP) is associated with the ECS instance. For instructions on how to enable public bandwidth, see Enable public bandwidth.
A rule is added to a security group of the Windows ECS instance to allow traffic on SSH port 22. For information about how to add a security group rule, see Add a security group rule.
NoteFor information about the operating system versions that support Cloud Assistant Agent, see the Limits section of Overview of Cloud Assistant.
Procedure
In the top navigation bar, select the region and resource group of the resource that you want to manage.

In the Create Command panel, configure the parameters. The following table describes the parameters.
Parameter
Description
Command Information
Command Source
Select Enter Command Content to create a command.
Command Type
Select a type of command.
For Windows instances, select PowerShell.
Command content
Paste the following code segment to the code editor.
$curDir = $PSScriptRoot
Set-Location $curDir
# Check the OS version
$OSversion = [Environment]::OSVersion.Version
if ($OSversion.Major -lt 6 -or ($OSversion.Major -eq 6 -and $OSversion.Minor -lt 1)) {
     throw "This script is not supported on Windows 2008 or lower"
}
$Arch =([Array](Get-WmiObject -Query "select AddressWidth from Win32_Processor"))[0].AddressWidth
if ($Arch -ne "64") {
    throw "Only 64-bit system architecture is supported"
}
function Check-Env() {
    $srv_status = (Get-WmiObject -Class win32_service -Filter "name= 'sshd'").Status
    if ( $srv_status -match "OK") {
        Write-Host "system already installed opensshd"
        exit
    }
}
function Download-File($file_url = "{{sshd_download_url}}", $file_path = "C:\Programdata\OpenSSH-Win64.zip") {
    if (Test-Path $file_path) { return; }
    [System.Net.ServicePointManager]::SecurityProtocol=[System.Net.SecurityProtocolType]::Tls12
    Invoke-WebRequest -Uri $file_url  -OutFile $file_path -UseBasicParsing
    if (! $?) { throw "$file_url download to $file_path error" }
}
function Unzip-File($src_file = "C:\Programdata\OpenSSH-Win64.zip", $dst_file = "C:\Programdata") {
    Expand-Archive -Path $src_file -DestinationPath $dst_file
    if (! $?) { throw "Unzip $src_file to $dst_file error, please check" }
}
function Install-Ssh() {
    powershell.exe -ExecutionPolicy Bypass -File C:\Programdata\OpenSSH-Win64\install-sshd.ps1
    if (! $?) {
        throw "Install openssh error, please check"
    }
    Start-Service sshd
    Set-Service -Name "sshd" -StartupType Automatic; Start-Service sshd
    if (! $?) {
        throw "set sshd enable auto start or start sshd error , please check"
    }
}
Check-Env
Download-File
Unzip-File
Install-Ssh
Use Parameters: Turn on Use Parameters. Then, you must configure the
{{sshd_download_url}}parameter in the preceding code segment. Replace the {{sshd_download_url}} parameter with the URL from which you can download and install a desired OpenSSH version on the OpenSSH official website. For example, replace the {{sshd_download_url}} parameter withhttps://github.com/PowerShell/Win32-OpenSSH/releases/download/v9.5.0.0p1-Beta/OpenSSH-Win64.zip.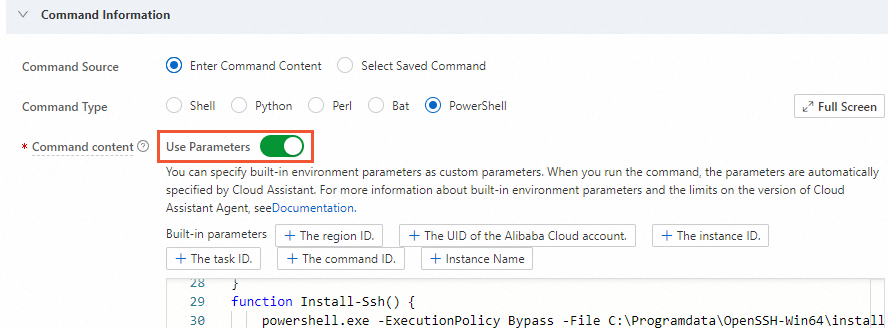
Execution Plan
Select Immediate execution.
Command Name
Enter a name for the command.
Command Description
Enter a description for the command. To facilitate management and maintenance, we recommend that you specify a description that can help you identify the command, such as the purpose of the command.
Username
Specify the username that you want to use to run the command on ECS instances.
To ensure security, we recommend that you run Cloud Assistant commands as a regular user based on the principle of least privilege. For more information, see Configure a regular user to run Cloud Assistant commands.
NoteBy default, Cloud Assistant commands are run by the root user on Linux instances and by the System user on Windows instances.
Execution Path
Specify an execution path for the command. Different default execution paths are provided based on the operating system of instances on which the command is run.
For Windows instances, the default execution path is the following directory in which the process of Cloud Assistant Agent resides:
C:\ProgramData\aliyun\assist\$(version).Timeout
Specify a Timeout for the command to run on instances. If a task that runs the command times out, Cloud Assistant forcefully stops the task.
Unit: seconds. Default value: 60. We recommend that you set this parameter to 300. You can change the value based on network conditions.
Select Instance
Select the ECS instances on which you want to run the command.
Select Managed Instances
Select the managed instances on which you want to run the command.
NoteA managed instance is an instance that is not provided by Alibaba Cloud but is managed by Cloud Assistant. For more information, see Alibaba Cloud managed instances.
Click Run and Save and confirm that the command is run.
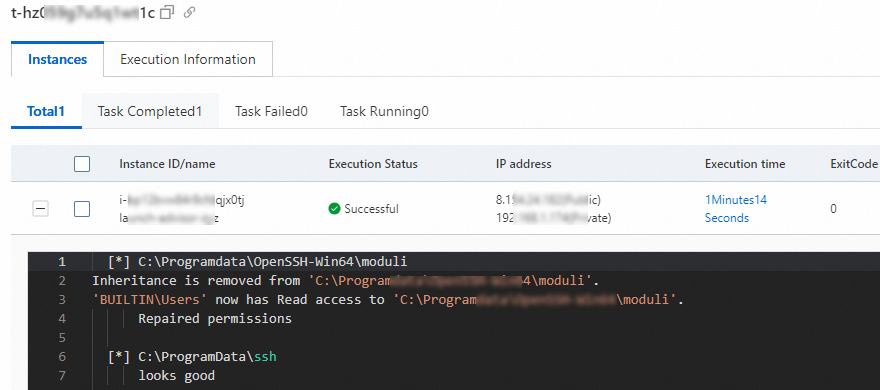
Install OpenSSH.
Connect to the Windows ECS instance by using Virtual Network Computing (VNC).
For more information, see Connect to an instance using VNC.
Click the
 icon and select Windows PowerShell to start Windows PowerShell.
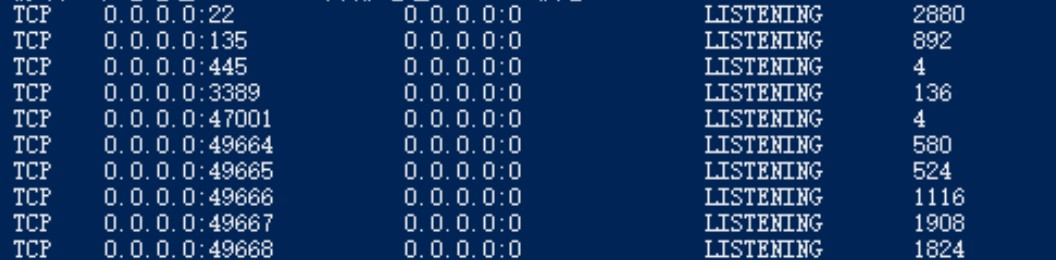
 Run the following command to install OpenSSH:
NETSTAT.EXE -anoThe following figure shows a sample command output, which indicates that OpenSSH is installed and listens on port 22.
Use an SSH client to connect to the Windows instance.
NoteUse the current username and password of the Windows instance to log on to the instance.