Problem description
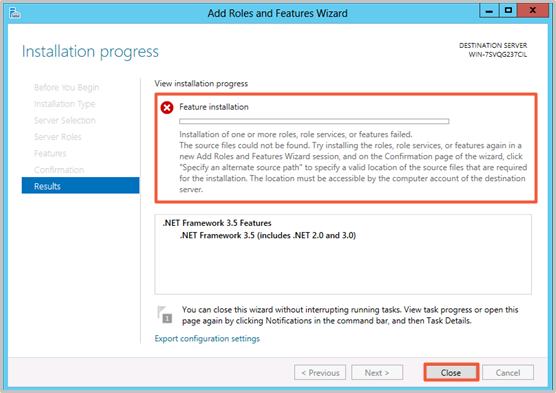
When you try to install .NET Framework 3.5, the installation fails with the error "The installation of one or more roles, role services, or features failed."
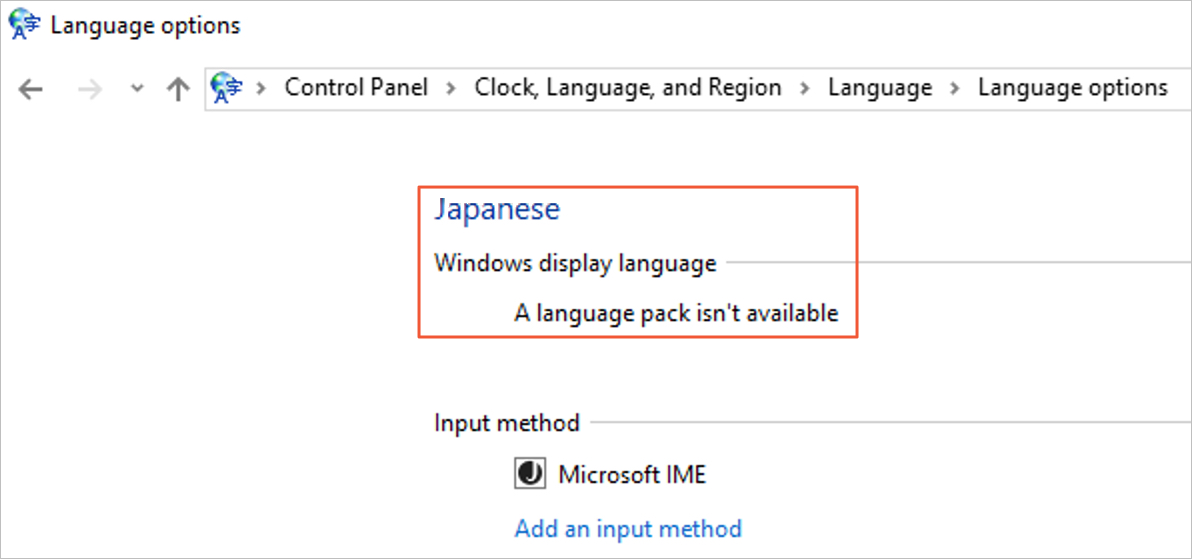
You cannot select or install a language pack when switching languages in Control Panel or browsing language options in Windows Update.
Cause
This issue is caused by the instance's default update source configuration. By default, the instance tries to download installation files from Windows Server Update Services (WSUS), but the required files for .NET Framework 3.5 and language packs are not available there. This leads to an installation failure.
Solutions
This topic provides two methods to install .NET Framework 3.5.
Before you begin, ensure the instance has a Public IP address.
Install using Cloud Assistant: Use Cloud Assistant in the console to run an installation command without logging on to the instance. This method is fast and convenient.
Install by switching the update source: Log on to the instance, manually change the group policy to switch the update source, and then install the feature.
Method 1: Install using Cloud Assistant
On the ECS Instances tab, find the target instance and click Run Command in the Actions column.
Enter the following command and select Immediate execution. Set Timeout to 6000 seconds or more. Keep the default values for other parameters, then click Run.
acs-plugin-manager.exe -e -P Windows_RestoreAndUpdate -p "-ByMedia iso -InstallFeature NetFx3"Verify the result. On the Command Execution Result tab, check the Execution Status of the command.
If the Execution Status is Execution Succeeded, click View in the Actions column. If the output shows no errors, the installation was successful.
For Windows Server 2012 R2, if the command fails or returns an error, troubleshoot potential security patch issues.
Method 2: Install by switching the update source
Use the GUI
Switch the update source.
Log on to the ECS instance.
Go to ECS console - Instance. In the top navigation bar, select the target region and resource group.
Go to the details page of the target instance, click Connect, and select Workbench. Set the connection method to Terminal, enter the username and password, and then log on to the graphical terminal page.
Right-click the
 icon, then click Run. Enter
 gpedit.mscto open the Local Group Policy Editor.Configure the local group policy.
For Windows Server 2012 R2, Windows Server 2016, Windows Server 2019, or Windows Server 2022
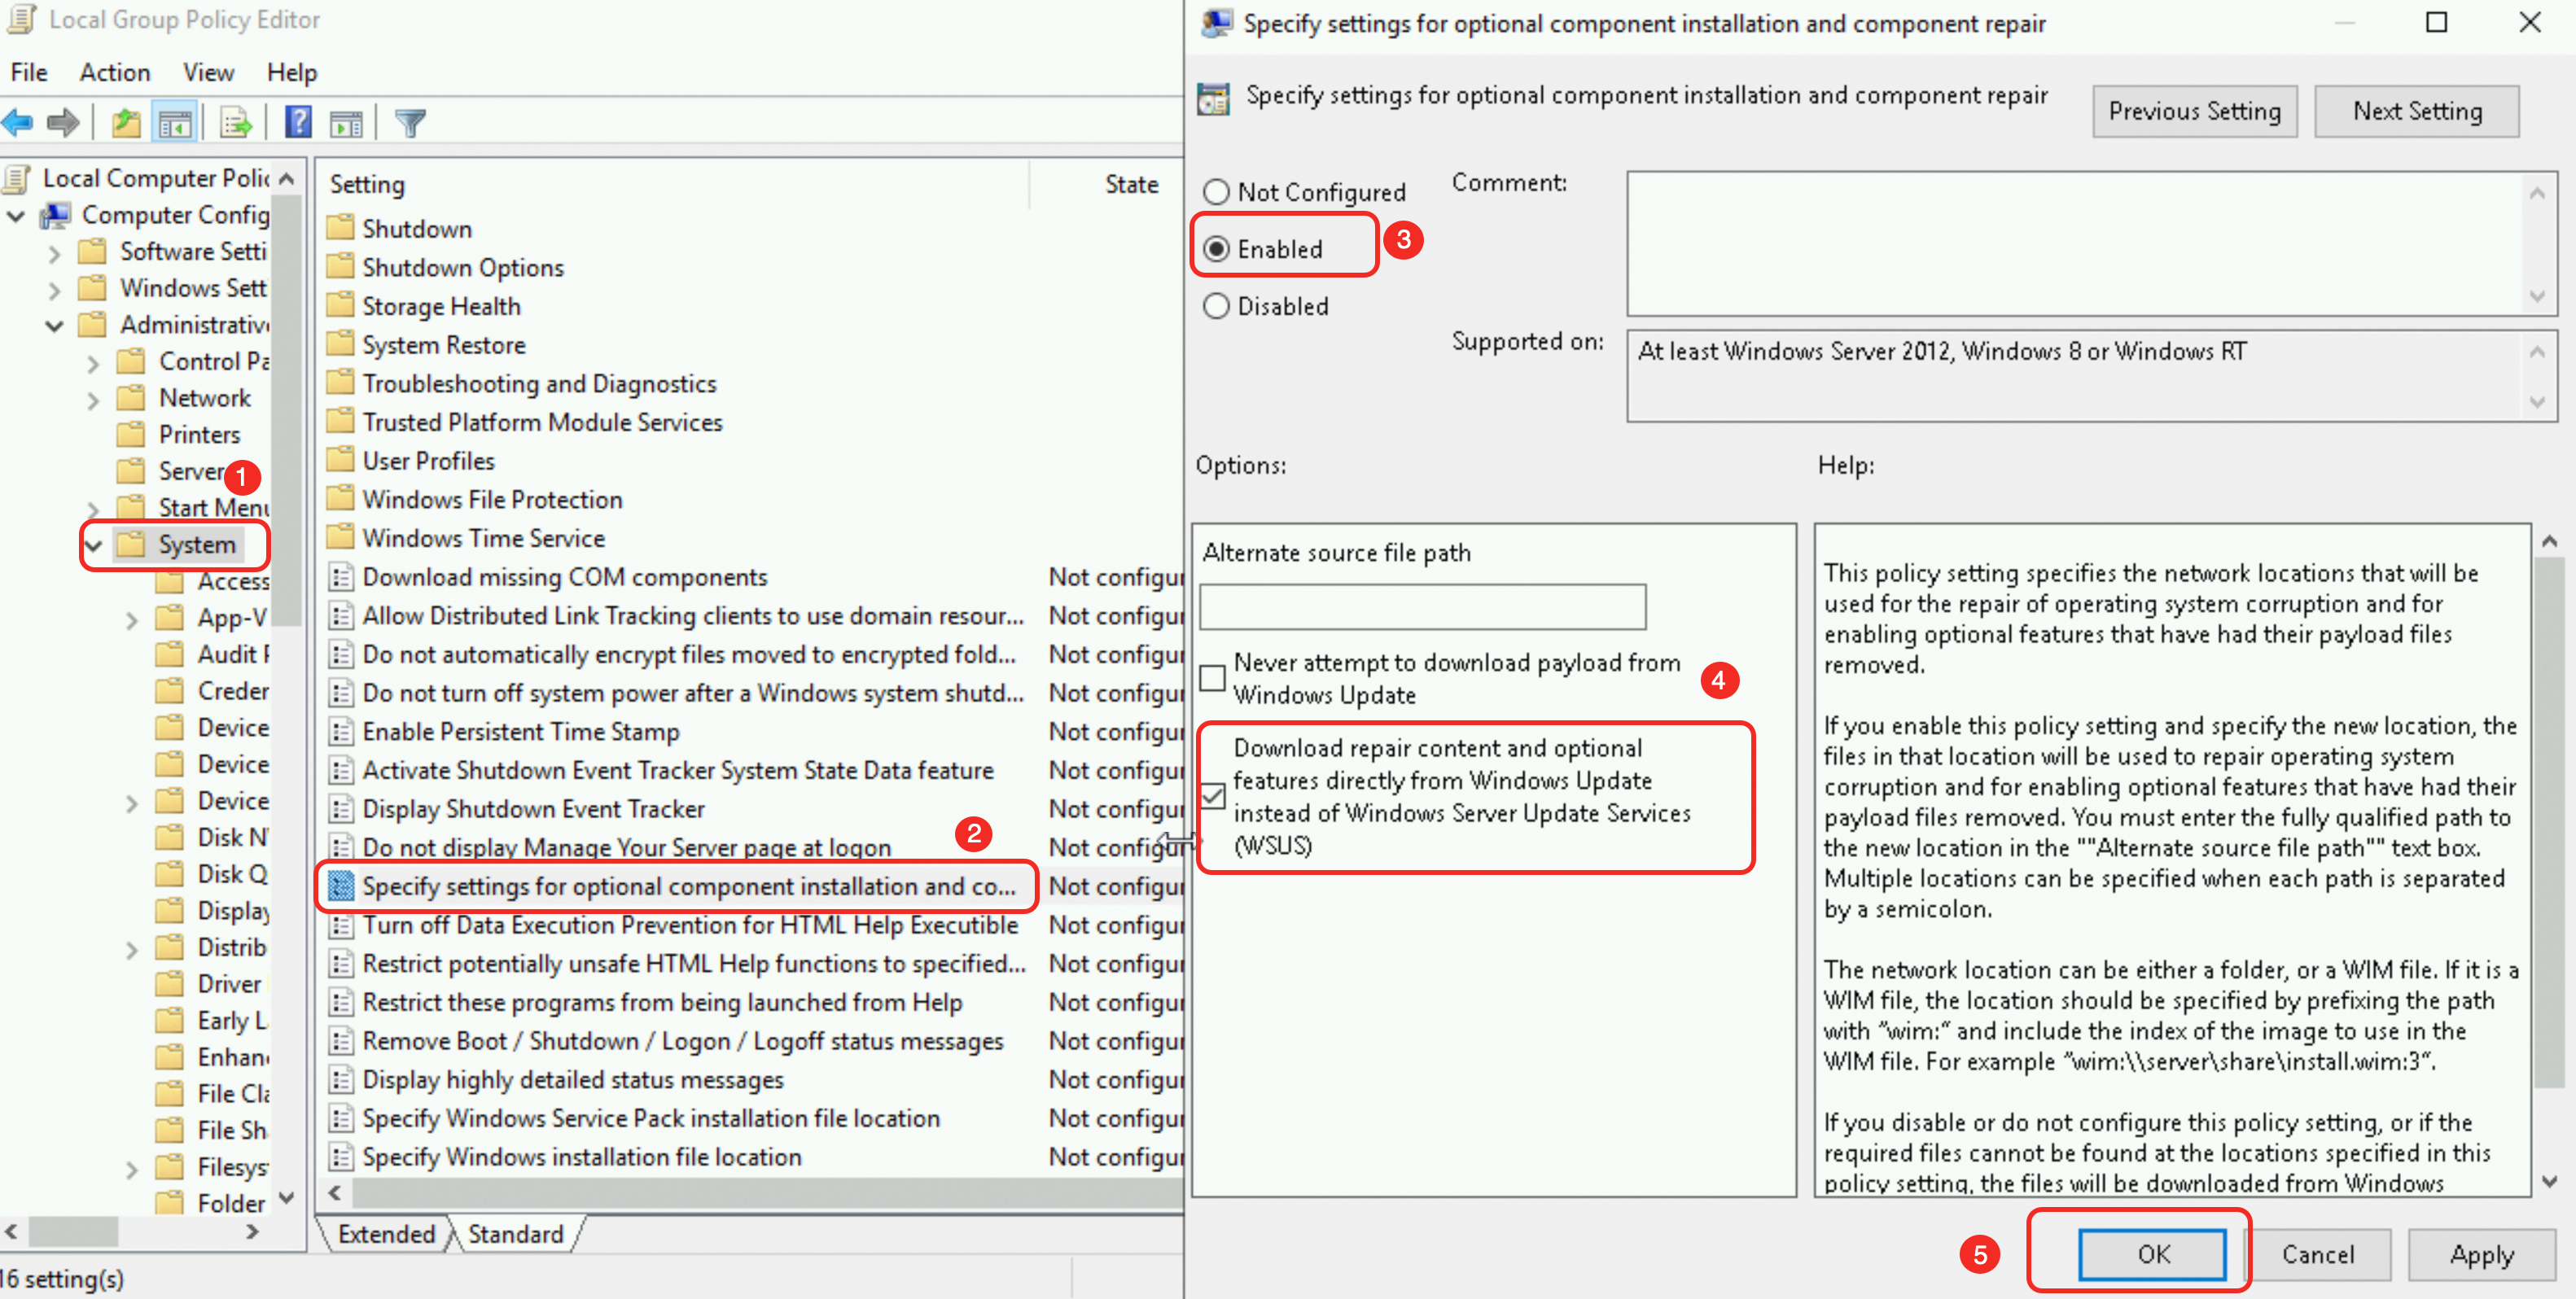
In the Local Group Policy Editor, navigate to .
Double-click , select Enabled, then select the Download repair content and optional features directly from Windows Update instead of Windows Server Update Services (WSUS) checkbox. Click OK.
On Windows Server 2012 R2, this checkbox is labeled Contact Windows Update directly to download repair content instead of Windows Server Update Services (WSUS).
Windows Server 2025
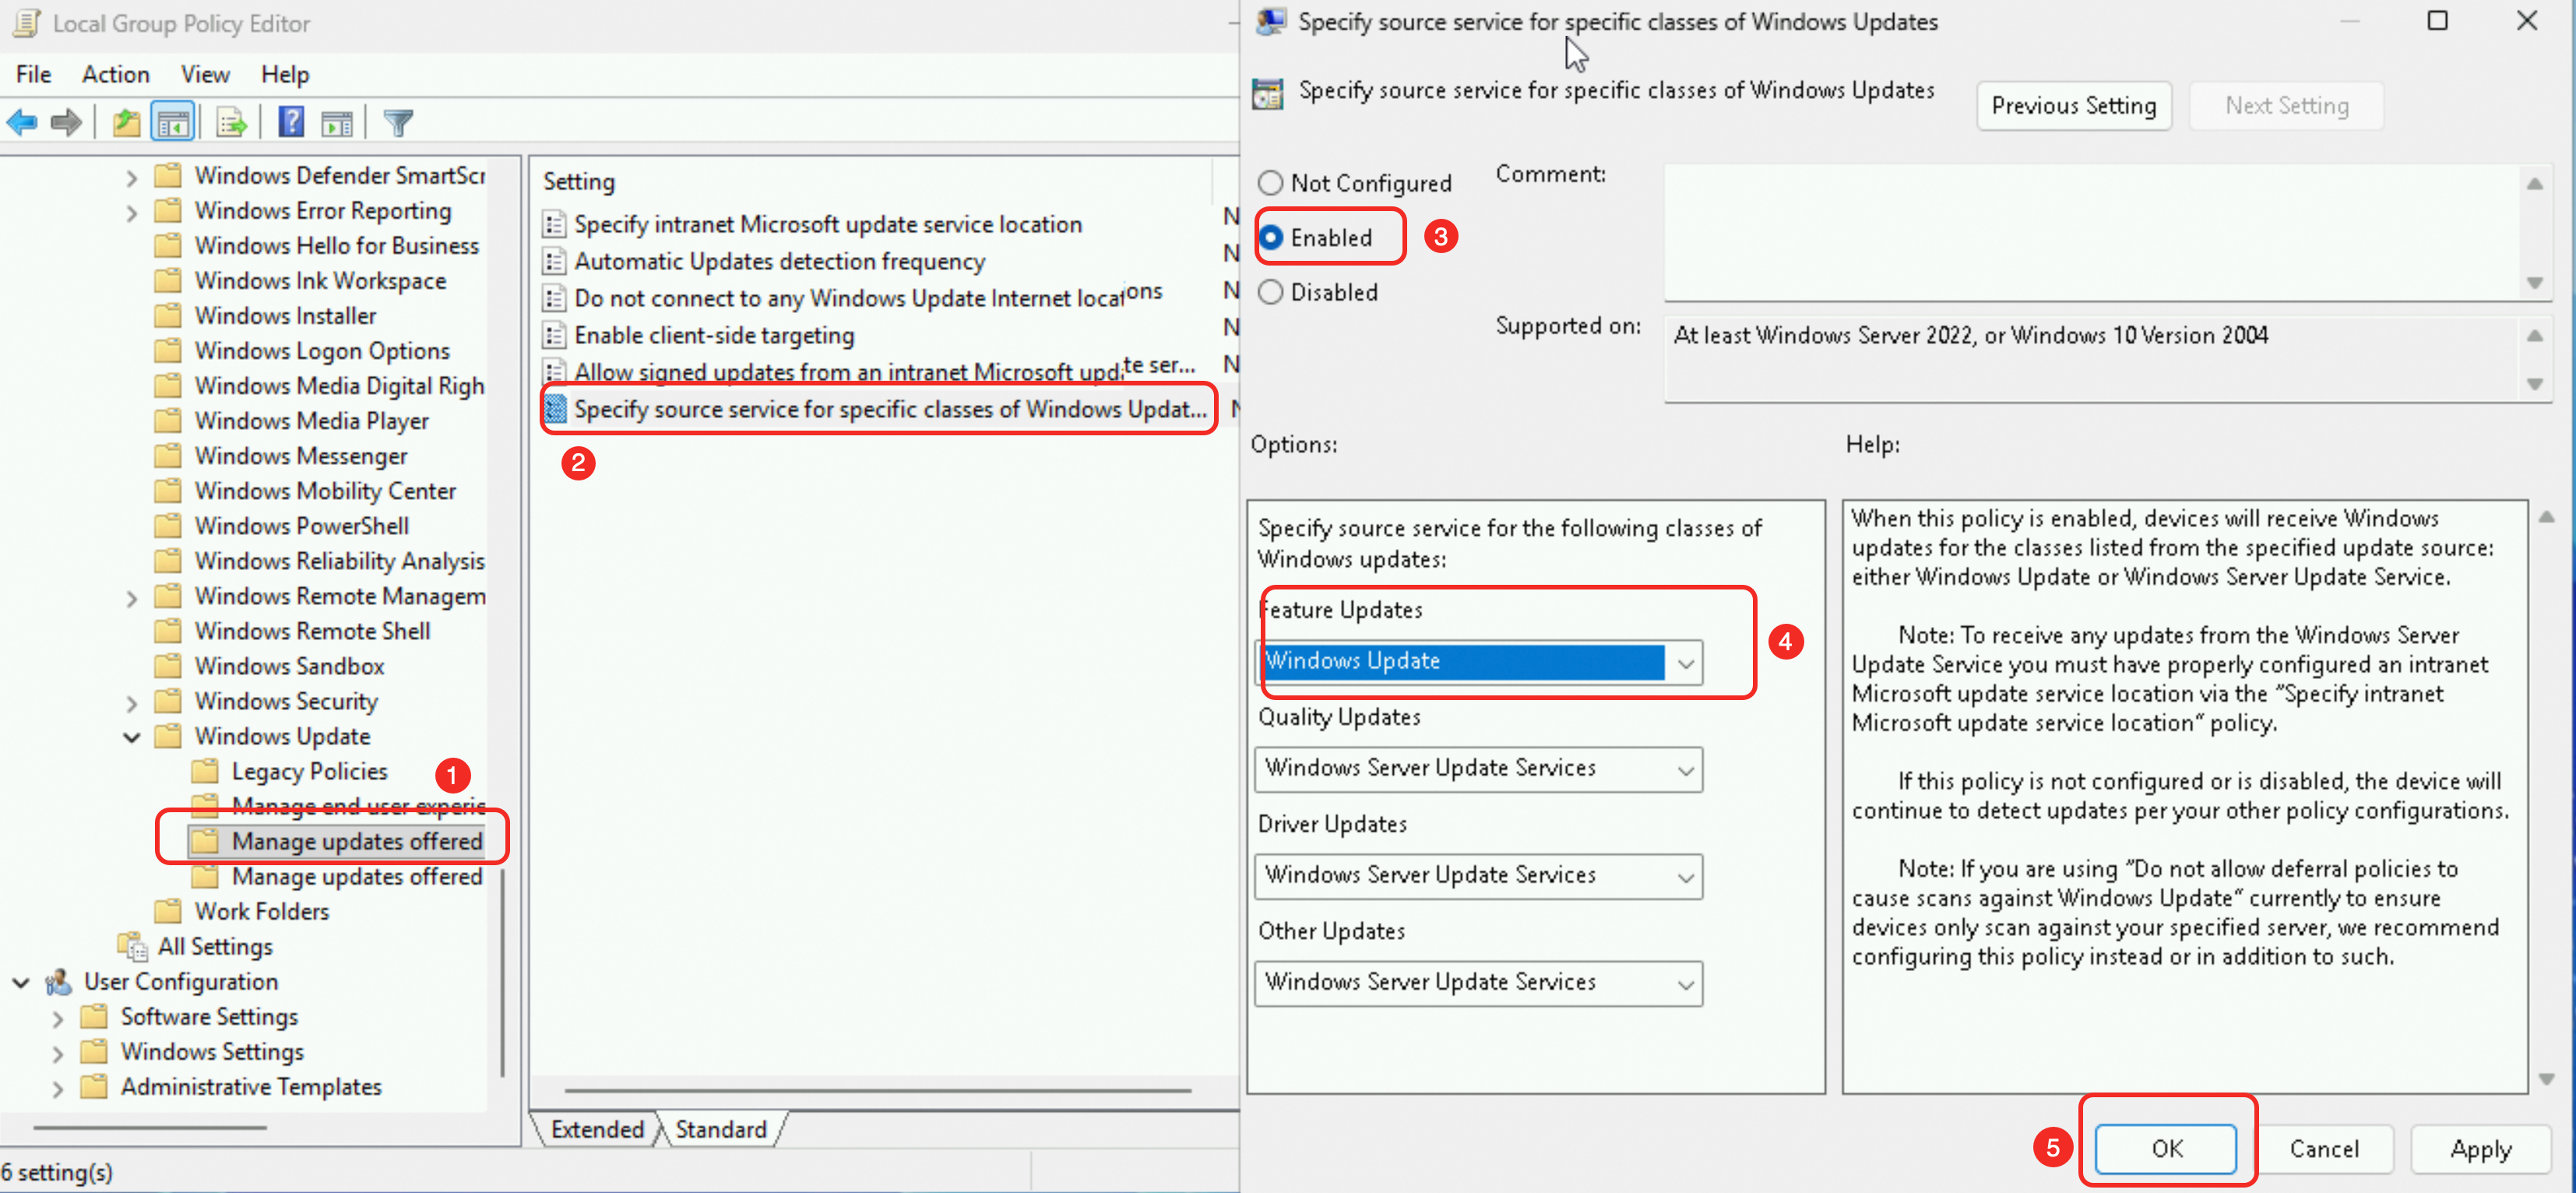
In the Local Group Policy Editor, choose .
Double-click Specify source service for specific classes of Windows Updates, select Enabled, set Feature Updates to Windows Update, and then click OK.
Apply the group policy.
Right-click the
icon, then click Run. Enter PowerShellto open a PowerShell window, then run thegpupdate /forcecommand to apply the policy immediately.
Install .NET Framework 3.5.
Click the
icon in the lower-left corner, then select Server Manager.In Server Manager, click Add roles and features.
In the wizard, go to the Features page, select the .NET Framework 3.5 Features checkbox, then proceed through the wizard to complete the installation.
For Windows Server 2012 R2, if the installation still fails, troubleshoot potential security patch issues.
(Optional) Revert the update source to WSUS.
If your environment uses WSUS to manage updates, revert to the original update source configuration in
PowerShellafter the installation is complete.Set-ItemProperty -Path 'HKLM:\SOFTWARE\Policies\Microsoft\Windows\WindowsUpdate\AU' -Name UseWUServer -Value 1 Restart-Service -Name wuauserv
Use the PowerShell command line
Switch the update source.
Log on to the ECS instance.
Go to ECS console - Instance. In the top navigation bar, select the target region and resource group.
Go to the details page of the target instance, click Connect, and select Workbench. Set the connection method to Terminal, enter the username and password, and then log on to the graphical terminal page.
Right-click the
icon, then click Run. Enter PowerShellto open a PowerShell window, then run the following commands to switch the update source.Set-ItemProperty -Path 'HKLM:\SOFTWARE\Policies\Microsoft\Windows\WindowsUpdate\AU' -Name UseWUServer -Value 0 Restart-Service -Name wuauserv
Install .NET Framework 3.5.
Dism /Online /Enable-Feature /FeatureName:NetFX3 /AllIf you encounter errors such as
0x800F0906or0x800F081F, refer to .NET Framework 3.5 installation error for a solution.For Windows Server 2012 R2, if the installation still fails, troubleshoot potential security patch issues.
(Optional) Revert the update source to WSUS.
If your environment uses WSUS to manage updates, revert to the WSUS source in
PowerShellafter the installation is complete.Set-ItemProperty -Path 'HKLM:\SOFTWARE\Policies\Microsoft\Windows\WindowsUpdate\AU' -Name UseWUServer -Value 1 Restart-Service -Name wuauserv
References
To install other versions of .NET Framework, see install the .NET Framework on Windows.