Cloud Phone provides a standard network. To access the Internet, you must attach a bandwidth plan. A bandwidth plan lets you set a peak bandwidth and apply instance-level throttling. This topic describes how to create and manage bandwidth plans.
This feature is in invitational preview and is not publicly available.
Create a bandwidth plan
Log on to the Cloud Phone console.
In the navigation pane on the left, choose .
On the Bandwidth Plans page, click Create Bandwidth Plan.
In the Create Bandwidth Plan pane, set the following parameters and click OK.
ImportantA bandwidth plan cannot be released after it is created. Proceed with caution.
Configuration Item
Description
Example
Select Region
The region where the bandwidth plan is located. Select the same region as the Cloud Phone instance group to which you want to attach the bandwidth plan.
China (Hangzhou)
Bandwidth Plan Name
The name must be 2 to 30 characters in length. It must start with an uppercase letter, a lowercase letter, or a Chinese character. It cannot start with
http://orhttps://. It can contain only Chinese characters, letters, digits, colons (:), underscores (_), periods (.), and hyphens (-).Demo
Billing Method
Only subscription is supported.
Subscription
Peak Bandwidth
The value ranges from 50 Mbps to 1,000 Mbps.
50
Private IP CIDR Block
Use
192.168.0.0/16,172.16.0.0/12, or10.0.0.0/12. Because Cloud Phone instances may be distributed across different zones, adjust the subnet mask to ensure that the maximum number of available private IP addresses is at least twice the target number of Cloud Phone instances.192.168.0.0/16Subscription Duration
Select a subscription duration and specify whether to enable Auto-renewal On Expiration.
1 month
After a bandwidth plan is created, you can select a bandwidth plan to attach when you create a Cloud Phone instance group.
Upgrade or downgrade a bandwidth plan
You can upgrade or downgrade a bandwidth plan to increase or decrease its peak bandwidth.
Log on to the Cloud Phone console.
In the navigation pane on the left, choose .
On the Bandwidth Plans page, find the active bandwidth plan that you want to modify and click Upgrade/Downgrade in the Actions column.
On the Cloud Phone - Upgrade/Downgrade Bandwidth Plan page, modify the peak bandwidth, and then click Buy Now or Downgrade. Complete the subsequent steps as prompted.
Click View Details to view the refund or additional payment amount.
Manually renew a bandwidth plan
Renew your bandwidth plan in advance to prevent service interruptions.
Log on to the Cloud Phone console.
In the navigation pane on the left, choose .
On the Bandwidth Plans page, find the active bandwidth plan that you want to renew and click Renew in the Actions column.
On the Cloud Phone - Renew Bandwidth Plan page, select a Renewal Duration, specify whether to Enable Auto-renewal, and then click Buy Now. Complete the subsequent steps as prompted.
Click View Details to view the price details.
View the public IP address usage of a bandwidth plan
You can view the number of public IP addresses in use in a bandwidth plan and details about the attached instances.
Log on to the Cloud Phone console.
In the navigation pane on the left, choose .
On the Bandwidth Plans page, find the bandwidth plan that you want to view and click its ID.
On the details page of the bandwidth plan, you can perform the following operations as needed:
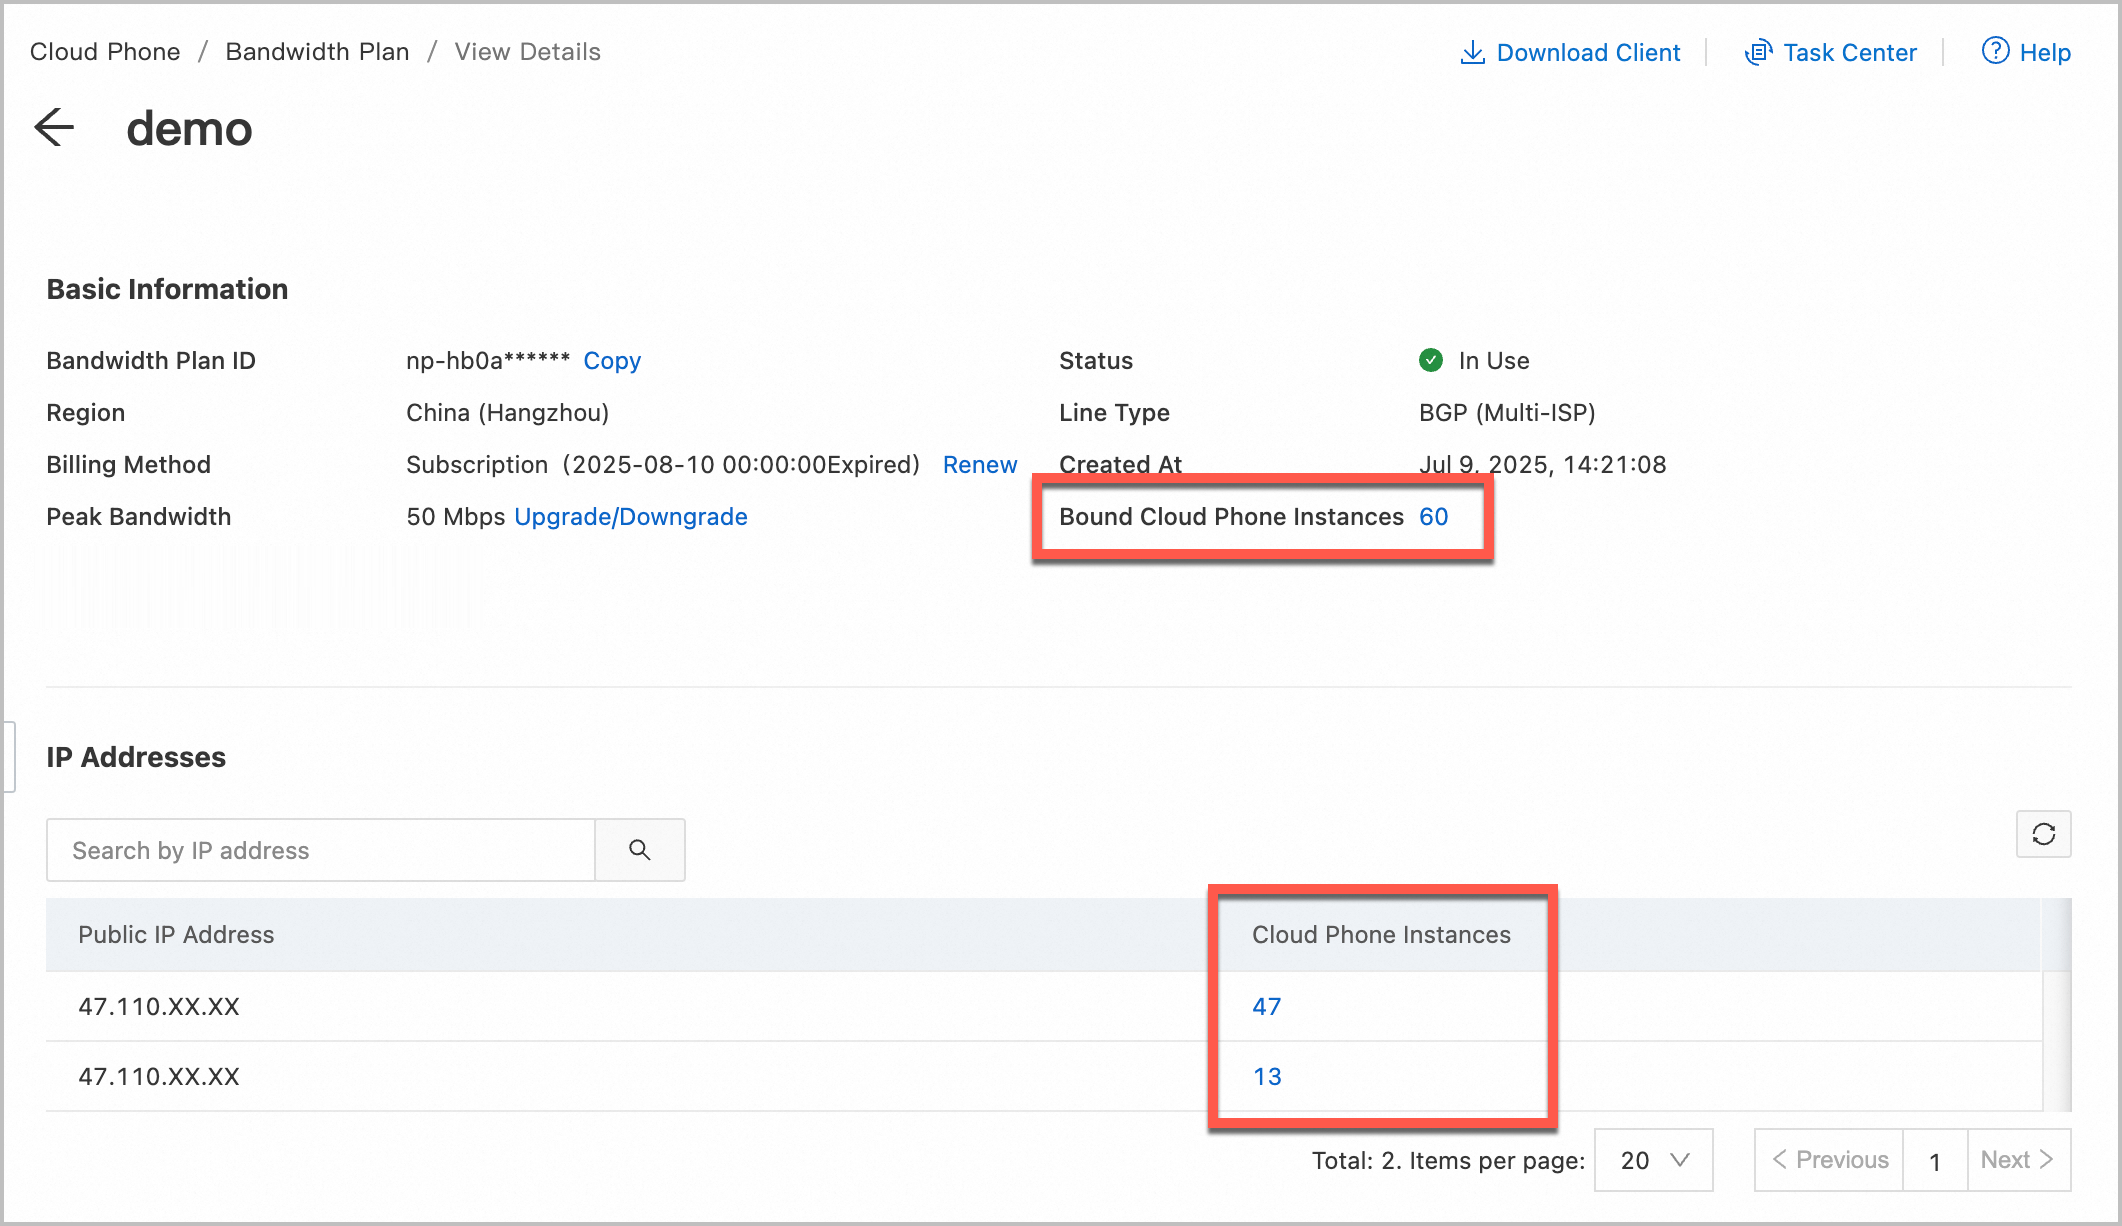
The number to the right of Attached Cloud Phone Instances indicates the total number of attached Cloud Phone instances. Click the number to view the instance list.
The Public IP List lists the public IP addresses in use and the number of Cloud Phone instances attached to each IP address. Click the number to view the instance list.
View bandwidth plan traffic statistics
Log on to the Cloud Phone console.
In the navigation pane on the left, choose .
On the Bandwidth Plans page, find the bandwidth plan that you want to view and click its ID.
On the details page of the bandwidth plan, click View Monitoring Statistics to the right of Inbound/Outbound Bandwidth.
In the pane that appears, you can view the monitoring graph. At the top of the pane, you can select a time range for the statistics, such as Last 1 Hour or Last 2 Days, and a traffic unit, such as bps or Kbps.