This topic describes how to enable Ranger access control for Hive and provides detailed examples of Ranger Hive permission configurations.
Prerequisites
A DataLake cluster has been created and the Ranger service has been selected. For more information about how to create a cluster, see Create a cluster.
Usage notes
After you enable Ranger access control for Hive, the HiveServer2 service loads the Ranger Hive plugin. Permission verification is triggered only when you submit SQL jobs through HiveServer2. Accessing Hive using other methods does not trigger permission verification.
Access methods that support permission verification
Accessing HiveServer2 using the Beeline client.
Connecting to HiveServer2 using a JDBC URL.
Access methods that do not support permission verification
Connecting directly to Metastore using the Hive client.
Connecting directly to Metastore using the Hive-Client API.
Configuration method
Go to the Cluster Service page.
In the top navigation bar, select a region and a resource group as required.
On the EMR on ECS page, in the Actions column for the target cluster, click Service.
Enable Hive in Ranger.
On the Services page, in the Ranger-plugin service area, click Status.
In the Service Overview area, turn on the enableHive switch.
In the dialog box that appears, click OK.
Restart HiveServer.
On the Service page, select
 > Hive.
In the Components area, find HiveServer, and in the Actions column, click Restart.
In the dialog box, enter an Execution Reason and click OK.
In the Confirm dialog box, click OK.
Permission configuration
Overview
You can configure Ranger permissions on the Ranger UI page. For more information about how to access the Ranger UI page, see Ranger overview.
To configure Ranger Hive permissions, click emr-hive under HADOOP SQL, as shown in the following figure.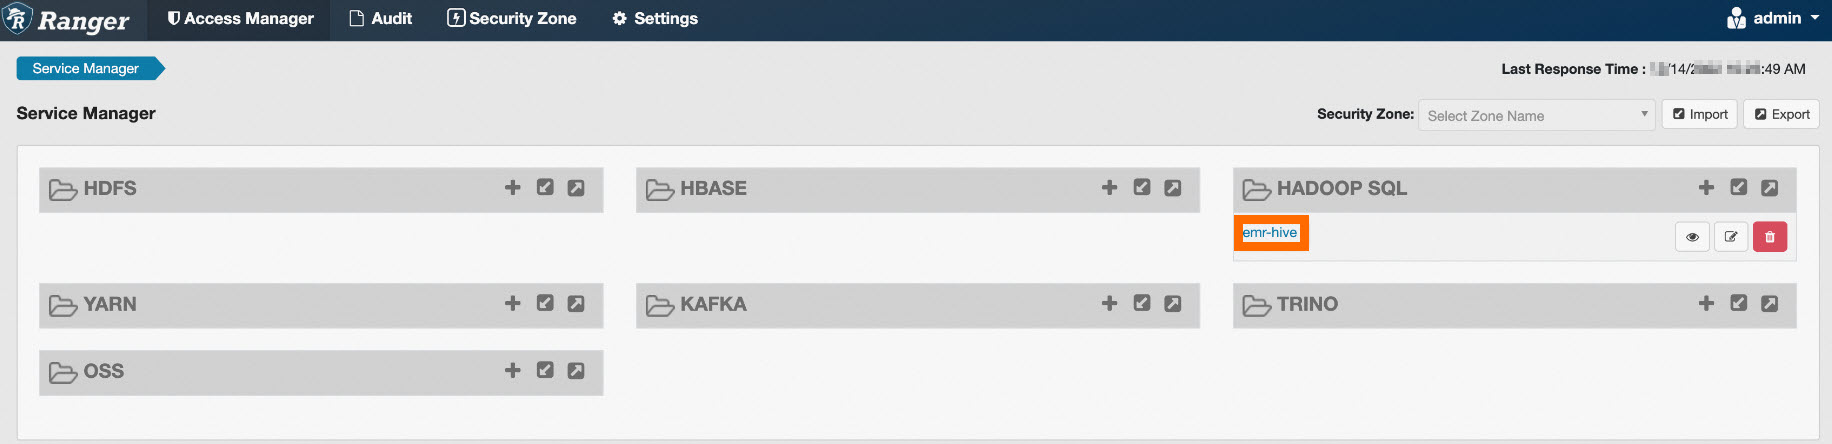
On the emr-hive page, you can view a list of all configured access policies. Ranger includes some default policies. For example, a default policy grants the hive user, who starts the HiveServer service, access permissions to all resources such as databases, tables, columns, user-defined functions (UDFs), and URLs. Another default policy grants all users the Create permission on databases and the Create permission within the default database.
Add an access policy
Click Add New Policy in the upper-right corner to create an access policy. You must specify a unique name for the policy in the Policy Name field. A basic permission configuration requires three elements: Resource, User, and Permission. Resource defines the resources managed by the policy, such as databases, tables, columns, and URLs. User specifies the user to whom the policy applies. Permission defines the type of access that the policy grants.
Policy Resource
In Ranger Hive, policy resources such as database, table, column, url, and udf are used for permission configuration. By default, the policy displays database, table, and column. You can click a resource name to switch to a different resource.
When you configure an access policy, enter the name of the resource. For example, set database to testdb, table to test, column to id, and url to oss://test-bucket/test/tmp. You can also enter an asterisk (*) to specify all resources of a specific type, as shown in the following figure.

Policy User
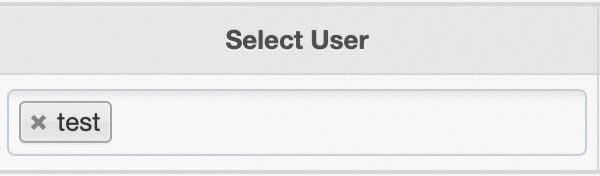
An access policy defines permissions for a user. From the Select User list, select the user to configure their permissions, as shown in the following figure.
Policy Permission
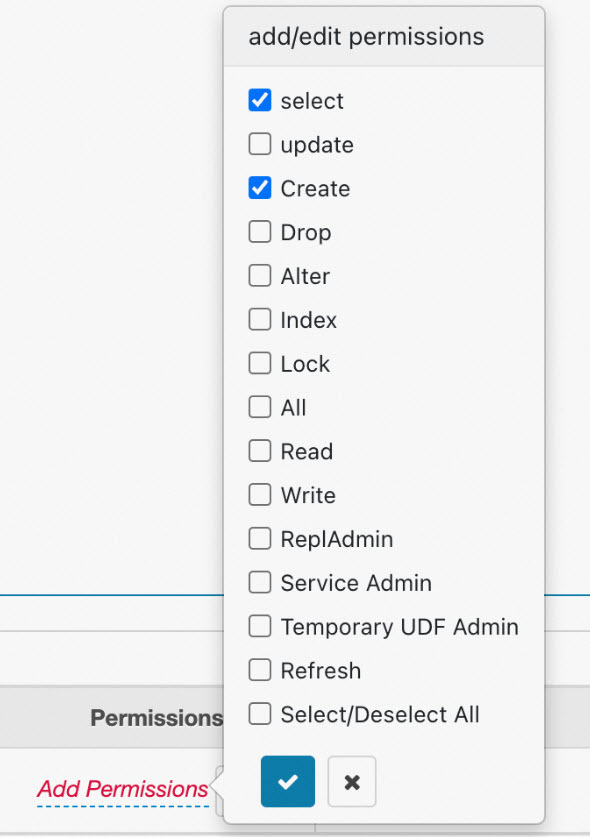
Click Add Permissions. In the add/edit permissions section that opens, select the required permission, as shown in the following figure.
Example 1: Column permission configuration
A common use case for Ranger access control is to grant the Select permission on a table to a specific user. This ensures that the user can run select columns from table operations. The following figure shows an example of the permission configuration.
This policy grants the test user the select permission on the id column of the test table in the testdb database. The user can then run select id from testdb.test. To allow a user to select all columns from the testdb.test table, set column to *.
Example 2: Table permission configuration
In Ranger Hive, you can configure table creation permissions at the table level. For example, if you configure the Create permission with database=testdb, table=test, and column=*, the user can create only the test table. If you want to allow a user to create any table within a database, you need to configure the Create permission with database=testdb, table=*, and column=*. This configuration is shown in the following image.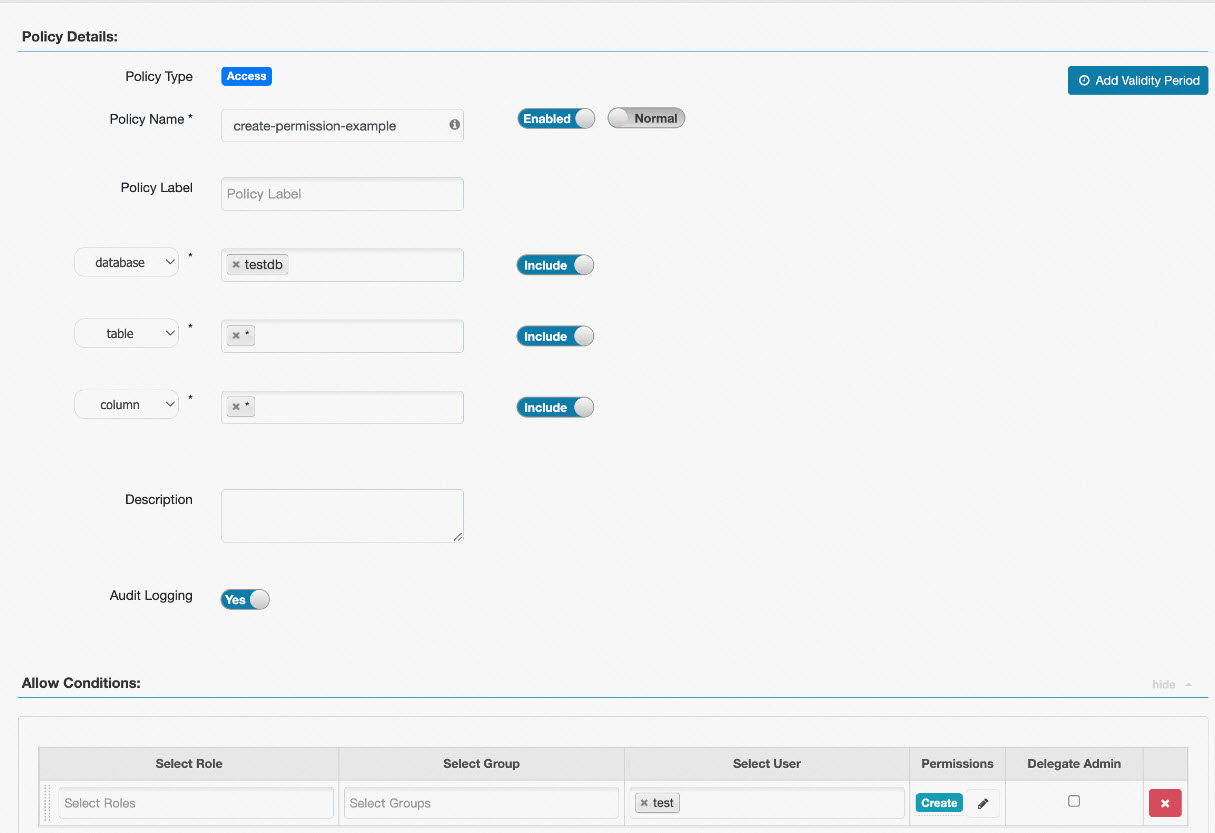
Example 3: URL permission configuration
If the Hive SQL statement that you execute contains location information and the scheme of the location is oss, the system checks whether you have the read and write permissions on the location. For example, when you execute the create external table test(id int, name string) location 'oss://test-bucket/test' statement, the system checks whether you have the read permission on oss://test-bucket/test.
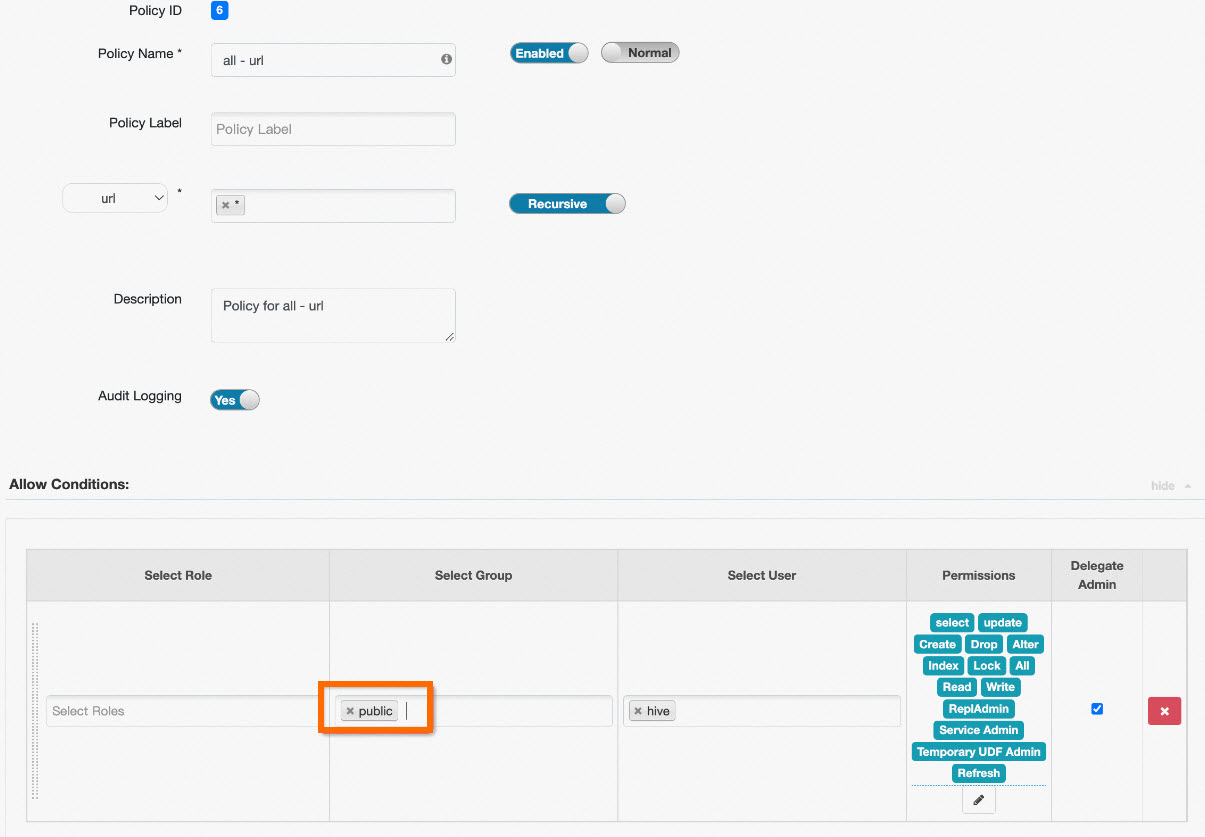
In this case, you must configure an access policy for the URL. For information about how to switch the resource to URL, see the Add an access policy section. The following figure shows an example of the configuration.
If you do not need to control URL permissions, you can also modify the all - url policy under Policy Name. In the Select Group field, add public. This grants all users read and write permissions to all URLs. The following figure shows the steps.
In Ranger, public is a special group that includes all users. If you set Select Group to public in a policy, the policy applies to all users.