This topic describes how to run Weather Research and Forecasting Model (WRF) in an Elastic High Performance Computing (E-HPC) cluster for meteorological simulation.
Background information
WRF is a next-generation mesoscale numerical weather prediction system that is designed for both atmospheric research and operational forecasting applications. WRF can produce simulations based on actual atmospheric conditions or idealized conditions. WRF uses a software architecture that allows parallel computation and provides system extensibility. The model can be used in a wide range of meteorological applications. For more information, visit the WRF official website.
Preparations
Create an E-HPC cluster. For more information, see Create a cluster by using the wizard.
Configure the parameters of the E-HPC cluster. The following table describes the parameters.
Parameter
Description
Hardware settings
Deploy a standard cluster that consists of two management nodes, one compute node, and one logon node. All nodes are ecs.c7.large Elastic Compute Service (ECS) instances. Each instance has 2 vCPUs, 4 GiB of memory, and one 2.7 GHz 3rd-generation Intel Xeon Scalable (Ice Lake) processor.
Software settings
Deploy a CentOS 7.6 public image and the Slurm scheduler. Turn on VNC.
Create a cluster user. For more information, see Manage users.
In this example, the username wrftest and the permission group sudo are used.
Install WRF and MPICH in the cluster. For more information, see Install and uninstall software.
Install the following software:
WRF-MPICH V3.8.1
MPICH V3.2
Install NCL in the cluster.
NCL is used to process and visualize meteorological data. For information about how to install NCL, see Installing NCL.
NoteBy default, CentOS images are installed with an earlier version of Python. Before you install NCL, you must upgrade Python. For information about how to download Python, see Download Python.
Step 1: Run geogrid.exe
The geogrid.exe program defines the simulation domain and horizontally interpolates static geographical data to the domain.
Log on to the cluster.
Log on to the cluster as a sudo user. For more information, see Log on to a cluster.
Check whether the required software of WRF is installed in the cluster.
export MODULEPATH=/opt/ehpcmodulefiles/
module avail
The following code shows an example of the returned output:
----------------------------------------------------------------------------------------------------------- /opt/ehpcmodulefiles/ ------------------------------------------------------------------------------------------------------------
mpich/3.2       vnc             wrf-mpich/3.8.1
Load the WRF software environment.
module load wrf-mpich/3.8.1 mpich/3.2
echo $WPSHOME $WRFHOME
Copy the installed WRF Preprocessing System (WPS) and WRF software to the working directory.
NoteReplace
$WPSCOPYHOMEand$WRFCOPYHOMEin the command with the actual working directory. In this topic,/home/wrftestis used as an example. The WPS and WRFV3 directories are generated in the working directory.cp -r $WPSHOME $WPSCOPYHOME cp -r $WRFHOME $WRFCOPYHOMEGo to the WPS directory, and download and decompress the geographical data file.
NoteIn this example, the geog_complete.tar.gz file is used. You can download a different geographical data file based on your business requirements. For more information, visit the WRF official website.
cd /home/wrftest/WPS
wget https://www2.mmm.ucar.edu/wrf/src/wps_files/geog_complete.tar.gz
tar -zxvf geog_complete.tar.gz
Link the GEOGRID.TBL file.
The GEOGRID.TBL file determines which fields are interpolated by &geogrid.
ln -s geogrid/GEOGRID.TBL GEOGRID.TBLEdit the namelist.wps file.
The namelist.wps file is a shared file of WPS. This file is used to configure the parameters of main programs, including geogrid.exe, ungrib.exe, and metgrid.exe. Each main program has an exclusive namelist record named &geogrid, &ungrib, and &metgrid. The three programs have a group record named &share. The following example shows the recommended values for the required parameters. For the parameters that are not described in the following example, use the default values. For information about the parameters and parameter descriptions of the namelist.wps file, visit the WRF official website.
NoteIn this example, the namelist.wps file is in the
/home/wrftest/WPS directory.Use
!to indicate comments in the namelist.wps file.
! The request parameters of &share.
&share
! wrf_core: specify the WRF dynamical core. Valid values: ARW and NMM. Default value: ARW.
wrf_core = 'ARW',
! start_date: specify the start time of the simulation.
start_date = '2005-08-28_00:00:00',
! end_date: specify the end time of the simulation.
end_date = '2005-08-29_00:00:00',
interval_seconds = 21600,
! max_dom: specify the total number of model domains, including nests. In this example, this parameter is set to 1.
max_dom = 1,
! # io_form_geogrid: specify the format of geogrid output files.
io_form_geogrid = 2,
/

! The request parameters of &geogrid.
! # Specify information such as the parent domain, parent-to-nest domain, grid size ratio, and map projection.
&geogrid
parent_id = 1,
parent_grid_ratio = 1,
i_parent_start = 1,
j_parent_start = 1,

! Specify the numbers of grid points in the west-east and south-north directions. For this example, set the values to 98 and 70.
e_we = 98,
e_sn = 70,
geog_data_res = 'default',

! Specify the grid lengths in the west-east and south-north directions. Unit: meters. For this example, set the values to 30000 and 30000.
dx = 30000,
dy = 30000,

! Specify the projection mode. For more information, visit the WRF official website.
map_proj = 'mercator'

! Specify the latitude and longitude of a known location in the domain.
ref_lat = 25.00,
ref_lon = -89.00,

! Specify the parameters of the map projection. The values vary based on the projection.
truelat1 = 0.0,
truelat2 = 0.0,
stand_lon = -89.0,
! geog_data_path = 'Path of static geographical data'
geog_data_path = '/home/wrftest/WPS/geog'
/

! The request parameters of &ungrib.
&ungrib
! out_format: specify the format of the intermediate files that are generated by ungrib.exe and you want metgrid.exe to read. Valid values: WPS, SI, and MM5. Default value: WPS.
out_format = 'WPS',
! prefix: specify the prefix of the intermediate files. The prefix can include a path.
prefix = 'FILE'
/

! The request parameters of &metgrid.
&metgrid
! fg_name: specify the name of the files generated by ungrib.exe.
fg_name = 'FILE',
! io_form_metgrid: specify the format of the metgrid.exe output file.
! Valid values: 1, 2, and 3. 1 indicates a binary file with an extension of .int. 2 indicates a NetCDF file with an extension of .nc. 3 indicates a GRIB1 file with an extension of .gr1.
! Default value: 2.
io_form_metgrid = 2
/
Interpolate static geographical data to the model domain.
./geogrid.exeAfter you run geogrid.exe, the geo_em.d0N.nc file is generated in the
/home/wrftest/WPSdirectory. The following code shows an example of the returned output: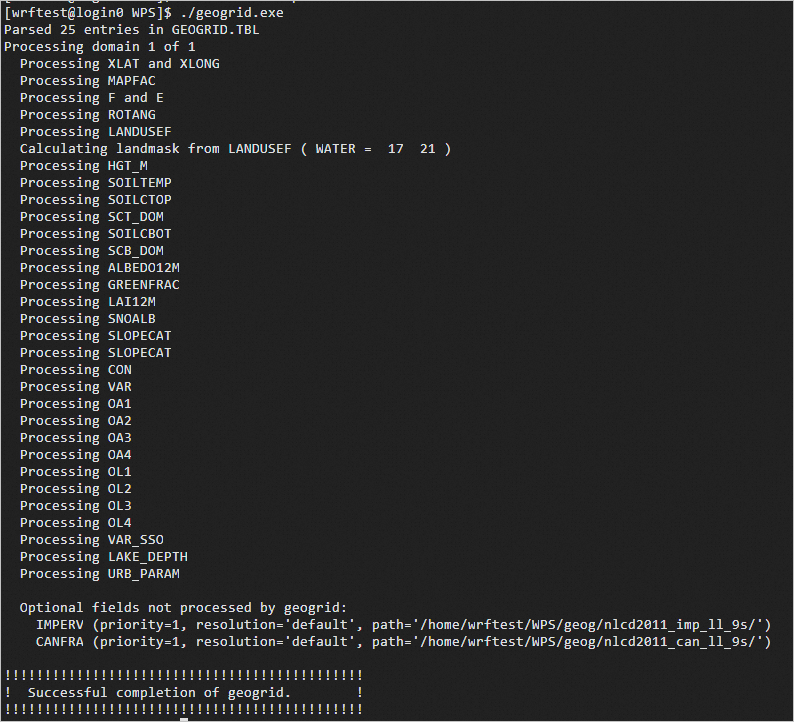
Step 2: Run ungrib.exe
The ungrib.exe program extracts meteorological fields from GRIB files.
Download and decompress the meteorological data file of Hurricane Katrina.
NoteIn this example, the Katrina.tar.gz file is used. To download Katrina.tar.gz, click Katrina.tar.gz. You can download a different geographical data file based on your business requirements. For more information, visit the WRF official website.
cd /home/wrftest/WPS
wget http://www2.mmm.ucar.edu/wrf/TUTORIAL_DATA/Katrina.tar.gz
tar -zxvf Katrina.tar.gz
Execute the following link_grib.csh script to link the meteorological data:
./link_grib.csh /home/wrftest/WPS/Katrina/avn*Link the Vtable of the data file.
In this example, Vtable.GFS is used. You can select a different Vtable based on your business requirements:
ln -sf ungrib/Variable_Tables/Vtable.GFS VtableExtract the required meteorological fields.
./ungrib.exeAfter you run ungrib.exe, the FILE:YYYY-MM-DD_hh* file is generated in the
/home/wrftes/WPSdirectory. The following code shows an example of the returned output: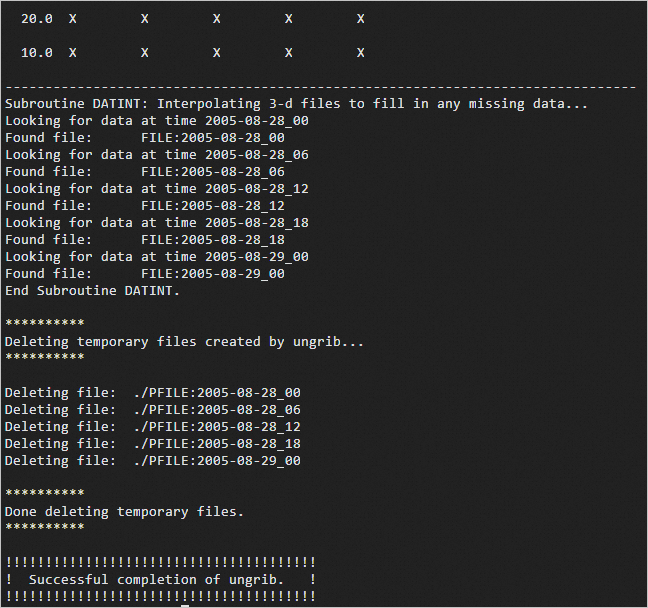
Step 3: Run metgrid.exe
The metgrid.exe program horizontally interpolates meteorological fields to the model domain that is determined by geogrid.exe.
Link the GEOGRID.TBL file.
The GEOGRID.TBL file defines how metgrid.exe horizontally interpolates meteorological fields to the model domain.
cd /home/wrftest/WPS
ln -s metgrid/METGRID.TBL.ARW METGRID.TBL
Horizontally interpolate meteorological fields to the model domain that is determined by geogrid.exe.
./metgrid.exeAfter you run metgrid.exe, the met_em.d0N.yyyy-mm-dd_hh:mm:ss.nc file is generated in the
/home/wrftes/WPSdirectory. The following code shows an example of the returned output: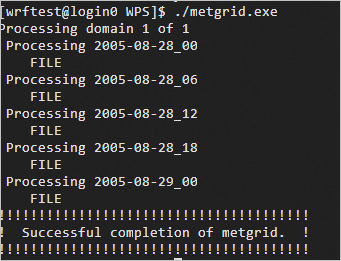
Step 5: Run wrf.exe
The wrf.exe program stores the forecast data.
Import the processing result of WPS.
cd /home/wrftest/WRFV3
ln -s /home/wrftest/WPS/met_em.d01.2005-08-2*.
Edit the namelist.input file.
cd /home/wrftest/WRFV3/run
vim namelist.input
The parameters that are related to &time_control and &domains in the namelist.input file must be the same as the parameters in the namelist.wps file. The following sample configurations are used in this topic. For information about the parameters in the namelist.input file, see namelist.input.
&time_control
run_days                            = 0,
run_hours                           = 12,
run_minutes                         = 0,
run_seconds                         = 0,
start_year                          = 2005, 2005, 2005,
start_month                         = 08,   08,   08,
start_day                           = 28,   28,   28,
start_hour                          = 00,   00,   00,
start_minute                        = 00,   00,   00,
start_second                        = 00,   00,   00,
end_year                            = 2005, 2005, 2005,
end_month                           = 08,   08,   08,
end_day                             = 29,   29,   29,
end_hour                            = 00,   00,   00,
end_minute                          = 00,   00,   00,
end_second                          = 00,   00,   00,
interval_seconds                    = 21600
input_from_file                     = .true.,.true.,.true.,
history_interval                    = 180,  60,   60,
frames_per_outfile                  = 1000, 1000, 1000,
restart                             = .false.,
restart_interval                    = 5000,
io_form_history                     = 2
io_form_restart                     = 2
io_form_input                       = 2
io_form_boundary                    = 2
debug_level                         = 0
iofields_filename                   = "extraoutput_d01.txt"
/

&domains
time_step                           = 180,
time_step_fract_num                 = 0,
time_step_fract_den                 = 1,
max_dom                             = 1,
e_we                                = 98,    112,   94,
e_sn                                = 70,    97,    91,
e_vert                              = 30,    30,    30,
p_top_requested                     = 5000,
num_metgrid_levels                  = 27,
num_metgrid_soil_levels             = 4,
dx                                  = 30000, 10000,  3333.33,
dy                                  = 30000, 10000,  3333.33,
grid_id                             = 1,     2,     3,
parent_id                           = 0,     1,     2,
i_parent_start                      = 1,     31,    30,
j_parent_start                      = 1,     17,    30,
parent_grid_ratio                   = 1,     3,     3,
parent_time_step_ratio              = 1,     3,     3,
feedback                            = 1,
smooth_option                       = 0,
/

&physics
mp_physics                          = 6,     6,     6,
ra_lw_physics                       = 4,     4,     4,
ra_sw_physics                       = 4,     4,     4,
radt                                = 10,    10,    10,
sf_sfclay_physics                   = 1,     1,     1,
sf_surface_physics                  = 2,     2,     2,
bl_pbl_physics                      = 1,     1,     1,
bldt                                = 0,     0,     0,
cu_physics                          = 0,     0,     0,
cudt                                = 0,     0,     0,
isfflx                              = 1,
ifsnow                              = 0,
icloud                              = 1,
surface_input_source                = 1,
num_soil_layers                     = 4,
sf_urban_physics                    = 0,     0,     0,
/


&fdda
/

&dynamics
w_damping                           = 0,
diff_opt                            = 1,      1,      1,
km_opt                              = 4,      4,      4,
diff_6th_opt                        = 0,      0,      0,
diff_6th_factor                     = 0.12,   0.12,   0.12,
base_temp                           = 290.
damp_opt                            = 0,
zdamp                               = 5000.,  5000.,  5000.,
dampcoef                            = 0.2,    0.2,    0.2
khdif                               = 0,      0,      0,
kvdif                               = 0,      0,      0,
non_hydrostatic                     = .true., .true., .true.,
moist_adv_opt                       = 1,      1,      1,
scalar_adv_opt                      = 1,      1,      1,
/

&bdy_control
spec_bdy_width                      = 5,
spec_zone                           = 1,
relax_zone                          = 4,
specified                           = .true., .false.,.false.,
nested                              = .false., .true., .true.,
/

&grib2
/

&namelist_quilt
nio_tasks_per_group = 0,
nio_groups = 1,
/
Initialize simulation data.
./real.exeAfter you run real.exe, the wrfinput_d01 and wrfbdy_d01 files are generated in the
/home/wrftest/WRFV3/rundirectory.Export the forecast data.
Write a job script.
vim wrf.slurmThe following example shows the content of wrf.slurm:
#!/bin/bash
#SBATCH -N 1
#SBATCH -n 2
#SBATCH --cpus-per-task=1
#SBATCH -J wrf-test
#SBATCH -o wrf_test.log

module load wrf-mpich/3.8.1 mpich/3.2
mpirun -np 2 -ppn 1  -bind-to core:1 /home/wrftest/WRFV3/run/wrf.exe
Submit the job.
sbatch wrf.slurmAfter you run the job, a file whose name is in the wrfout_d01_[date] format is generated in the
/home/wrftest/WRFV3/rundirectory. Example: wrfout_d01_2005-08-28_00:00:00.
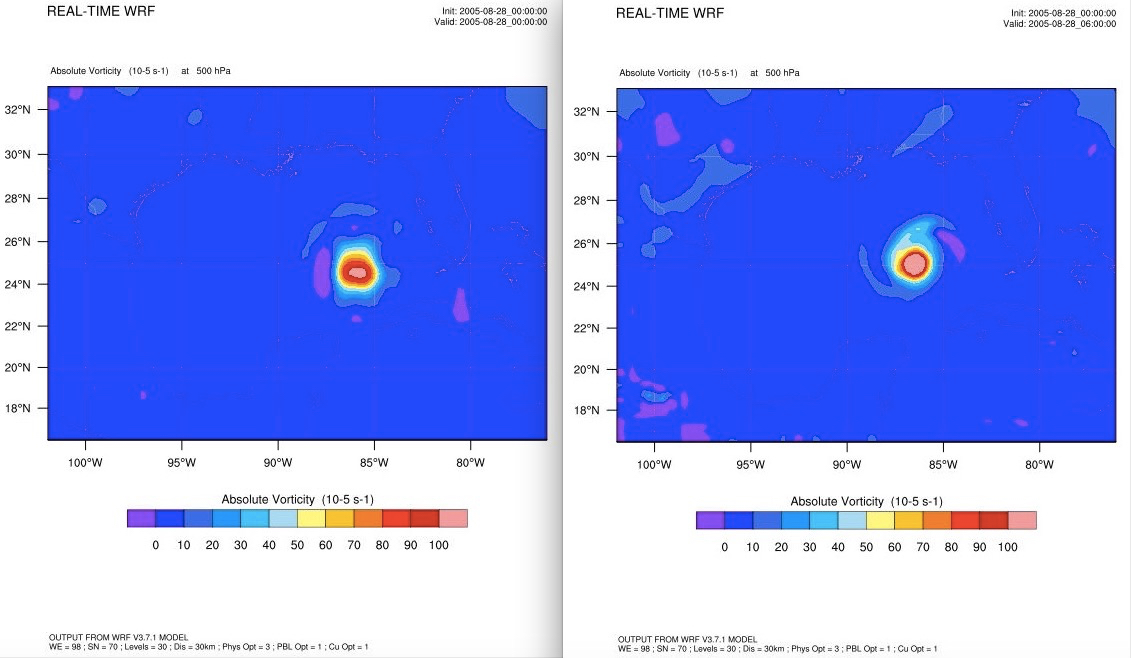
Create NCAR Graphics images for the WRF result.
Sample code: