Anti-DDoS Proxy allows you to create custom mitigation policies. A custom mitigation policy allows you to apply a scenario-specific template for high-traffic scenarios, such as new service launches, shopping spree, or stress testing. You can create custom mitigation policies based on your business needs.
Background information
Scenario-specific templates are provided for you to create custom mitigation policies. When you create a custom mitigation policy, you must select a template and specify one or more assets for the policy. The assets include domain names and IP addresses that are added to Anti-DDoS Pro and Anti-DDoS Premium. A custom mitigation policy is valid only during a specified period of time. During the specified period, the custom mitigation policy takes effect instead of the standard mitigation policy.
If no traffic surges happen, we recommend that you use standard mitigation policies instead of custom mitigation policies.
Supported templates
Only the Important Activity template is available. More templates will be provided in the future.
Example
If a large-scale event is held on a website, a large number of requests are sent to the website. As a result, the throughput of the website is much higher than usual. In this case, standard mitigation policies may report false positives. We recommend that you select the Important Activity template on the Custom Policies page. The Important Activity template automatically adjusts the standard mitigation policies during the specified period. Standard mitigation policies are adjusted based on the following rules:
At the beginning of an activity, the Important Activity template saves the original configurations of the Intelligent Protection and Frequency Control features, and then automatically disables them to avoid false positives.
At the end of the activity, the Important Activity template restores the configurations of these features.
If you enable these features during the activity, the manual configuration takes effect.
Procedure
Log on to the Anti-DDoS Proxy console.
In the top navigation bar, select the region of your instance.
Anti-DDoS Proxy (Chinese Mainland): Choose the Chinese Mainland region.
Anti-DDoS Proxy (Outside Chinese Mainland): Choose the Outside Chinese Mainland region.
In the left-side navigation pane, choose .
Click Create Scenario-specific Policy.
In the Create Scenario-specific Policy dialog box, specify the parameters and then click OK.
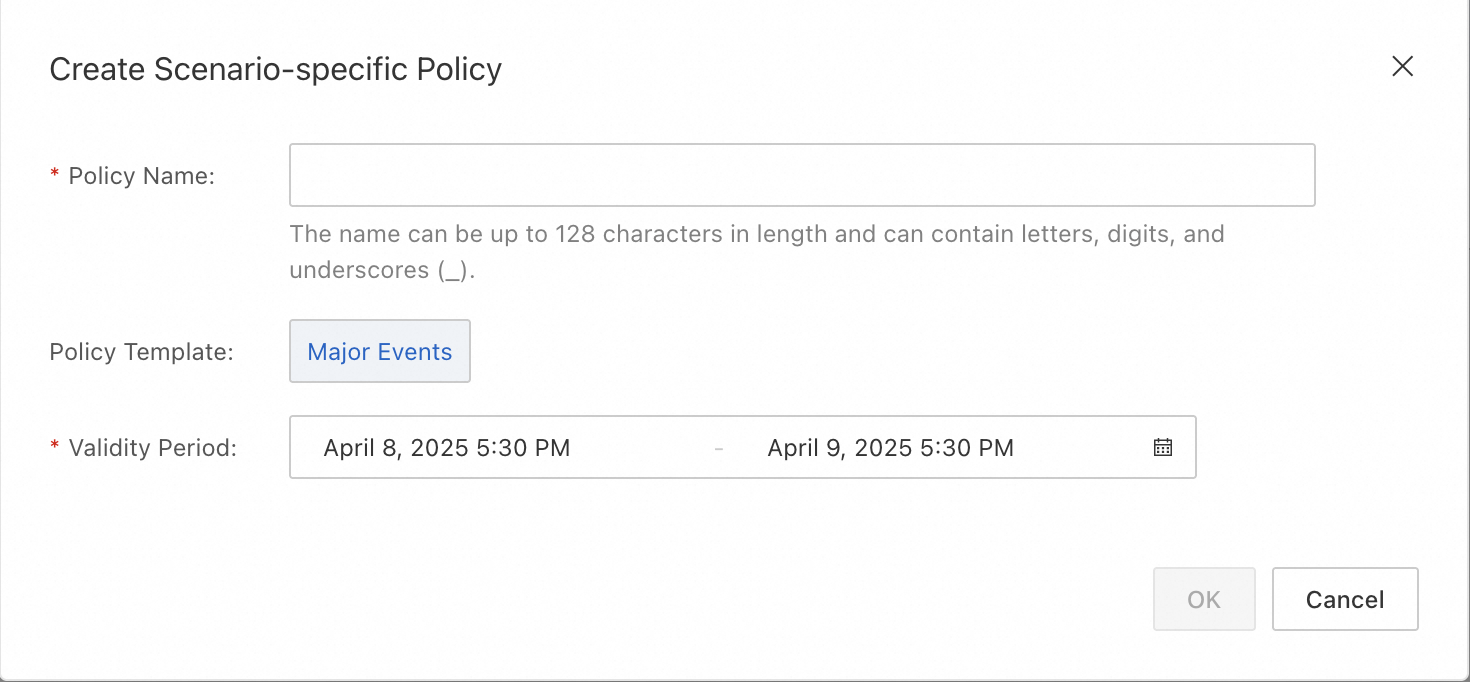
Parameter
Description
Policy Name
The name of the policy.
Policy Template
The template that you want to apply to the policy. Set the value to Important Activity.
Validity Period
The validity period of the policy. The policy takes effect during this period.
NoteIf a template is applied to more than one policy, make sure that the values of Validity Period for these policies do not overlap with each other.
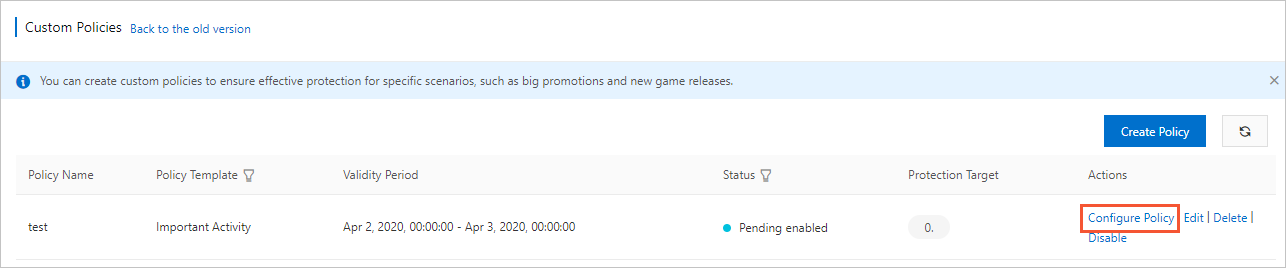
After a policy is created, the policy is automatically enabled. You can view the policy on the Custom Policies page and check Status of the policy to determine whether the policy is in effect. A policy may have the following states:
Pending Enabled: indicates that the policy is still not in effect. The current time is earlier than the start time of the specified validity period.
Updating: indicates that the policy is being issued. The process requires one or two minutes to complete.
Running: indicates that the policy is in effect. The current time is within the specified validity period.
Expired: indicates that the policy has expired. The current time is later than the specified validity period.
Disabled: indicates that the policy is disabled. The policy does not take effect even if the current time is within the specified validity period.
In the list of custom mitigation policies, find the policy that you want to configure and click Configure Policy in the Actions column.
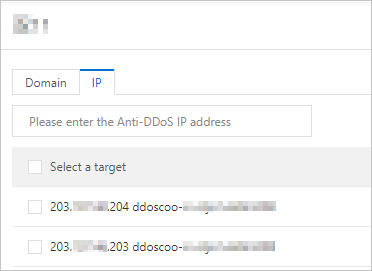
Select one or more domain names or IP addresses that are added to Anti-DDoS Pro or Anti-DDoS Premium for policy. Then, click OK.
NoteIf a website is added to Anti-DDoS Pro or Anti-DDoS Premium by using a domain name, we recommend that you enable the policy for the domain name. If a Layer 4 service is added to Anti-DDoS Pro or Anti-DDoS Premium by using an IP address, we recommend that you enable the policy for the IP address.
After the policy takes effect, information in the Protection Target column is automatically updated. You can move the pointer over the number in the Protection Target column to view the information.
