DataWorks integrates with Git to offer a new data development workflow. Its synchronization and merge features seamlessly connect the DataWorks platform with your Git repository.
This feature is available only in DataWorks Enterprise Edition and is in invitational preview. To enable it, submit a ticket.
Overview
The integration between DataWorks and Git includes two workflows that enable code management within a workspace and merging code across workspaces:
Sync from DataWorks to Git: When you save or publish code in DataWorks, a dedicated Git account and a Serverless resource group automatically commit the changes to a protected branch in the Git repository.
Merge from Git to DataWorks: Merge code changes from the main branch or a feature branch of the Git repository back into DataWorks.
DataWorks automatically creates and manages the following three branches in your Git repository and uses protected branch rules to prevent manual changes:
dataworks_${region}_${projectId}_save: Corresponds to the code after a save operation in DataWorks.dataworks_${region}_${projectId}_release_dev: Corresponds to the code that is successfully published to the development environment.dataworks_${region}_${projectId}_release_prod: Corresponds to the code that is successfully published to the production environment.
Configuration and initialization
Step 1: Prepare resources and network
Code synchronization tasks use a Serverless resource group for execution and require network access to your Git repository and OSS.
Prepare a Serverless resource group and configure the network.
Prepare a DataWorks Serverless resource group and attach it to the target workspace.
Ensure that the resource group can access the SSH port of the Git server. Only port 22 is supported.
Public Git repository (for example, Apsara DevOps CodeUp or GitHub.com): Configure a NAT Gateway and an EIP for the resource group's VPC to enable public network access.
Private Git repository: Ensure that your resource group and Git server can communicate over the private network (VPC). For more information, see VPC peering connection.
Prepare an OSS data source. The code synchronization feature uses OSS for temporary storage.
Create an OSS bucket in the same region as your DataWorks workspace.
On the Data Source Management page of your DataWorks workspace, create an OSS data source for the bucket.
NoteOnly data sources that use an AccessKey are supported. The AccessKey must have the following permissions:
oss:GetObject,oss:ListObjects,oss:PutObject, andoss:DeleteObject.
Step 2: Prepare the Git environment
Create a dedicated account, configure an SSH key, and set branch protection rules in your Git platform.
Create a dedicated Git account and generate an SSH key.
In your Git platform, such as Apsara DevOps CodeUp or GitLab, create a dedicated account for automatic code commits, such as
dataworks_pusher, and configure a valid email address for it.Generate an SSH key pair for this account using the RSA algorithm. Do not set a passphrase when prompted.
Purpose: Generate an SSH public and private key for authentication.
Command:
# Replace "your_user_email@example.com" with the account email from the previous step. ssh-keygen -t rsa -C "your_user_email@example.com" # When prompted for a passphrase, press Enter to skip. # Enter passphrase (empty for no passphrase): [Enter] # Enter same passphrase again: [Enter]Result: When the command completes, it creates the
id_rsa(private key) andid_rsa.pub(public key) files in the~/.ssh/directory. You will use the contents of these files in the following steps.# Copy and save the contents of the public and private keys for the following steps. cat ~/.ssh/id_rsa.pub cat ~/.ssh/id_rsa
Add the public key to your Git platform.
Log in to your Git platform. On the SSH key management page for the
dataworks_pusheraccount, add the content of the public key (id_rsa.pubfile) that you generated in the previous step.Create a repository and configure protected branch rules.
Create a Git repository dedicated to DataWorks code management, for example,
DataWorks_code.In the repository, set up protected branch rules to prevent direct modifications to the branches that DataWorks manages automatically. A repository administrator must perform this operation.
ImportantIf protected branch rules are not configured correctly, the branches automatically managed by DataWorks can be modified unexpectedly, disrupting synchronization.
Branch name pattern:
dataworks_*Allowed to push: Select the option for specific members, and then add the
dataworks_pusheraccount.Allowed to merge: Select No one.
Step 3: Configure and initialize code synchronization
Only tenant administrators and workspace administrators can configure code synchronization for the current workspace. Other roles cannot add or change these settings.
Establish a connection between the DataWorks workspace and the Git repository, and then start the initialization.

Go to the Workspaces page in the DataWorks console. In the top navigation bar, select a desired region. Find the desired workspace and choose in the Actions column.
(Optional) Test connectivity. Before proceeding with the configuration, you can create a temporary Shell node in DataStudio and use the prepared Serverless resource group for debugging. This step verifies network connectivity and SSH private key validity.
Test network connectivity: Run the
telnetcommand. If the log shows "Connected to ...", the network connection is successful and you can stop the task.# Replace your_git_server_domain with your Git server's domain name or IP address, for example, codeup.aliyun.com for Apsara DevOps CodeUp. telnet your_git_server_domain 22Using Apsara DevOps CodeUp as an example, if the following content appears in the log, the network is connected, and you can stop the task. Otherwise, check your network configuration.

Test SSH key validity: Run the following script. If the log shows a success message, such as "Welcome to ...", the private key is configured correctly.
# Verify the SSH private key. The expected output is "Welcome to ...."
# This script writes your private key content to the standard SSH key file (~/.ssh/id_rsa) in a temporary runtime environment.
# It then tests the connection to the Git server to validate the private key.
# Encode the private key content to Base64.
id_rsa_base64=$(cat <<'EOF' | base64 -w 0
# [Paste the full content of your id_rsa private key here]
-----BEGIN OPENSSH PRIVATE KEY-----
...
-----END OPENSSH PRIVATE KEY-----
EOF
)
# Recreate the SSH key file in the runtime environment.
id_rsa=$(base64 -d <<< "$id_rsa_base64")
mkdir ~/.ssh
echo "$id_rsa" > ~/.ssh/id_rsa
chmod 600 ~/.ssh/id_rsa
ssh-keygen -y -f ~/.ssh/id_rsa > ~/.ssh/id_rsa.pub
chmod 644 ~/.ssh/id_rsa.pub

# Test the SSH connection. Replace your_git_server_domain with your Git SSH address, for example, codeup.aliyun.com.
ssh -T git@your_git_server_domain
Click Run. Using Apsara DevOps CodeUp as an example, if the following content appears in the run log, the private key for the account is correct.

In the left-side navigation pane, click
 Code Management to go to the Code Synchronization configuration page. Configure the following parameters:
Note: The Code Management tab is visible only if this feature is enabled for your account.
Parameter
Description
SSH Address
The SSH address of the target Git repository.
Private Key
Paste the full content of the private key (
id_rsafile) that you generated in Step 2.ImportantThe private key must include
-----BEGIN OPENSSH PRIVATE KEY-----and-----END OPENSSH PRIVATE KEY-----.OSS Data Source
Select the prepared OSS data source.
NoteIf the UI displays "The current resource group is not authorized to access the OSS data source, go to authorize," click "go to authorize" to grant the necessary permissions.
OSS Path
Specify an OSS path to store code metadata, for example,
dataworks-workspace-code.Resource Group
Select the Serverless resource group that you prepared earlier.
After completing the configuration, click Start Synchronization. You must then initialize the repository by clicking Initialize. The system automatically creates the required branches in the Git repository and synchronizes the code from the current workspace. This process may take several minutes. During this time, you can click the
 icon in the upper-right corner to view the initialization log.Note
If you disable and then re-enable synchronization, you must initialize it again. Before re-initializing, clear the corresponding files from OSS.
Once configured, DataWorks automatically creates and manages the following three branches in your Git repository. Do not create or modify them manually:
dataworks_${region}_${projectId}_save: Corresponds to the code after a save operation in DataWorks.dataworks_${region}_${projectId}_release_dev: Corresponds to code successfully published to the development environment. If the workspace is in simple mode, this branch is not generated.dataworks_${region}_${projectId}_release_prod: Corresponds to code successfully published to the production environment.
After this, every save and publish operation in DataWorks automatically synchronizes the corresponding code and configuration changes to the respective Git branch.
Click the default
savebranch to view the saved node code, workflows, directories, and other information in the current workspace.
Step 4: Verify code synchronization
Create a Shell node in DataStudio and name it
shell_test.In the code editor, enter the following code and click the Save button in the toolbar.
echo 'Code push test.'Log in to Git, go to the target repository, and select the
savebranch. Find theshell_testfolder. In theshell_testfolder, you will see three files:shell_test.sh (code file),shell_test.spec.json (scheduling configuration file), anddataworks.properties (variable file), confirming that the synchronization was successful. Clickshell_test.shto view theshell_testnode and its code.To verify synchronization for the other two branches, publish the node to the corresponding environments. For more information about the publish operation, see Publish nodes within the same workspace.
Scenarios and features
Reverse merge
DataWorks supports both synchronizing code to Git and a reverse merge capability, allowing you to merge the latest changes from a remote Git branch back into the DataWorks platform.
This capability is compatible with both the main synchronization branch and any feature branch created from it. Developers can follow standard development practices on independent branches for development, testing, and code review, and then safely integrate the mature code back into DataWorks. This process enables professional and efficient team collaboration.
This feature requires synchronization to be enabled and is available for roles with developer permissions or higher.
Initiate a merge
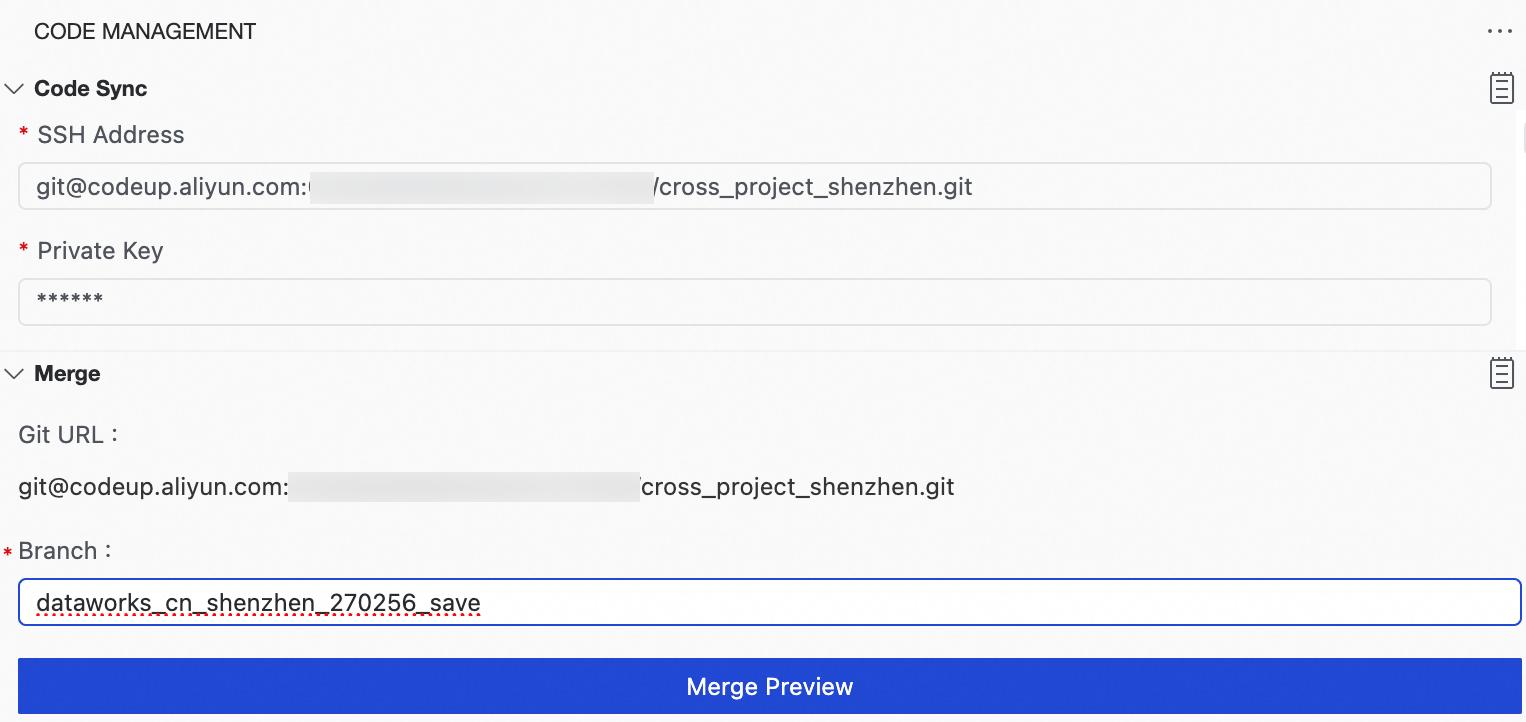
In , expand the Code Merge section.
Preview the merge
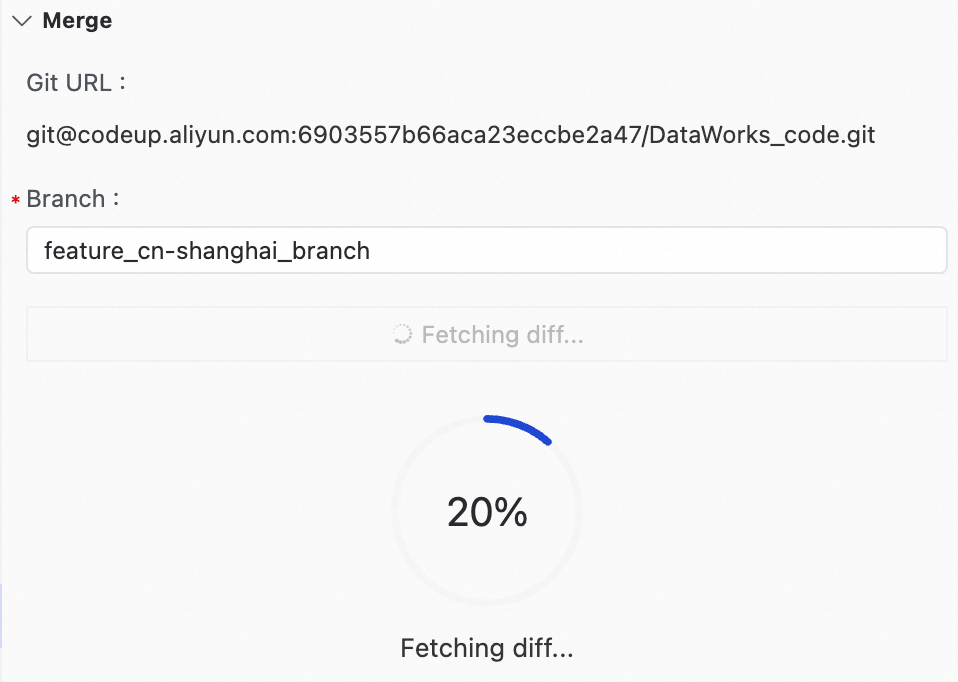
Enter the name of the branch to be merged and click Preview Merge. The system compares the source branch with the default DataWorks
savebranch to identify new, changed, and deleted content.No conflicts: The interface displays a diff of the changes, listing the nodes and code modifications to be added, modified, or deleted.
Conflicts: The interface alerts you to any conflicts and displays the specific details. You must return to your local environment, manually resolve the conflicts in Git, and then initiate the merge again in DataWorks.
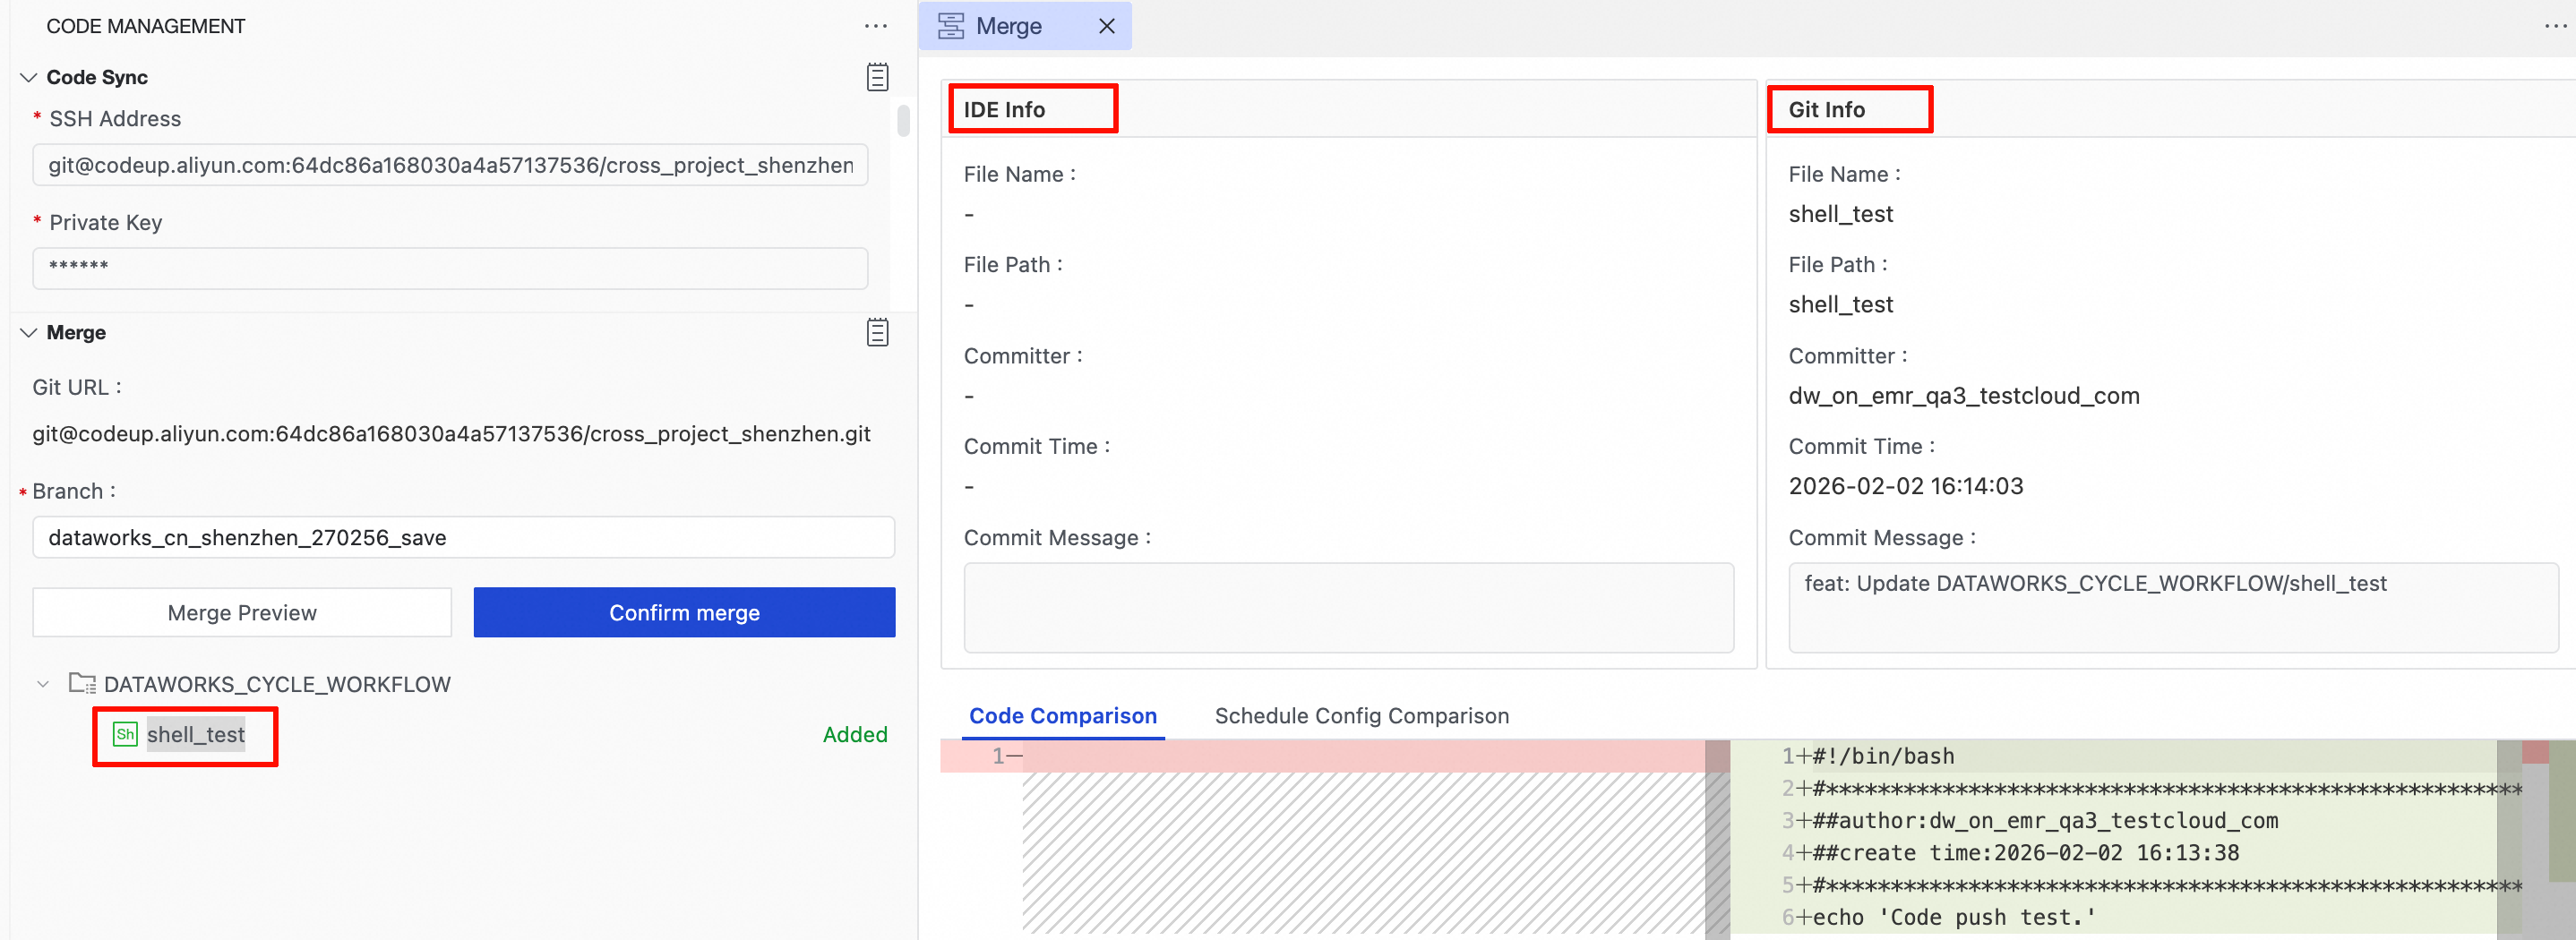
Confirm the merge
After you confirm that the preview is correct, click Confirm Merge.
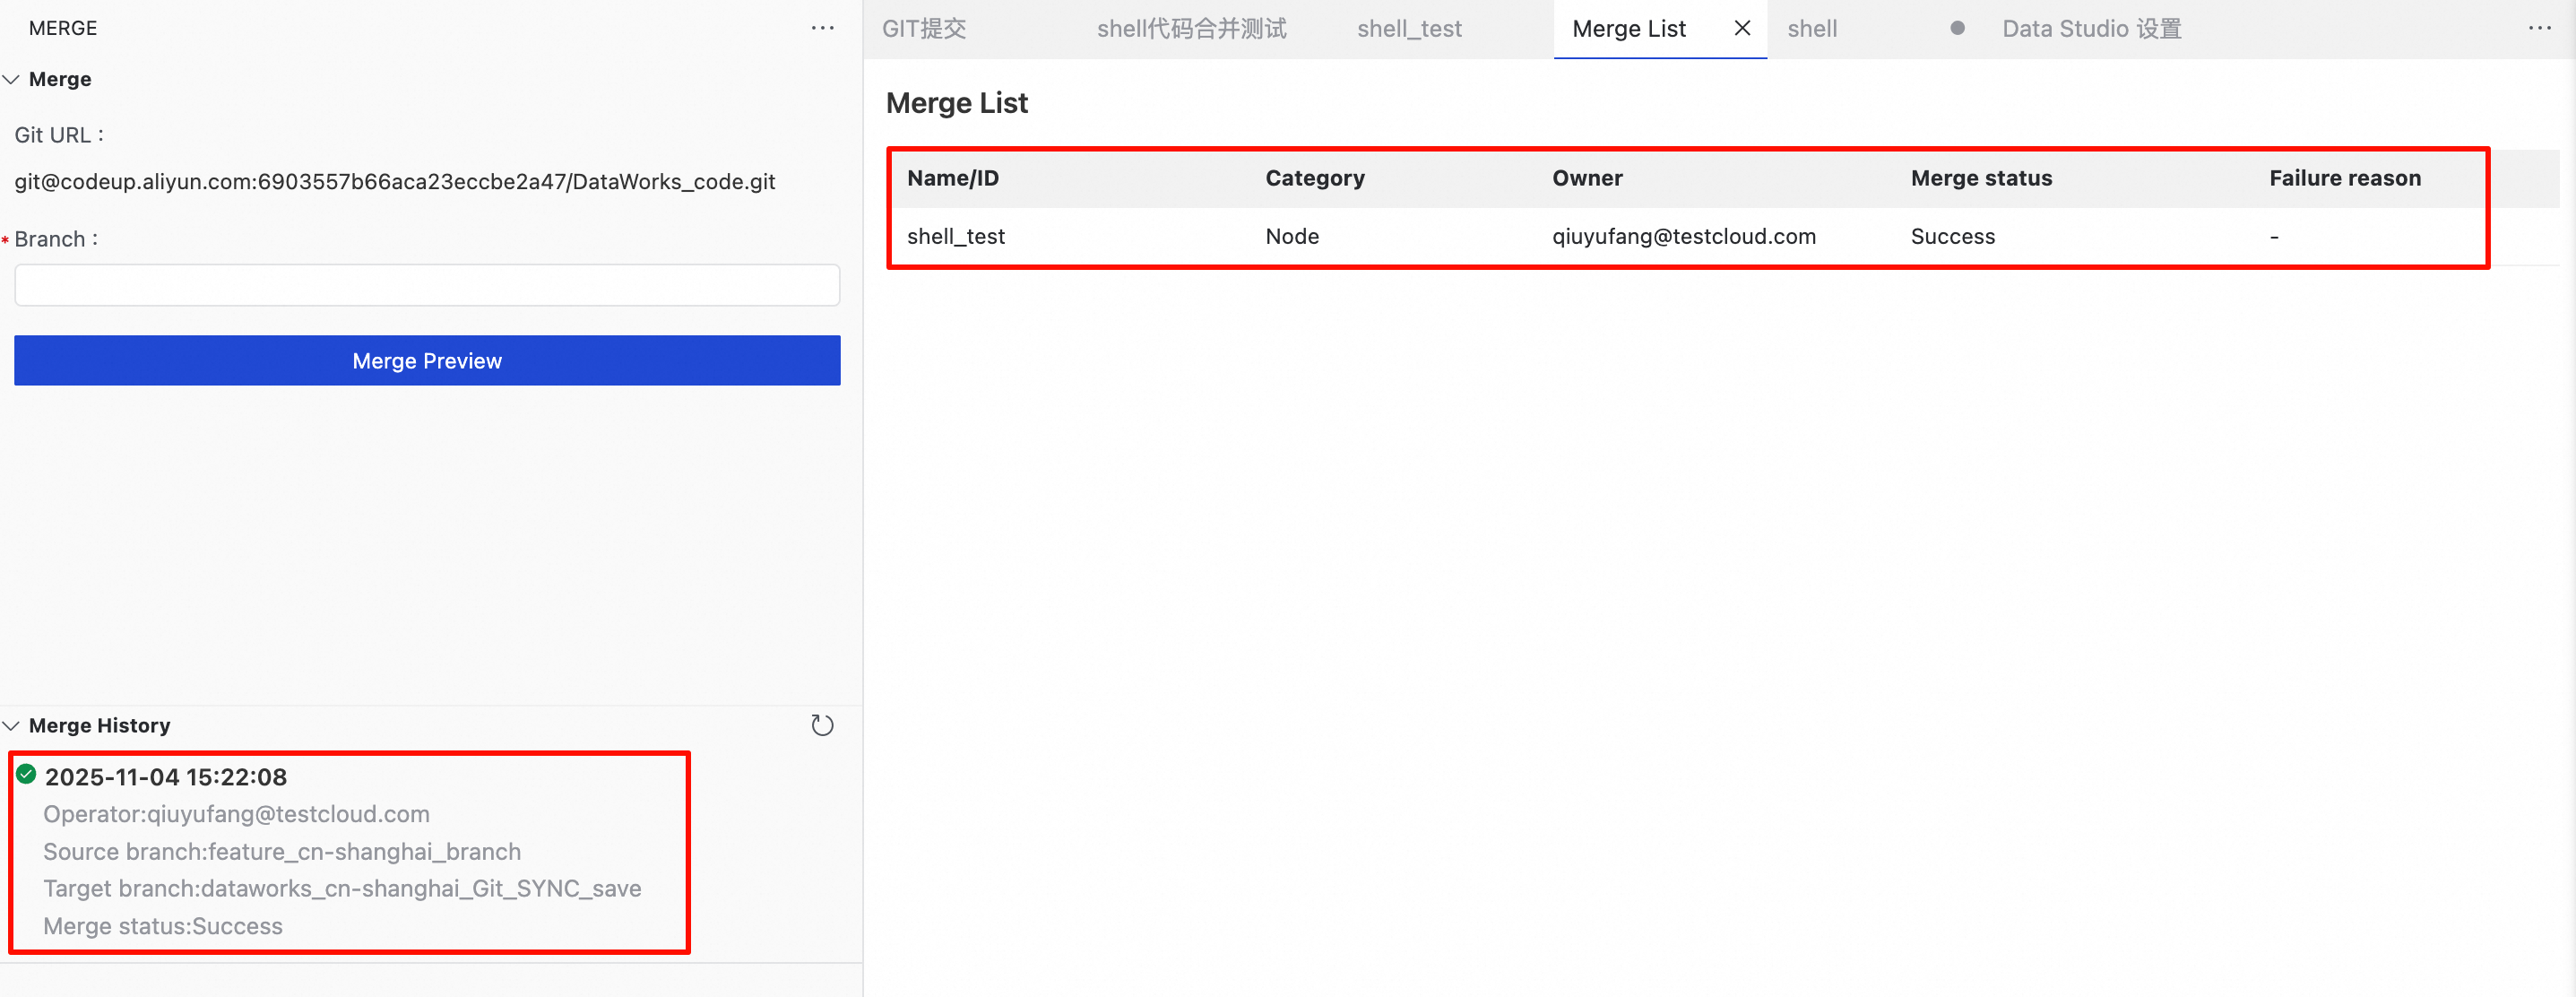
The system starts the merge task. You can view the merge progress in real time.
All historical merge records are displayed in the Code Merge History area. You can view the owner, merge status, and branch details at any time.
Cross-workspace merge
The Git synchronization feature supports cloning DataWorks projects across workspaces and even across regions. This design allows you to reuse a standardized set of code logic as a "template" and quickly distribute it to multiple business scenarios. For example, you can deploy a universal user analysis model to separate workspaces for different business lines and run it on their respective dedicated computing resources and data sources.

Initial setup
Create two projects:
git_cross_project_1andgit_cross_project_2. They can be in different regions.Follow the instructions in Step 1 to configure a resource group, an OSS data source, and network connections for each workspace. You can use the same data source for both.
Follow the instructions in Step 2 to prepare a single Git repository that will serve as the shared repository for both workspaces.
Follow the instructions in Step 3 to configure and initialize Git synchronization for both workspaces, using the same SSH address and private key for both configurations. After initialization, branches for both workspaces (for example,
270256for project1 and270257for project2) appear in the Git repository.
Cross-project merge strategy
When you merge code branches across projects, only the node code, basic attributes, and scheduling configurations are merged. Runtime configurations are not merged into the target workspace.
Because the two workspaces may have different configurations for computing resources, resource groups, and data sources, you must configure the resource mapping
merge_mapping.On your local machine, open a terminal, clone the repository, and check out the source workspace's
savebranch. For example, thesavebranch for project1 might bedataworks_cn_shenzhen_270256_save.# Clone the remote Git repository to your local machine. git clone git@your_git_server_domain:64dc86a16800a4a57137536/cross_project_shenzhen.git # Switch to the save branch of project1. git checkout <your_branch_name>Create the
merge_mappingfile.# cross_project_shenzhen is the repository name. cd cross_project_shenzhen # Create the directory. mkdir -p DATAWORKS_SYSTEM_CONFIG/merge_mapping # Create the mapping file. The file name should be in the format: cn_shenzhen_270256_to_cn_shenzhen_270257.properties vi DATAWORKS_SYSTEM_CONFIG/merge_mapping/<region>_<projectId>_to_<region>_<projectId>.propertiesConfigure the file content according to your environment. Modify the values on both sides of the
=sign. You can specify multiple parameters for each type.# Data source # spec.datasource.name.= spec.datasource.name.mysql_01=mysql_02 # Resource group # spec.runtimeResource.resourceGroup.= spec.runtimeResource.resourceGroup.group_524257424564736=Serverless_res_group_524257424564736_764027070300961 # Node output name prefix # spec.output-prefix.= spec.output-prefix.git_cross_project_1=git_cross_project_2 # Project identifier for tables in MaxCompute SQL # script.project-identifier.= script.project-identifier.git_cross_project_1=git_cross_project_2 # Image # spec.script.runtime.container.imageId.= spec.script.runtime.container.imageId.Default=System_python311_ubuntu2204_20251201 # RAM role # spec.script.runtime.linkedRoleArn.= spec.script.runtime.linkedRoleArn.acs:ram::1107550004253538:role/aliyundataworksaccessingenirole=acs:ram::1107550004253538:role/aliyundataworksaccessingossrolePush the code to the Git repository.
# Stage the changes.
git add .
# Commit the mapping file.
git commit -m "add mapping files"
# Push the branch content to the remote Git repository.
git push
Merge code across projects
Go to DataStudio in the target workspace
git_cross_project_2, click Code Management in the left-side navigation pane, and go to the Code Merge tab.In the branch input field, enter the name of the source workspace's
savebranch, for example,dataworks_cn_shenzhen_270256_save.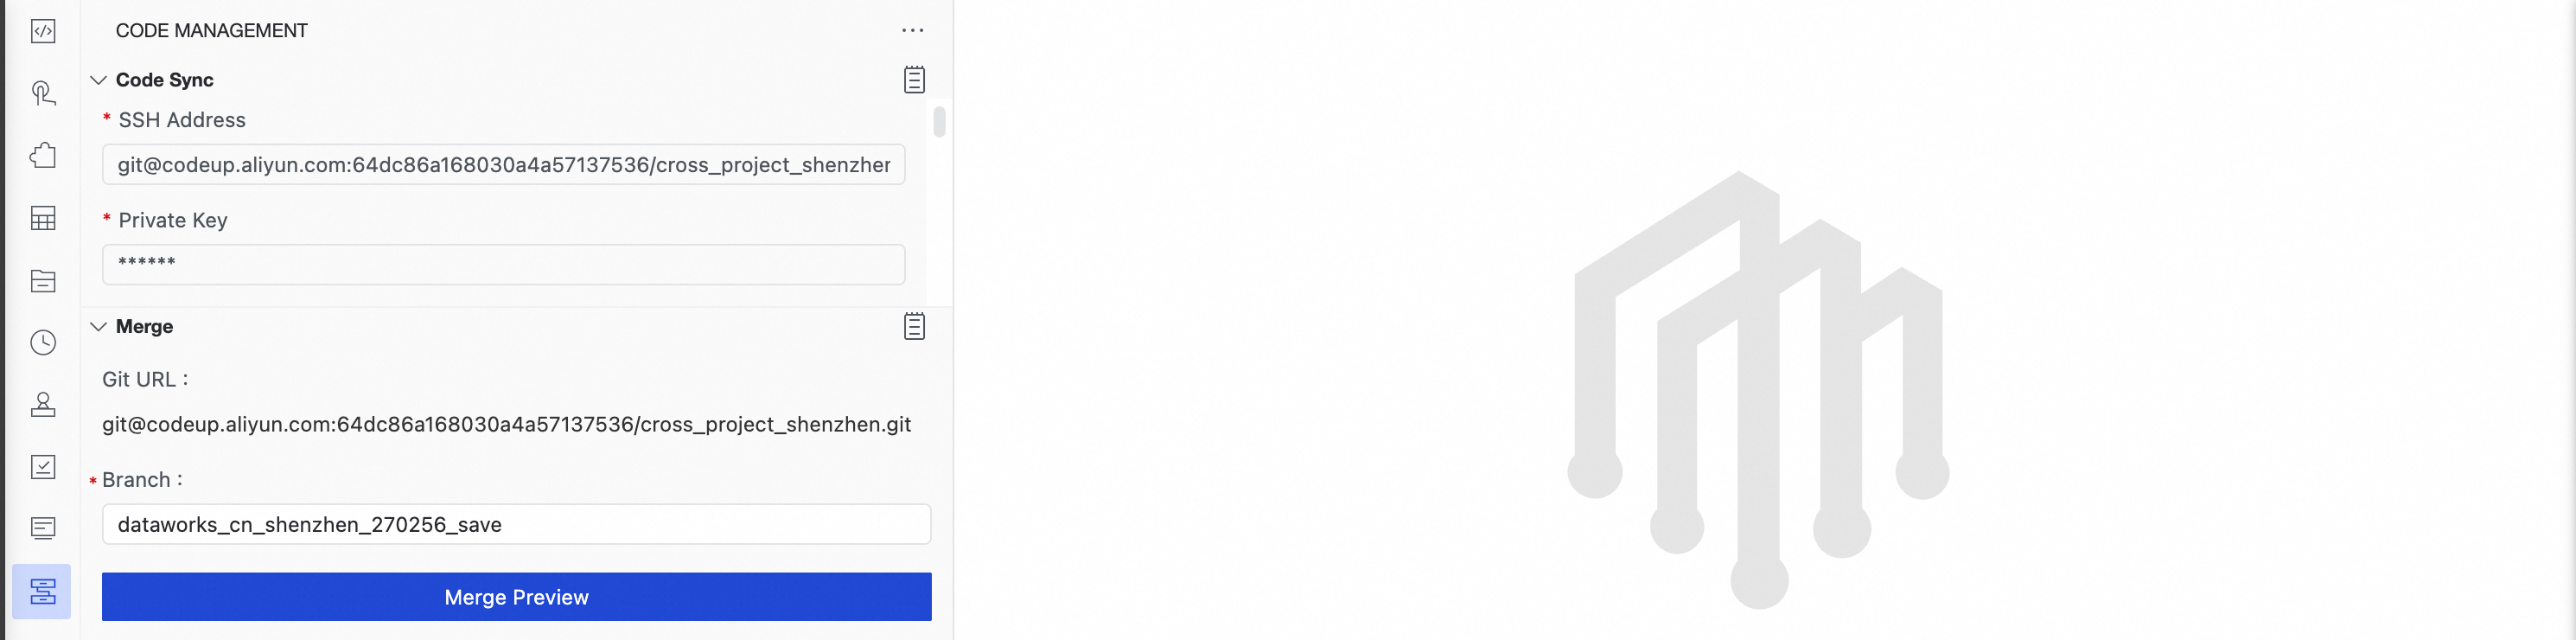
Click Preview Merge. After you confirm that the preview is correct, merge the code from workspace
git_cross_project_1into workspacegit_cross_project_2. For more information about the merge operation, see Reverse merge.
Billing
Billable resources include:
Serverless resource group: Synchronization tasks use a resource specification of 1 CU. Fees vary depending on the billing method of the purchased resource group. For more information, see Serverless resource group billing.
NAT Gateway and EIP: If the Git repository is on the public internet, corresponding data transfer fees are incurred. For more information, see NAT Gateway billing.
OSS storage: Used to store code synchronization data. It is billed based on storage capacity and the number of requests. For more information, see OSS billing overview.
FAQ
Q: Initialization is reported as successful, but no branch is created in my Git repository. What should I do?
A: Follow the instructions in the Test connectivity section to check whether the
telnetandsshconnections are successful. Pay close attention to the network configuration of your Serverless resource group, such as the NAT Gateway and VPC settings.Q: A merge conflict occurred. How do I resolve it?
A: In your local development environment, merge the DataWorks
savebranch (dataworks_${region}_${projectId}_save) into your development branch by usinggit mergeorgit rebase. After you resolve the conflicts, push your development branch to the remote repository. Finally, return to the DataWorks page and initiate the merge again.