Data Integration supports offline, full-database synchronization to Hologres from various sources, such as AnalyticDB for MySQL 3.0, ClickHouse, Hologres, and PolarDB. This topic describes how to perform an offline synchronization of an entire AnalyticDB for MySQL 3.0 database to a Hologres database.
Prerequisites
You have purchased a Serverless resource group or an exclusive resource group for Data Integration.
You have created an AnalyticDB for MySQL 3.0 data source and a Hologres data source. For more information, see Data Source Configuration.
You have established a network connection between the resource group and the data sources. For more information, see Network connectivity solutions.
Procedure
1. Select the sync task type
Go to the Data Integration page.
Log on to the DataWorks console. In the top navigation bar, select the desired region. In the left-side navigation pane, choose . On the page that appears, select the desired workspace from the drop-down list and click Go to Data Integration.
In the navigation pane on the left, click Sync Task. At the top of the page, click Create Sync Task to go to the task creation page. Configure the basic information.
Source And Destination:
AnalyticDB for MySQL (V3.0)→HologresNew Task Name: Enter a custom name for the sync task.
Sync Type:
Offline Full-Database.Sync Steps: Select Full Synchronization and Incremental Synchronization.
2. Configure the network and resources
In the Network And Resource Configuration section, select the Resource Group for the sync task. For Task Resource Usage, assign the number of CUs.
For Source Data Source, select your
AnalyticDB for MySQL (V3.0)data source. For Destination Data Source, select yourHologresdata source. Then, click Test Connectivity.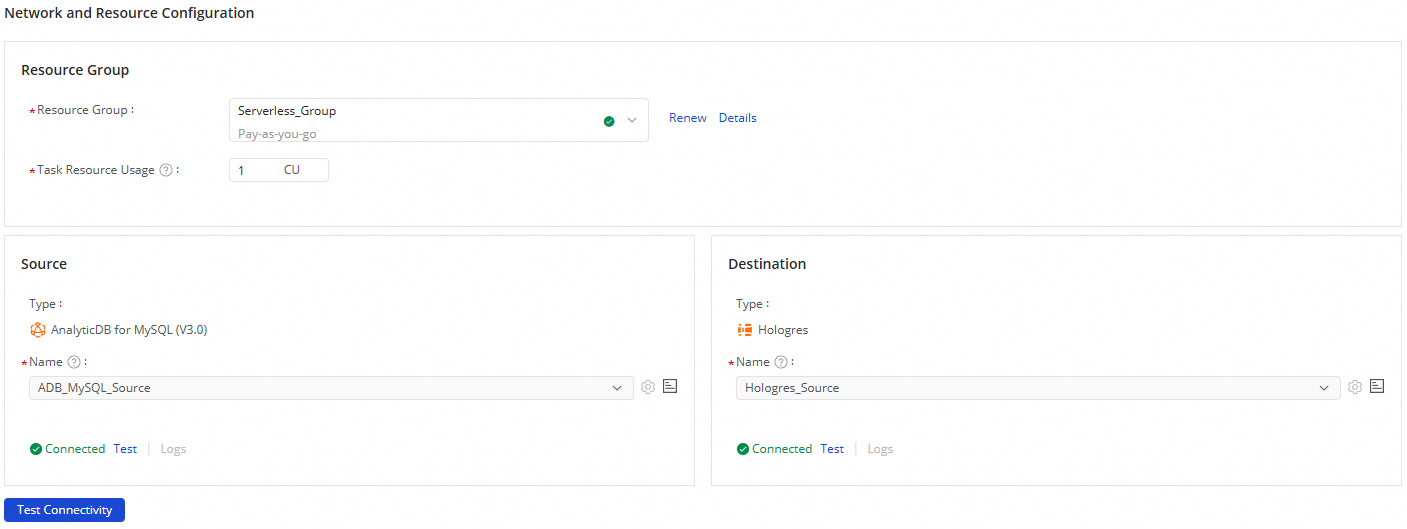
After you confirm that the connections to the source and destination data sources are successful, click Next.
3. Select the databases and tables to synchronize
In the Source Table area, select the tables to sync from the source data source. Click the ![]() icon to move the tables to the Selected Tables list.
icon to move the tables to the Selected Tables list.

4. Configure full and incremental synchronization
Configure the full and incremental sync type for the task.
If you select both Full initialization and Incremental synchronization in the Synchronization Mode, the task defaults to a one-time full sync and recurring incremental syncs. This setting cannot be changed.
If you selected Full initialization in the Synchronization Mode, you can configure the task for a one-time full sync or a recurring full sync.
If you select Incremental synchronization in the Synchronization Mode, you can configure the task as a one-time or recurring incremental sync.
NoteThe following steps use a one-time full sync and recurring incremental sync task as an example.
Configure recurring schedule parameters.
If you want the task to run on a recurring schedule, click Configure Scheduling Parameters for Periodical Scheduling.
5. Map target tables
After you select the tables to sync in the previous step, they are automatically displayed on this page. The destination tables have a status of 'mapping to be refreshed'. You must define the mapping between the source and destination tables, which specifies how data is read from the source tables and written to the destination tables. Then, click Refresh to proceed. You can refresh the mapping immediately or customize the destination table rules first.
You can select the tables to synchronize and click Batch Refresh Mapping. If no mapping rules are configured, the default table name rule is
${Source Table Name}. If a table with the same name does not exist in the destination data source, it is automatically created.Because recurring scheduling is required, you must define the properties for the recurring scheduling task. These properties include Scheduling Cycle, Scheduling Time, and Scheduling Resource Group. The scheduling configuration for the current synchronization is the same as the node scheduling configuration in Data Development. For more information about the parameters, see Node scheduling.
Set the Incremental Condition to filter the source data with a WHERE clause. You only need to enter the content of the WHERE clause, not the WHERE keyword. If you enable recurring scheduling, you can use system parameter variables.
In the Custom Destination Schema Name Mapping column, click Configure to customize the destination schema naming rule.
You can use built-in variables and manually entered strings to create the destination schema name. You can also edit the built-in variables. For example, you can create a new schema naming rule that adds a suffix to the source database name to form the destination schema name.
In the Custom Destination Database Name Mapping column, click Configure to customize the destination database naming rule.
You can use built-in variables and manually entered strings to create the destination database name. You can also edit the built-in variables. For example, you can create a new database naming rule that adds a suffix to the source database name to form the destination database name.
In the Customize Mapping Rules column, click Edit to customize the destination table naming rule.
You can use built-in variables and manually entered strings to create the destination table name. You can also edit the built-in variables. For example, you can create a new table naming rule that adds a suffix to the source table name to form the destination table name.
1. Edit mapping of field data types
A sync task maps source field types to destination field types by default. To customize this mapping, click Edit Mapping of Field Data Types in the upper-right corner of the table. After you configure the mapping, click Apply and Refresh Mapping.
2. Edit the destination table schema and assign field values
If a destination table has a status of To Be Created, you can add fields to its schema. Follow these steps:
Add fields to the destination table.
To add a field to a single table, click the
 button in the Target Table Name column.
To add fields in batches, select all tables to sync. At the bottom of the table, choose .
Assign values to the fields. You can use the following operations to assign values to the fields that you just added.
To assign values to a single table: In the Destination Table Field Assignment column, click Configure.
To assign values in batches, at the bottom of the list, choose to assign values to identical fields across multiple destination tables.
NoteYou can assign constants or variables. Click the
 icon to switch between assignment modes.
3. Custom advanced parameters
For fine-grained control over the task, click Configure in the Custom Advanced Parameters column.
Modify these parameters only if you fully understand what they do. Incorrect settings can cause unexpected errors or data quality issues.
6. Configure advanced parameters
The sync task provides several parameters that you can modify as needed. For example, you can limit the maximum number of connections to prevent the sync task from exerting too much pressure on your production database.
Modify these parameters only if you fully understand what they do. Incorrect settings can cause unexpected errors or data quality issues.
In the upper-right corner of the page, click Configure Advanced Parameters to go to the advanced parameter configuration page.
On the Configure Advanced Parameters page, modify the parameter values.
7. Configure the resource group
In the upper-right corner of the page, click Resource Group Configuration to view or switch the resource group for the current task.
8. Run the sync task
After you finish the configuration, click Complete at the bottom of the page.
On the page, find the created sync task and click Deploy in the Operation column.
In the Tasks, click the Name/ID of the task to view the execution details.
9. Configure alert rules
After the task runs, a scheduled job is generated in the Operation Center. To prevent task errors from causing data sync latency, you can set an alarm policy for the sync task.
In the Tasks, find the running sync task. In the Actions column, choose to open the task editing page.
Click Next. Then, click Configure Alert Rule in the upper-right corner of the page to open the alarm settings page.
In the Scheduling Information column, click the scheduled job to open the task details page in the Operation Center and retrieve the Task ID.
In the navigation pane on the left of the Operation Center, choose to go to the Rule Management page.
Click Create Custom Rule and set Rule Object, Trigger Condition, and Alert Details. For more information, see Rule management.
In the Rule Object field, search for the target task using the obtained Task ID and set an alert.
Sync task O&M
View the task status
After you create a sync task, you can view the list of created sync tasks and their basic information on the Sync Task page.

In the Actions column, you can Start or Stop a sync task. You can also click More for other operations, such as Edit and View.
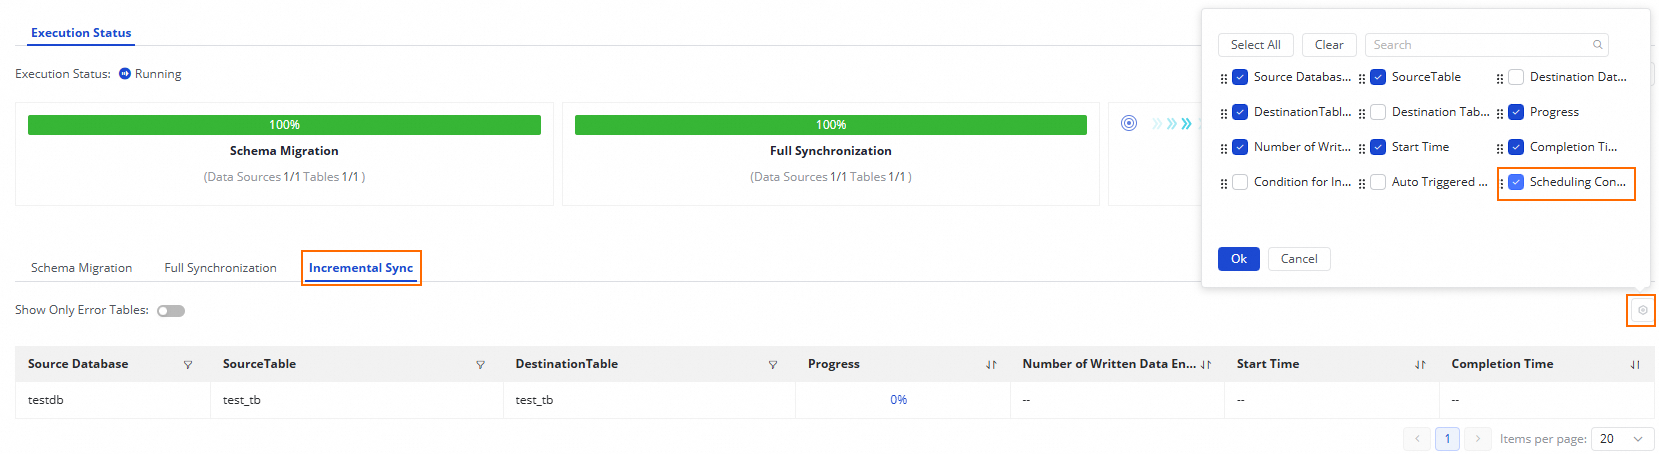
For a running task, you can view the basic running status in the Execution Overview section. You can also click the overview section to view execution details.
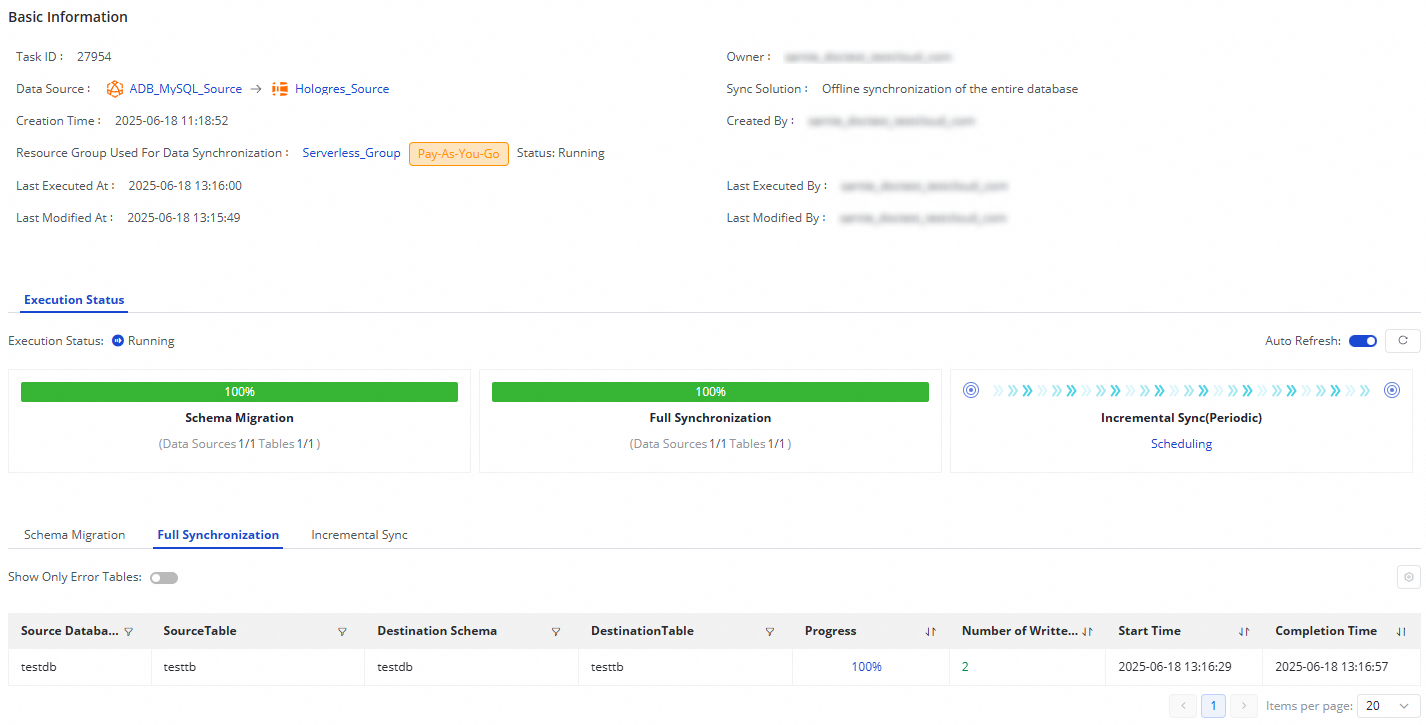
For an offline, full-database sync task from AnalyticDB for MySQL (V3.0) to Hologres:
If the sync step of your task is Full Synchronization, schema migration and full synchronization are displayed.
If the sync step of your task is Incremental Synchronization, schema migration and incremental synchronization are displayed.
If the sync steps of your task are Full Synchronization and Incremental Synchronization, schema migration, full synchronization, and incremental synchronization are displayed.
Rerun a task
Click Rerun to rerun the task without changing the task configuration.
Effect: This operation reruns a one-time task or updates the properties of a recurring task.
To rerun a task after modifying it by adding or removing tables, edit the task and click Complete. The task status then changes to Apply Update. Click Apply Update to immediately trigger a rerun of the modified task.
Effect: Only the new tables are synced. Tables that were previously synced are not synced again.
After you edit a task (for example, by changing a destination table name or switching to a different destination table) and click Complete, the available operation for the task changes to Apply Update. Click Apply Update to immediately trigger a rerun of the modified task.
Effect: The modified tables are synced. Unmodified tables are not synced again.
Use cases
If you have downstream data dependencies and need to perform data development operations, you can set upstream and downstream dependencies for the node as described in Node scheduling configuration. You can view the corresponding recurring task node information in the Scheduling Configuration column.