The ad hoc query feature allows you to test your code in the development environment. This way, you can perform troubleshooting or check whether your code works as expected.
Background information
If you need to only query data and SQL code, test whether code is run as expected, or verify whether code is correct in the development environment, you can create an ad hoc query. You do not need to deploy the data or SQL code to the production environment and use a desired compute engine in the production environment.
Create a folder
Go to the DataStudio page.
Log on to the DataWorks console. In the top navigation bar, select the desired region. In the left-side navigation pane, choose . On the page that appears, select the desired workspace from the drop-down list and click Go to Data Development.
In the left-side navigation pane of the DataStudio page, click Ad Hoc Query.
You can click the
 icon in the lower-left corner to show or hide the left-side navigation pane.
 Move the pointer over the
 icon and select Folder.
 In the Create Folder dialog box, configure the Folder Name and Location parameters.
NoteThe node name cannot exceed 128 characters in length and can contain only letters, digits, underscores (_), and periods (.).
DataWorks supports multiple levels of folders. You can save a newly created folder in an existing folder.
Click Create.
Create an ad hoc query node
In the Ad Hoc Query pane, you can create the following types of ad hoc query nodes: EMR Hive, ODPS SQL, EMR Spark SQL, EMR Presto, EMR Impala, Shell, AnalyticDB for PostgreSQL, AnalyticDB for MySQL, and Data Lake Analytics.
This section describes how to create an ODPS SQL node.
In the Ad Hoc Query pane, right-click the folder that you created and choose .
In the Create Node dialog box, configure the Name and Path parameters.
- Click Confirm.
On the configuration tab of the node, write code for the node.
 Note
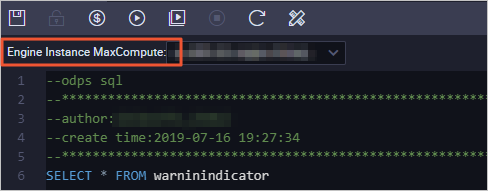
NoteIf multiple MaxCompute computing resources are associated with DataStudio in your workspace, you must select one from the computing resources based on your business requirements before you run the node.
If the selected MaxCompute data source uses a default pay-as-you-go resource group, you can click the
 icon in the toolbar to estimate the cost for running the node. The actual cost is included in your bill.
Click the
 icon in the toolbar to view the running result.