This topic describes how to configure the network, whitelist, and permissions for a PolarDB data source to prepare for data synchronization to Hologres.
Prerequisites
- The source PolarDB for MySQL cluster and the destination Hologres instance are created.
- An exclusive resource group for Data Integration is purchased and configured. For more information, see Plan and configure resources.
- You have evaluated your network environment and established a connection between your data source and the exclusive resource group for Data Integration.
- If the data source and the exclusive resource group for Data Integration are in the same Virtual Private Cloud (VPC) within the same region, they can connect automatically.
- If they are in different network environments, you must connect them using a method such as VPN Gateway.
Background information
- Network whitelistFor example, in a Virtual Private Cloud (VPC) environment, add the CIDR block of the exclusive resource group to the data source's whitelist. This ensures the resource group can access the data source.
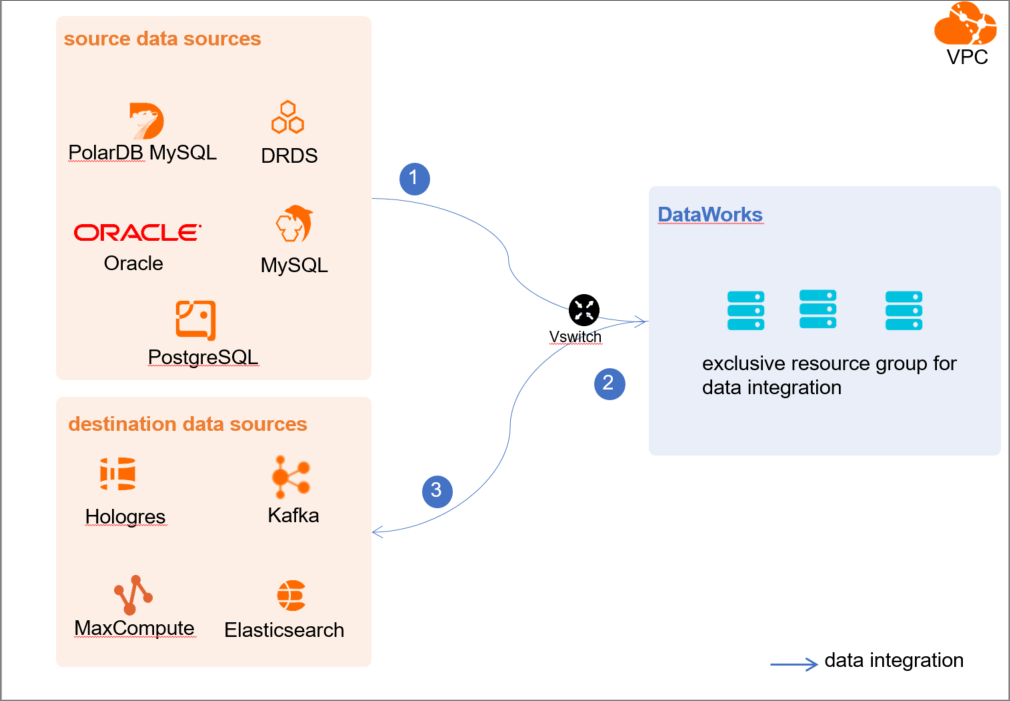
-
Prepare an account that Data Integration can use to access the data source for data extraction and write operations.
-
If the source data source is PolarDB for MySQL, you must enable the binary log. PolarDB for MySQL is a cloud-native database that is fully compatible with MySQL. By default, PolarDB uses higher-level physical logs. To integrate with the MySQL ecosystem, you can enable the binary log.
Limits
- Only PolarDB for MySQL data sources are supported in synchronization solutions. Other types of PolarDB data sources are not supported. In this topic, PolarDB refers to a PolarDB for MySQL data source.
- Real-time synchronization from PolarDB is supported only on the primary node (read/write node).
- XA ROLLBACK is not supported. Data from transactions that are in the XA PREPARE state is synchronized to the destination. If an XA ROLLBACK operation occurs, real-time synchronization does not roll back the prepared data at the destination. To handle XA ROLLBACK scenarios, manually remove the affected table from the real-time synchronization task. Then, re-add the table and perform a full data initialization followed by incremental real-time synchronization.
Procedure
- Configure the whitelist.
Add the CIDR block of the VPC where the exclusive resource group for Data Integration resides to the whitelist of the PolarDB cluster.
- View and record network information.
- Log on to the DataWorks console.
- In the left-side navigation pane, click Resource Groups.
- On the Exclusive Resource Groups tab, find the target exclusive resource group for Data Integration and click View Information.
- Copy the EIPAddress and CIDR Blocks in the dialog box.
- On the Exclusive Resource Groups tab, click Network Settings for the target exclusive resource group for Data Integration.
- On the VPC Binding tab, view the vSwitch CIDR Block and add it to the database whitelist.
- Add EIPs and CIDR blocks to the whitelist.
In the left-side navigation pane of the PolarDB console, click Cluster Whitelist. In the IP List section, click Add IP Whitelist Group and add the EIP and CIDR blocks to the group. For more information, see Set a whitelist.
- View and record network information.
- Create an account and grant permissions.
Create a database account for subsequent operations. This account requires the
SELECT, REPLICATION SLAVE, REPLICATION CLIENTprivileges.- Create an account.
For more information, see Create and manage database accounts.
- Grant privileges.
You can run the following command to grant the required privileges to the account. Alternatively, you can grant the
SUPERprivilege to the account.-- CREATE USER 'sync_user'@'%' IDENTIFIED BY 'your_password'; GRANT SELECT, REPLICATION SLAVE, REPLICATION CLIENT ON *.* TO 'sync_user'@'%';
- Create an account.
- Enable the binary log.
For more information, see Enable the binary log.
Next steps
After you configure the data source, the source, destination, and resource instance can connect over the network without access restrictions. You can then add the data sources in DataWorks and associate them with your data synchronization solution.
For more information about how to add a data source, see Add a data source.