A plan is a pre-configured display solution in the visualization studio that lets you quickly switch between different data views, theme styles, or interaction patterns for various demonstration scenarios. You can create, cast, and manage plans as needed.
The visualization studio feature is newly added to version 7.0 products. Perform operations based on the Visualization Application Center environment.
Create a plan
If you receive a message indicating insufficient quota when creating a plan, click Manage Quotas to configure plan quota.
-
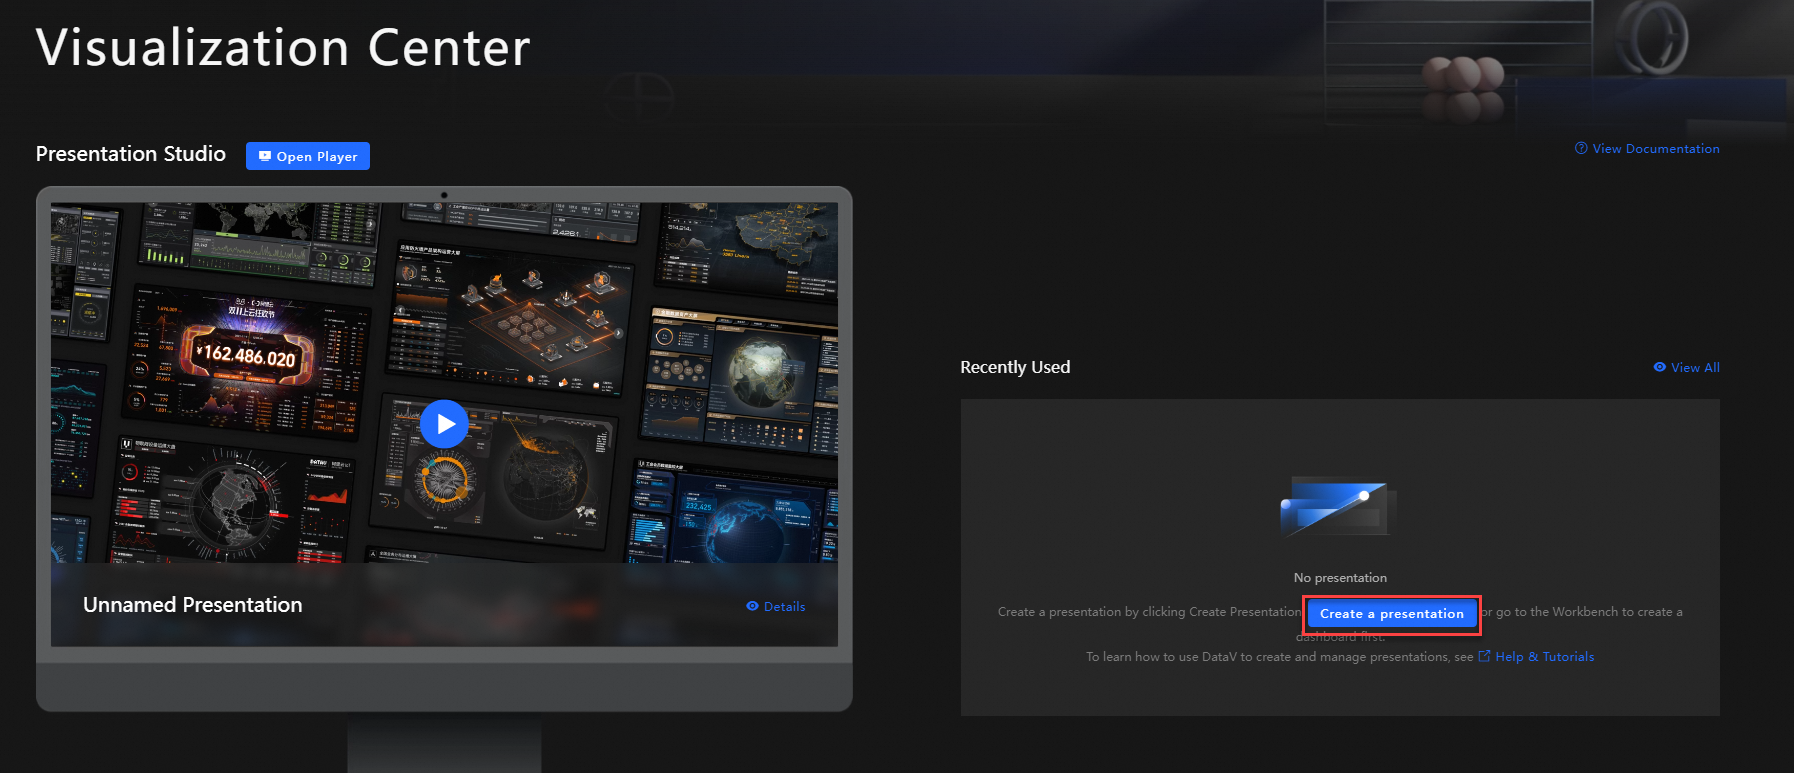
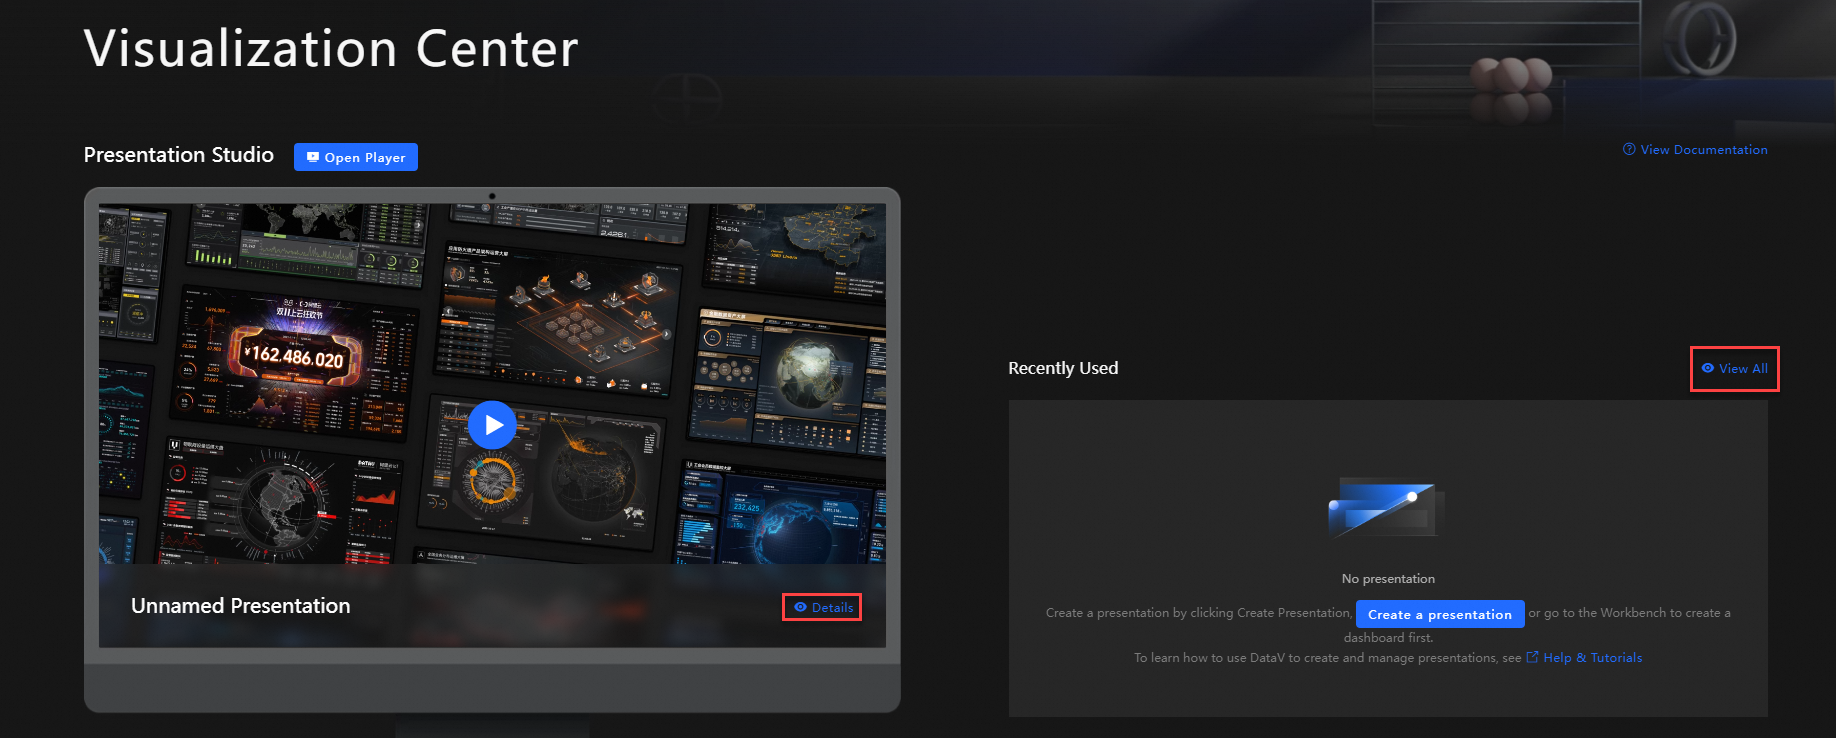
In the Presentation Studio module of the Visualization Application Center, check whether plan information exists.
-
If not, click Create a presentation to go to the Presentation Studio page.
-
If yes, move your mouse over any plan, click Details or View All to go to the Presentation Studio page.
-
-
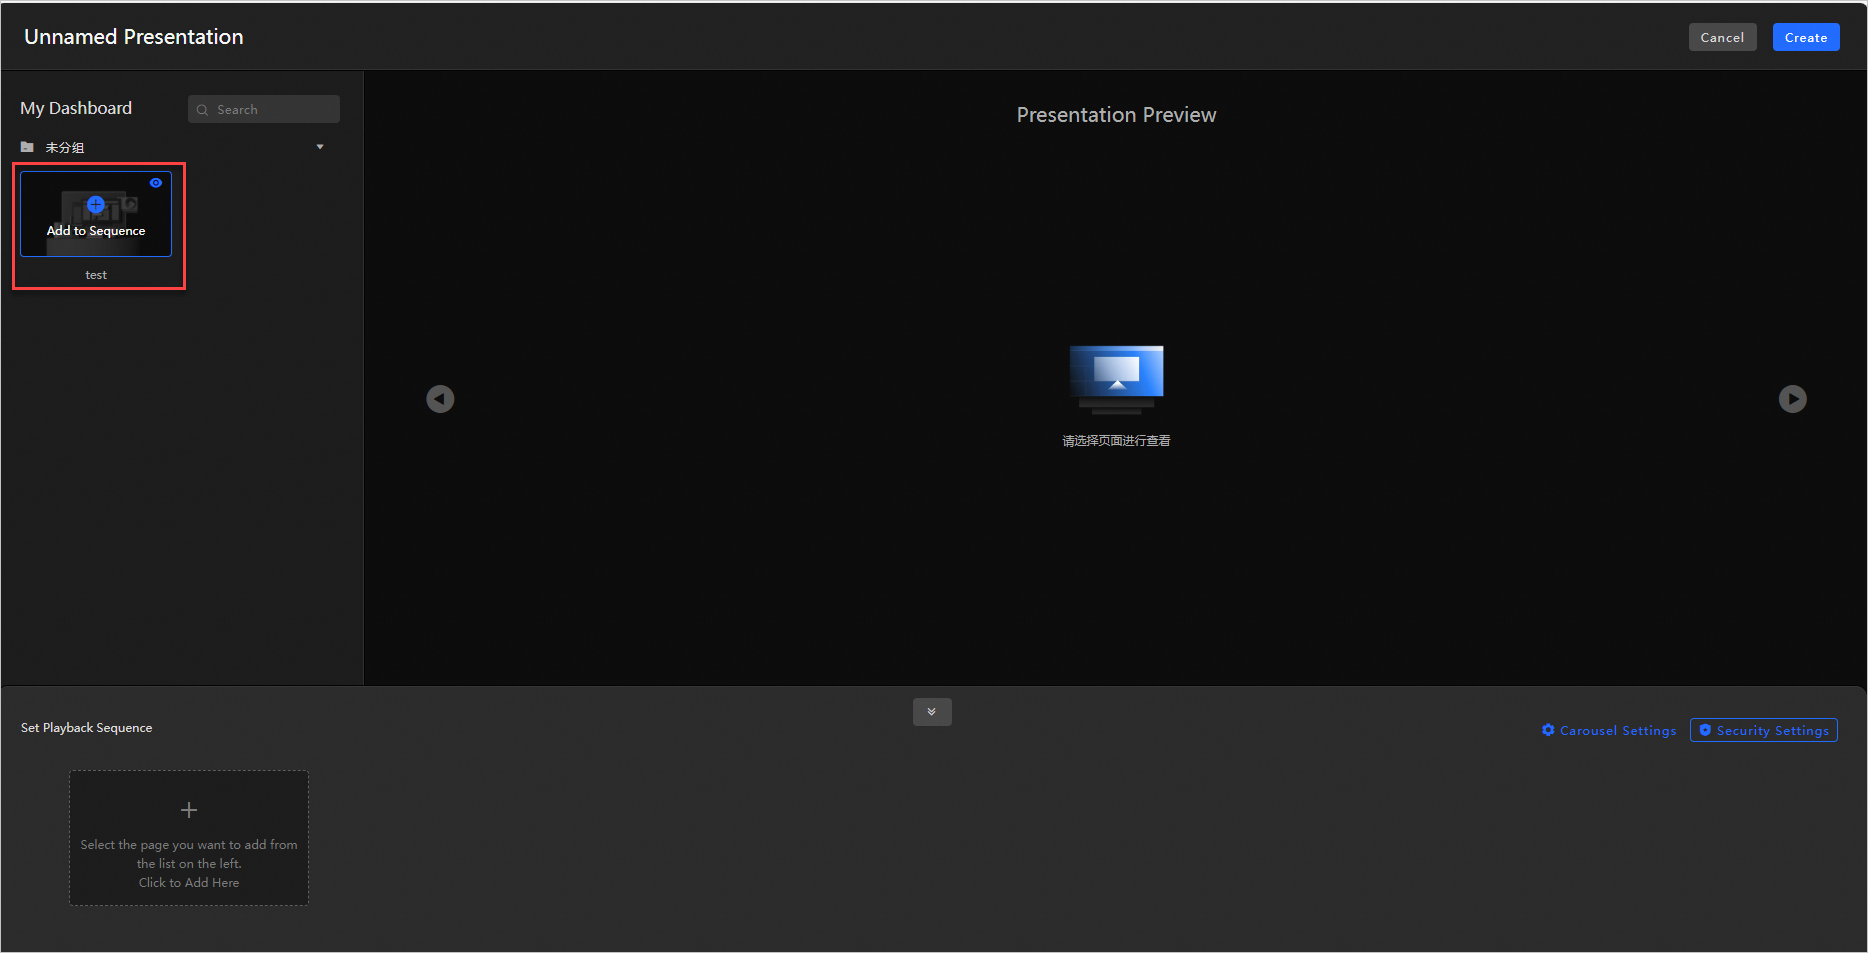
Click Create a presentation in the visualization studio to enter the configuration page.
-
In the My Dashboard section on the left, search for or directly select the data dashboard you want to add, and click Add to Sequence.
-
In the Set Playback Sequence section below, you can drag dashboards to change their order, or click the
 icon to remove dashboards from the sequence.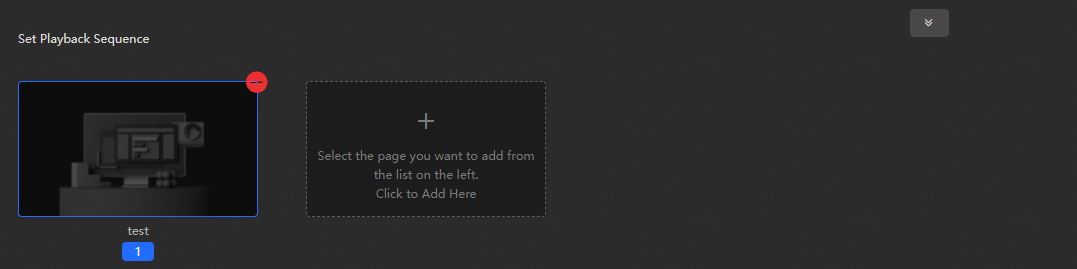
-
Optional: Click Carousel Settings or Security Settings on the right to set the interval time for dashboard carousel in seconds, or add a control terminal password for the current demo plan.
-
After confirmation, click Create in the upper right corner, enter the Plan Name in the popup window, and confirm.
-
Click Back in the upper right corner to return to the Visualization Application Center and view the newly created plan.
Screen casting plan
You can cast plans on the web . Before you start, make sure you have created a plan.
In the Presentation Studio module of the Visualization Center, select the plan you want to cast and click the  icon to go to the casting control page.
Web version
-
On the casting control page, click Open Player in the upper right corner of the page to open the casting page, which will display the Screen mirroring code.
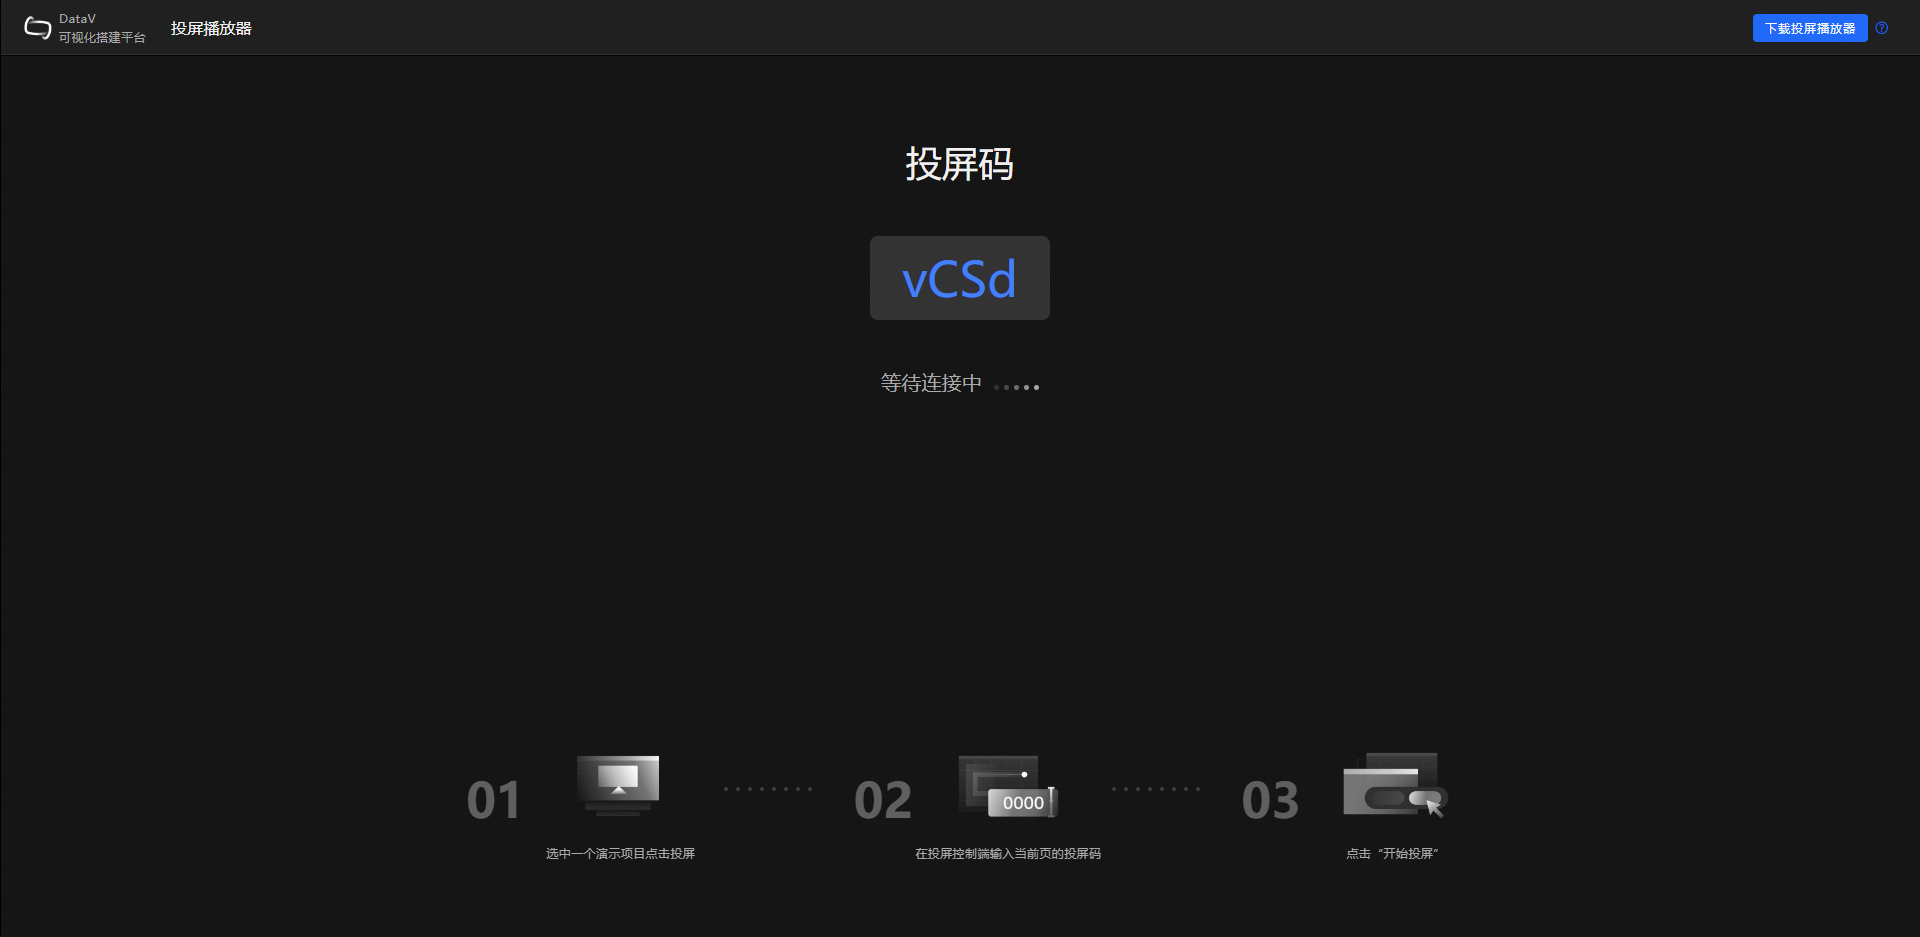
-
Enter the screen mirroring code on the casting control page, then click Start Screen Mirroring. Click OK again to initiate the casting request.
-
Click Accept on the casting page to start casting.
-
Return to the casting control page. You can control the content displayed on the casting page by setting Autoplay and Next operations. You can also share the Control QR Code with other users.
-
(Optional) To end casting, click End Casting in the upper right corner of the page, and click Confirm again in the popup window.
Manage plans
In the Presentation Studio module of the Visualization Center, select a plan and click Details to open the details page, where you can perform the following operations.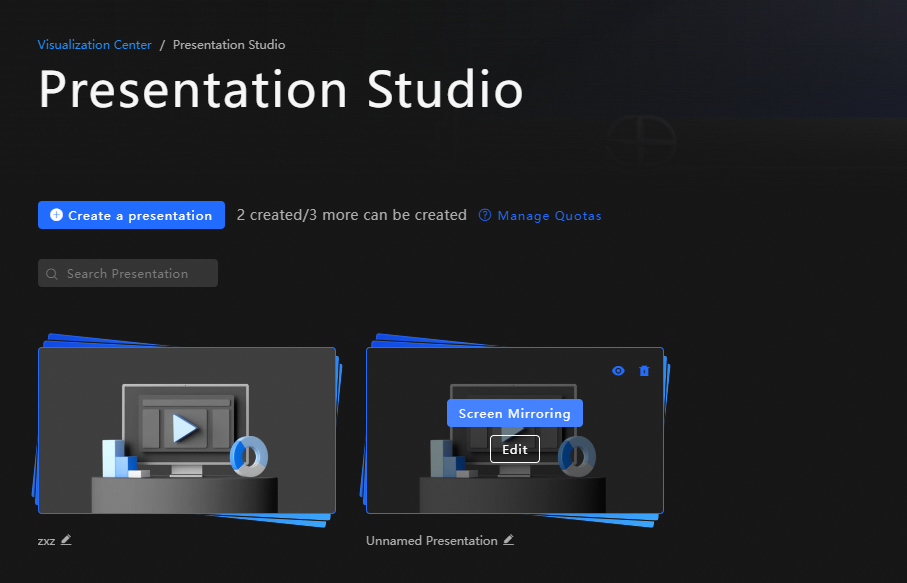
-
Search for plans: Enter a plan name in the search box. The system performs fuzzy matching automatically.
-
Rename a plan: Click the
 icon below the plan to rename it.
 -
Preview a plan: Hover over a plan and click the
 icon in the upper-right corner to preview it.
 -
Edit a plan: Hover over a plan and click Edit.
-
Delete a plan: Hover over a plan and click the
 icon in the upper-right corner to delete it.
 -
Manage plan quota: Click Manage Quotas to configure plan quota.