This topic describes how to migrate data from an on-premises File Storage NAS server to File Storage NAS for long-term storage.
Background information
A Hangzhou pharmaceutical company stores data, such as product documents and experimental data, on its internal NAS file server. The data includes 10,000,000 files, which are about 10 TB in size. The NAS server is located in the data center of the company. The server uses the Network File System (NFS) protocol and has a firewall installed. The server cannot be accessed over the Internet but provides an internal IP address of 10.0.0.254.
For data security and cost saving, the company needs to migrate data from the NAS server to File Storage NAS.
Migration scheme
Based on the user requirements and background information, the following migration scheme is formulated:
Create an File Storage NAS file system in the China (Hangzhou) region and attach the file system to an Alibaba Cloud virtual private cloud (VPC).
Use a dedicated leased line to connect the on-premises NAS server to the VPC. Modify the firewall settings of the NAS server and enable access to the NAS server from all the IP addresses in the VPC.
Use Data Online Migration to migrate data from the on-premises NAS server to File Storage NAS.
Step 1: Create an File Storage NAS file system
In the China (Hangzhou) region, create an File Storage NAS file system that uses the NFS protocol type. For more information, see Mount an NFS file system.
Attach the File Storage NAS file system to a VPC. For more information, see Mount an NFS file system.
Modify the security group of the VPC to enable read/write access to the NAS file system from all the IP addresses in the VPC. For more information, see Manage permission groups.
Step 2: Connect the NAS server to the Alibaba Cloud VPC
Use a dedicated leased line that provides a transmission rate of 1 Gbit/s to connect the NAS server to the VPC where the File Storage NAS file system is located. For more information, see Create and manage a dedicated connection over an Express Connect circuit.
Modify the firewall settings of the NAS server to enable access to the NAS server from all the IP addresses in the VPC.
Step 3: Create a migration job
Create a Resource Access Management (RAM) user in the Alibaba Cloud Management Console and grant the RAM user the permissions to create migration jobs. For more information, see Create and authorize a RAM user.
Use the RAM user to log on to the Data Transport console.
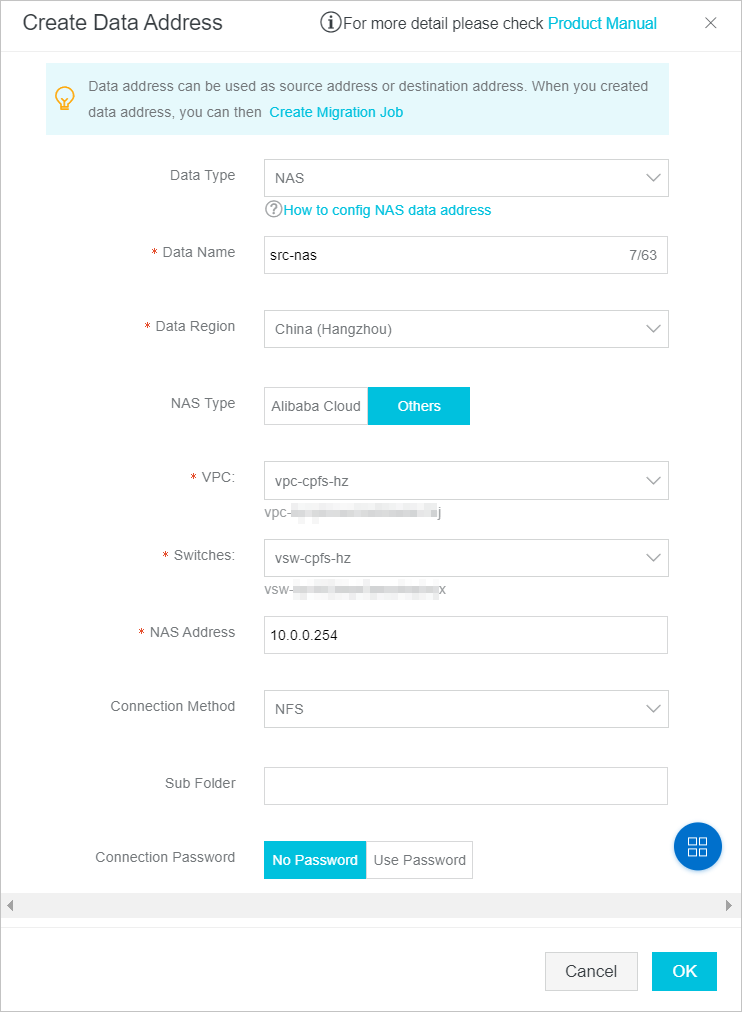
Create a source data address based on the information about the on-premises NAS server. For more information about the parameters, see Create a source data address. The following figure shows the configuration details.
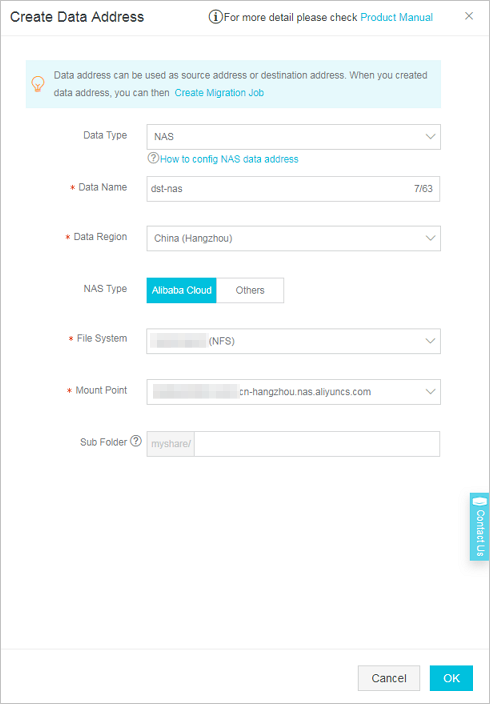
Create a destination data address based on the information about the File Storage NAS file system. The following figure shows the configuration details.
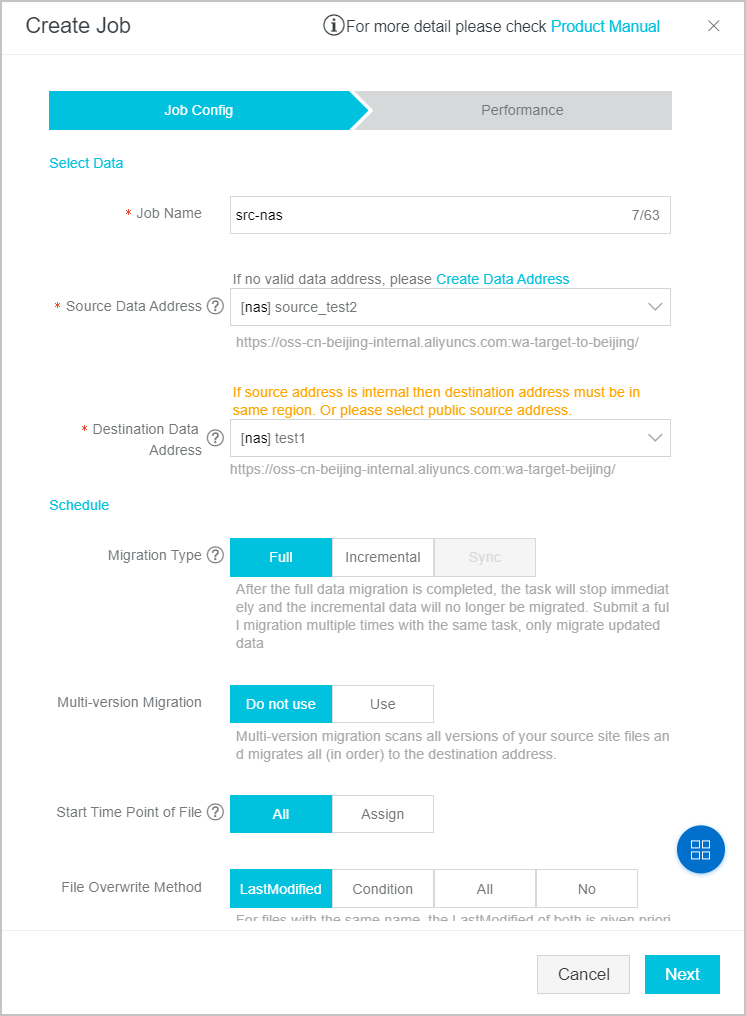
Create a migration job of the Full type to migrate data from the on-premises NAS server to File Storage NAS. For more information about the parameters, see Create a migration job. The following figure shows the configuration details.
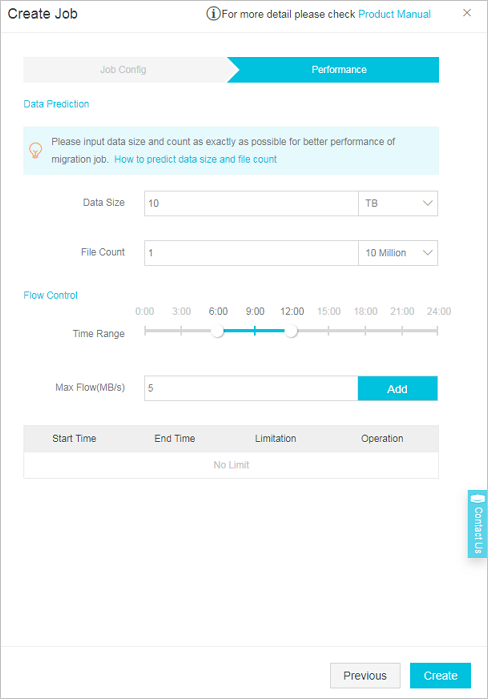
The following figure shows you how to configure performance optimization.
A migration job requires about one day to complete. After the migration job is completed, you must verify that all data is migrated. To do so, view the migration report and compare the data at the source data address with the data at the destination data address.
NoteIf a file fails to be migrated, troubleshoot the failure. For more information, see Common causes of a migration failure and solutions.