This topic describes how to migrate data from a local IDC to OSS.
Background information
An e-commerce enterprise uses the Fast Distributed File System (FastDFS) to store data in the user-created IDC. The data includes about 30,000,000 files and has a total size of about 300 TB. The enterprise has connected the local IDC to a VPC in China (Shenzhen) by using Alibaba Cloud Express Connect.
- During migration, you must avoid the impacts on normal data access from users.
- After the migration job is complete, you must check data integrity to ensure a seamless switchover of the businesses to OSS.
Migration solution
- Create an OSS bucket in the China (Shenzhen) region and change the default storage location to the data address of this bucket.
- Use the built-in FastDFS NGINX module to export all files to be migrated to a list
of HTTP URLs, and you can access these URLs in the VPC.
HTTP URLs are separated by line and each line indicates a file. Separate multiple URLs with line feeds (\n). For more information about the format, see Migrate data from HTTP and HTTPS sources to OSS.
- Use Data Transport to migrate data from the local IDC to OSS.
- Switch over your businesses to OSS after the migration is complete.
Step 1: Create a bucket and modify the storage location
- In the China (Shenzhen) region, create a bucket to store data. For more information, see Create buckets.
- Configure the bucket policy and only enable access to the bucket from enterprise employees. For more information, see Use bucket policies to authorize other users to access OSS resources.
- Inform employees of changing the default storage location to the bucket.
Step 2: Create a migration job
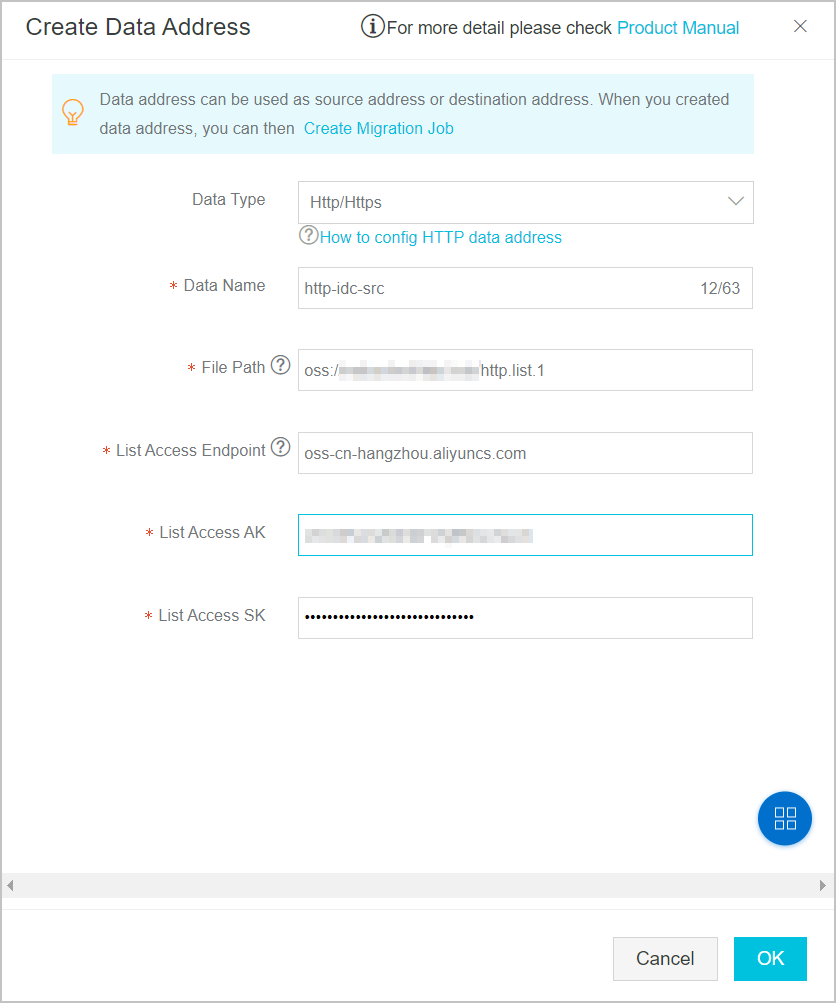
- Create an HTTP source data address. For more information, see Create a source data address.
When creating an HTTP source data address, you must select Use for Whether to Use VPC and specify the VPC. To ensure a successful migration, you must specify the VPC to access HTTP URLs. The following figure shows the configuration details.
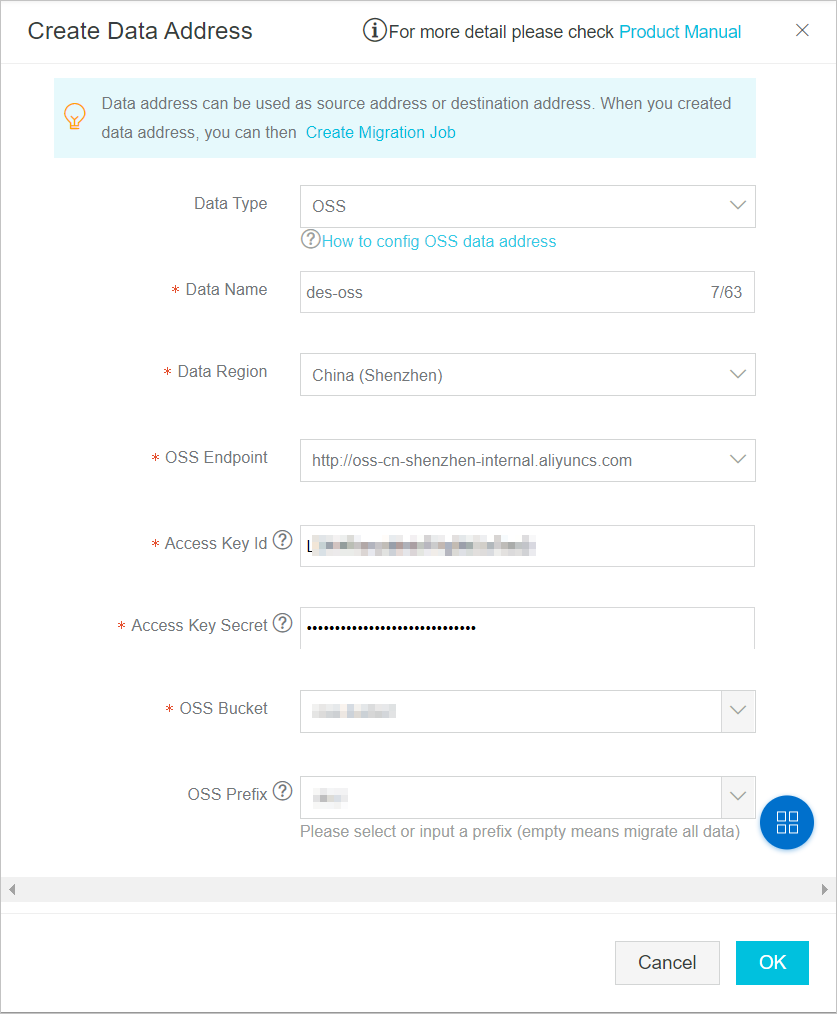
- Create an OSS destination data address. For more information, see Create a destination data address.


Step 3: Switch over businesses to OSS
After the migration is complete, you can change the data address where the business applications retrieve data to OSS. Then, you can store and manage data on OSS.