This tutorial presents an example of Blender rendering using the Render Manager system. Batch Compute provides a computing node image for public testing (Windows Server 2008, ID: m-wz9du0xaa1pag4ylwzsu). This image is installed with Blender rendering software, so you do not have to create a computing node image for this test (for actual production, you must create a computing node image based on your actual needs). A small scenario created using Blender has already been uploaded to OSS. It is in a public read bucket, so you must download it and upload it to your own OSS bucket for testing.
Register and log on to an Alibaba Cloud console and activate OSS, ECS, and Batch Compute.
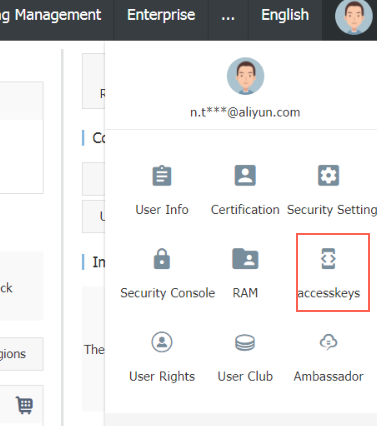
Create an AccessKey. Go to Account Information > AccessKeys > Create AccessKey and record the AccessKey information. AK information is sensitive, so keep it confidential. In actual production, be sure to use a subaccount AK with the relevant permissions.
2. A rendering example using Blender
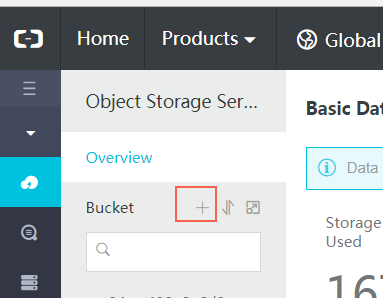
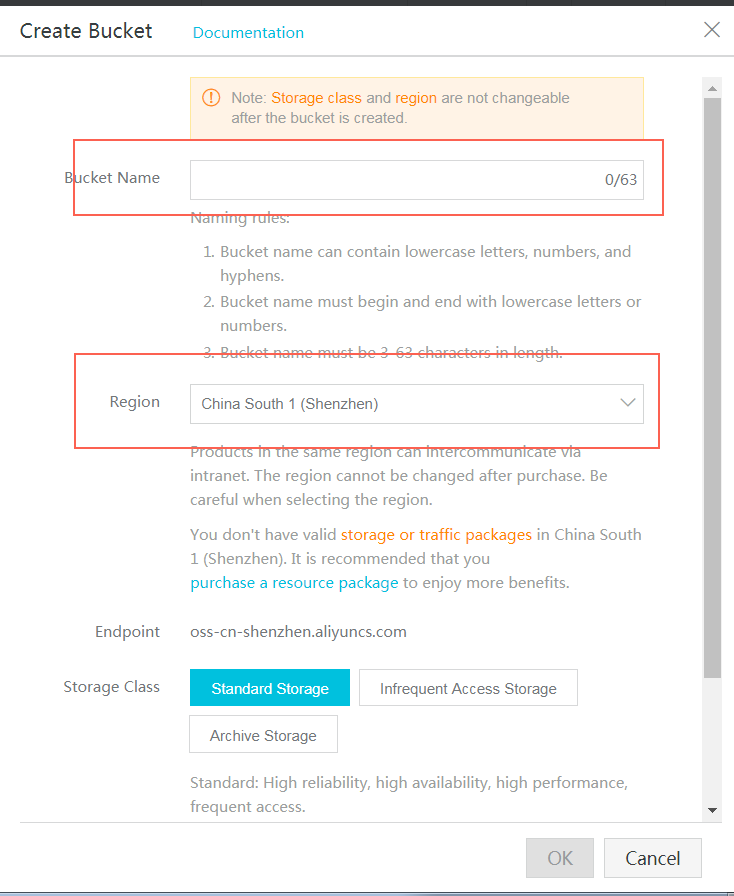
Log on to the Alibaba Cloud console. On the console, select OSS > Create Bucket. Set the bucket name according to the relevant specifications (in this example, the bucket name is “renderbucket”), select the China South 1 (Shenzhen) region, and set read and write permissions to private.
3. Download the Blender scenario and upload it to your own OSS bucket
In your browser, enter the address http://openrm.oss-cn-qingdao.aliyuncs.com/blender/monkey/cube.blend and download the scenario files (the test scenario provided by Batch Compute). In the OSS console, create the directory structure blender/monkey. Then, upload the files to this directory, with the file path oss://renderbucket/blender/monkey/cube.blend.
4. Start Render Manager
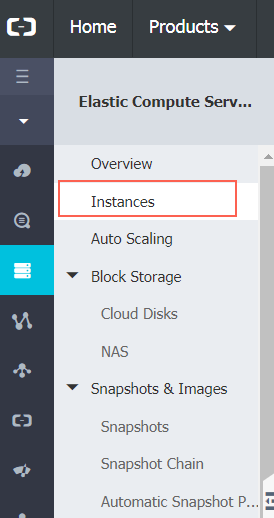
Log on to the Alibaba Cloud console. On the console, select ECS > Create Instance.
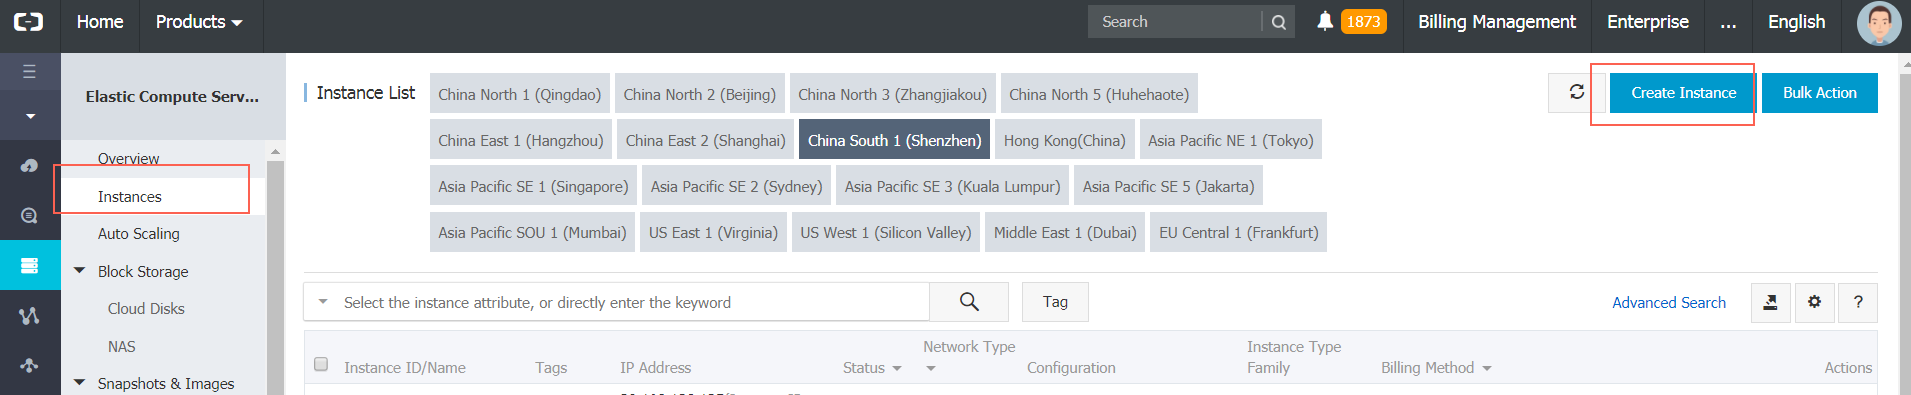
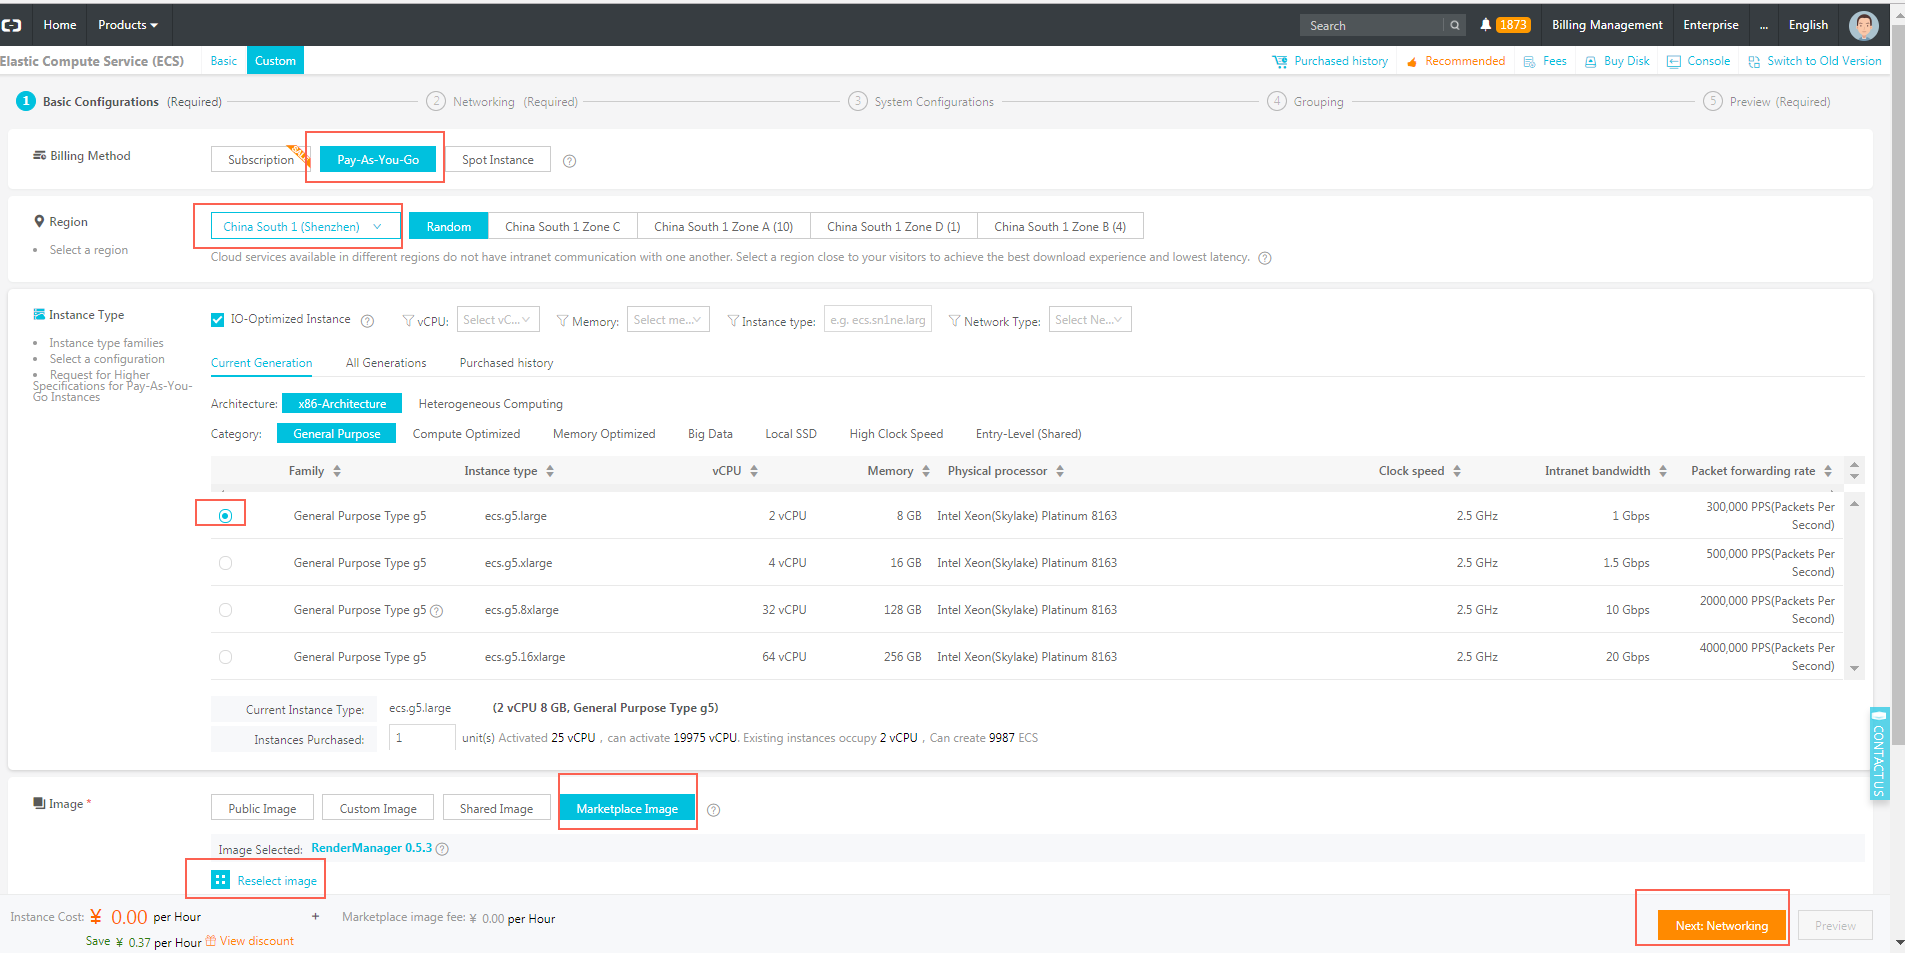
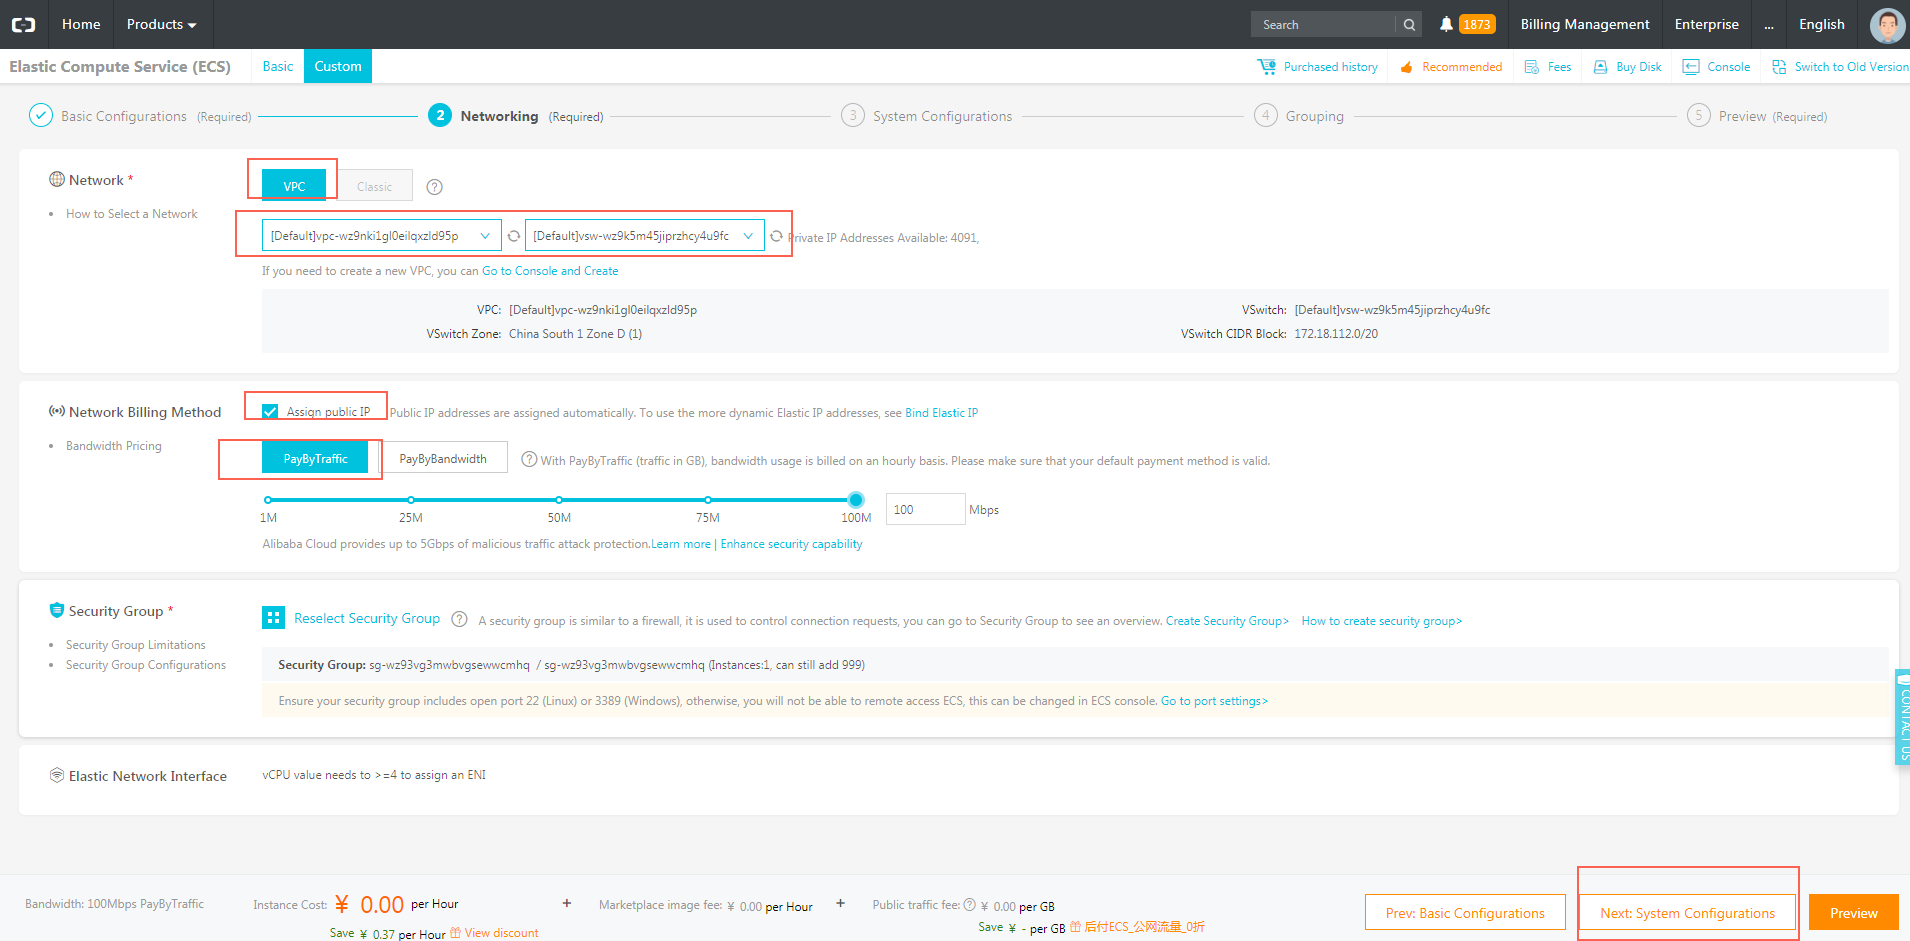
Select the Pay-As-You-Go billing method and the rendermanager image (search for ‘rendermanager’ under the application development category in the image marketplace). Then, purchase an instance with the configuration shown in the following figure (increase the bandwidth as needed). To use the Pay-As-You-Go billing method, your account must have a balance of at least 100 RMB. You are not required to select a specific region. You can select any region where ECS instances are available.
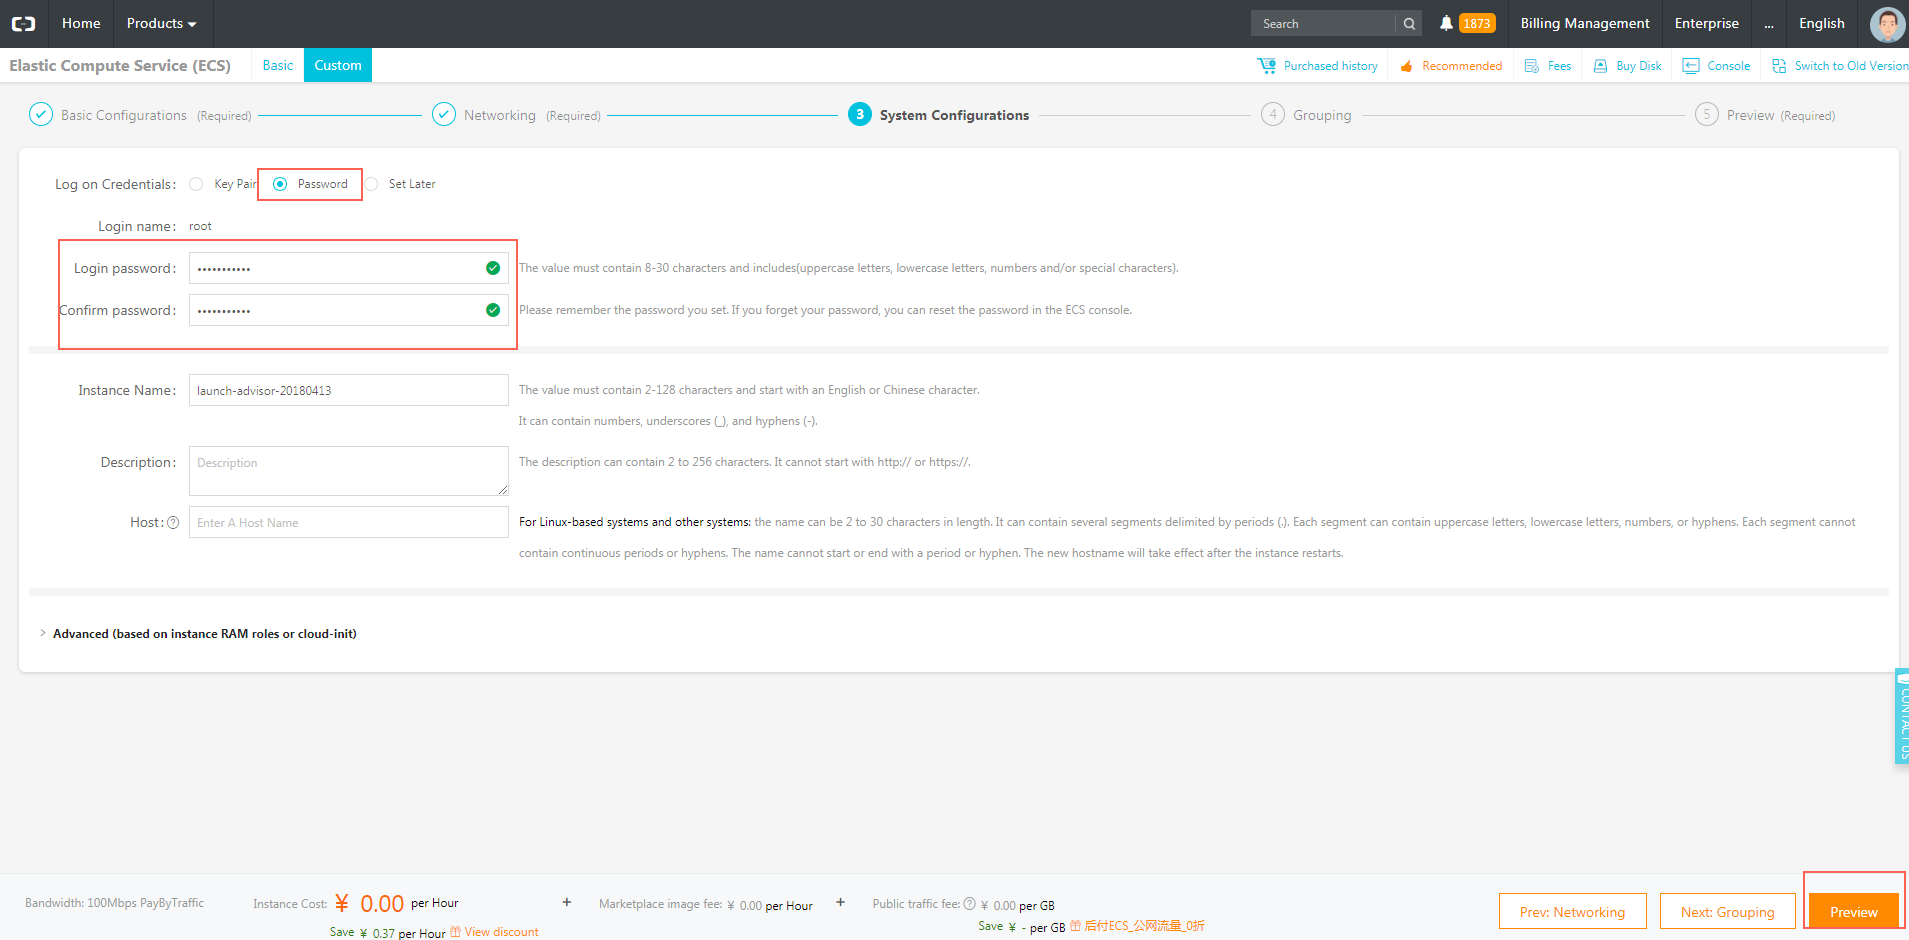
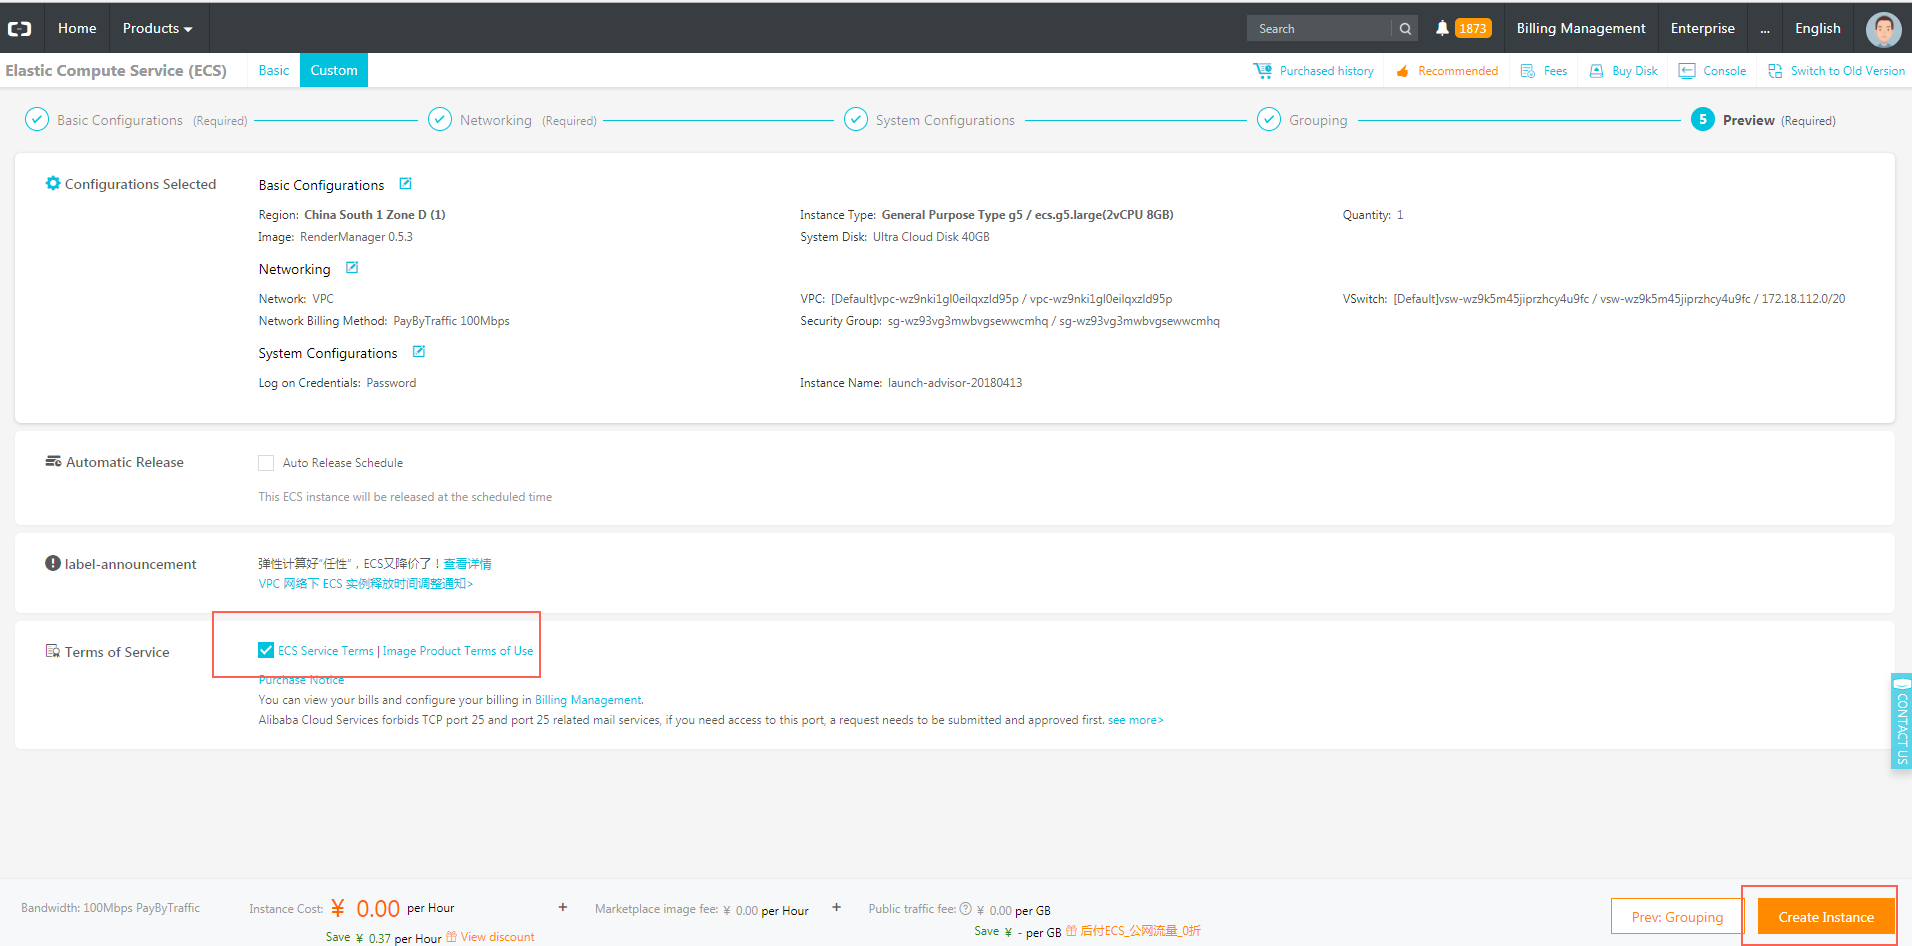
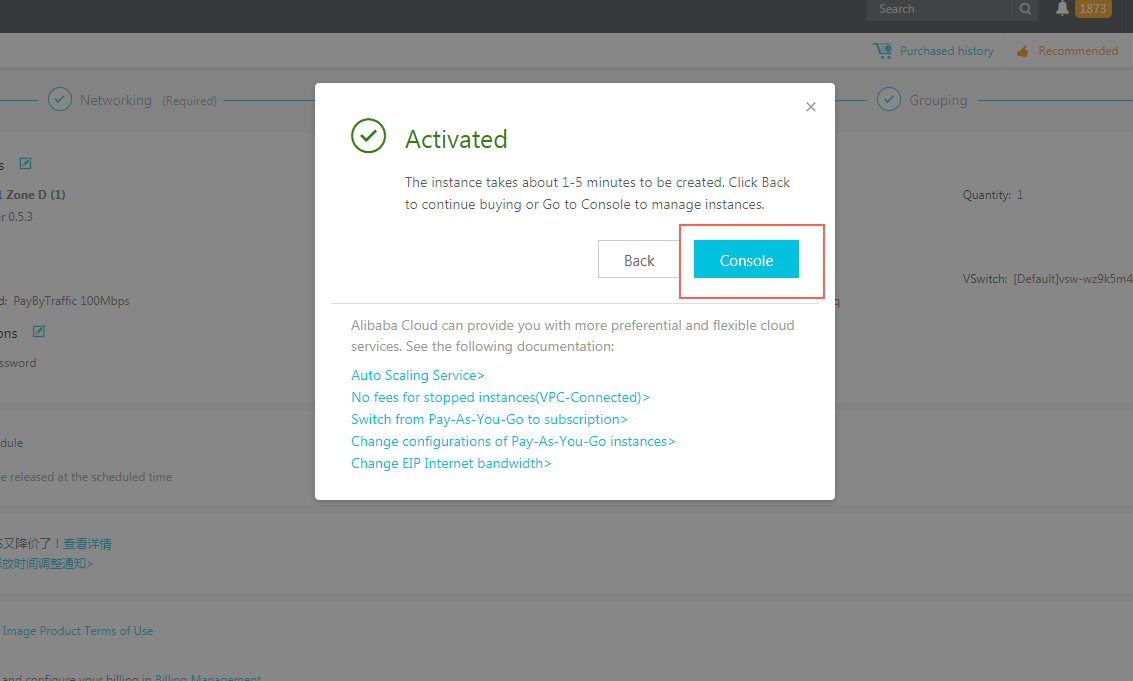
After purchasing the instance, go to the console. The new instance appears in the instance list when it is ready (creation takes some time, so refresh the list until it appears).
5. Log on to the Render Manager page
In your browser, enter the address https://ecs_instance_ip/rm/login , replacing “ecs_instance_ip” with the public IP address of the instance. Because this is an HTTPS address, which indicates that it is a trusted address in your browser. The initial account password is:
rm_admin
rm_admin@123
Note: In actual production, be sure to change the account and password.
6. Configure Render Manager
After you log on, click Configure in the upper-right corner to go to the configuration page. Enter the SECURITY_ID, SECURITY_KEY, and OSS_BUCKET values. The SECURITY_ID and SECURITY_KEY values can be found in the AccessKey information obtained during the preparation stage.
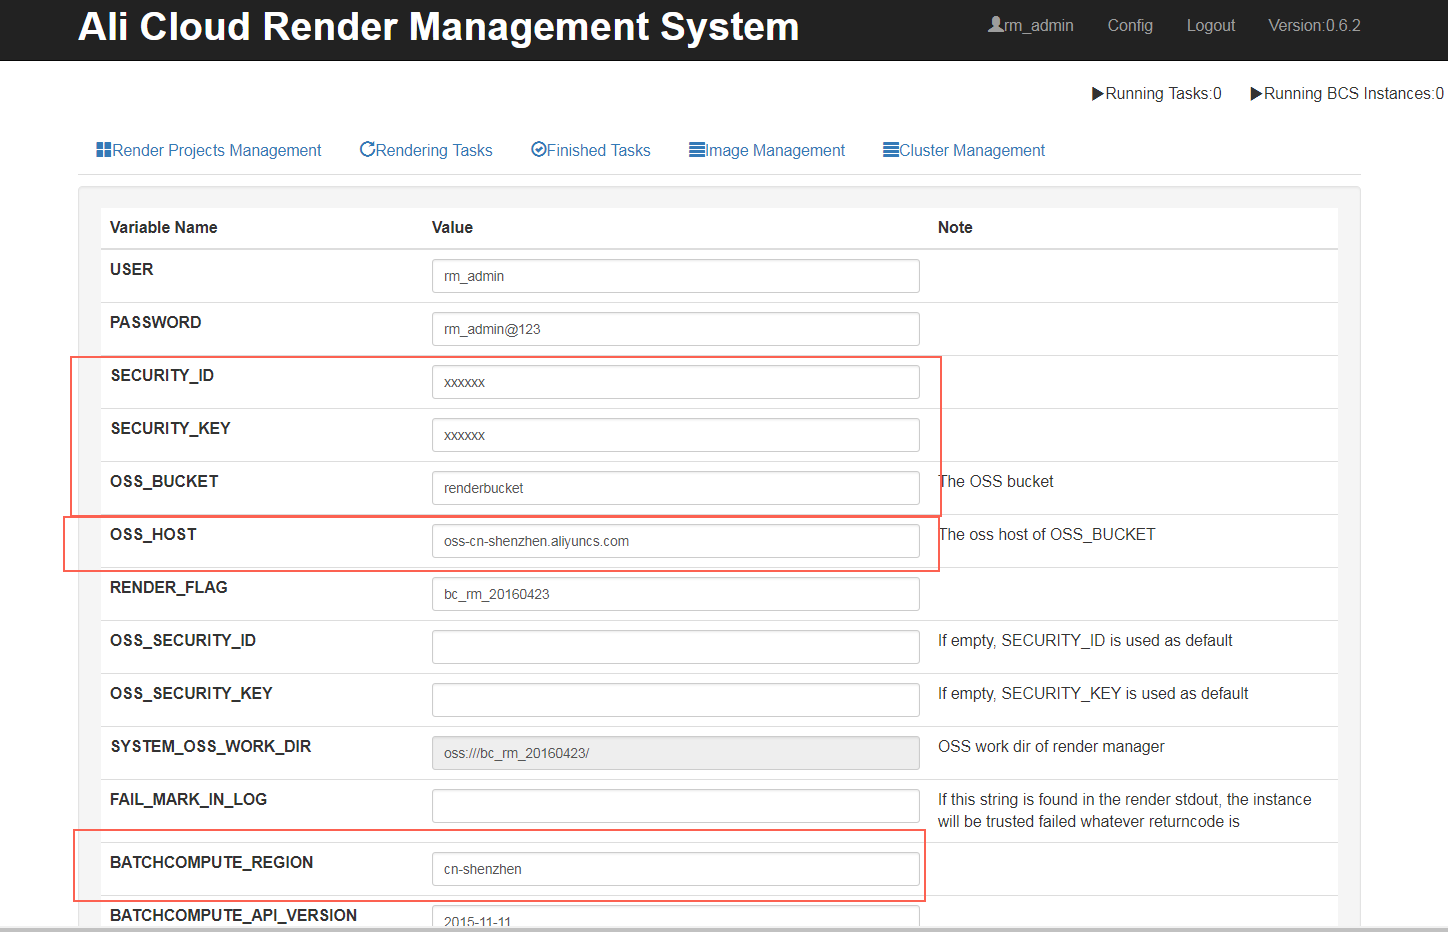
Set the OSS_HOST to oss-cn-shenzhen.aliyuncs.com.

Set the BATCHCOMPUTE_REGION to cn-shenzhen.
 Click Save.
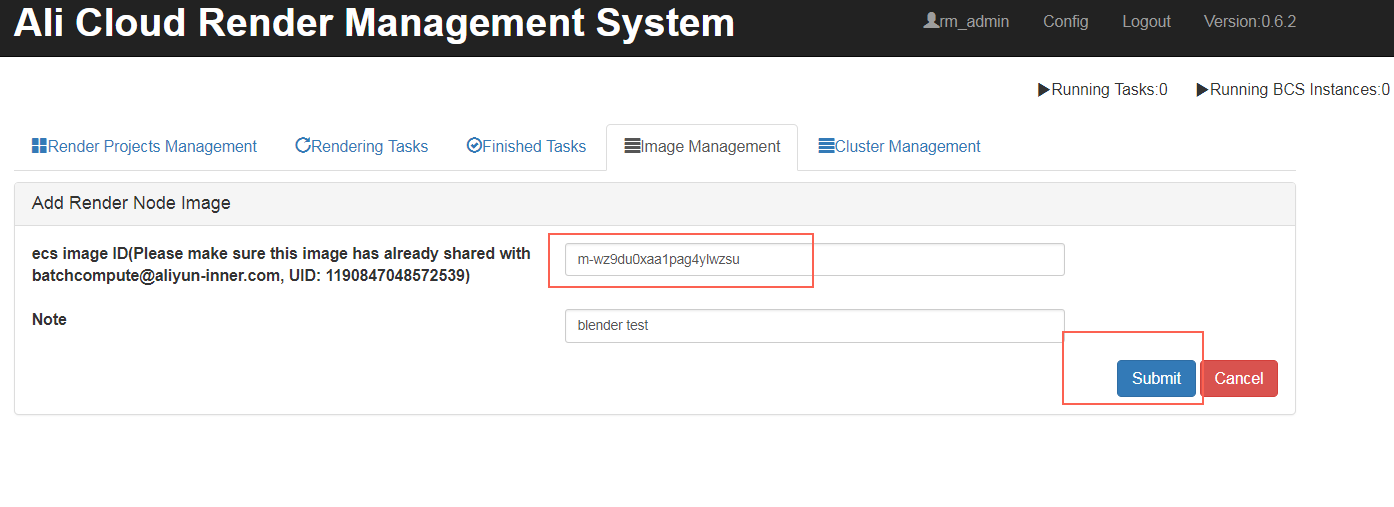
7. Add a computing node image
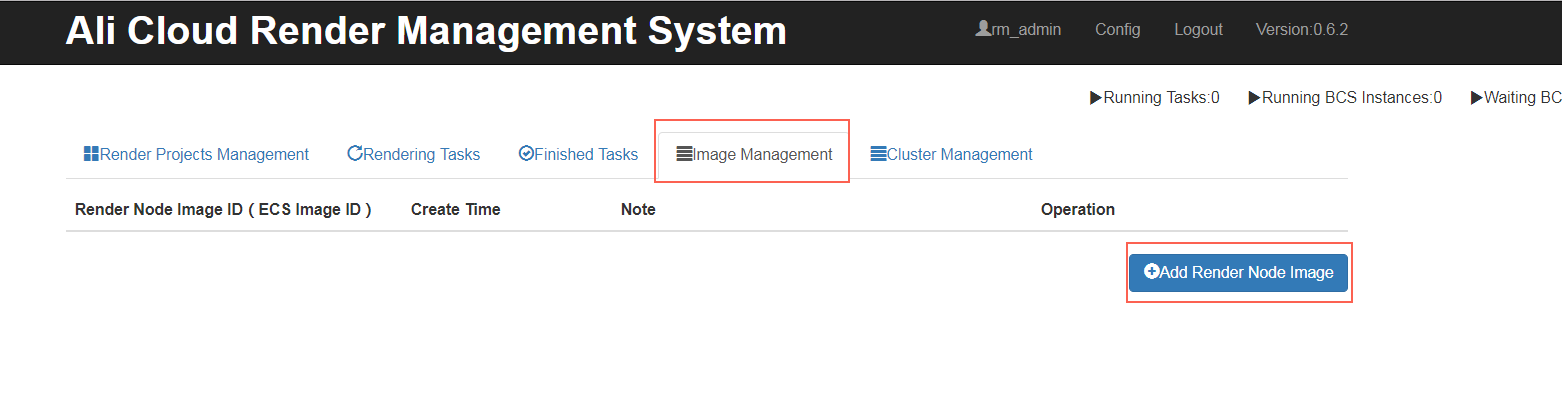
Go to Image Management > Add Computing Node Image and enter the ECS image ID: m-wz9du0xaa1pag4ylwzsu. Batch Compute provides public computing node images, but in actual production, you must create a computing node image based on your actual needs.
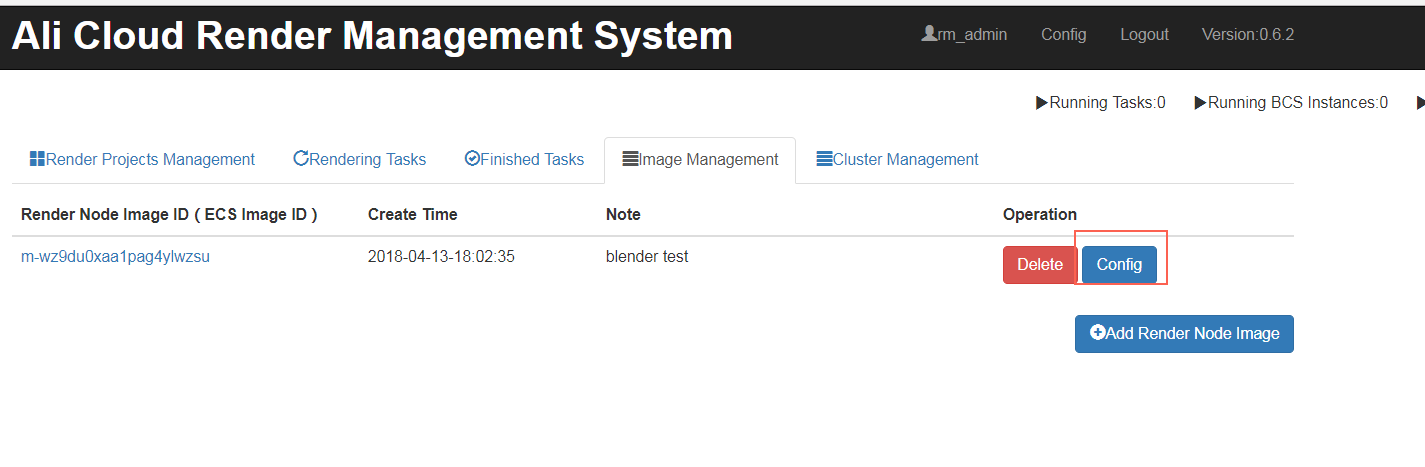
8. Configure rendering software information
Go to Image Management and select Software Configuration.
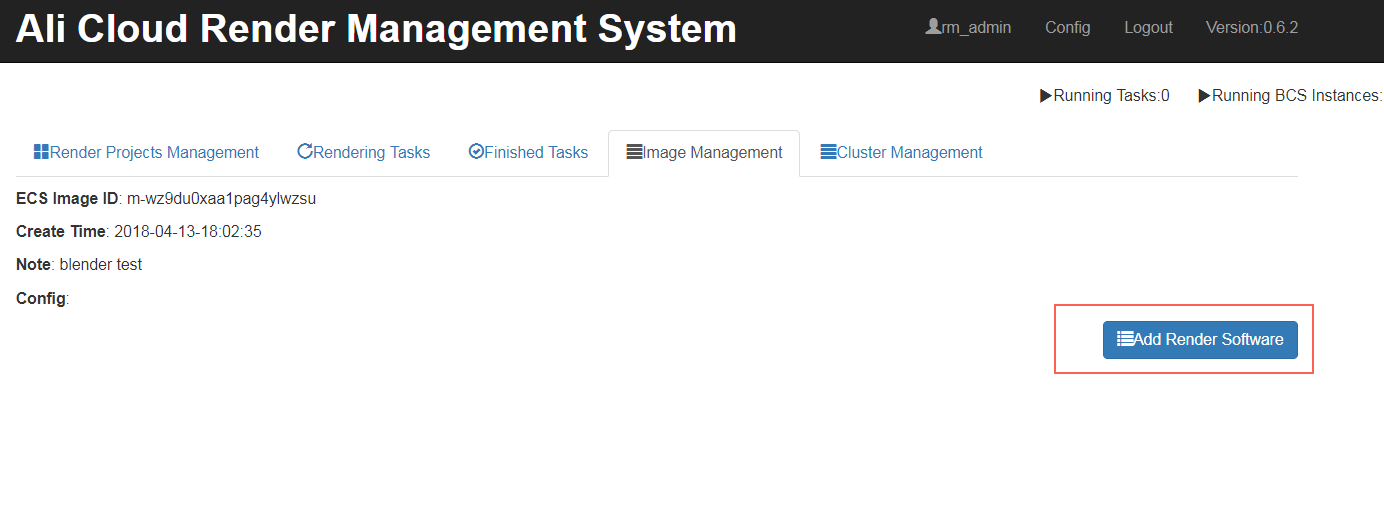
Select the Blender template and click OK. In the execution code, render_cmd is the command line used to run rendering.
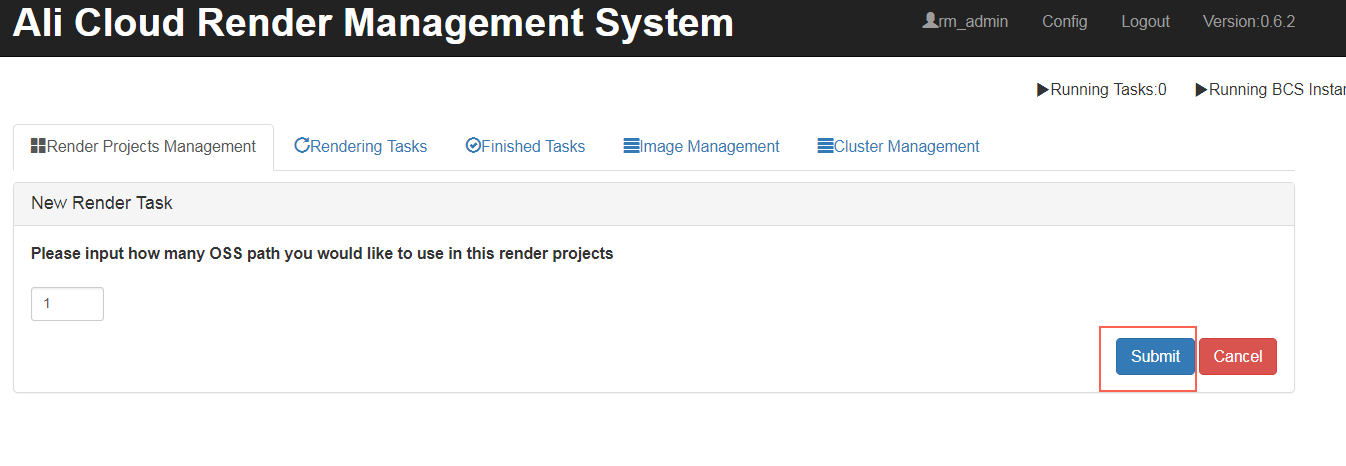
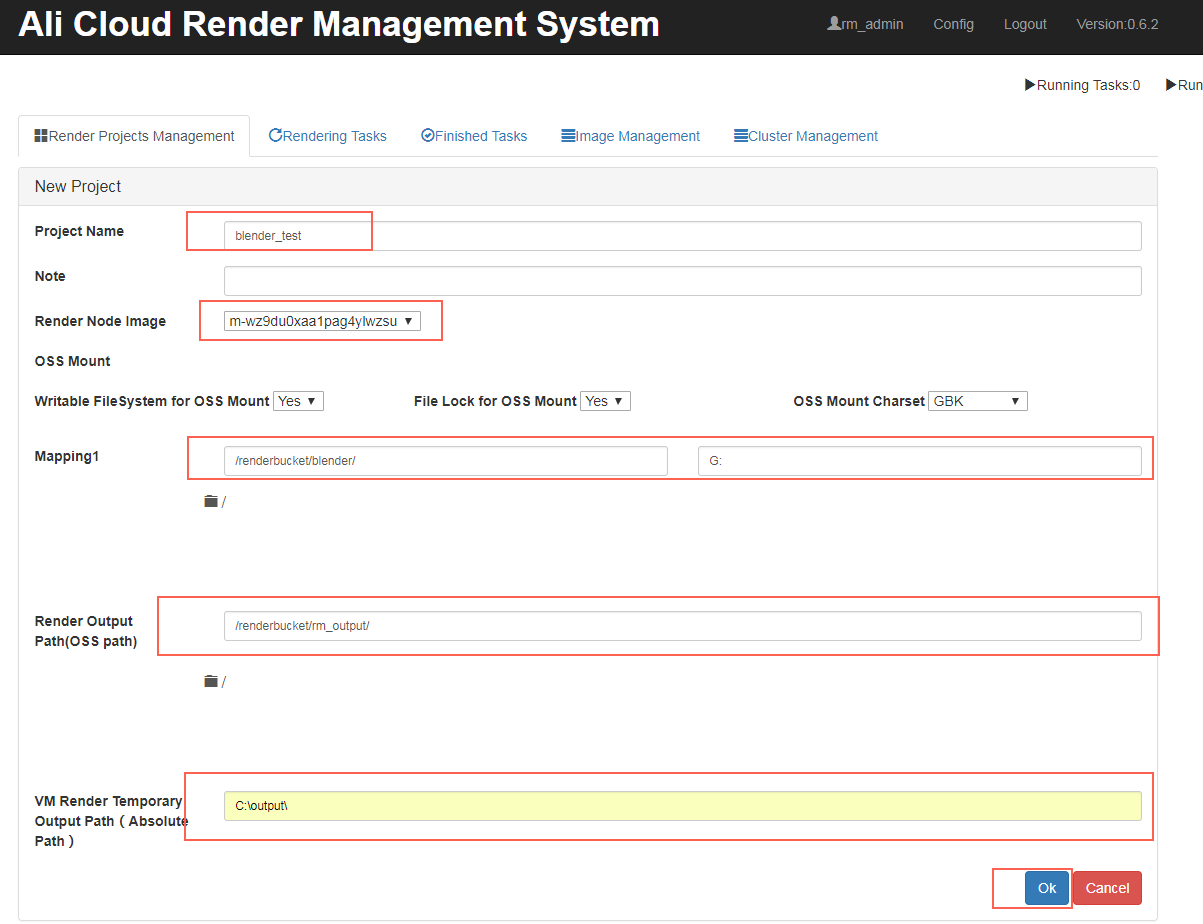
9. Create a project
Go to Project Management > Create Project.

Enter the number of OSS paths to map (in this example, you only map one OSS path) and click OK.
Enter the project name: blender_test.
Select the image created in the previous step.
In OSS mapping, select, or enter the path: renderbucket/blender/.
Set the OSS mapping destination to the drive letter G: (in this example, the image system is Windows Server 2008).
Enter ‘/renderbucket/rm_test/output/‘ as the OSS output directory.
Enter ‘C:\render_output\’ as the VM output directory. This path is used to temporarily store rendering results in rendering nodes. Then, the rendering results in this directory are transmitted to the OSS output directory.
Confirm submission.
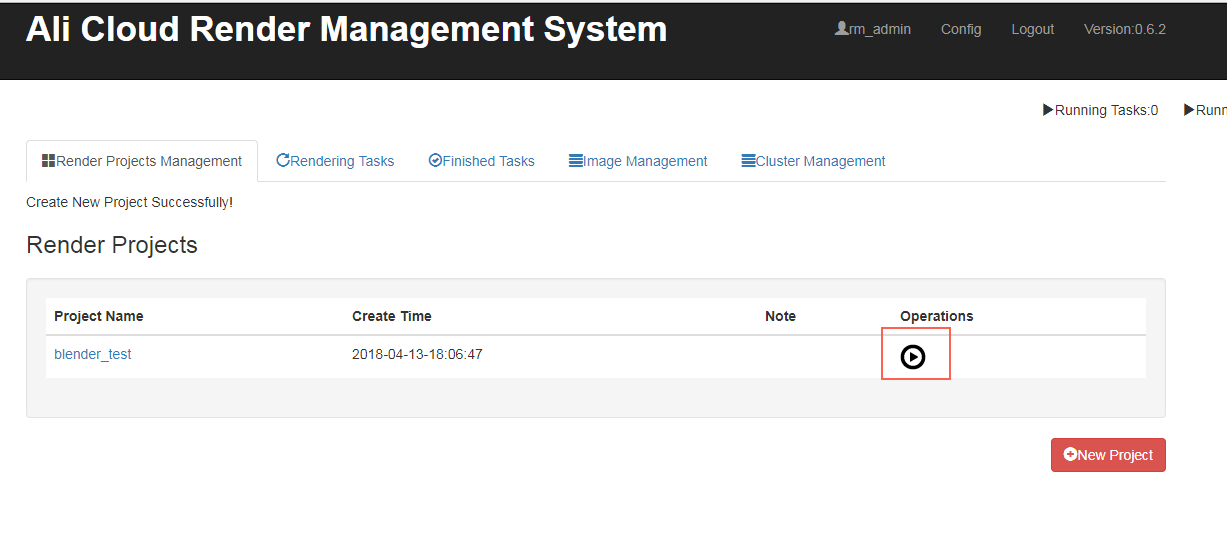
10. Submit a rendering task
Go to Project Management and select Submit for Rendering.
Select the scenario’s OSS path prefix.

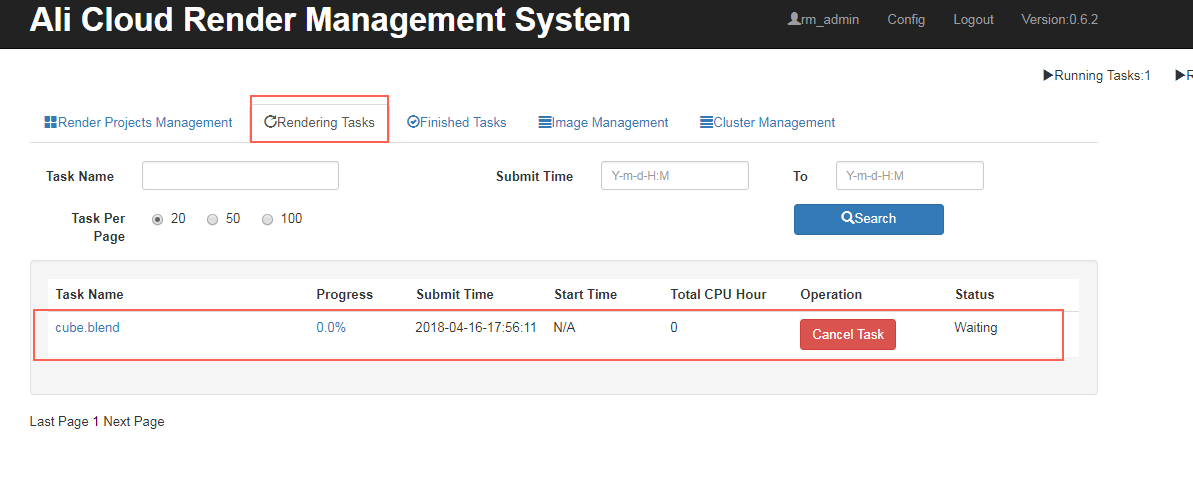
Open the project’s root directory folder to view the scenario file cube.blend. Select the monkey file to see the scenario selection interface at the lower-end of the page. Select the scenario, select the rendering software, enter the rendering start and end frames (1 and 5), and click Submit for Rendering.

Click the rendering task in progress to view the submitted job.
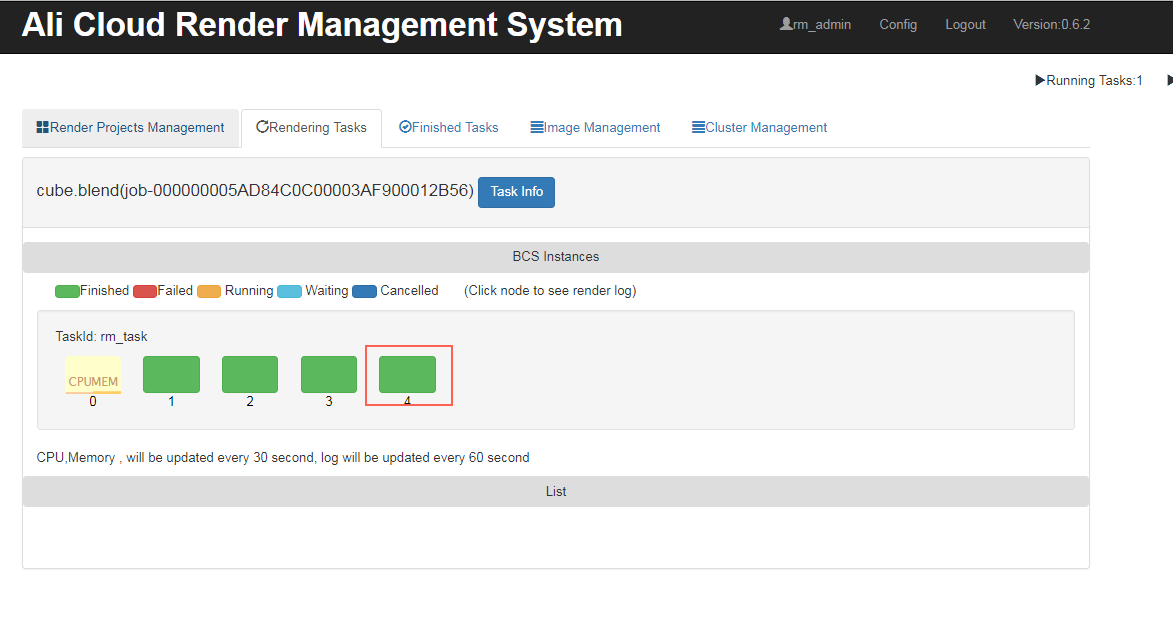
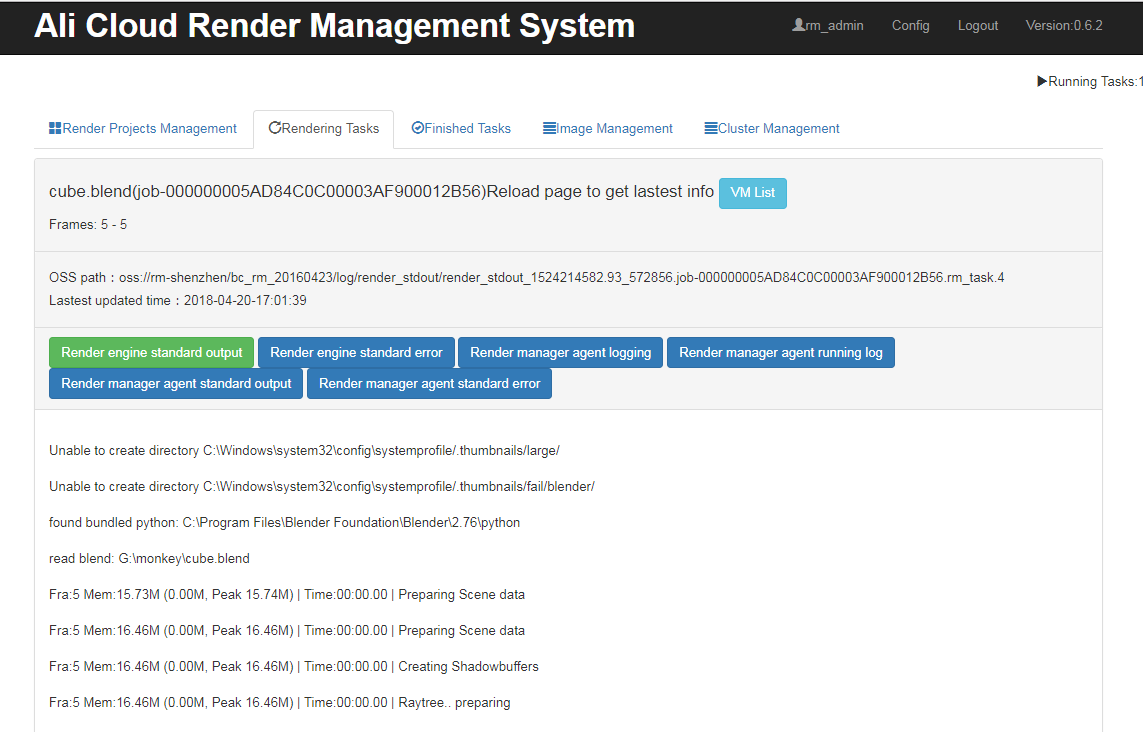
11. View rendering log
Click the task name and then click Node List.
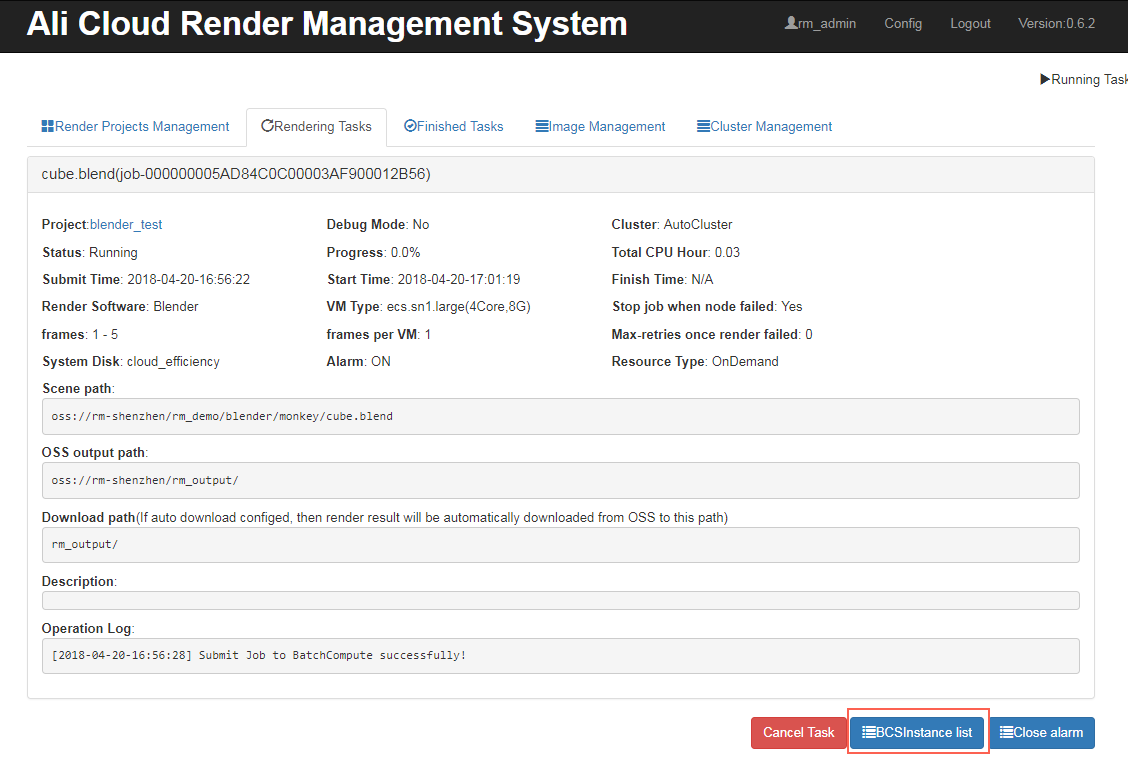
Click on a node to view it. This displays the various renderer and Render Manager logs, standard output, and error messages (you can view log information after the computing node starts running).
12. View rendering results
Wait for the job to finish, so the task status changes to “Finished” in the list of completed tasks.
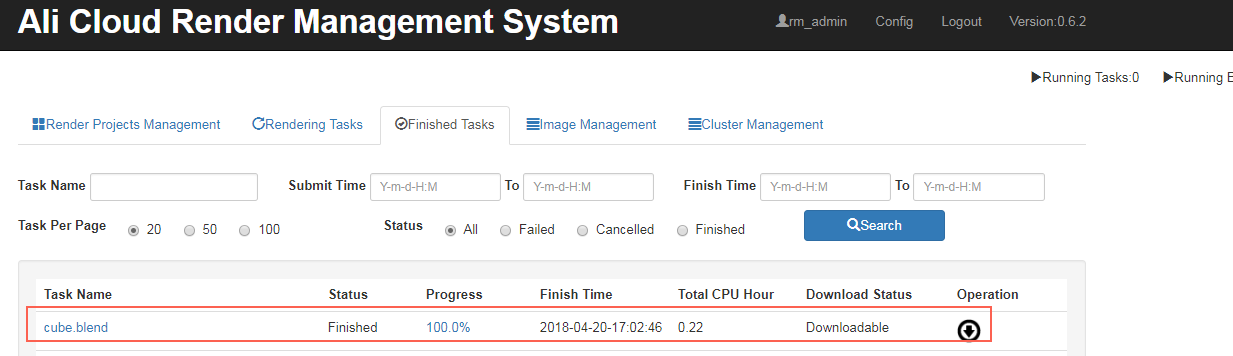
Click the task name to view the OSS output path.
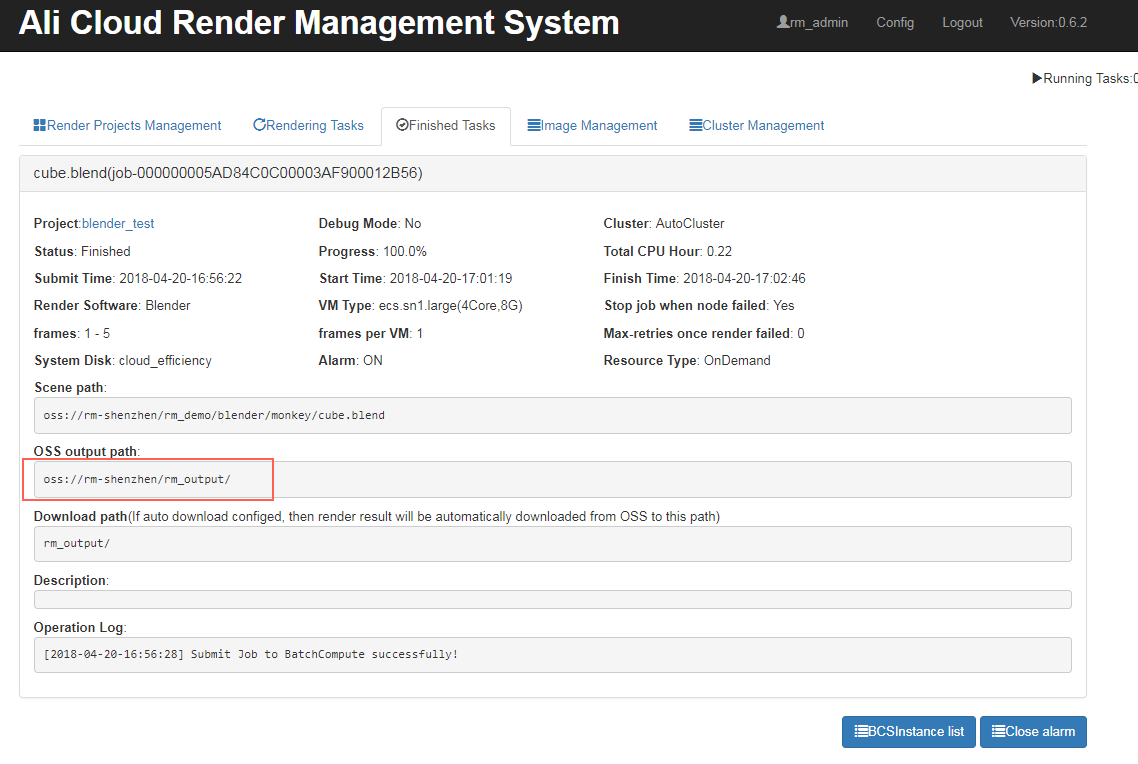
View the corresponding output path on the OSS console. After obtaining the address, click Get URL and copy the URL.
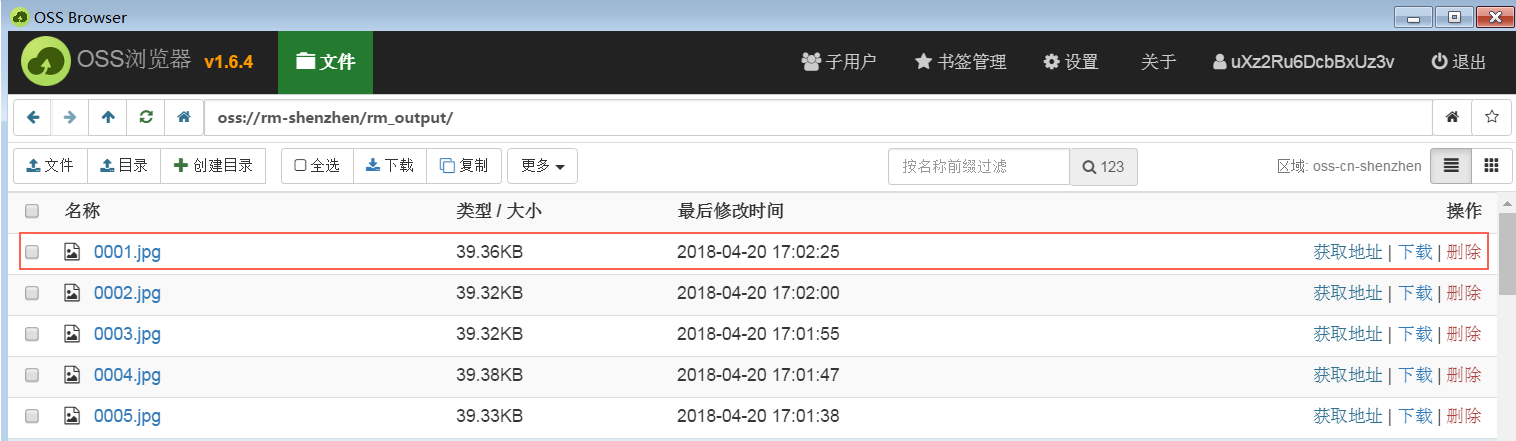
Paste the URL in your browser to directly view the rendered images.
You have successfully completed the cloud-based Blender rendering test.