Real User Monitoring (RUM) provides comprehensive monitoring for mobile applications. It supports real-time monitoring and analysis of key metrics such as application performance, crashes, and stuttering. This topic describes how to integrate an Android application.
Prerequisite
The SDK supports Android 7.0 and later.
Step 1: Integrate the SDK
Maven automatic integration (Recommended)
Add the Maven online dependency to the build.gradle configuration script in your Android Studio project to import the latest version of the SDK.
Add the plugin dependency to the build.gradle configuration script in the project root directory.
buildscript {
  repositories {
    mavenLocal()
    google()
    mavenCentral()
    gradlePluginPortal()
  }

  dependencies {
        // Import the Alibaba Cloud ARMS RUM plugin dependency.
        // Import the latest version of the plugin. For more information about the latest SDK version, see the Android SDK release notes.
    classpath "com.aliyun.rum:alibabacloud-android-rum-plugin:2.0.5"
  }
}
Enable the plugin and add the SDK dependency in the build.gradle configuration script for the project's app module.
// Enable the Alibaba Cloud ARMS RUM plugin.
apply plugin: "com.aliyun.rum"

dependencies {
  // Import the Alibaba Cloud ARMS RUM SDK.
  // Obtain the latest SDK version from the following URL:
  // https://www.alibabacloud.com/help/zh/arms/user-experience-monitoring/android-sdk-release-notes
  implementation("com.aliyun.rum:alibabacloud-android-rum-sdk:2.0.5")
}
Manual integration
Download and decompress the SDK.
After you decompress the .zip file, the following content is extracted:
The libs folder, which contains the required JAR packages and JNI libraries.
The repo folder, which contains the required plugin.
The libs/assets folder, which contains the required resource files.
Configure the project.
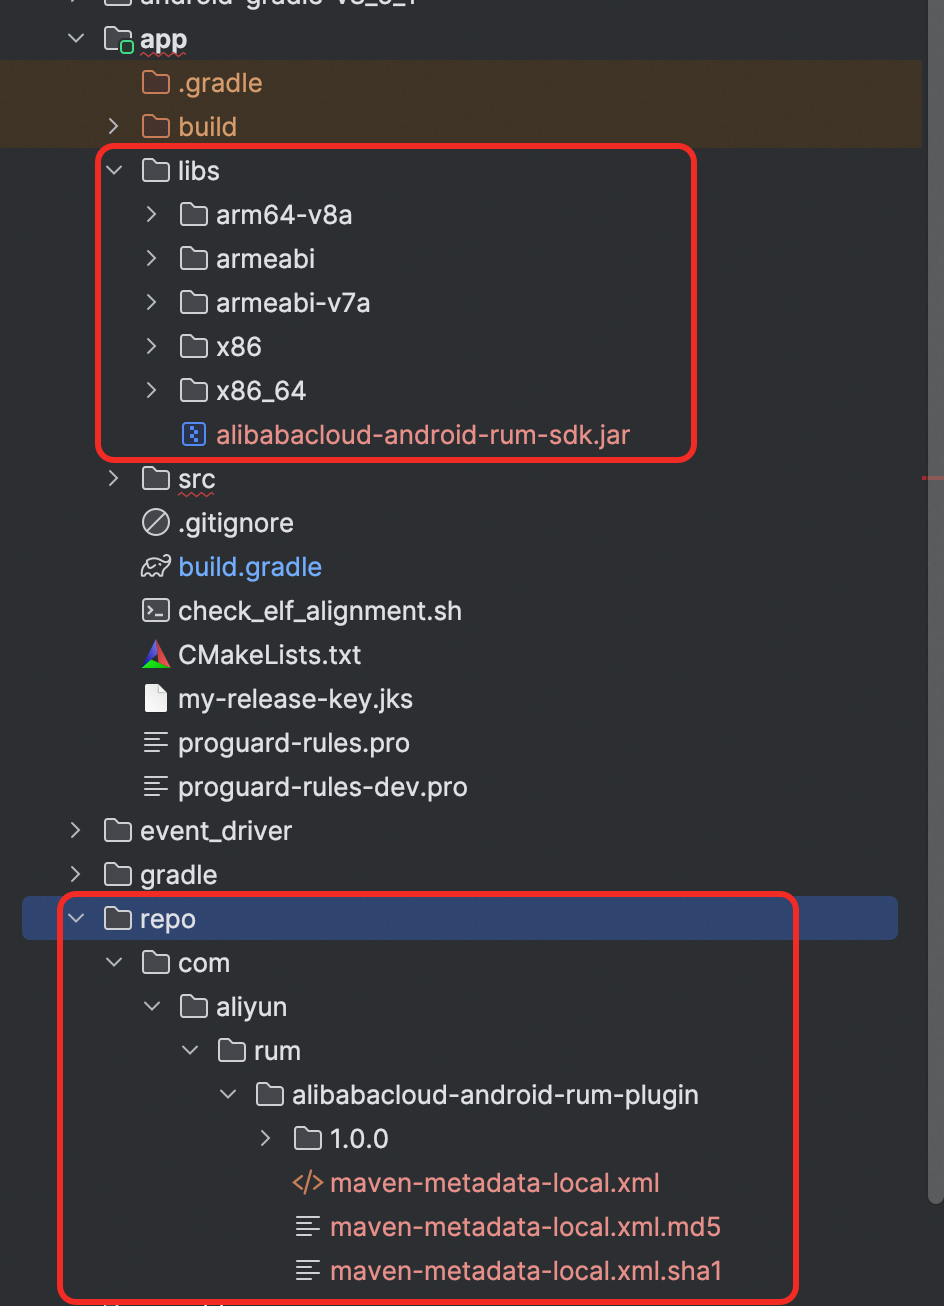
Copy the repo folder to the project root directory. Copy the libs folder to the app module directory. Copy the files from libs/assets to the App/src/assets directory.
Open the build.gradle file (for Gradle 7.0 and earlier) or the settings.gradle file (for Gradle 7.0 and later) in the project root directory. Add the following Maven configuration to the repositories block.
build.gradle file configuration
buildscript {
    repositories {
        maven {
            url uri('./repo')
        }
        //... Other configurations
    }
}

allprojects {
    repositories {
        maven {
            url uri('./repo')
        }
        //... Other configurations
    }
}

//... Other configurations
settings.gradle file configuration
pluginManagement {
    repositories {
        maven {
            url uri('./repo')
        }
        //... Other configurations
    }
}
dependencyResolutionManagement {
    repositoriesMode.set(RepositoriesMode.FAIL_ON_PROJECT_REPOS)
    repositories {
        maven {
            url uri('./repo')
        }
        //... Other configurations
    }
}
//... Other configurations
Add the classpath configuration to the build.gradle file in the project root directory.
// Add the following content regardless of the Gradle version.
buildscript {
    dependencies {
        classpath "com.aliyun.rum:alibabacloud-android-rum-plugin:2.0.3"
    }
}
//... Other configurations
Open the build.gradle file in the app module and import the AlibabaCloudRUM plugin and dependencies.
apply plugin: "com.aliyun.rum"
//... Other configurations
android {
    //... Other configurations
    sourceSets {
        main {
            jniLibs.srcDirs = ['libs']
        }
    }
    //... Other configurations
}

dependencies {
    implementation files('libs/alibabacloud-android-rum-sdk.jar')
    //... Other configurations
}
Step 2: Configure the plugin
In the build.gradle file of the app module, add the plugin configuration as needed:
AlibabacloudRumExt {
    // Exclude packages that do not need to be instrumented.
    excludePackages = [
        "com.example.internal",      // Exclude internal implementation packages.
        "com.myapp.debug",           // Exclude debugging-related packages.
        "com.thirdparty.analytics"   // Exclude third-party analytics SDKs.
    ]
}
//... Other configurations
Step 3: Configure permissions
The ARMS RUM SDK requires the host application to be granted the following permissions.
<!--  Required  -->
<uses-permission android:name="android.permission.INTERNET"/>
<uses-permission android:name="android.permission.ACCESS_NETWORK_STATE"/>
<!--  Optional  -->
<uses-permission android:name="android.permission.READ_PHONE_STATE"/>
<uses-permission android:name="android.permission.READ_BASIC_PHONE_STATE"/>
<uses-permission android:name="android.permission.WRITE_EXTERNAL_STORAGE"/>
<uses-permission android:name="android.permission.READ_EXTERNAL_STORAGE"/>
Step 4: Configure obfuscation
If your application uses ProGuard for obfuscation, add the following rules.
-keep public class com.alibabacloud.rum.** { *; }
-dontwarn com.alibabacloud.rum.**

-optimizations !code/simplification/*,!field/*,!class/merging/*,!method/propagation/*,!class/unboxing/enum,!code/allocation/variable
Step 5: Initialize the SDK
Add the following code to the first line of the onCreate function in your custom Application class.
import com.alibabacloud.rum.AlibabaCloudRum;

public class YourApplication extends Application {
  @Override
  public void onCreate() {
    super.onCreate();
    // SDK version >= 2.0.0
    AlibabaCloudRum.withServiceId("") // Obtain the ServiceId when you create the RUM application.
          .withWorkspace("") // Obtain the Workspace when you create the RUM application.
          .withEndpoint("") // Obtain the Endpoint when you create the RUM application.
          .start(getApplicationContext());

    // SDK version < 2.0.0
    AlibabaCloudRum.withAppID("<your appid>") // The AppID. Obtain it when you create the RUM application in Step 1.
        .withConfigAddress("<your config address>") // The ConfigAddress. Obtain it when you create the RUM application in Step 1.
        .start(getApplicationContext());
  }
}
Verify the integration
Start the application that has the SDK integrated and view the logs in Android Studio Logcat. Search for the AlibabaCloudRUM keyword or filter by the AlibabaCloudRUM tag. If the following log entry appears, the SDK is successfully integrated and has started collecting data.
