You can configure the live streaming latency for different streaming protocols. This helps prevent unexpected issues during a live stream. This topic describes how to configure live streaming latency.
The Latency Settings feature, formerly Streaming Latency Settings, lets you adjust the live streaming latency using the Low, Medium, and High settings.
Procedure
Log on to the ApsaraVideo Live console.
In the left-side navigation pane, click Domain Names. The Domain Management page appears.
Select the streaming domain that you want to configure and click Domain Settings.
Click Latency Settings. Modify the live streaming latency settings.
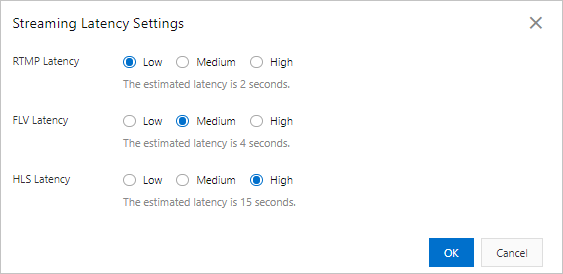
ApsaraVideo Live provides latency settings for three protocols. For each protocol, you can select Low, Medium, or High latency. The actual latency depends on two factors: the latency setting and the Group of Pictures (GOP) of the ingested stream. For details about the latency, see the following table. Configure the settings as needed.
Set the stream ingest GOP to 1 to 2 seconds to balance latency and smoothness. For example, the HLS segment length is affected by the GOP. Each Transport Stream (TS) segment must contain at least one GOP. If you set the GOP to 2 seconds, the latency is calculated as follows: High latency is 2 seconds × 6 segments, Medium latency is 2 seconds × 4 segments, and Low latency is 2 seconds × 3 segments.
For more information, see Live streaming latency.
Stream ingest GOP | Protocol | Low | Medium | High |
1s | RTMP | 3-4s | 4-6s | 6-8s |
FLV | 3-4s | 4-6s | 6-8s | |
HLS | 5-6s | 6-8s | 10-15s | |
2s | RTMP | 4-5s | 5-7s | 7-9s |
FLV | 4-5s | 5-7s | 7-9s | |
HLS | 6-8s | 10-15s | 20-25s | |
4s | RTMP | 4-8s | 6-10s | 8-12s |
FLV | 4-8s | 6-10s | 8-12s | |
HLS | 15-20s | 20-30s | 30s+ |
Click OK.