Set up ApsaraMQ for MQTT, send your first message, and verify end-to-end connectivity. This guide covers creating an ApsaraMQ for MQTT instance, binding it to a storage instance, and publishing and subscribing to messages.
This guide covers the default MQTT protocol. To access ApsaraMQ for MQTT instances over a non-MQTT protocol, such as China New Energy Vehicle National Standards, purchase ApsaraMQ for MQTT Platinum Edition instances. Documentation and technical support for Platinum Edition are provided through an exclusive channel.
Prerequisites
Before you begin, make sure you have:
An Alibaba Cloud account with an AccessKey pair. For details, see Obtain an AccessKey pair
ApsaraMQ for RocketMQ activated. If not yet activated, activate ApsaraMQ for RocketMQ
How it works
ApsaraMQ for MQTT is a stateless gateway that maintains client connections and forwards messages in IoT and mobile Internet scenarios. It does not persist message data. Every ApsaraMQ for MQTT instance must be bound to an ApsaraMQ for RocketMQ instance that handles message storage. Only ApsaraMQ for RocketMQ instances are supported as storage instances.
The overall workflow:
Create an ApsaraMQ for MQTT instance (gateway)
Create and bind an ApsaraMQ for RocketMQ instance (storage)
Create a topic and group ID
Obtain the endpoint
Publish and subscribe to messages
Verify your setup

Create all resources before publishing or subscribing to messages. The ApsaraMQ for MQTT broker rejects connections from clients that reference nonexistent resources.
Step 1: Create an ApsaraMQ for MQTT instance
An ApsaraMQ for MQTT instance is a gateway that maintains client connections and forwards messages.
Log on to the ApsaraMQ for MQTT console.
In the top navigation bar, select a region, such as China (Beijing).
In the left-side navigation pane, click Instances.
On the Instances page, click Create Instance.
Select an instance type, configure specifications, and complete the purchase.
Estimate your transactions per second (TPS), connection count, and subscription count based on your business scenario. For subscription instances, an undersized specification may trigger throttling.
After purchase, the instance appears in the instance list on the Instances page.
A Basic Edition instance takes effect immediately. A Platinum Edition instance requires deployment time. You are notified when it becomes available.
A limited number of ApsaraMQ for MQTT instances can be created in each region. For the specific limit, see the prompts in the console.
Step 2: Create and bind a storage instance
After creating an ApsaraMQ for MQTT instance, create an ApsaraMQ for RocketMQ instance for storage and bind them together.
Binding rules
| Rule | Description |
|---|---|
| One-time binding | An ApsaraMQ for MQTT instance can be bound only once. The bound storage instance cannot be changed. |
| One-to-one only | Each storage instance can be bound to only one ApsaraMQ for MQTT instance. |
| Same namespace type | Both instances must have the same namespace type. An exclusive-namespace instance cannot bind to a non-exclusive-namespace instance. |
| Storage dependency | Deleting a bound storage instance may make the ApsaraMQ for MQTT instance unavailable. |
Procedure
In the left-side navigation pane, click Overview. Select the ApsaraMQ for MQTT instance and click Configure Settings.
In the Message Persistence Settings dialog box, set parameters:
If you already have an ApsaraMQ for RocketMQ instance: Select Select Existing Instance, click your instance, and then click Confirm.
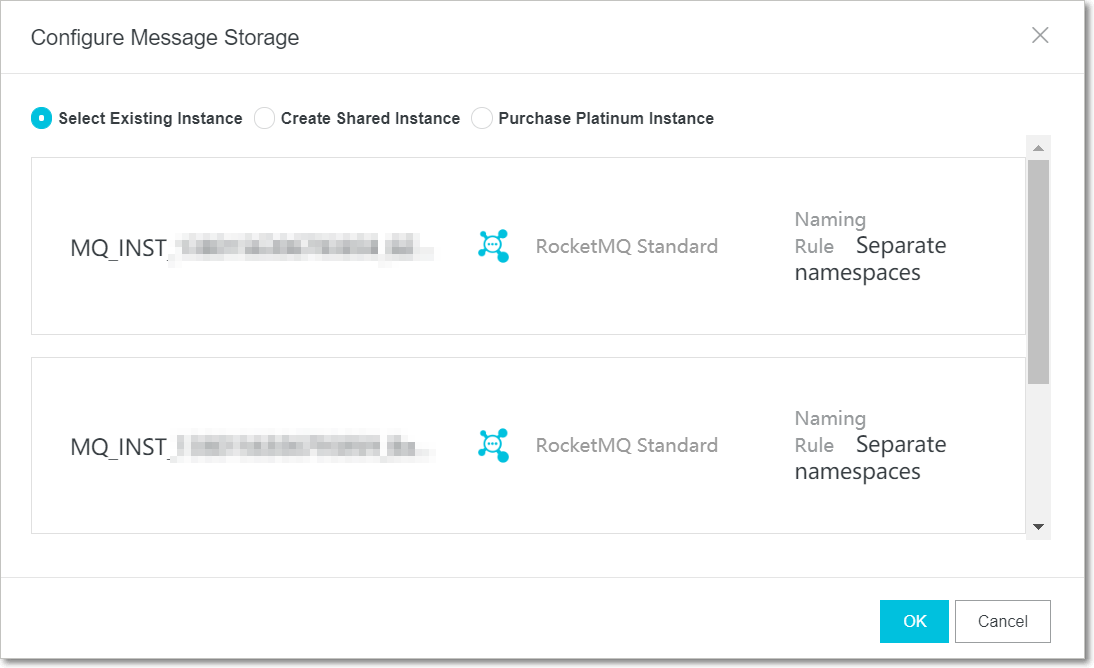
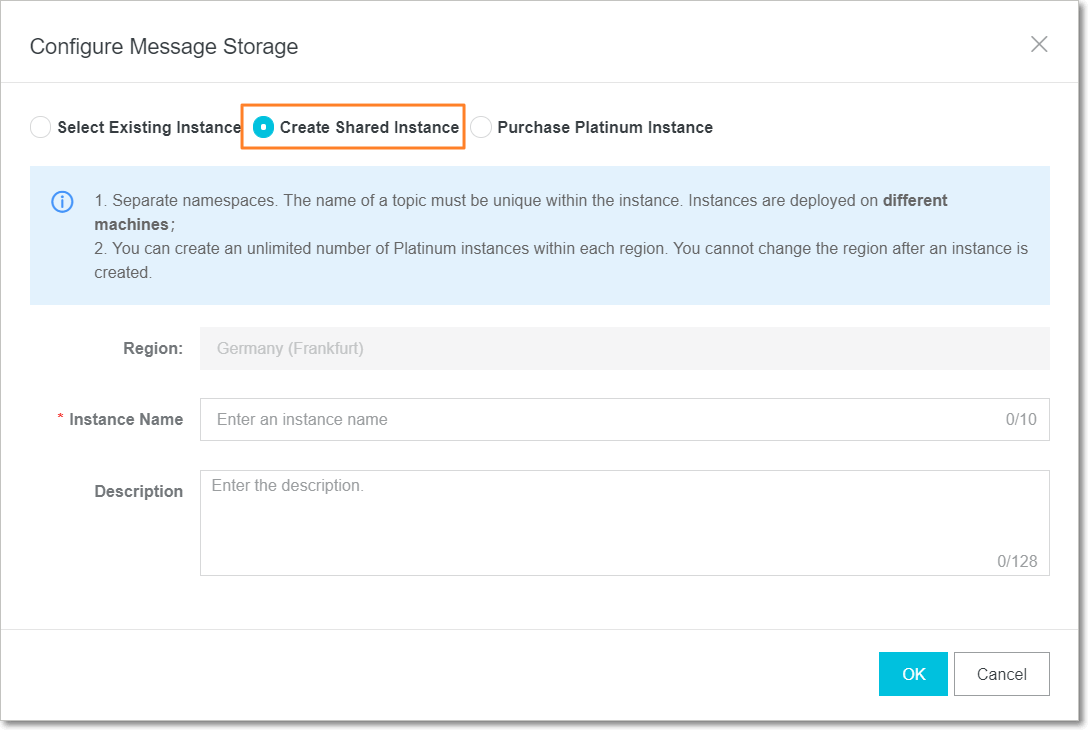
If you do not have an ApsaraMQ for RocketMQ instance, choose one of the following:
Create Shared Instance: Creates an ApsaraMQ for RocketMQ Standard Edition instance. Enter a name and description, then click OK.
Purchase Platinum Instance: Creates an ApsaraMQ for RocketMQ Platinum Edition instance. Select Purchase Platinum Instance and click Buy Now. Complete the purchase, then return and select Select Existing Instance to bind it.

Step 3: Create a topic and group ID
Create a topic
A parent topic is a first-level topic for publishing and subscribing to messages. Subtopics at different levels can be added directly in code without creating them in the console.
Due to the one-to-one binding between the ApsaraMQ for MQTT instance and its ApsaraMQ for RocketMQ storage instance, topics are created on the storage instance and mapped to the ApsaraMQ for MQTT console. Topic operations can also be performed in the ApsaraMQ for RocketMQ console.
If you already created a topic through ApsaraMQ for RocketMQ, use it directly. Otherwise:
In the left-side navigation pane, click Message Storage.
On the Topics page, select the ApsaraMQ for MQTT instance and click Create Topic.
In the Create Topic dialog box, enter a topic name, select the message type, enter remarks, and click OK.
To publish ordered messages from an ApsaraMQ for MQTT client, select the ordered message type. ApsaraMQ for MQTT clients do not support strongly ordered messages in consumption scenarios.
Create a group ID
A group ID identifies a set of devices with the same features. A group ID and a device ID together form the client ID. For details, see Terms.
In the left-side navigation pane, click Groups.
On the Groups page, select the ApsaraMQ for MQTT instance and click Create Group ID.

In the Create Group ID dialog box, enter a group ID and click OK.
After creation, the group ID appears on the Groups page.
Delete unused group IDs promptly.
A group ID can only be used by the account that created it. Group IDs created by an Alibaba Cloud account cannot be used by Resource Access Management (RAM) users under that account. RAM users must create their own group IDs.
Step 4: Obtain the endpoint
To publish and subscribe to messages with an SDK, specify the endpoint of the ApsaraMQ for MQTT instance. The endpoint consists of a domain name and a port.
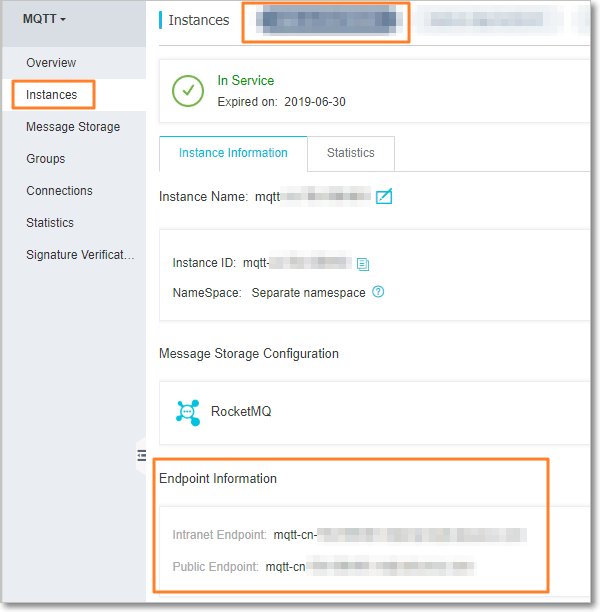
In the top navigation bar, select the region where your instance is located. In the left-side navigation pane, click Instances.
On the Instances page, select the ApsaraMQ for MQTT instance and click the Instance Information tab.
In the Endpoint Information section, find the endpoint domain name.
Endpoint types
| Endpoint type | Description | Typical use case |
|---|---|---|
| Public Endpoint | Access ApsaraMQ for MQTT over the Internet | IoT devices, mobile applications |
| VPC Endpoint | Access ApsaraMQ for MQTT within a virtual private cloud (VPC) | Cloud applications |
Always use the domain name, not the IP address. IP addresses change dynamically. ApsaraMQ for MQTT is not liable for faults caused by:
Using an IP address that becomes invalid after a domain name resolution update.
Firewall policies that block new IP addresses after a domain name resolution update.
Supported ports
| Protocol | Port | Use case |
|---|---|---|
| MQTT on TCP | 1883 | Standard IoT device connections |
| SSL | 8883 | Encrypted IoT device connections |
| WebSocket | 80 | Browser-based clients |
| WebSocket SSL/TLS | 443 | Encrypted browser-based clients |
| Flash | 843 | Legacy Flash applications |
Replace the port number in the endpoint as needed.
ApsaraMQ for MQTT provides one-way SSL encryption. No certificate upload is required on the client. The server-side certificate is automatically issued during the request handshake and is bound to the endpoint domain name. Custom certificate encryption is not supported.
Step 5: Publish and subscribe to messages
Use an SDK
Download the client SDK. For download links in different languages, see Download the SDK. ApsaraMQ for MQTT supports the standard MQTT protocol. Open source third-party MQTT client SDKs work well. If your language is not listed, search for any MQTT-compatible SDK.
Download the demo project and review the parameter descriptions. Run the demo to publish and subscribe to messages. For download links, see Demo projects. The demo library covers some mainstream languages and is updated over time. If your language is not covered, download the Java demo and modify it. The demo shows basic functions only. Modify all parameters for your production environment.
Quick test from the console
To verify topic availability without writing code, publish a test message from the console:
In the left-side navigation pane, click Message Storage.
In the Topics section on the Message Storage page, find the topic and click Send in the Actions column.
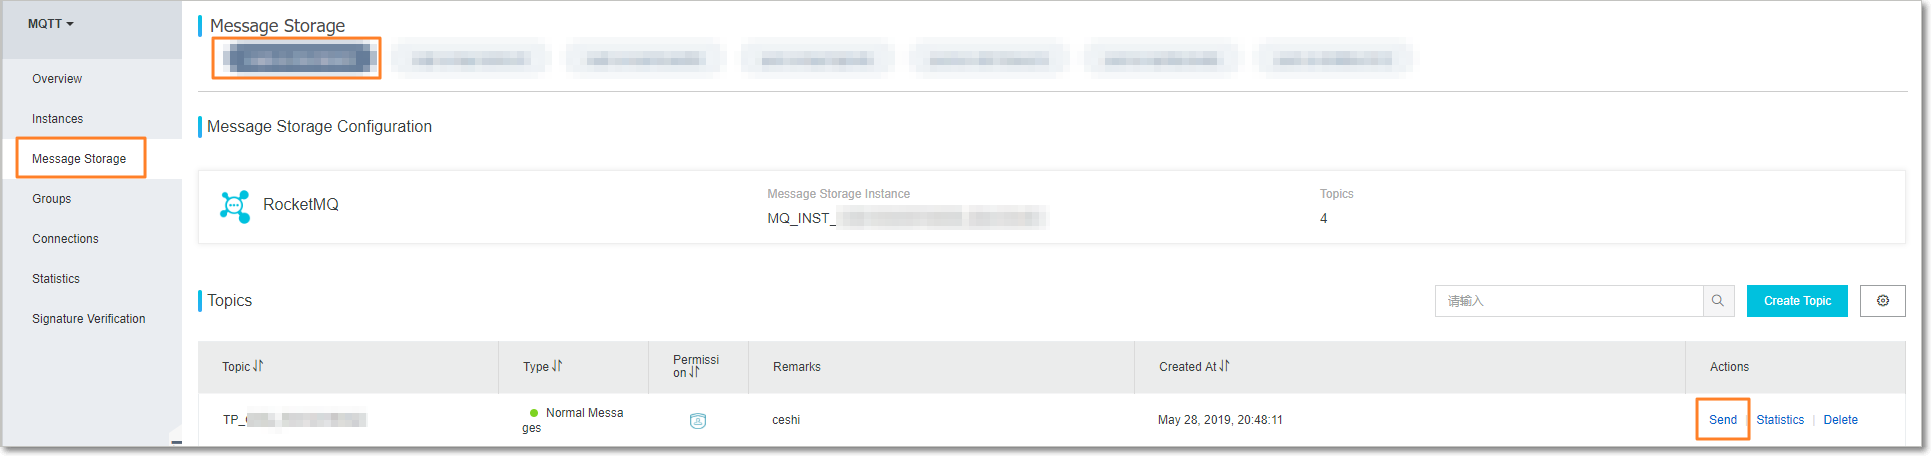
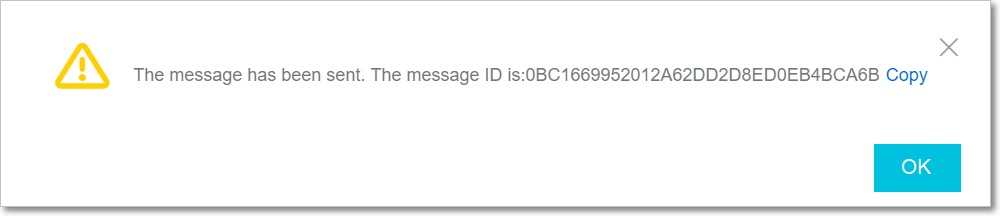
In the Send Message dialog box, set message attributes, enter the content, and click OK. The console returns a notification with the message ID.
Usage notes
Only topics and group IDs on the same instance in the same region can communicate. For example, if a topic is created on Instance A in the China (Beijing) region, only clients with group IDs created on Instance A in China (Beijing) can access that topic.
Next steps
SDK reference: Integrate ApsaraMQ for MQTT with language-specific SDKs
Terms: Subtopics, QoS levels, clean sessions, and other MQTT concepts
Demo projects: Working examples in different programming languages