Export tasks
After you create a batch or single table export task in OceanBase Developer Center (ODC), you can view the task in the task list on the Export tab of the Task Center panel.
Task list
The task list displays the tasks in the last 48 hours.
ODC allows you to run up to three export tasks in parallel, while subsequent tasks wait in the queue.
On the management page of the target database connection, click Task Center in the top navigation bar to open the Task Center panel. Click Export to display the task list.

The following table describes the columns in the task list. You can filter and sort tasks by some of the columns.
Column | Description |
Task ID | The ID of the export task. |
Task Type | The task type specified when the task was created. The following task types are supported: import, export, data mocking, and database change. |
Connection | The name of the database connection to which the task belongs. You can click the filter icon |
Database | The database to be changed. You can click the search icon |
Creator | The user who created the export task. You can click the search icon |
Creation Time | The date and time when the task was generated. |
Task Status | The current status of the task. ODC provides different management actions for tasks in different states. |
Actions | The actions you can take. Valid values: View, Approve/Reject, Abort, and Download.
|
 to filter the tasks by connection.
  to search for the database to which the task belongs.
 Create an export task
Log on to ODC and go to the management page of the target connection. In the top navigation bar, click Task Center. On the Task Center panel that appears, click + on the right side of Export, and a new export task panel will pop up.

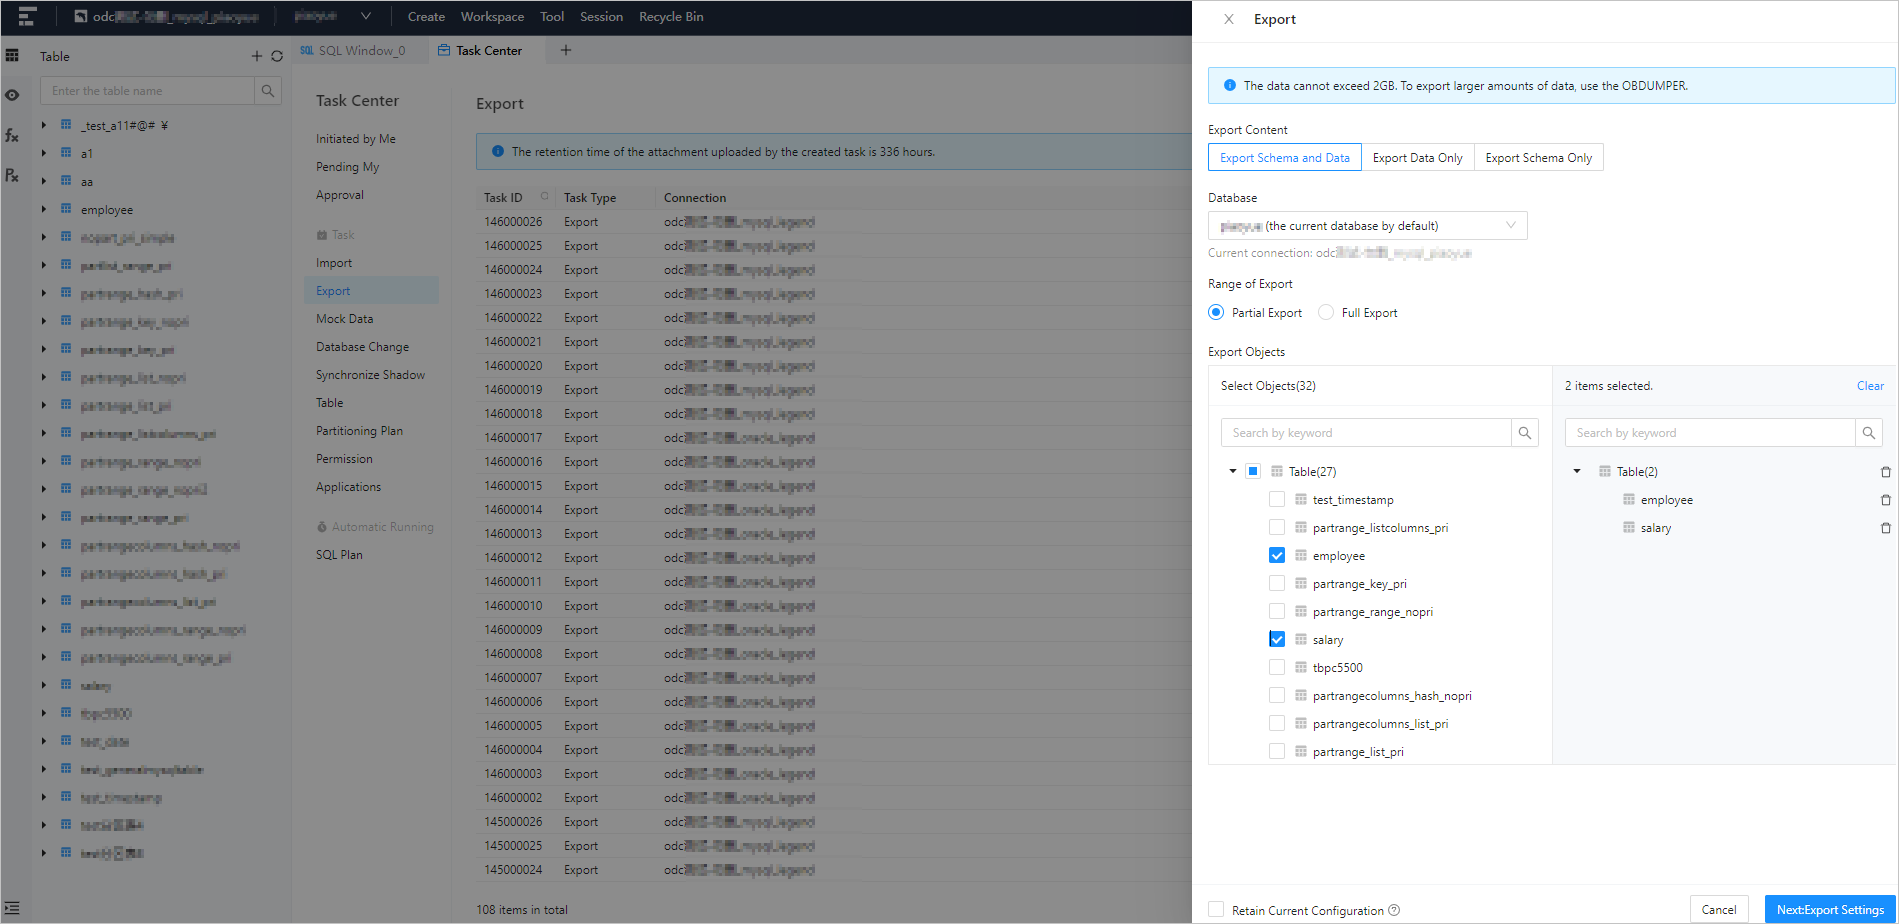
Specify the export content

ODC supports three export modes: Export Schema and Data, Export Data Only, and Export Schema Only. Export Schema Only exports the definition statements of the target object. You can select the export content from the Export Content drop-down list. For more information about formats, see Export and import formats.
Select a database
Select the database where the object to export resides. The name of the database connection to which the task belongs is also displayed.
Specify the export range
You can select Partial Export or Full Export.
If you select Partial Export, you can select the objects you want to export in the Select Objects pane in the Export Objects section. You can use the search box to search for desired objects.
If you select Full Export, all objects in the database are exported.
Go to the Export Settings panel
Click Next: Export Settings to specify the file export settings and the sys tenant account.
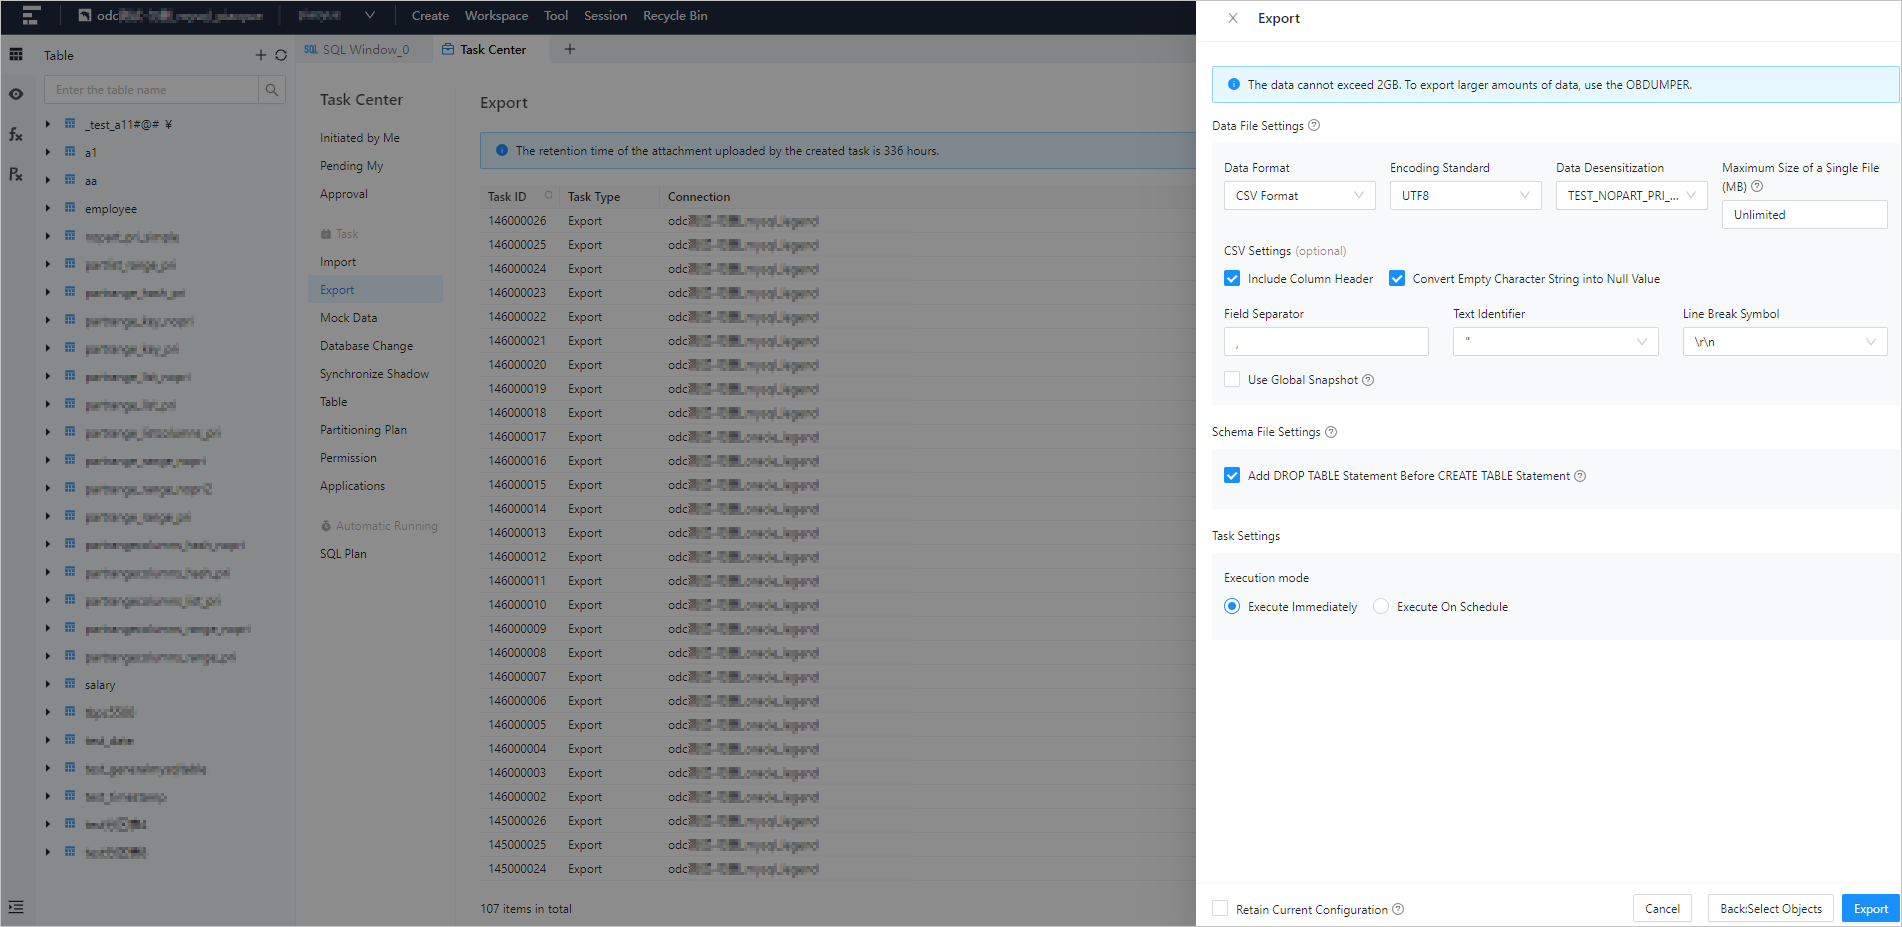
Go to the Data File Settings panel
NoteIf you select Export Schema Only for Export Content, you do not need to configure the export data settings.
Specify Data Format.
ODC supports exporting data to files in the CSV format and SQL format. If you specify Export Schema Only for Export Content, you can only export data to files in the SQL format.
Specify File Encoding.
ODC supports the following encoding standards: ASCII, ISO-8859-1, GB2312, GBK, GB18030, Unicode (UTF-8), Unicode (UTF-16), Unicode (UTF-32), and BIG5. You can select the encoding standard from the File Encoding drop-down list.
Specify Data Desensitization.
By default, desensitization is disabled. You can select and manage the names of the desensitization strategies. In the Manage Desensitization Strategies section, you can add, edit, or delete strategies. For more information, see .
Specify Maximum Size of a Single File.
If you select Export Schema Only for Export Content, you do not need to set the maximum size of a single file.
You can choose the upper limit of the exported single file. If the data file of a single table exceeds the upper limit, the file will be automatically split up. If you specify not to limit the file size, the file will not be split up.
Specify Data File Settings.
Use Global Snapshot: If you select this option, ODC exports the data in the latest global snapshot of the specified table to ensure global data consistency.
Batch Commit Quantity (SQL Format): You can click Advanced next to Export Data Settings to specify this field. If you select SQL Format for Data Format, you can specify the number of rows to be committed during the export. When this number is reached, a
COMMITcommand is executed.Specify information for the CSV format.
Specify schema file settings
If you select Export Schema Only for Export Content, you can choose whether to select Merge Exported Results into an SQL File. If you select this option, the DDL will be merged and exported as a SQL file.
Choose whether to select Add DROP TABLE Statement before CREATE TABLE Statement. If you select this option, a
DROPstatement is added before the correspondingCREATEstatement of an object when the schema files of the object are exported.
Select an execution method
Select Execute immediately or Timed execution.
Retain Current Configuration
Check Retain Current Configuration to keep the current part of the data file and structure file configuration.
Generate an export task
After you specify all preceding information, you can click Export in the lower-right corner of the panel to create an export task and export the backup file directly to a local directory.
View an export task
Task details
Click View in the Actions column of the row where the target task is located. The Task Details panel appears. Click the Task Information tab in the panel to view the basic task information, export file information, and export object information.
Item | Description |
Basic information | Displays the basic information of the task, such as Task ID, Connection Name, Mode Name, Task Type, Creation Time, Retry Limit, and Retry Time. |
Export file information | Displays the information that you specified when you created the export task, such as Export Content, Data Format, Encoding Standard, Export Data Settings, Export Schema Settings, and Task Error Handling Method. |
Export object information | Displays the information of exported objects and the progress of the export task, such as Object Name, Object Type, Schema Processing Status, Total Record Number, Processed Data Entries, and Data Processing Status. |
Task process
Click View in the Actions column of the row where the target task is located. The Task Details panel appears. Click the Task Process tab in the panel to view information on the following nodes: Initiate Task, Approval Node, and Perform.
Task logs
Click View in the Actions column of the row where the target task is located. The Task Details panel appears. Click the Task Logs tab in the panel to view the alert logs and all logs of the task.
Field | Description |
All Logs | Displays the INFO, ERROR, and WARN logs of the task. |
Alert Logs | Displays the ERROR and WARN logs of the task. When a task fails, you can view the error message in the alert logs. |