When you use a virtual service to define routing rules for a service that contains multiple microservices or routing rules, the virtual service is complex, which brings much maintenance work. To reduce risks brought by changes in routing rules, Service Mesh (ASM) introduces delegates to manage routing rules in a more fine-grained manner. This topic shows you how to use multiple virtual services to define routing rules for a service. The Bookinfo application is used in the following example.
Prerequisites
A Container Service for Kubernetes (ACK) cluster is added to an ASM instance whose version is 1.8.6.4 or later. For more information, see Add a cluster to an ASM instance.
An ingress gateway is deployed. For more information, see Create an ingress gateway.
The application is deployed in the ACK cluster that is added to your ASM instance. For more information, see Deploy an application in an ASM instance.
Background information
In Service Mesh, a virtual service is used to define routing rules to control traffic routed to a service. In actual scenarios, you may need to maintain a complex virtual service. Each time you modify the routing rules that are defined by the virtual service, you must modify the virtual service. After the routing rules are modified, the routing rules may conflict with each other, specific routing rules may be redundant, or the routing rules may be coupled with each other. Configuration errors of routing rules may affect the services that are deployed in the cluster on the data plane or even make all services inaccessible.
ASM introduces delegates to extend the configuration of virtual services, which allows you to decouple routing rules that are defined for a service. You can split a virtual service into a primary virtual service and multiple secondary virtual services. The primary virtual service defines the overall routing rules of a service. Each secondary virtual service defines a detailed routing rule of the service. The primary virtual service is maintained by administrators, while the secondary virtual services are maintained by service maintainers. This greatly reduces risks that are brought by changes in routing rules and improves the efficiency of independent service deployment and updates.
Usage notes
You can set the parameters related to delegate only in a primary virtual service. If you set the parameters related to delegate both in a primary virtual service and secondary virtual services, the primary virtual service and secondary virtual services do not take effect.
The HTTPMatchRequest configuration in secondary virtual services must be a subset of that in the primary virtual service. Otherwise, a conflict exists, and the HTTPRoute configuration does not take effect.
The parameters related to delegate can be specified only when the route and redirect fields in the primary virtual service are left empty. The hosts field in secondary virtual services must be left empty. The routing rules that are defined by secondary virtual services are combined with the routing rules that are defined by the primary virtual service.
Step 1: Configure an Istio gateway
Log on to the ASM console.
In the left-side navigation pane, choose .
On the Mesh Management page, find the ASM instance that you want to configure. Click the name of the ASM instance or click Manage in the Actions column.
On the details page of the ASM instance, choose in the left-side navigation pane. On the page that appears, click Create from YAML.
Select a namespace from the Namespace drop-down list, copy the following content to the code editor, and then click Create. In this example, the default namespace is used.
apiVersion: networking.istio.io/v1alpha3
kind: Gateway
metadata:
  name: bookinfo-gateway
spec:
  selector:
    istio: ingressgateway # use istio default controller
  servers:
  - port:
      number: 80
      name: http
      protocol: HTTP
    hosts:
    - "*"
Set the
numberparameter to80. This setting specifies that the Bookinfo application can establish inbound or outbound HTTP connections by using port 80.
Step 2: Configure a primary virtual service
Log on to the ASM console.
In the left-side navigation pane, choose .
On the Mesh Management page, find the ASM instance that you want to configure. Click the name of the ASM instance or click Manage in the Actions column.
On the details page of the ASM instance, choose in the left-side navigation pane. On the page that appears, click Create from YAML.
Select a namespace from the Namespace drop-down list, copy the following content to the code editor, and then click Create. In this example, the default namespace is used.
The following content can be used to create a
delegatenamed vs-1 and a delegate named vs-2. The vs-1 delegate specifies that only request URLs that contain/logcan be used to access the Bookinfo application. The vs-2 delegate specifies that only request URLs that contain/can be used to access the Bookinfo application.apiVersion: networking.istio.io/v1beta1 kind: VirtualService metadata: name: bookinfo namespace: default spec: gateways: - bookinfo-gateway hosts: - '*' http: - delegate: name: vs-1 namespace: ns1 match: - uri: prefix: /log - delegate: name: vs-2 namespace: ns1 match: - uri: prefix: /Description of the parameters in the delegate field:
name: the delegate name.
namespace: the namespace to which the delegate is applicable.
Step 3: Configure secondary virtual services
Log on to the ASM console.
In the left-side navigation pane, choose .
On the Mesh Management page, find the ASM instance that you want to configure. Click the name of the ASM instance or click Manage in the Actions column.
On the details page of the ASM instance, choose in the left-side navigation pane. On the page that appears, click Create from YAML.
Select a namespace from the Namespace drop-down list, copy the following content to the code editor, and then click Create.
In this example, the ns1 namespace is used. For more information about how to create a namespace, see Manage global namespaces.
apiVersion: networking.istio.io/v1beta1 kind: VirtualService metadata: name: vs-1 namespace: ns1 spec: http: - match: - uri: exact: /login - uri: exact: /logout route: - destination: host: productpage.default.svc.cluster.local port: number: 9080metadata: associates the secondary virtual service with a delegate in the primary virtual service. The settings of metadata must be the same as those of a delegate in the primary virtual service. In this substep, the settings of metadata are the same as those of the vs-1 delegate. This means that the secondary virtual service is associated with the vs-1 delegate.
match: specifies filter conditions for HTTP requests. In this substep,
uriis set toexact: /loginandexact: /logout. This setting specifies that you can log on to or log off from the Bookinfo application.
Repeat the preceding steps. On the Create page, select a namespace from the Namespace drop-down list, copy the following content to the code editor, and then click Create.
apiVersion: networking.istio.io/v1beta1 kind: VirtualService metadata: name: vs-2 namespace: ns1 spec: http: - match: - uri: exact: /productpage - uri: prefix: /static - uri: prefix: /api/v1/products route: - destination: host: productpage.default.svc.cluster.local port: number: 9080metadata: associates the secondary virtual service with a delegate in the primary virtual service. The settings of metadata must be the same as those of a delegate in the primary virtual service. In this substep, the settings of metadata are the same as those of the vs-2 delegate. This means that the secondary virtual service is associated with the vs-2 delegate.
match: specifies filter conditions for HTTP requests. In this substep, the setting specifies that only request URLs that contain /productpage or start with /static or /api/v1/products can be used to access the Bookinfo application.
Verify the result
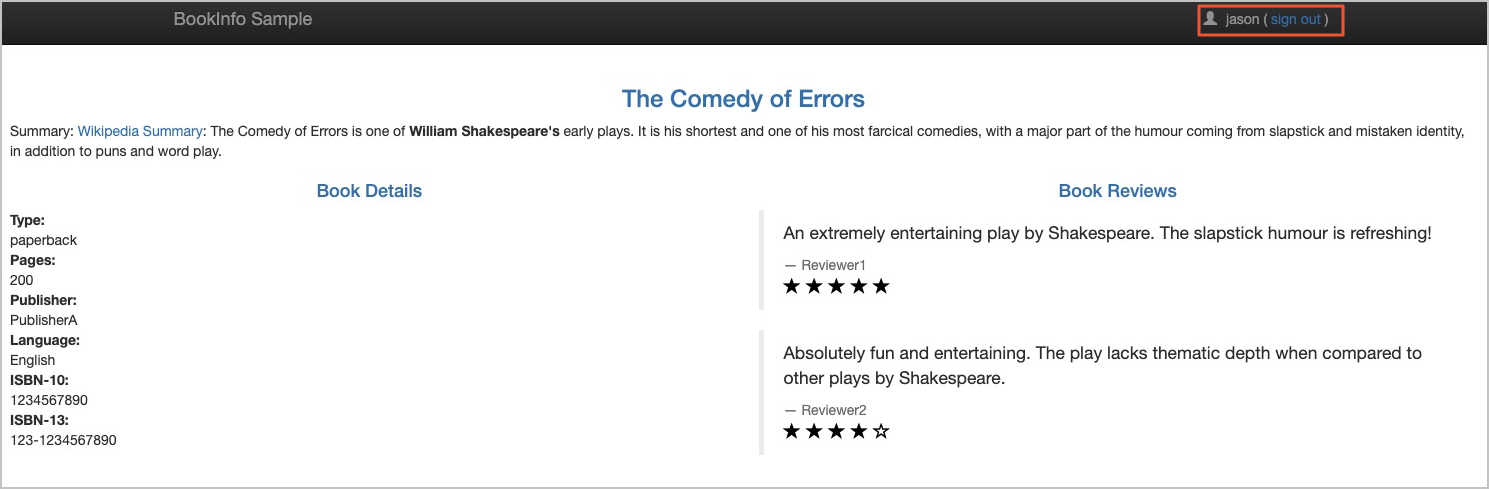
Enter http://<IP address of the ASM ingress gateway>/productpage in the address bar of a browser.
The following page appears. This means that the Bookinfo application is accessed by using the request URL that contains
/productpage. The result indicates that the secondary virtual service that is associated with the vs-2 delegate takes effect. For more information about how to obtain the IP address of an ASM ingress gateway, see the "Obtain the IP address of the ingress gateway" section in the Use Istio resources to route traffic to different versions of a service topic.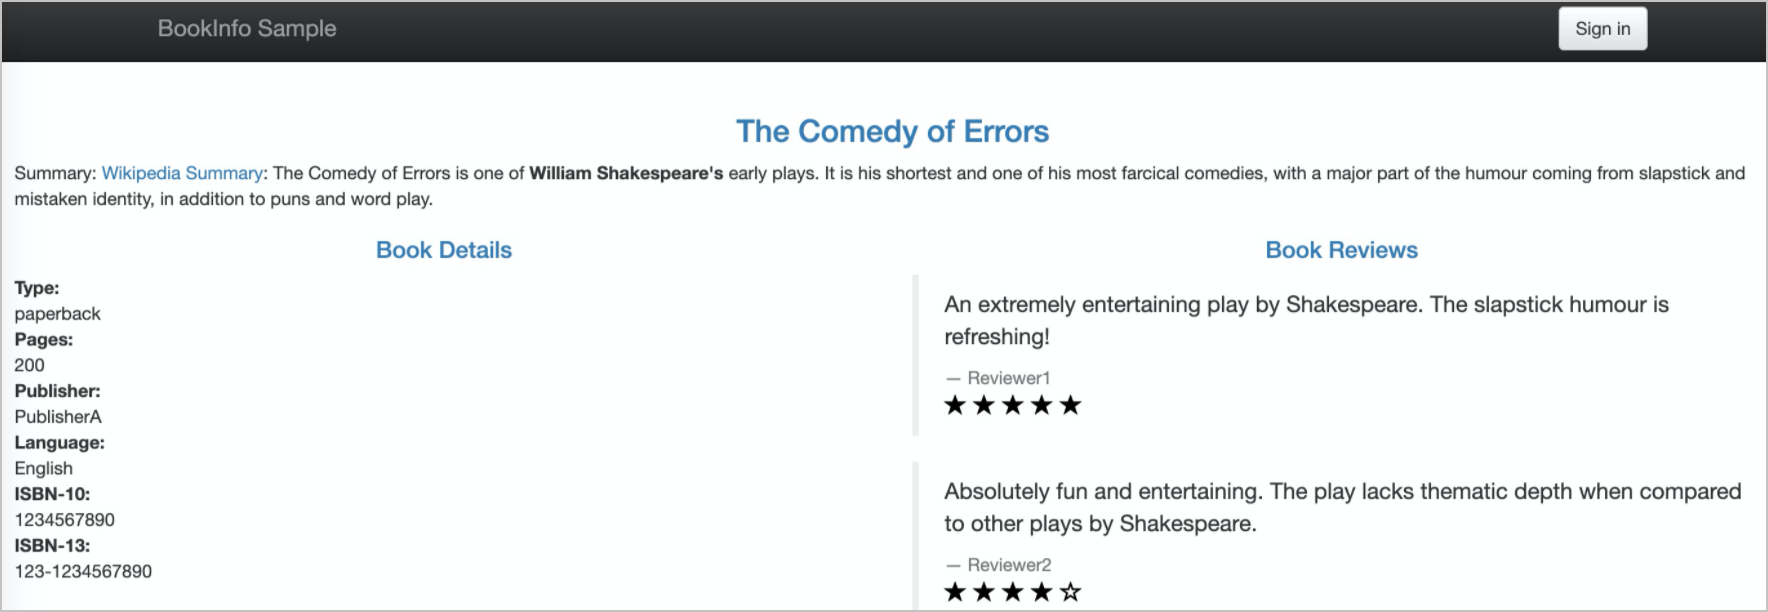
Click Sign in in the upper-right corner. In the dialog box that appears, enter a username and the corresponding password to log on to the Bookinfo application.
The following page appears. This means that you have logged on to the Bookinfo application. The result indicates that the secondary virtual service that is associated with the vs-1 delegate takes effect.