Argo Rollouts is a Kubernetes controller and a set of CustomResourceDefinitions (CRDs) for progressive delivery. Integrating Service Mesh (ASM) with Argo Rollouts enables canary releases that gradually shift traffic from a stable version to a new version based on configurable weight percentages.
With native Kubernetes rolling updates, the traffic ratio is tied to the replica count -- routing 1% of traffic to a canary requires 99 stable replicas. ASM-based canary releases decouple traffic splitting from pod count by using Istio VirtualService rules. This means autoscaling does not disrupt the traffic ratio, and fine-grained percentages work regardless of how many replicas are running.
How it works
A canary release with ASM and Argo Rollouts follows this lifecycle:
Deploy a Rollout resource that defines the canary strategy: traffic weight steps, pause durations, and references to the Istio VirtualService.
Create two Kubernetes Services -- one for the stable version, one for the canary -- and an Istio VirtualService that routes traffic between them.
When you update the Rollout image, the Argo Rollouts controller automatically adjusts the VirtualService weights according to the defined steps.
At each step, the controller pauses for the specified duration (or waits for manual approval) before increasing the canary weight.
After all steps complete, the canary version becomes the new stable version.
Optionally, attach a Prometheus-based AnalysisTemplate to monitor the canary version's success rate. If the rate drops below a threshold, the controller automatically rolls back to the stable version.
This guide demonstrates host-level traffic splitting, where two separate Services (istio-rollout-stableandistio-rollout-canary) handle traffic distribution. Istio also supports subset-level traffic splitting using a DestinationRule, which is better suited for east-west (intra-cluster) traffic because it avoids DNS complications. For details, see Argo Rollouts Istio traffic management.
Prerequisites
Before you begin, make sure that you have:
An ASM instance of version 1.12.4.50 or later. For more information, see Create an ASM instance
A cluster added to the ASM instance. For more information, see Add a cluster to an ASM instance
kubectl connected to the ASM instance. For more information, see Use kubectl on the control plane to access Istio resources
Install Argo Rollouts
For full installation details, see Argo Rollouts installation.
Install the Argo Rollouts controller:
kubectl create namespace argo-rollouts
kubectl apply -n argo-rollouts -f https://github.com/argoproj/argo-rollouts/releases/latest/download/install.yaml
Install the Argo Rollouts kubectl plugin for CLI-based management:
brew install argoproj/tap/kubectl-argo-rollouts
Enable data-plane KubeAPI access
Enable KubeAPI access to manage Istio resources (VirtualServices, Gateways, DestinationRules) directly from the data-plane cluster using kubectl.
Log on to the ASM console. In the left-side navigation pane, choose Service Mesh > Mesh Management.
On the Mesh Management page, click the name of the ASM instance. In the left-side navigation pane, choose ASM Instance > Base Information.
Click Enable to the right of Enable Data-plane KubeAPI access.
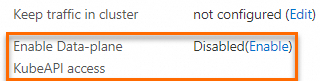
In the confirmation dialog box, click OK.
Implement a canary release
This section walks through a complete canary release: deploying a stable version (blue), then progressively shifting traffic to a canary version (yellow).
Step 1: Create the Rollout and Services
Create the Rollout
Create a
rollout.yamlfile with the following content:Key fields under
strategy.canary:Field Description setWeightPercentage of traffic routed to the canary version at this step pause: {}Pause indefinitely until you run kubectl argo rollouts promotepause: {duration: 20s}Pause for 20 seconds, then automatically proceed to the next step Deploy the Rollout to the cluster added to your ASM instance:
kubectl apply -f rollout.yaml
Create the Services
Create a
service.yamlfile with the following content:Both Services use the same selector (
app: istio-rollout). Argo Rollouts manages which pods each Service targets during the canary release.apiVersion: v1 kind: Service metadata: name: istio-rollout-canary # Canary Service -- Argo Rollouts maps this to canary pods spec: ports: - port: 80 targetPort: http protocol: TCP name: http selector: app: istio-rollout --- apiVersion: v1 kind: Service metadata: name: istio-rollout-stable # Stable Service -- Argo Rollouts maps this to stable pods spec: ports: - port: 80 targetPort: http protocol: TCP name: http selector: app: istio-rolloutDeploy the Services:
kubectl apply -f service.yaml
Step 2: Create the Istio resources
With data-plane KubeAPI access enabled, use kubectl from the data-plane cluster to create Istio resources directly. Alternatively, use the ASM console or the control-plane kubeconfig.
Create the VirtualService
Create an
istio-rollout-vsvc.yamlfile with the following content:apiVersion: networking.istio.io/v1alpha3 kind: VirtualService metadata: name: istio-rollout-vsvc spec: gateways: - istio-rollout-gateway hosts: - '*' http: - match: - uri: prefix: / name: primary # Must match the route name in the Rollout route: - destination: host: istio-rollout-stable # All traffic goes to stable initially weight: 100 - destination: host: istio-rollout-canary # Canary destination -- weight starts at 0Deploy the VirtualService:
kubectl apply -f istio-rollout-vsvc.yaml
Create the Gateway
Create an
istio-rollout-gateway.yamlfile with the following content:apiVersion: networking.istio.io/v1beta1 kind: Gateway metadata: name: istio-rollout-gateway spec: selector: istio: ingressgateway # Binds to the ASM ingress gateway servers: - hosts: - '*' port: name: http number: 80 # Accept HTTP traffic on port 80 protocol: HTTPDeploy the Gateway:
kubectl apply -f istio-rollout-gateway.yaml
Step 3: Deploy an ingress gateway
Create an ASM ingress gateway with port 80 enabled for service access.
Log on to the ASM console. In the left-side navigation pane, choose Service Mesh > Mesh Management.
On the Mesh Management page, click the name of the ASM instance. In the left-side navigation pane, choose ASM Gateways > Ingress Gateway.
On the Ingress Gateway page, click Create and configure the following parameters: For other parameters, see Create an ingress gateway.
Parameter Value Name ingressgatewayGateway types North-South IngressGateway Port Mapping Protocol: HTTP, Service Port: 80 Click Create.
Step 4: Verify the initial Rollout status
Run the following command to verify that the Rollout is healthy:
kubectl argo rollouts get rollout istio-rolloutExpected output:
Name:            istio-rollout
Namespace:       default
Status:           Healthy
Strategy:        Canary
  Step:          18/18
  SetWeight:     100
  ActualWeight:  100
Images:          argoproj/rollouts-demo:blue (stable)
Replicas:
  Desired:       1
  Current:       1
  Updated:       1
  Ready:         1
  Available:     1

NAME                                       KIND        STATUS     AGE  INFO
⟳ istio-rollout                            Rollout      Healthy  52s
└──# revision:1
└──⧉ istio-rollout-7f96d86486           ReplicaSet   Healthy  52s  stable
   └──□ istio-rollout-7f96d86486-vpqvb  Pod         Running  52s  ready:2/2
A Healthy status with image argoproj/rollouts-demo:blue (stable) confirms the initial deployment succeeded.
Step 5: Test the initial deployment
Get the ingress gateway IP address:
Log on to the ASM console. In the left-side navigation pane, choose Service Mesh > Mesh Management.
Click the ASM instance name. In the left-side navigation pane, choose ASM Gateways > Ingress Gateway.
Copy the Service address of the ingress gateway.
Open
http://<ingress-gateway-ip>/in a browser. The page makes concurrent calls to/colorand fills the grid with the returned color. Because the stable version uses theblueimage and no canary is running, all grids display blue.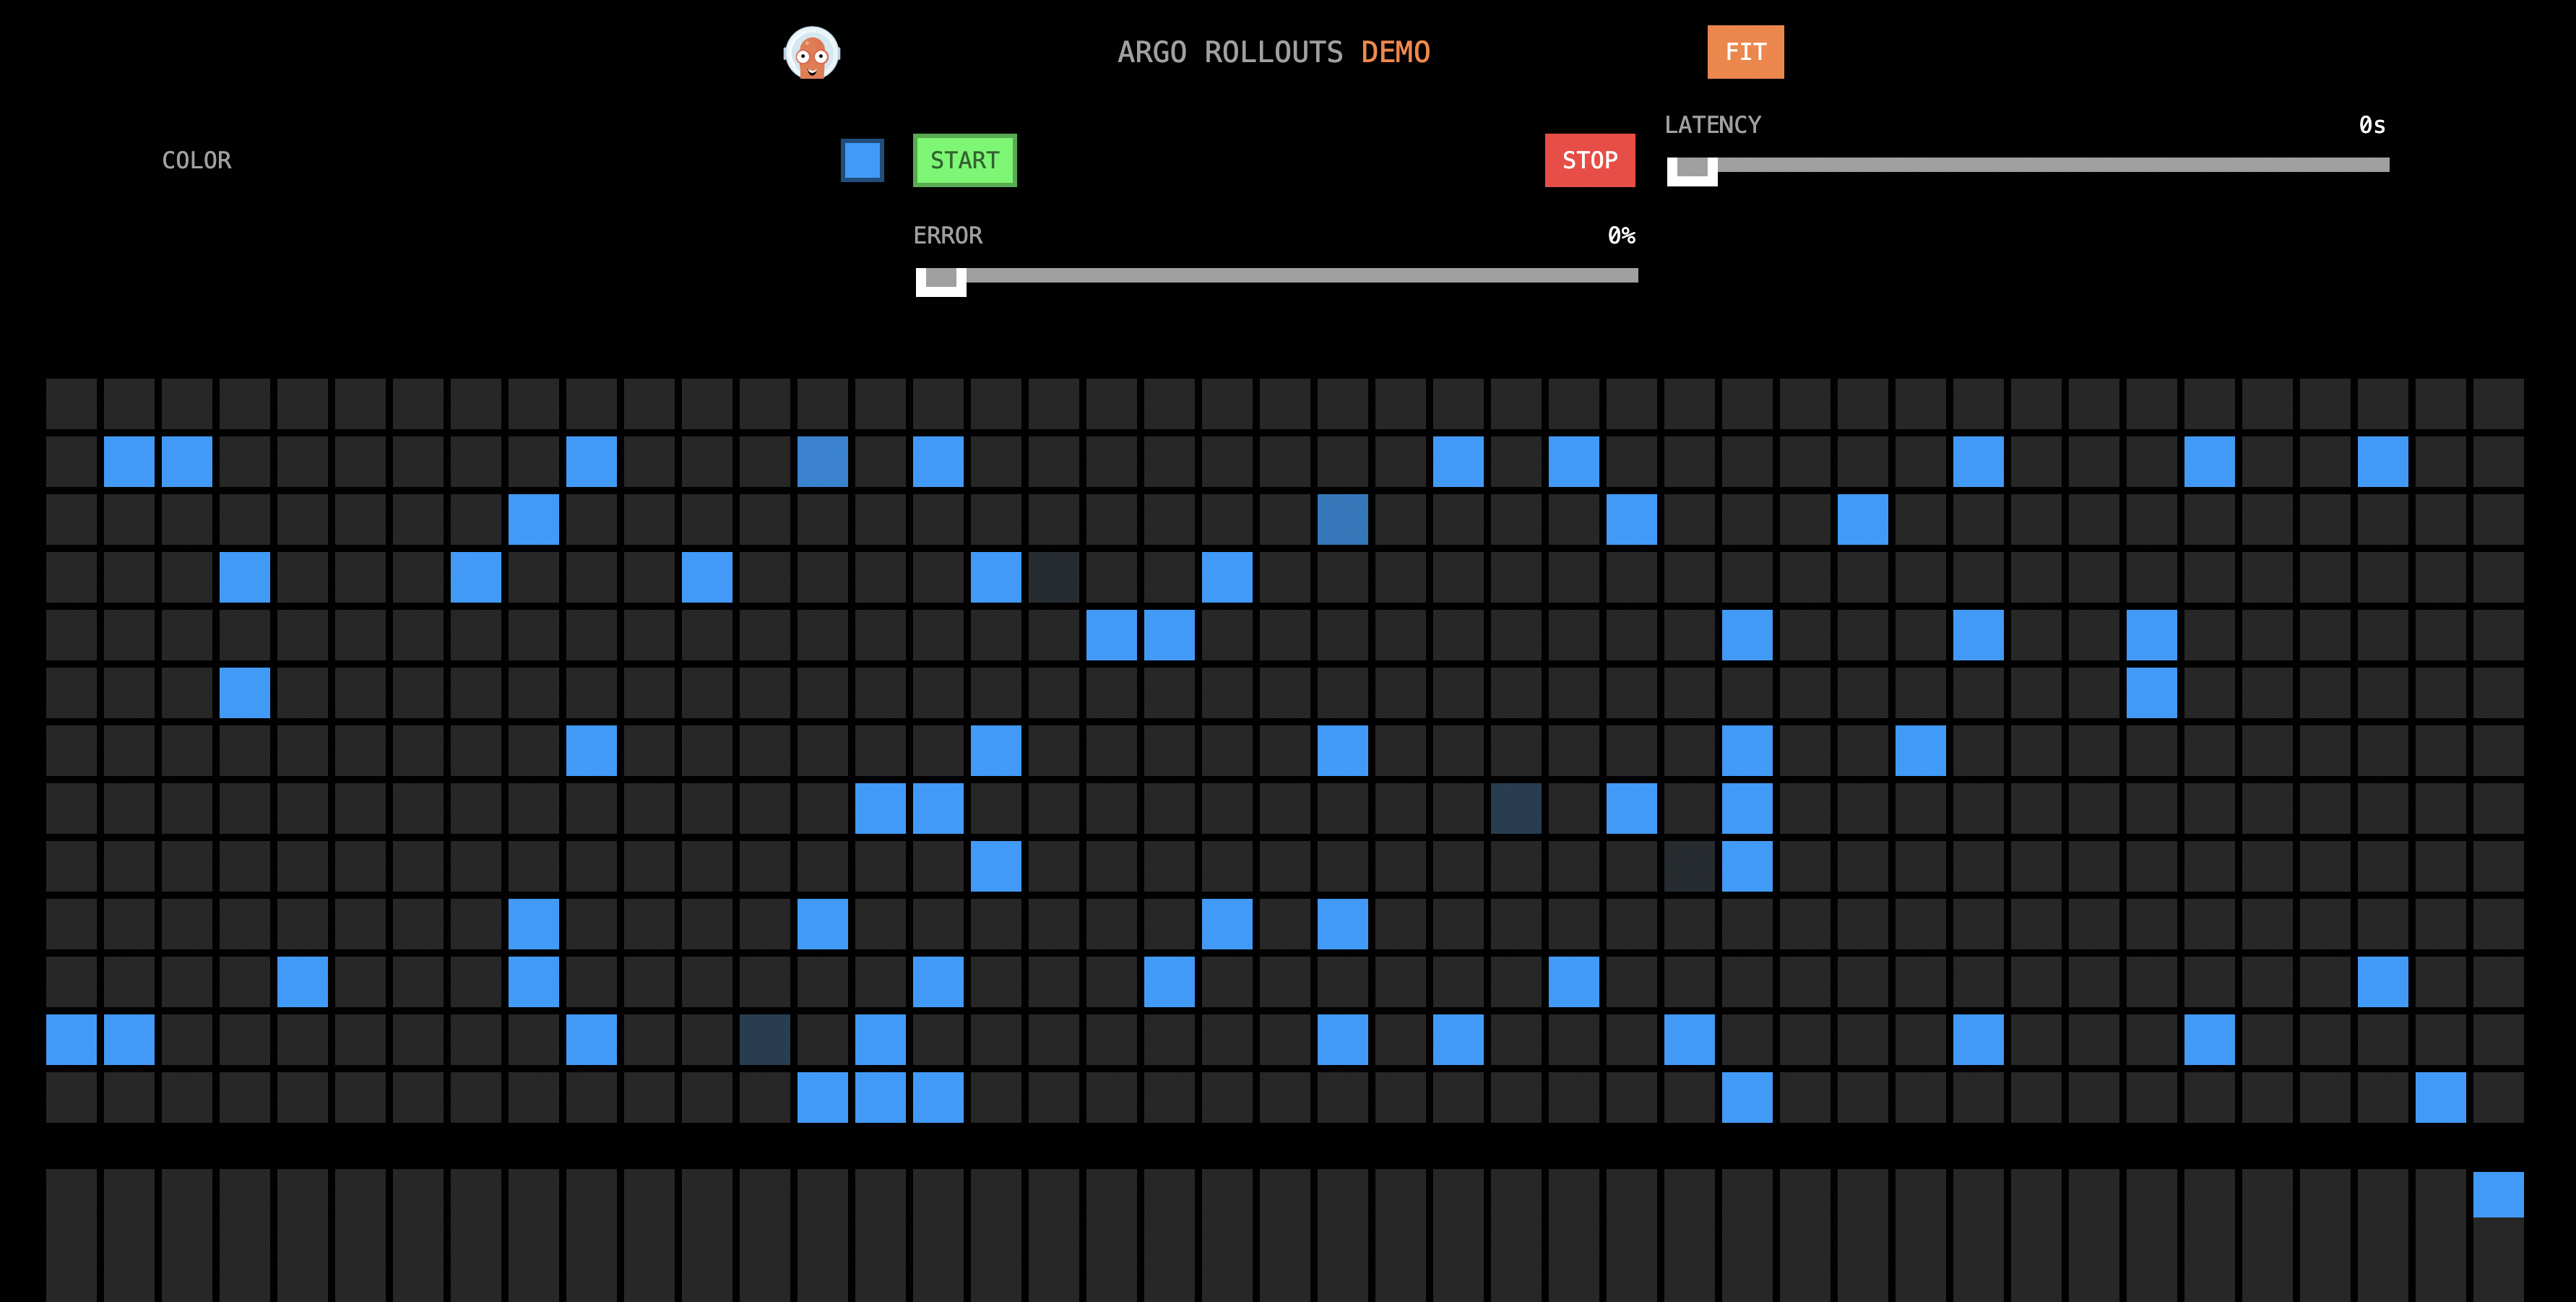
Step 6: Perform the canary release
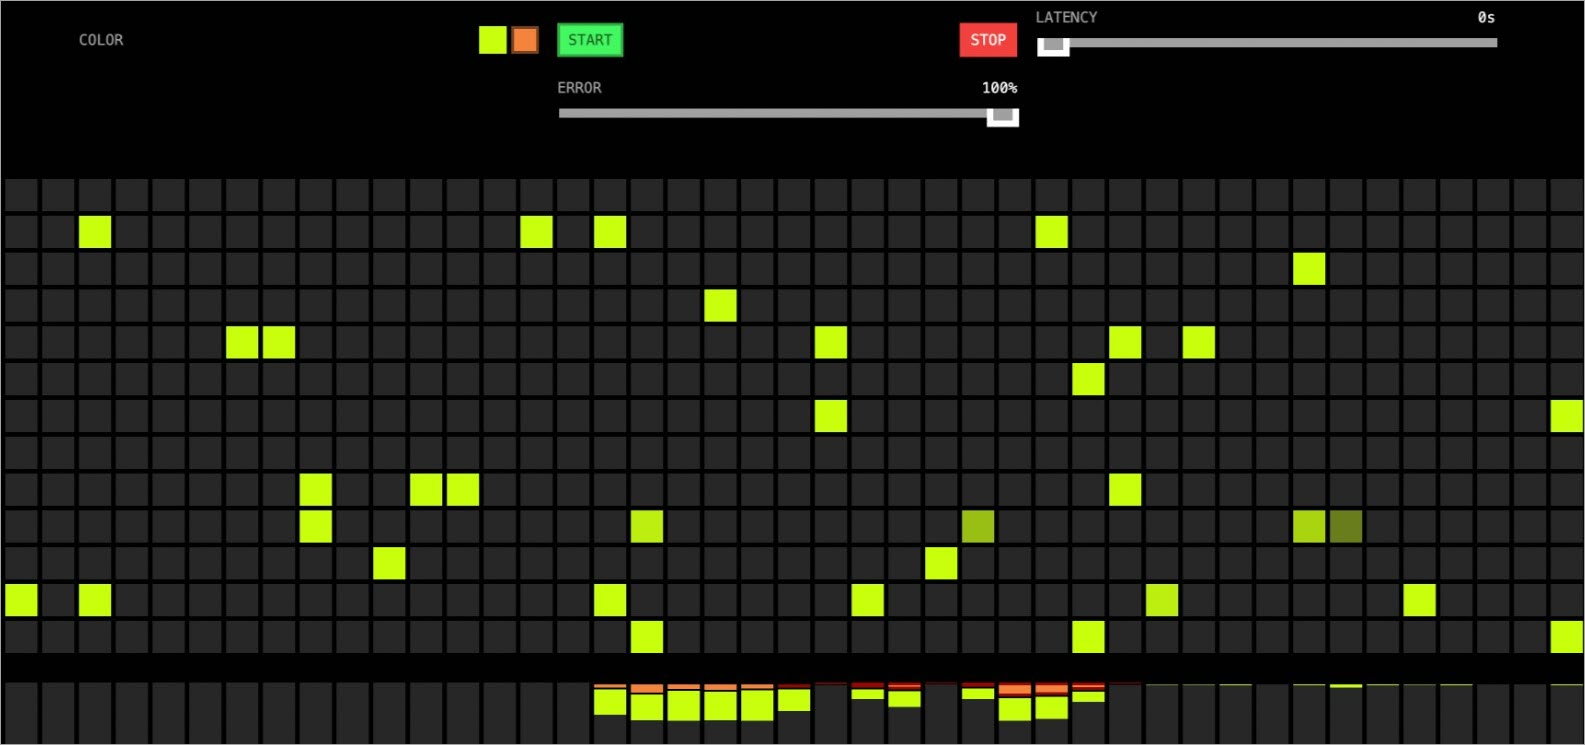
In this example, yellow represents the canary version. As the release progresses, the grid gradually transitions from blue to yellow.
Update the Rollout image
Set the new image version:
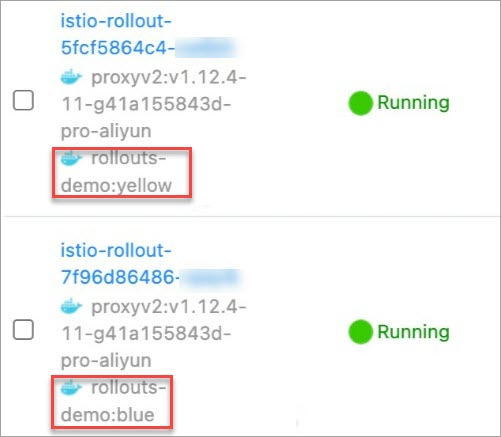
kubectl argo rollouts set image istio-rollout "*=argoproj/istio-rollout:yellow"Verify that both pod versions are running:
Log on to the ACK console and click Clusters in the left-side navigation pane.
Click the cluster name, then choose Workloads > Pods.
In the Name column, confirm that pods for both the blue (stable) and yellow (canary) versions exist.
Observe the first traffic shift
Open http://<ingress-gateway-ip>/ in a browser. About 10% of the grids now display yellow. The Argo Rollouts controller updated the VirtualService weights: stable (blue) dropped from 100 to 90, and canary (yellow) increased from 0 to 10.
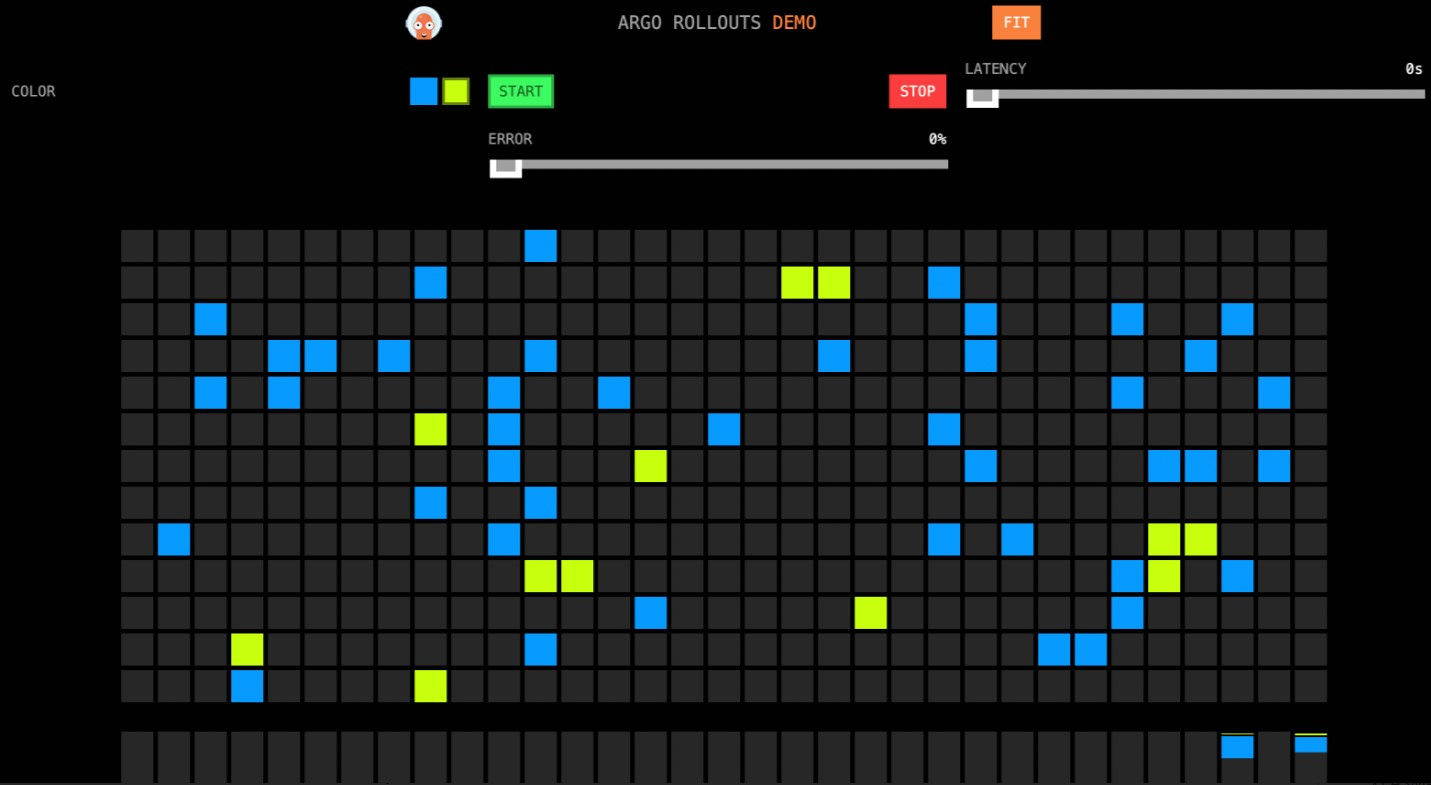
The first step specifies pause: {} with no duration, so the Rollout waits for manual approval before proceeding.
Continue the release
Approve the Rollout to advance past the manual pause:
kubectl argo rollouts promote istio-rolloutOpen
http://<ingress-gateway-ip>/in a browser. The VirtualService weights continue adjusting automatically through the remaining steps (20%, 30%, ... 90%), pausing 20 seconds between each step.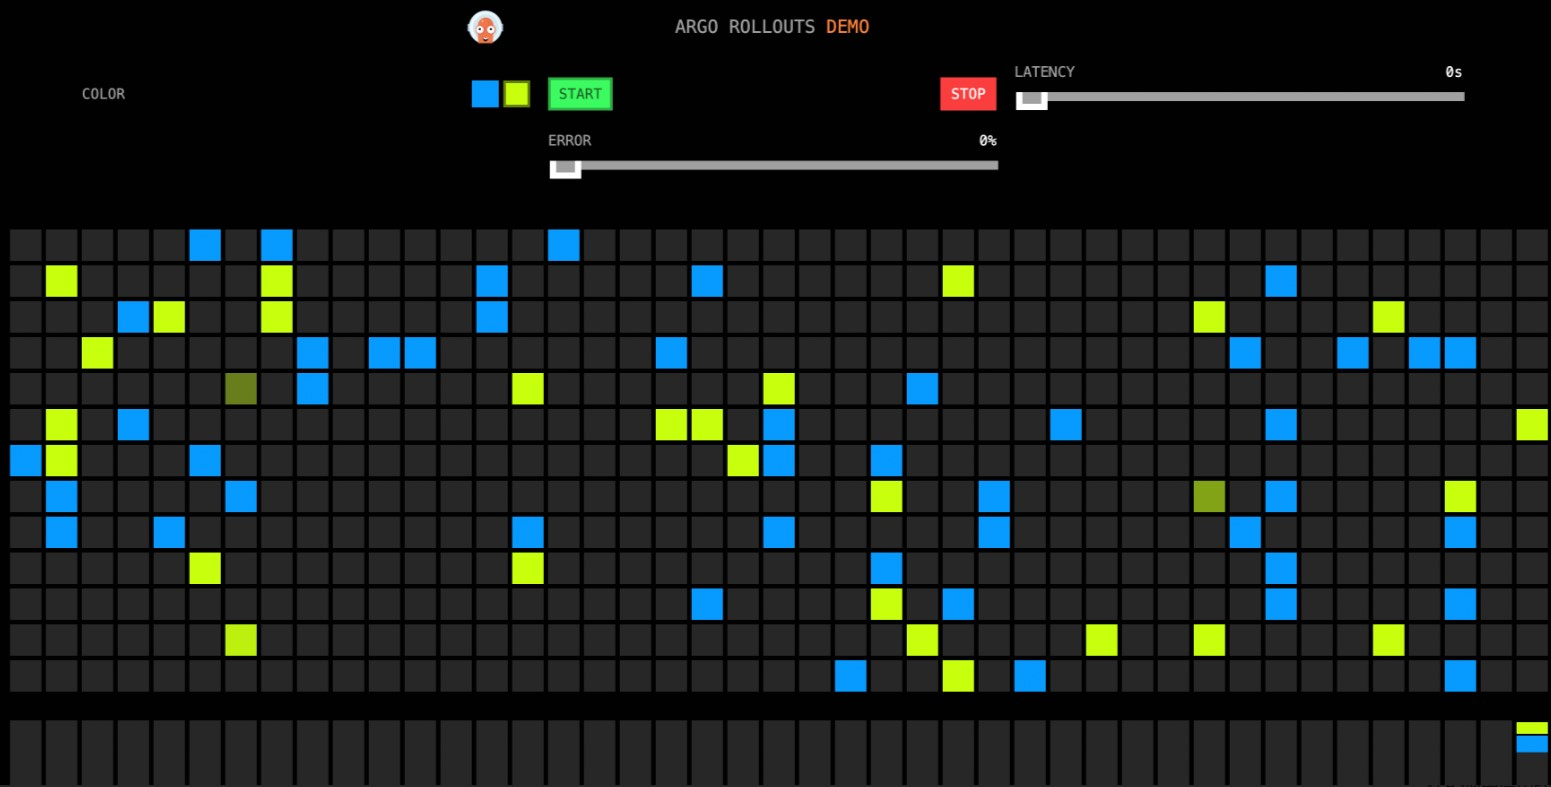
Verify the completed release
After all steps complete, open
http://<ingress-gateway-ip>/in a browser. All grids now display yellow, confirming that the canary version has fully replaced the stable version.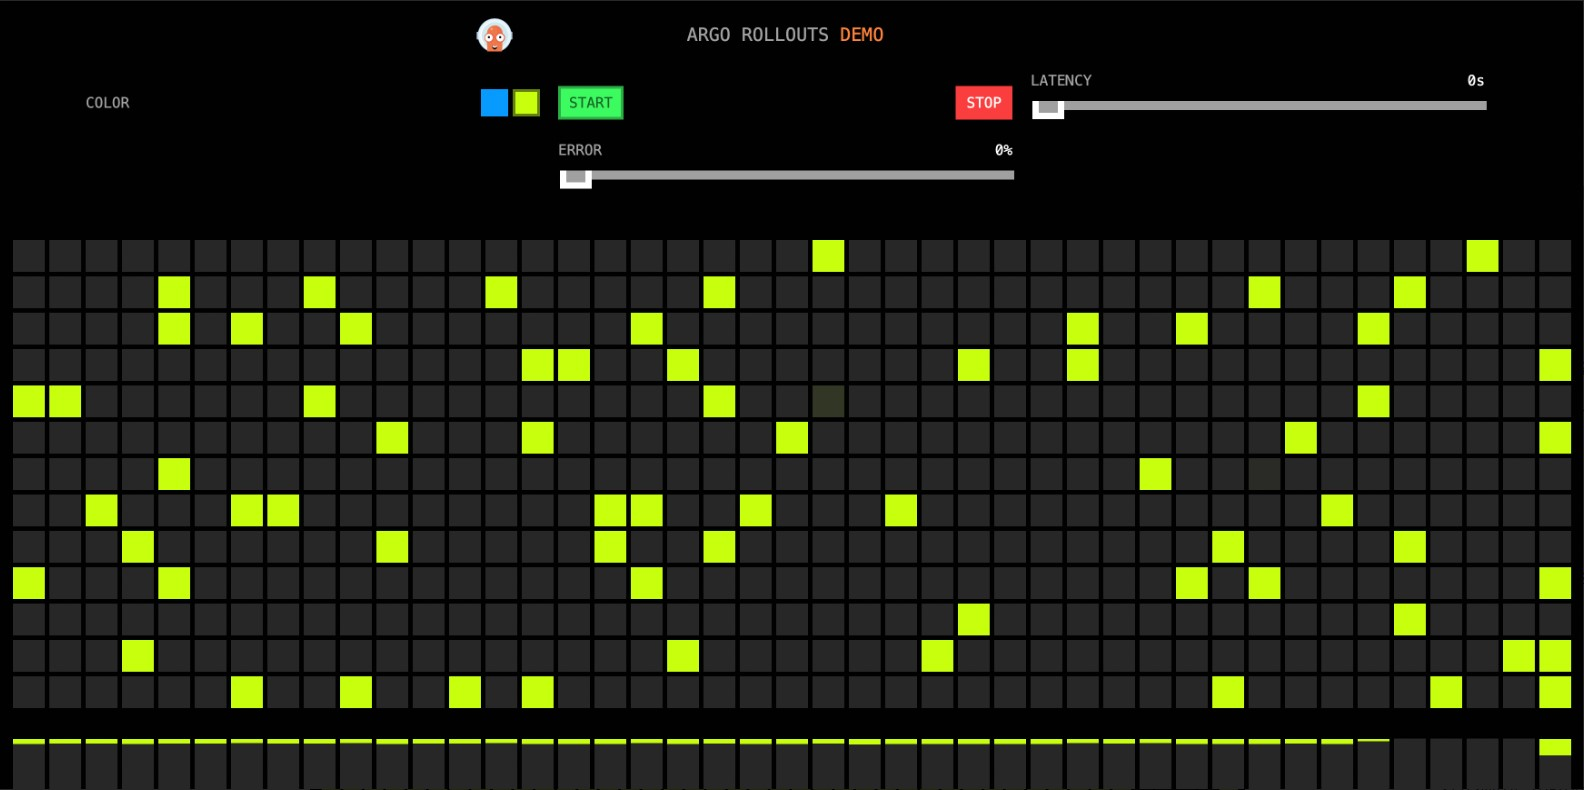
Verify the Rollout status: Expected output: The image now shows
argoproj/rollouts-demo:yellow (stable), confirming the canary version has been promoted.kubectl argo rollouts get rollout istio-rollout --watchName: istio-rollout Namespace: default Status: Healthy Strategy: Canary Step: 18/18 SetWeight: 100 ActualWeight: 100 Images: argoproj/rollouts-demo:yellow (stable) Replicas: Desired: 1 Current: 1 Updated: 1 Ready: 1 Available: 1 NAME KIND STATUS AGE INFO ⟳ istio-rollout Rollout Healthy 48m ├──# revision:4 │ └──⧉ istio-rollout-5fcf5864c4 ReplicaSet Healthy 27m stable │ └──□ istio-rollout-5fcf5864c4-vw6kh Pod Running 26m ready:2/2 ├──# revision:3 │ └──⧉ istio-rollout-897cb5b6d ReplicaSet ScaledDown 27m └──# revision:1 └──⧉ istio-rollout-7f96d86486 ReplicaSet ScaledDown 48m
Set up automatic rollback with Prometheus
Instead of relying on manual observation, configure Prometheus-based analysis to automatically roll back a canary release when the success rate drops below a threshold.
To manually roll back at any point during a canary release, run:
kubectl argo rollouts abort istio-rolloutStep 1: Enable Prometheus in ASM
Enable Prometheus monitoring for the ASM instance. For more information, see:
Step 2: Create an AnalysisTemplate
The AnalysisTemplate defines a Prometheus query that calculates the request success rate for the canary version. If the success rate drops to 0.90 or below (meaning more than 10% of requests return 5xx errors), the Rollout is marked as Degraded and automatically rolled back.
Create an
istio-success-rate.yamlfile with the following content: Replace<your-prometheus-endpoint>with the actual endpoint of your Prometheus instance connected to ASM.apiVersion: argoproj.io/v1alpha1 kind: AnalysisTemplate metadata: name: istio-success-rate spec: args: - name: service # Service name, passed from the Rollout - name: namespace # Namespace, auto-resolved from the Rollout metrics: - name: success-rate initialDelay: 60s # Wait 60s for traffic to flow before first check interval: 20s # Re-evaluate every 20 seconds successCondition: result[0] > 0.90 # Pass if success rate > 90%; fail otherwise provider: prometheus: address: http://<your-prometheus-endpoint>:9090/api/v1/prometheus/ query: >+ sum(irate(istio_requests_total{ reporter="source", destination_service=~"{{args.service}}.{{args.namespace}}.svc.cluster.local", response_code!~"5.*"}[40s]) ) / sum(irate(istio_requests_total{ reporter="source", destination_service=~"{{args.service}}.{{args.namespace}}.svc.cluster.local"}[40s]) )Deploy the AnalysisTemplate:
kubectl apply -f istio-success-rate.yaml
Step 3: Associate the AnalysisTemplate with the Rollout
Update the Rollout to include an analysis section that references the AnalysisTemplate. The analysis starts from the second step (startingStep: 1), giving the canary version time to receive traffic before metrics are evaluated.
Create a new
rollout.yamlfile with the following content:Update the Rollout:
kubectl apply -f rollout.yaml
Step 4: Trigger a canary release with analysis
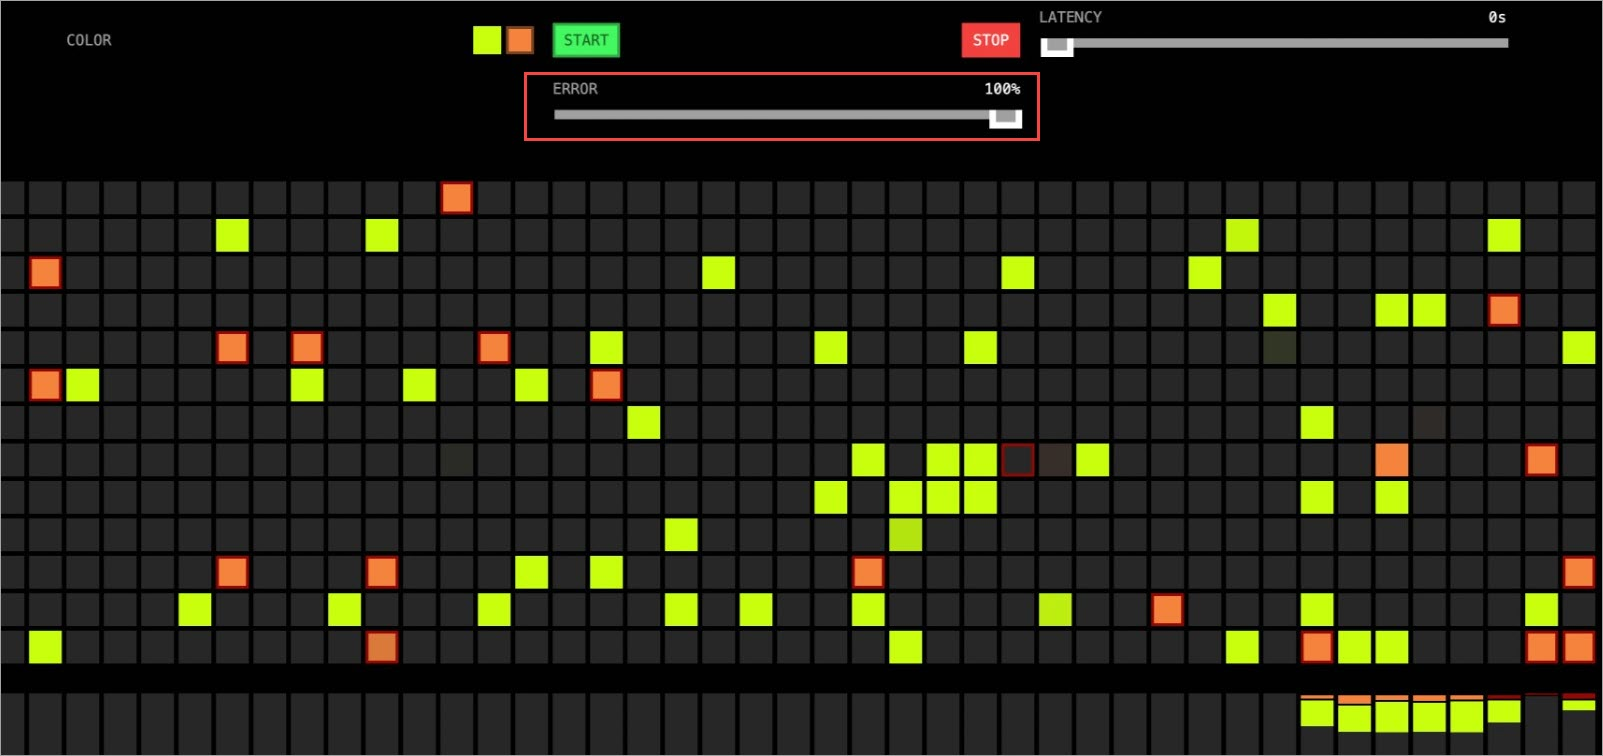
Update the image to start a new canary release: Open
http://<ingress-gateway-ip>/in a browser. Orange grids begin appearing as canary traffic flows.kubectl argo rollouts set image istio-rollout "*=argoproj/rollouts-demo:orange"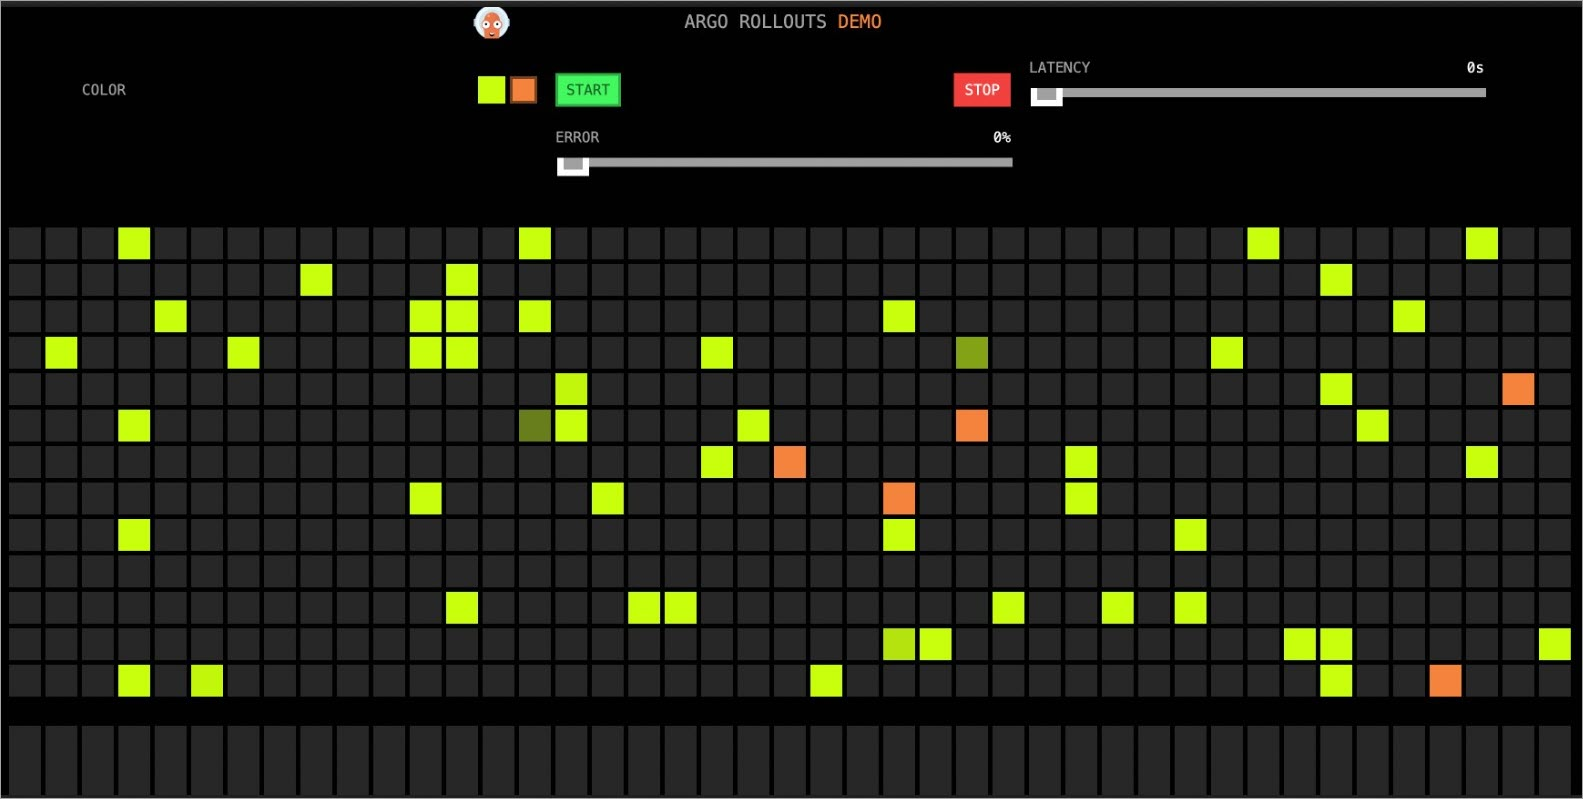
Approve the Rollout to start the automatic canary progression with Prometheus monitoring:
kubectl argo rollouts promote istio-rolloutMonitor the Rollout status:
kubectl argo rollouts get rollout istio-rollout --watch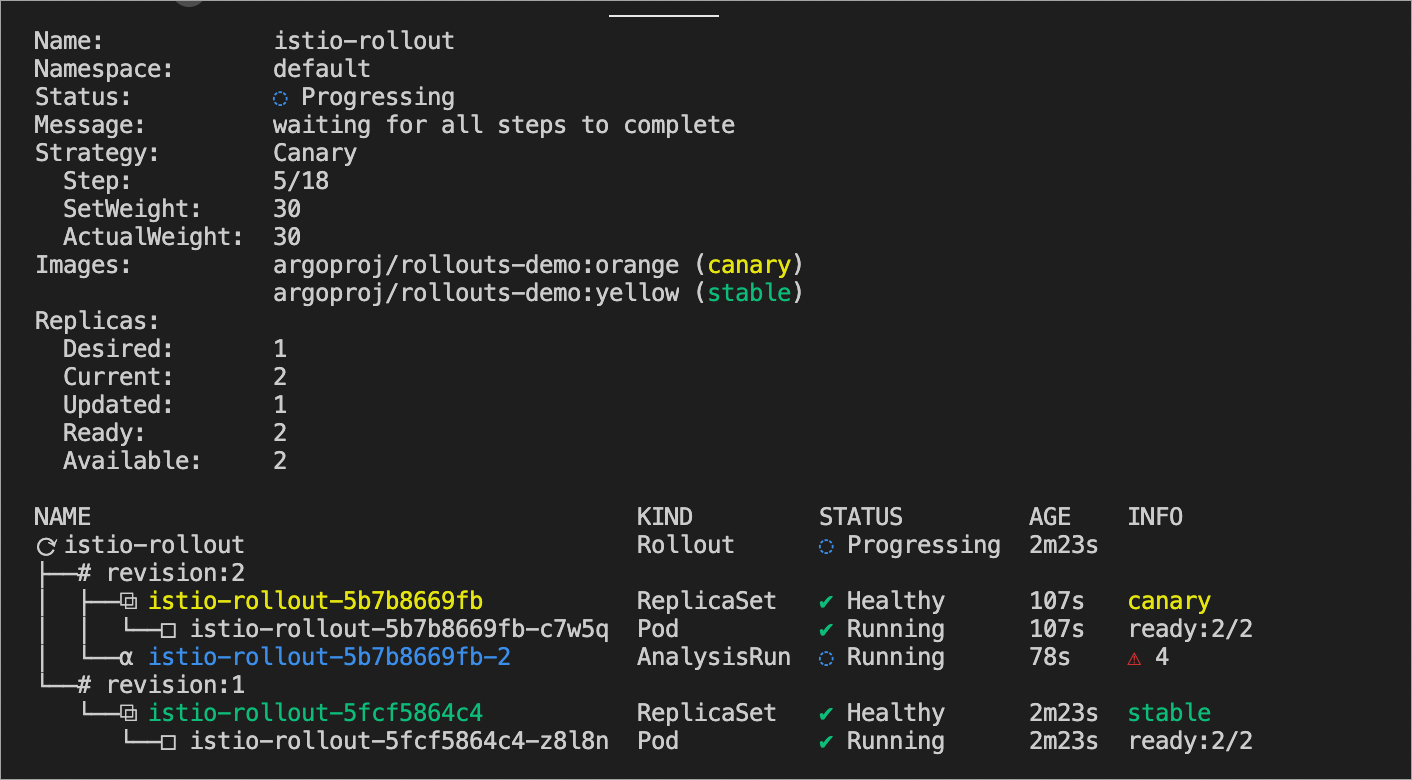
Step 5: Test automatic rollback
To test rollback behavior, increase the error rate for the canary version using the error rate slider on the demo application page. When the error rate exceeds 10% (success rate drops below 0.90), the AnalysisTemplate marks the Rollout as Degraded, and the controller automatically rolls back to the stable version (yellow).
After a short delay, all traffic returns to the stable version:
What's next
Configure a canary release -- Learn about canary release concepts and additional configuration options.
Argo Rollouts Istio traffic management -- Explore advanced options including subset-level traffic splitting and multicluster setups.