You can read this topic to learn about the iOS integration steps for the Qu Video Demo.
Prepare the environment
Category | Description |
System version | iOS 9.0 or later is supported. |
iPhone | iPhone 5 or later is supported. |
Supported CPU Architectures | The ARM64, ARMv7, and ARMv7s architectures are supported for physical devices. Simulator architectures are not supported. |
Xcode version | Xcode 9.0 or later is supported. Download Xcode. |
Prerequisites
The server-side is integrated and running. For more information, see Server-side integration.
You need an Apple Developer account.
Procedure
Download and decompress the QueVideo demo. For instructions on how to download the QueVideo SDK for iOS, see QueVideo SDK (Short Video Solution).
Directory structure:
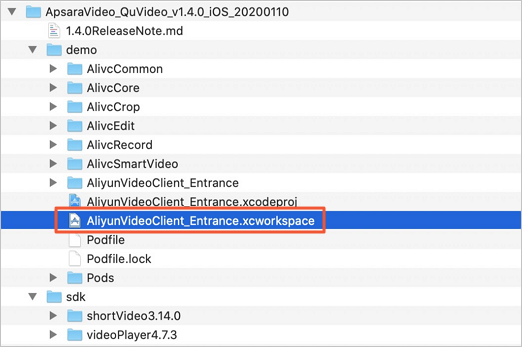
- demo
      - |- AlivcCommon      # The public component.
      - |- AlivcCore        # The public component of the short video service.
      - |- AlivcCrop        # The component that contains the code used to implement the cropping UI.
      - |- AlivcEdit        # The component that contains the code used to implement the editing UI.
      - |- AlivcRecord      # The component that contains the code used to implement the recording UI.
      - |- AlivcSmartVideo  # The component of the short video service.
      - |- AliyunVideoClient_Entrance    # The project entry file of the short video service.
- doc  # The related documentations.
- sdk  # The SDK that is used by the project. You can manually import an SDK as needed.
- xxxReleaseNote.md  # The release note.
Import and configure the project.
Open Xcode, click Open a project or file, and double-click the AliyunVideoClient_Entrance.xcworkspace file in the demo folder.
Specify the server address.
File path: demo/AlivcCommon/AlivcCommon/Classes/Macro/AlivcDefine.m.
Modify the
kAlivcQuUrlStringvariable in the file. Set the variable to the public IP address of the Elastic Compute Service (ECS) instance that runs your AppServer. Then, append the port number 8080.Example: http://<Public IP address of the ECS instance>:8080.

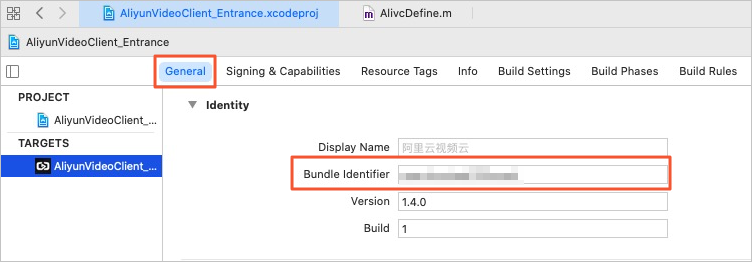
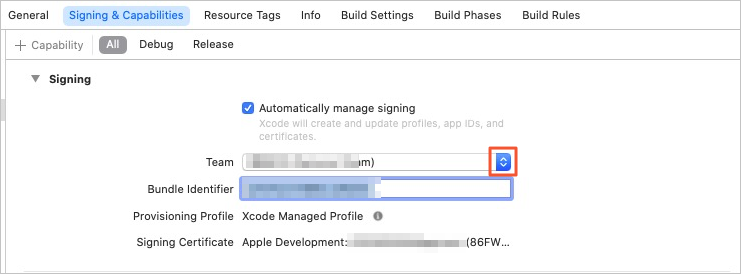
Modify the Bundle Identifier and Signing Certificate parameters.
ImportantChange the Bundle Identifier to
com.<Your company name>.<Your project name>to prevent runtime failures that can occur if the bundle ID is already registered.The value of the Bundle Identifier parameter must be defined in the package_name parameter in the profile of your short video AppServer. Assume that you do not set the Bundle Identifier parameter on the short video AppServer. When your application runs on the short video client for iOS, the bundle ID interceptor that is deployed on the short video AppServer intercepts the bundle ID of the application. As a result, a 403 error with the "Request failed:forbidden" error message is returned when the application sends a request to the short video AppServer. For more information about how to set the Bundle Identifier parameter on the short video AppServer, see Build the short video AppServer.
You can modify this on the General tab.
You can make changes on the Sign & Capabilities tab.
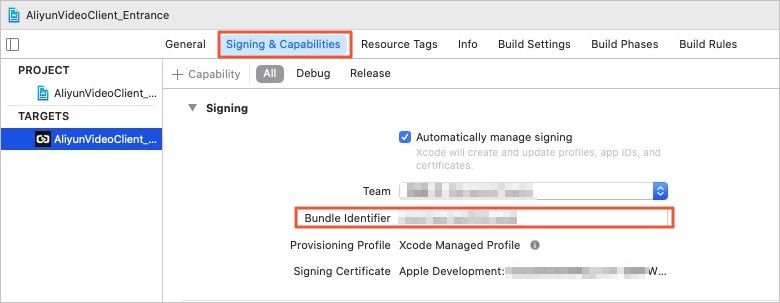
On the Sign & Capabilities tab, select Automatically manage signing and set the Team parameter.
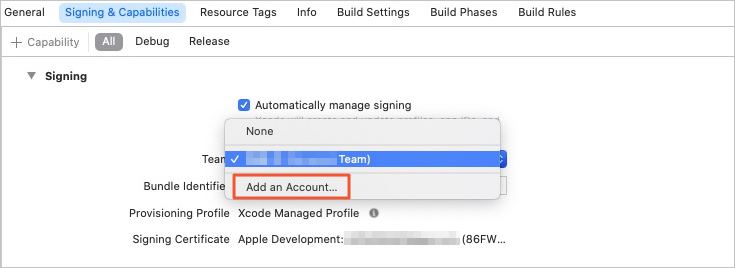
You can select Team.
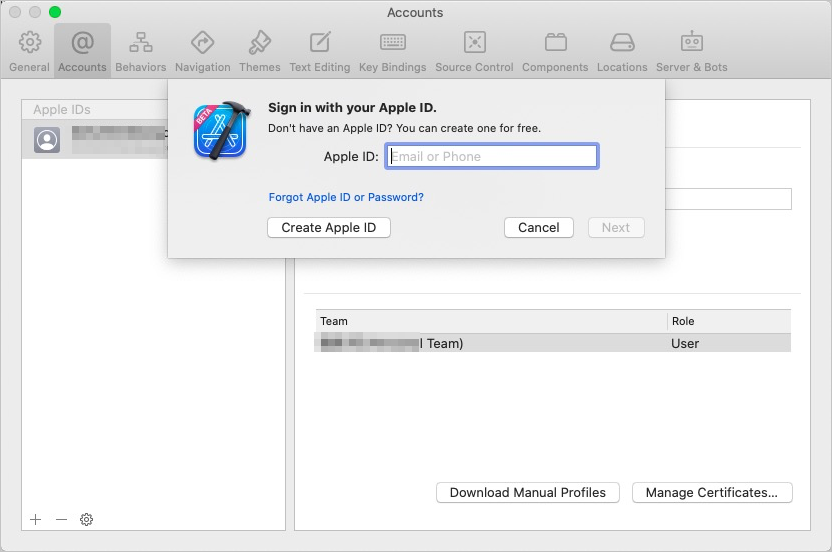
If you have not yet added an account, click Add an Account.
The account was added successfully.
Select the created account from the Team drop-down list. Make sure that no error message appears after you add the signature.
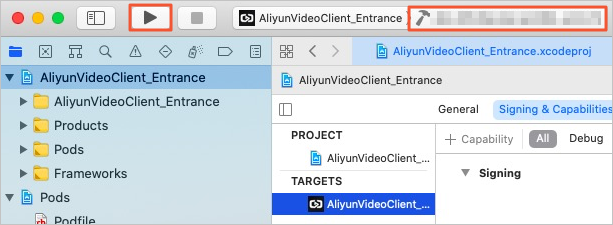
Compile and run the project.
Select AlivcVoiceCallSoloClient as the target. Connect an iOS physical device to your computer using a data cable. In Xcode, select the physical device. Then, enable Developer Mode in the system settings on the device.
Click Build and Run.