The Network File System (NFS) protocol has limited native support in Windows. Therefore, we recommend mounting NFS file systems on Windows only when cross-platform data sharing is required. For Windows-only environments, consider using the SMB protocol. This topic describes how to mount an NFS file system on a Windows Elastic Compute Service (ECS) instance.
Prerequisites
A running Windows ECS instance in the same region as your NAS file system. For more information, see Creation method overview.
An NFS file system created on General-purpose NAS. The mount target for the file system must be in the same VPC as the ECS instance. For more information, see Create a General-purpose NAS file system in the console.
You cannot mount an Extreme NFS file system on Windows.
Step 1: Install an NFS client
Connect to the ECS instance. For more information, see Connect to an ECS instance.
Start Server Manager.
Choose .
Follow the Add Roles and Features Wizard to install the NFS client.
In the Server Roles step, select .
In the Features step, select Client for NFS.
Restart the ECS instance.
Start the Command Prompt and run the
mountcommand.The following command output indicates that the NFS client is installed.

Step 2: Mount the General-purpose NFS file system
Mount an NFS file system manually for temporary use or configure it to mount automatically at boot. A manually mounted file system does not persist across instance reboots. For persistent storage, we recommend that you configure automatic mounting.
Manually mount the NFS file system
On a Windows client, run the following command to mount the NFS file system:
mount -o nolock -o mtype=hard -o timeout=60 \\file-system-id.region.nas.aliyuncs.com\! Z:Replace
Z:with your desired drive letter andfile-system-id.region.nas.aliyuncs.comwith your file system's mount target.ImportantDo not use system drive letters (such as
C:) to mount the file system. Instead, use high drive letters (such asZ:,Y:) as the mount targets.If you mount a subdirectory of a NAS file system, the mount may fail. We recommend that you do not mount a subdirectory of a NAS file system. For more information, see What do I do if the invalid device error is returned when I rename a file in an NFS file system on a Windows client?
Run the
mountcommand to check the mount result.If the command output is similar to the following information and contains mount = hard, locking = no, and timeout = <a value that is greater than or equal to 10>, the NFS file system is mounted. Otherwise, the NFS file system fails to be mounted.
To resolve a mount failure, run the
net use <Drive letter> /deletecommand to unmount the file system and then mount the file system again based on the mount command provided in Step 1.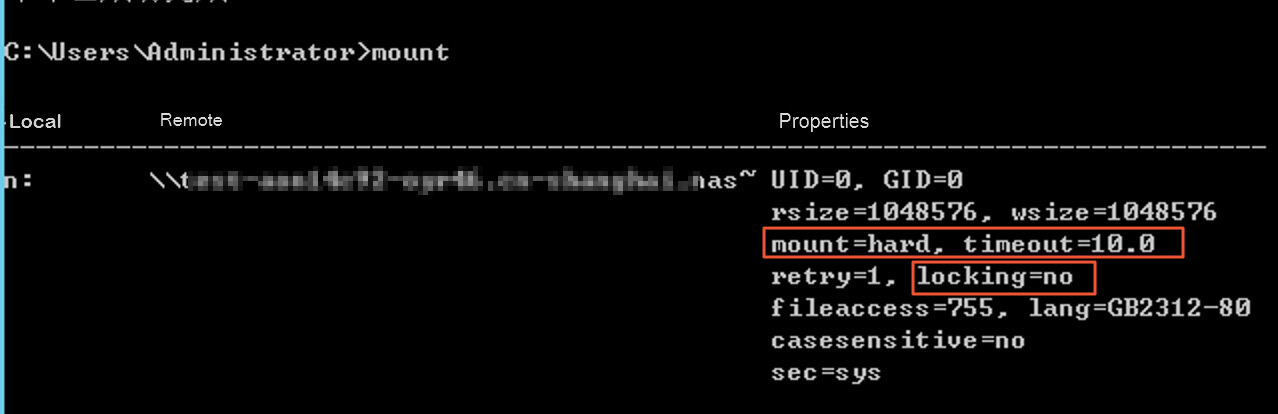
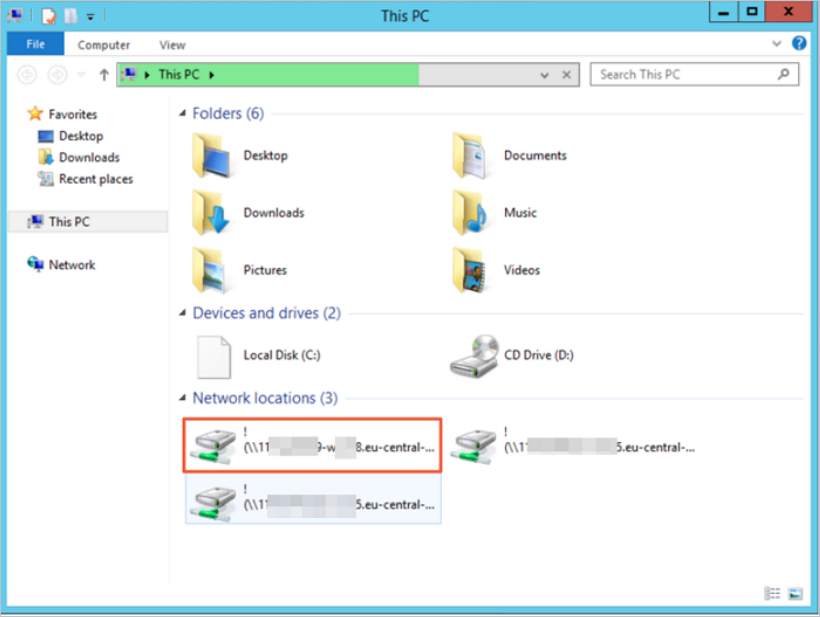
Double-click the This PC icon to view the shared file system.
Create files and folders in the shared file system to check whether you can manage the shared file system.
Automatically mount the NFS file system
Configure the c:\ProgramData\Microsoft\Windows\Start Menu\Programs\StartUp\auto_mount.bat file of a Windows ECS instance to automatically mount an NFS file system when the ECS instance is restarted.
Go to the
C:\ProgramData\Microsoft\Windows\Start Menu\Programs\StartUpdirectory, create a script file namednas_auto.bat, and then enter the following content in the file.Example:
mount -o nolock -o mtype=hard -o timeout=60 \\file-system-id.region.nas.aliyuncs.com\! Z:Replace
Z:with your desired drive letter andfile-system-id.region.nas.aliyuncs.comwith your file system's mount target. For more information, see Mount parameters.Create a scheduled task.
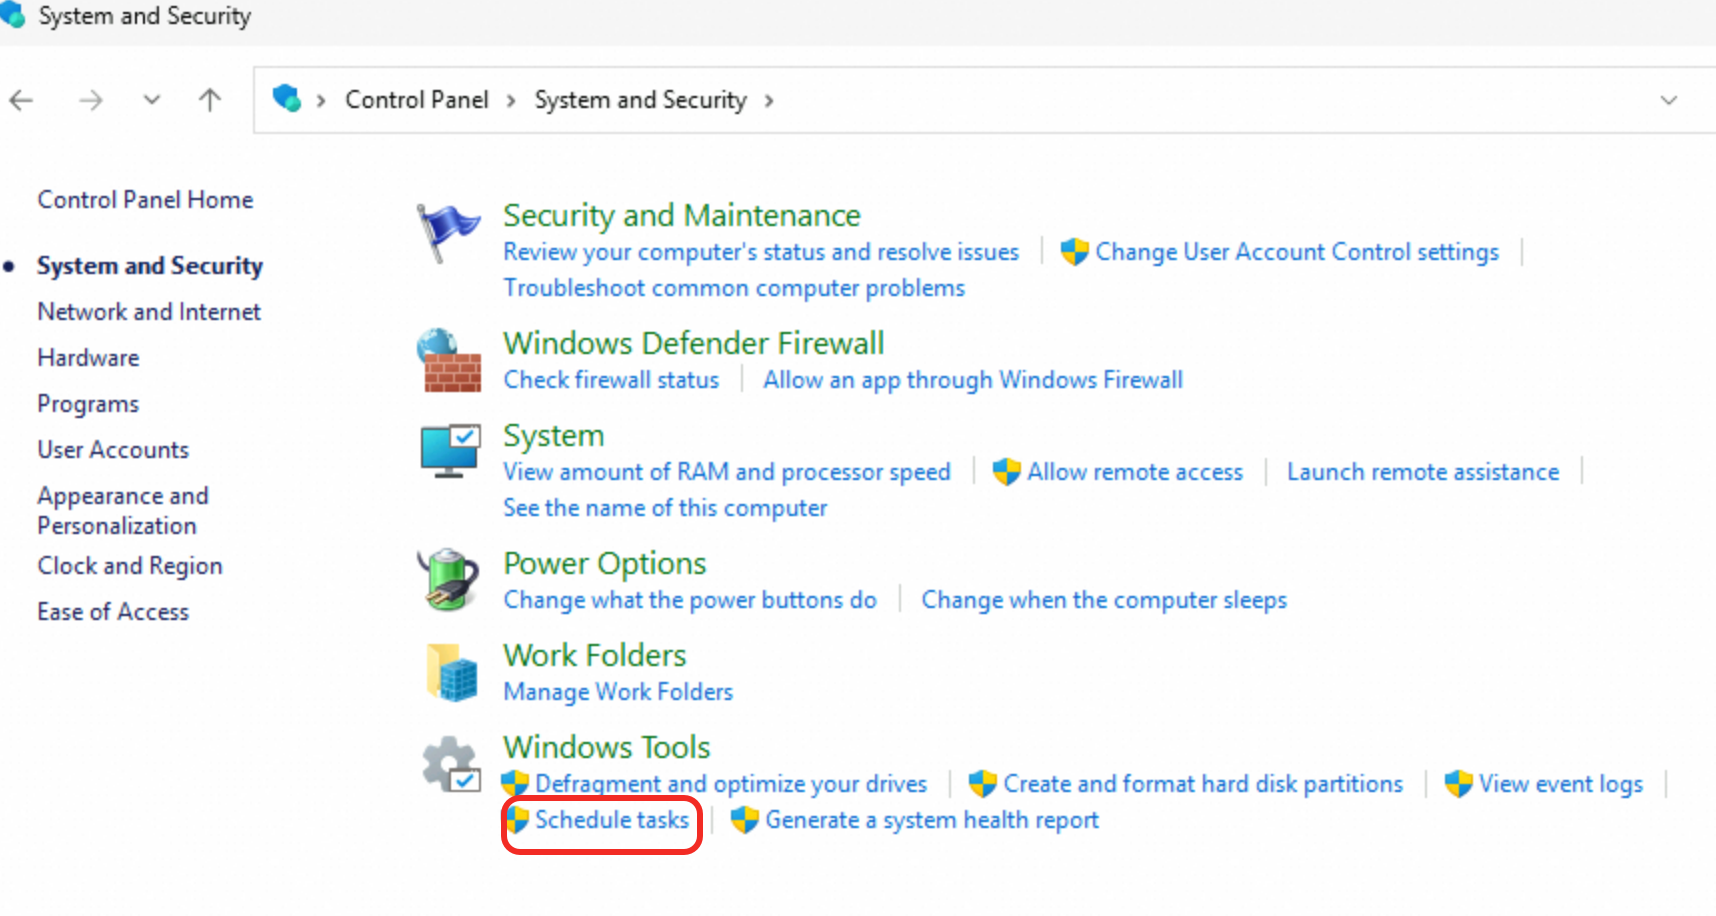
Open the Control Panel and click System and Security. In the Windows Tools section, click Schedule tasks.
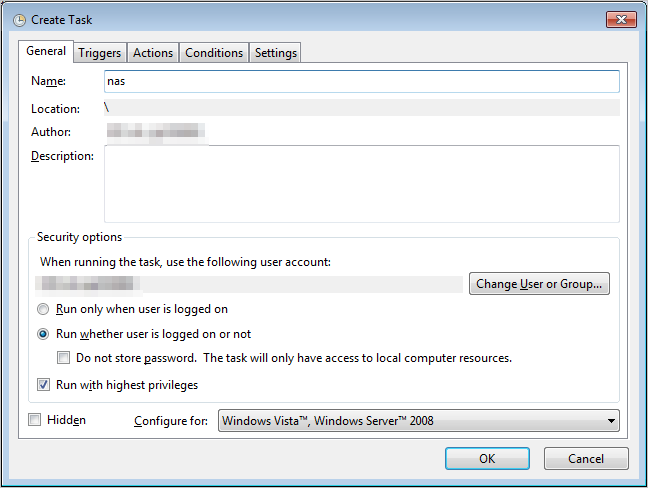
In the Task Scheduler window, choose .

On the General tab, enter the name of the task and select Run whether user is logged on or not and Run with highest privileges.
ImportantOn Windows Server 2016, you must select Run only when user is logged on for the automatic mount to function correctly.
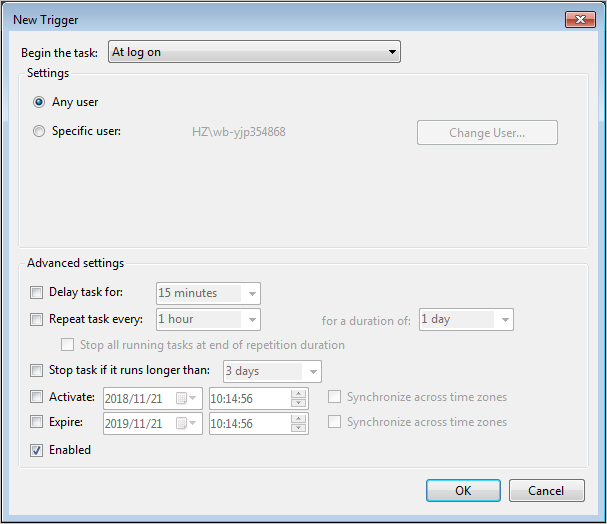
On the Triggers tab, click New. Select At log on from the Begin the task drop-down list. In the Advanced settings section, select Enabled. Click OK.
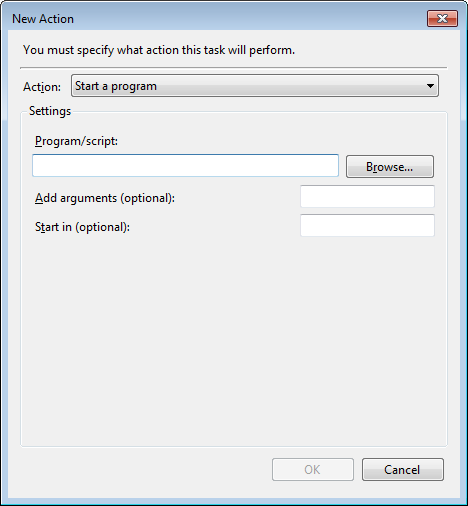
On the Actions tab, click New. Select Start a program from the Action drop-down list and then specify the nas_auto.bat file that you created in Step 1 in the Program/script field. Click OK.
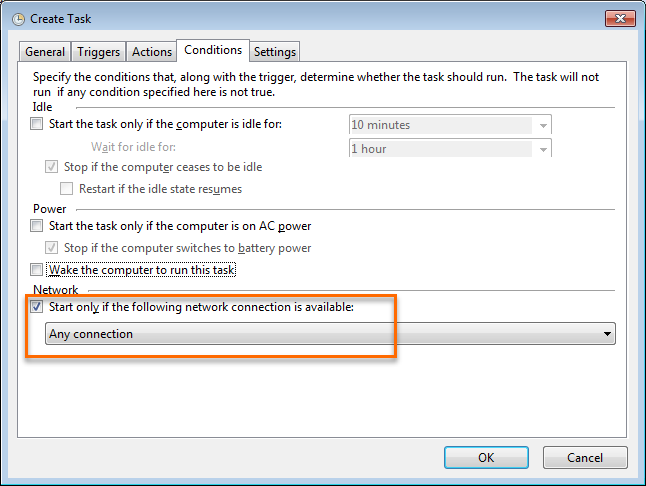
On the Conditions tab, select Start only if the following network connection is available and Any connection in the Network section.
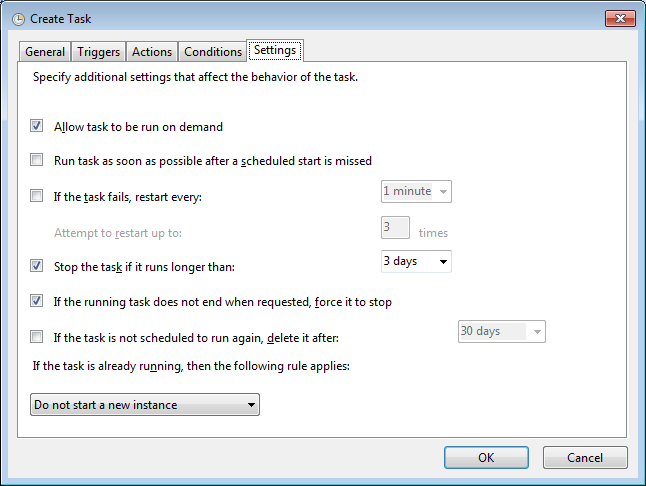
On the Settings tab, select If the running task does not end when requested, force it to stop. Select Do not start a new instance from the drop-down list under If the task is already running, then the following rule applies.
Click OK.
Restart the ECS instance to check whether the scheduled task is created.
ImportantIf you restart the ECS instance, services are interrupted. We recommend that you perform the operation during off-peak hours.
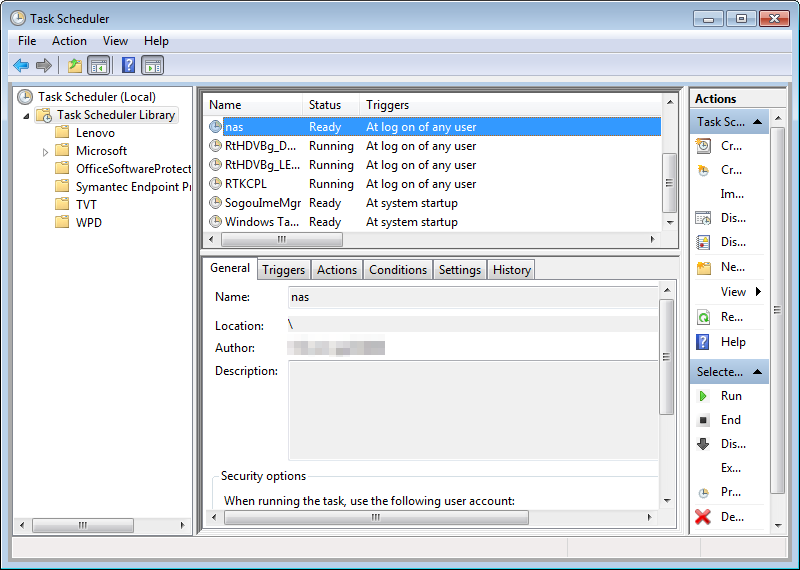
View the status of the scheduled task.
If the task appears in the list as shown in the following example, it was created successfully.
Run the
mountcommand to check the mount result.If the command output is similar to the following information and contains mount=hard, locking=no, and timeout=<a value that is greater than or equal to 10>, the NFS file system is mounted. Otherwise, the NFS file system fails to be mounted.
To resolve a mount failure, open the nas_auto.bat script file and replace the existing script based on the content provided in Step 1.