By default, Simple Application Server instances that run Ubuntu provide only a command-line interface. You can set up a graphical desktop environment to manage the instance visually.
Prerequisites
You have created a Simple Application Server instance that runs Ubuntu. For more information, see Create a Simple Application Server.
Procedure
Step 1: Set up the graphical interface
Ubuntu 24.04
As the
rootuser, remotely connect to the Linux server.Run the following commands to install the desktop environment.
apt-get update
apt install -y xfce4 xfce4-goodies dbus-x11
Install and configure Virtual Network Computing (VNC).
Run the following command to install VNC.
apt install -y tightvncserverRun the following command to start the VNC service and set a password for VNC as prompted.
vncserverImportantIf the password is longer than eight characters, only the first eight characters are used as the VNC logon password.
Modify the VNC configuration file.
echo 'startxfce4 &' >> ~/.vnc/xstartupRun the following commands to restart the desktop process.
vncserver -kill :1
vncserver
Ubuntu 22.04
As the
rootuser, remotely connect to the Linux server.Run the following commands to install the desktop environment.
apt-get update
apt install -y xfce4 xfce4-goodies
Run the following command to install VNC.
apt install -y tightvncserverRun the following command to start the VNC service and set a password for VNC as prompted.
vncserverImportantIf the password is longer than eight characters, only the first eight characters are used as the VNC logon password.
Ubuntu 18.04/20.04
As the
rootuser, remotely connect to the Linux server.Run the following commands to install the desktop environment.
apt-get update
apt install -y gnome-panel gnome-settings-daemon metacity nautilus gnome-terminal ubuntu-desktop
Install and configure VNC.
Run the following command to install VNC.
Ubuntu 18.04
apt-get install -y vnc4serverUbuntu 20.04
apt-get install -y tightvncserverRun the following command to start VNC.
vncserverWhen you start VNC for the first time, you are prompted to set a logon password. Enter and confirm the VNC logon password. Then, enter n at the following prompt and press Enter.
 Important
If the password is longer than eight characters, only the first eight characters are used as the VNC logon password.
If the command output is similar to the following figure, VNC has started.

izbp166dsac66tx****:1 indicates the port number of the VNC service on the server. izbp166dsac66tx**** is the hostname.
Run the following command to back up the VNC xstartup configuration file.
cp ~/.vnc/xstartup ~/.vnc/xstartup.bakRun the following command to modify the VNC xstartup configuration file.
vim ~/.vnc/xstartupPress the i key to enter edit mode and replace the content of the file with the following:
#!/bin/sh
export XKL_XMODMAP_DISABLE=1
export XDG_CURRENT_DESKTOP="GNOME-Flashback:GNOME"
export XDG_MENU_PREFIX="gnome-flashback-"
gnome-session --session=gnome-flashback-metacity --disable-acceleration-check &
Press the Esc key, enter
:wq, and then press the Enter key to save the file and exit.
Restart VNC.
Run the following command to shut down the running VNC service.
vncserver -kill :1Run the following command to start a new VNC service.
The VNC port number is still 1.
vncserver -geometry 1920x1080 :1
Ubuntu 16.04
As the
rootuser, remotely connect to the Linux server.Install the desktop environment.
Run the following command to install the X Window System.
apt-get install -y x-window-system-coreRun the following command to install gdm3, the GNOME display manager.
apt-get install -y gdm3Run the following command to install the Ubuntu desktop.
apt-get install -y ubuntu-desktopRun the following command to install GNOME dependency packages.
apt-get install -y gnome-panel gnome-settings-daemon metacity nautilus gnome-terminalRun the following command to back up the VNC xstartup configuration file.
cp ~/.vnc/xstartup ~/.vnc/xstartup.bakRun the following command to modify the VNC xstartup configuration file.
vi ~/.vnc/xstartupPress the i key to enter edit mode.
Modify the configuration file as follows:
Add a number sign (
#) at the beginning of each of the following lines to comment them out:xsetroot -solid grey vncconfig -iconic & x-terminal-emulator -geometry 80x24+10+10 -ls -title "$VNCDESKTOP Desktop" & x-window-manager &Add the following configuration information to the end of the file:
gnome-panel &
gnome-settings-daemon &
metacity &
nautilus &
gnome-terminal &
The modified configuration file should look similar to the following:

Press the Esc key, enter
:wq, and then press the Enter key to save and exit the file.
Install and configure VNC.
You can run the following command to update the software sources.
apt-get updateYou can run the following command to install VNC.
apt-get install -y vnc4serverRun the following command to start VNC.
vncserverWhen you start VNC for the first time, you are prompted to set a logon password. Enter and confirm the logon password.
ImportantIf the password you set is longer than eight characters, only the first eight characters are used as the VNC logon password.
If the command output is similar to the following figure, VNC has started.
In the output izbp166dsac66tx****:1, izbp166dsac66tx**** is the hostname and :1 is the port number for the VNC service.
Restart VNC.
Run the following command to stop the VNC service.
vncserver -kill :1Run the following command to start a new VNC service.
The VNC port number is 1.
vncserver :1
Step 2: Access the graphical desktop
This section uses VNC Viewer as an example.
Configure the security group.
In the firewall of the Ubuntu server, allow traffic on ports
5900and5901for the VNC service. For more information, see Firewall settings.
On your local Windows computer, go to the official VNC Viewer website to download and install VNC Viewer.
Open VNC Viewer. In the menu bar, select .
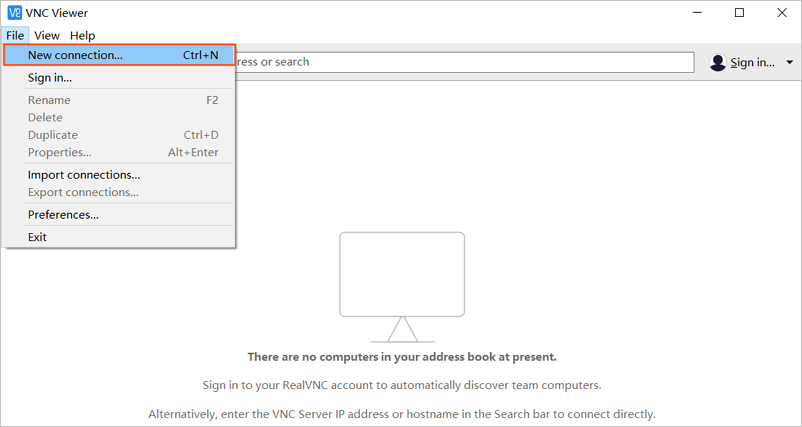
In the Properties dialog box, configure the logon information for the Ubuntu desktop, and then click OK.
The required configuration items are as follows:
VNC Server: Enter <Public IP address of the Ubuntu server>:<VNC port number>. For example:
114.55.XX.XX:5901.For more information about how to obtain the public IP address of the Ubuntu server, see How do I find the public IP address of a Simple Application Server?.
Name: Enter a custom name for the Ubuntu desktop. For example:
test001.
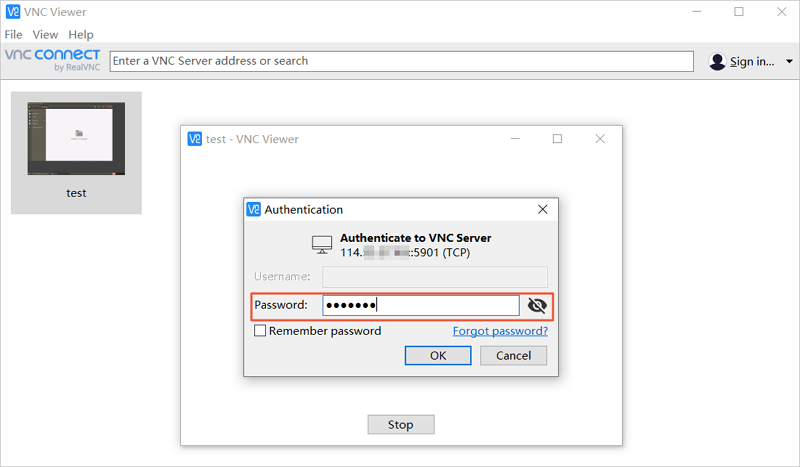
Double-click the card for the Ubuntu desktop.
For example, double-click the card named
test001.In the Authentication dialog box, enter the VNC logon password in the Password text box, and then click OK.
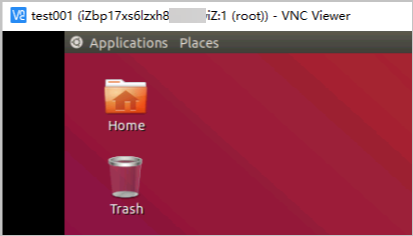
After you log on, the Ubuntu graphical interface appears, as shown in the following figure. To open a terminal in the graphical interface, right-click and select Open Terminal.
FAQ
What do I do if I cannot access the graphical desktop using VNC Viewer?
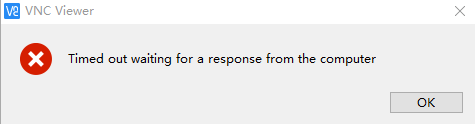
Check whether the Ubuntu server's firewall allows traffic on ports 5900 and 5901 for the VNC service. For more information, see Firewall settings.
Check whether a firewall is configured on your local computer.
Check whether you can ping the public IP address of the Ubuntu server from your local computer.
For more information, see Remote connection FAQ.
How do I reset the VNC password?
Change the VNC password. When prompted, enter and confirm the new password.
vncpasswdImportantIf the password is longer than eight characters, only the first eight characters are used as the VNC logon password.
(Optional) Restart the VNC service.
vncserver -kill :1
vncserver