This topic describes how to open a SQL window and the supported SQL window operations.
Prerequisites
You have access permissions to DMS and you have logged on to the DMS console.
Background
- This example uses MySQL databases.
- You can open a maximum of 20 SQL windows in DMS. We recommend that you open a maximum of 5 windows at one time.
Procedure
Select a MySQL database, and click Log on to Database.
In the top navigation bar, choose SQL Operations>SQL Window.
Open a blank SQL window, as shown in the following figure.
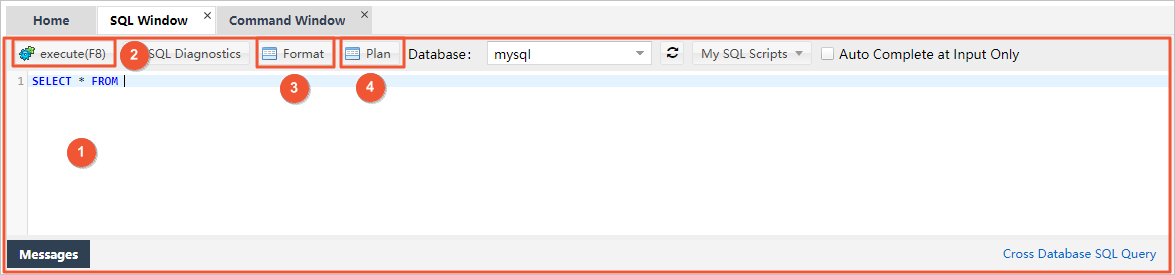
The callout numbers in the figure are described in the following table.
Callout number Name Description 1 SQL window The body of the SQL window. 2 Execute (F8) Click this button to execute the entered SQL statement. 3 Beautify /td> Click this button to reformat the entered SQL statement to make it more readable. 4 Execution Plan Click this button to display the execution plan of the selected SQL statement. This function allows you to optimize the SQL statement and improve the processing performance. Enter a SQL statement and click Execute to query or update the data.
Notes
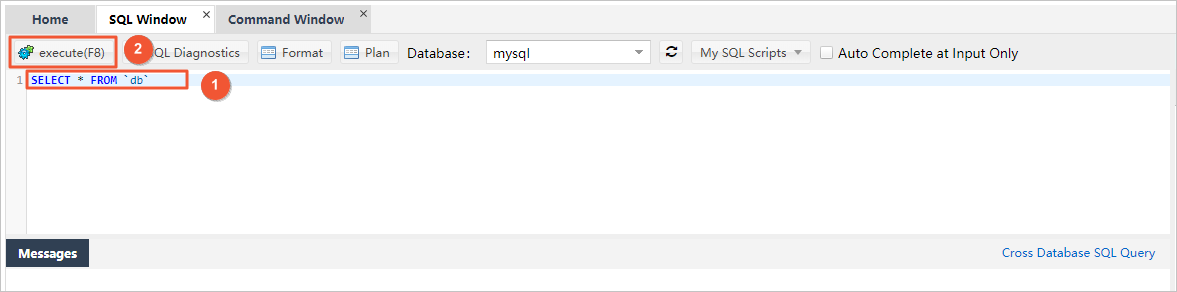
- Callout number 1: Enter a SQL statement.
- Callout number 2: Click Execute (F8) to execute the SQL statement.
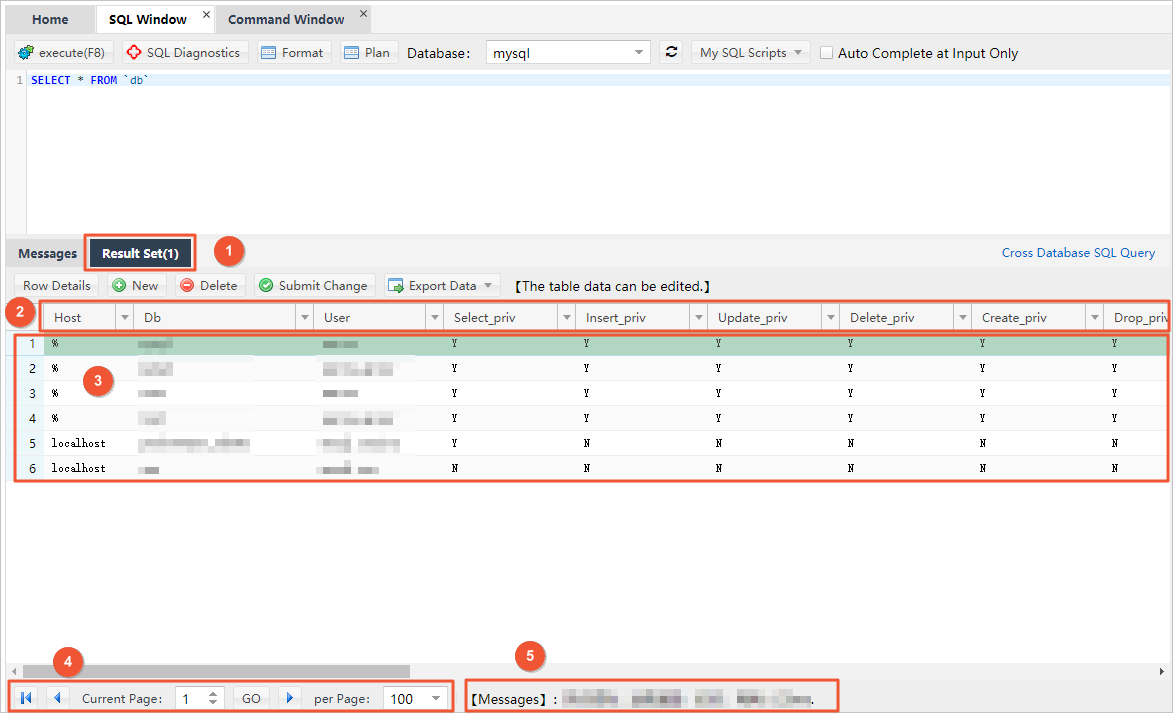
You can view the Result Set of the execution.
Notes
Callout number 1: The Result Set tab page displays the results returned by the query.
Callout number 2: The first row of the table shows the field names. If an alias has been specified for a field in the SQL statement, the alias is displayed in this table.
Callout number 3: This area displays the queried data in rows. A horizontal scroll bar and a vertical scroll bar may appear if the table is too small to display all of the data.
Callout number 4: Click Show in Pages or Next Page to view the results.
- By default, each page shows 100 rows. Go to the next page if you want to view more results.
- You can set the number of data rows displayed on each page in the Per Page column.
- The results on the next page are appended to the data displayed in callout number 3 in the figure.
- Callout number 5: The progress and elapsed time for data acquisition.
View the messages about the SQL execution.
Each time a data query (SELECT) or a data correction (INSERT, UPDATE, or DELETE) is executed, DMS returns a message that indicates the result of the execution, including the status and impacts.
Notes
After you execute a SQL statement, you can click the Messages tab to view the execution message. No result set is returned for data correction. DMS directly displays the Massages tab after the data correction is complete.
DMS executes entered SQL statement in the following steps:
Analyzes the SQL statement.
Executes the SQL statement in the database.
Displays the queried data.
Calculates the number of data rows that are queried or changed, and collects other statistics.
DMS displays the SQL execution results.
Whether the execution is successful.
Number of queried rows, or number of rows affected by the adding, deleting, or modifying operations.
The time consumed to execute the SQL statement.
Execute multiple SQL statements.
DMS allows you to execute multiple SQL statements simultaneously.
To perform this task, follow these steps:
Enter the SQL statements that you want to execute in the SQL window. Separate each SQL statement with a separator, for example, a semicolon (;).
If you want to execute only some of the entered SQL statements, select the expected SQL statements for execution. If you want to execute all the entered SQL statements, unselect or select all the SQL statements and click Execute.
Wait until all SQL statements are executed.
After you execute a SELECT statement, DMS displays the result set. If you execute other statements, DMS displays the execution results, such as the number of changed rows.
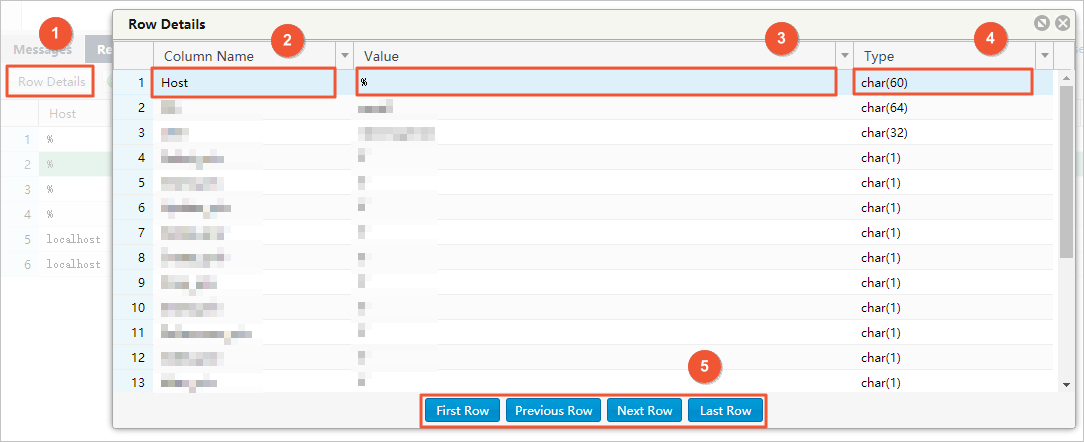
Click Row Details to view the details of a specific row in the result set.
Notes
Callout number 1: In the Result Set table, select a single row record and click Row Details to view the details of the selected row. The Row Details dialog box appears. In this dialog box, you can view the name, value, and type of each field in the record.
Callout number 2: Field Name: If you have specified aliases for the fields, the aliases are displayed.
Callout number 3: Field Value: DMS automatically parses the field values and displays the parsed results. DMS also reformats the time data and binary data to readable strings for display.
Callout number 4: Field Type: You can view the type and length of each field.
Callout number 5: Record navigation area. You can click Previous, Next, First, and Last to view the row details of the previous, next, or first data record.
If you need to edit the data, for example, if you want to add, delete, or update the field value, you can edit the queried data in the result set and submit changes.
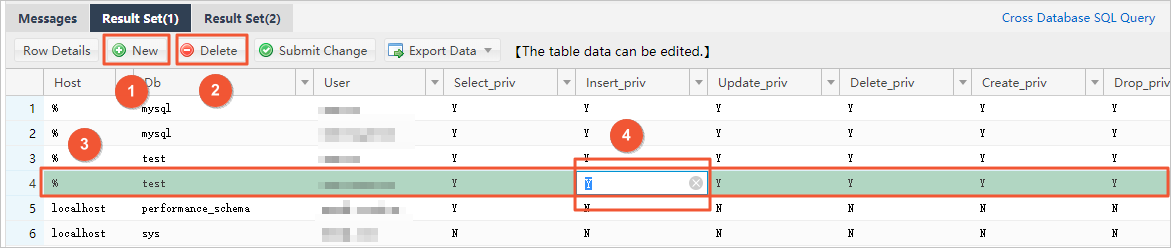
Notes
Callout number 1: Click Add to add a data row to the currently queried table.
Callout number 2: Click Delete to delete the selected data row from the result set table.
Callout number 3: Select a data row. You must select a row before you operate the table data.
Callout number 4: Directly update the values of the fields in the selected row.
After you have modified the data, click Submit Change and click OK to save the results to the database.
Notes
After you click Submit Change, DMS displays the SQL statement used to save your changes. You can confirm the SQL statement to prevent mistakes or data loss.
Click Format to reformat the selected SQL statement and change it to a readable SQL statement.
If you have selected a SQL statement, only the selected SQL statement will be reformatted. If you do not select any SQL statement, all the SQL statements that you entered will be reformatted.
The Format function reformats your SQL statements to standard and readable statements, without changing the SQL execution logic and semantics or affecting the execution.Example
Original SQL statements.

Reformed SQL statements

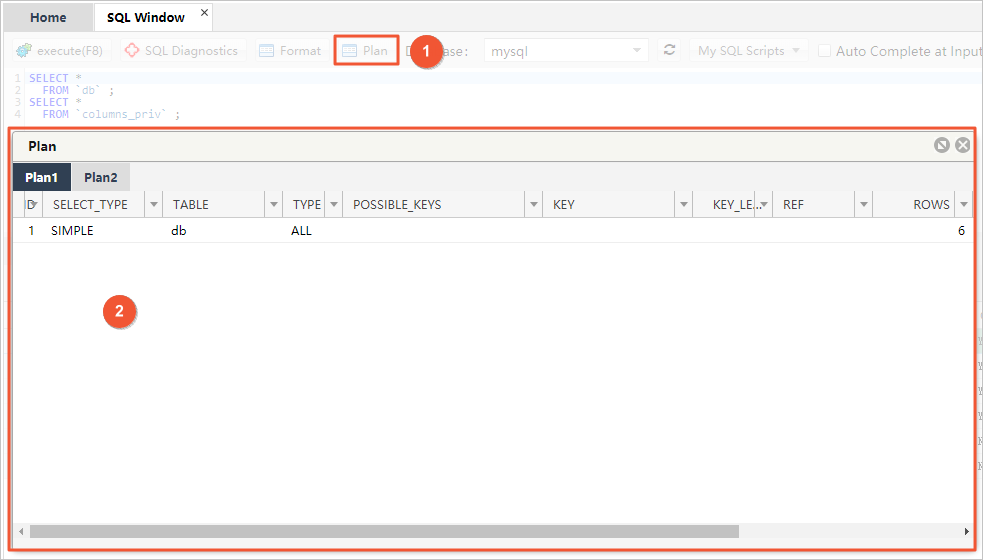
Click Execution Plan to view the execution plan if you want to troubleshoot SQL-related problems or optimize SQL performance.
Notes
Callout number 1: Click Execution Plan to view the execution plan of the selected SQL statement. If no SQL statement is selected, DMS displays the execution plans of all SQL statements.
Callout number 2: DMS displays a execution plan in details. You can view information about an execution plan, such as the plan type and possible keys.
- The display mode and the actual displayed content depend on the type of the database.
- If you select multiple SQL statements to view their execution plans, DMS displays the execution plan of each SQL statement in detail on a different tab page.