When teams collaborate in Yuque, document events often need to reach other systems for audit logging, notification routing, or workflow automation. Developed by Alibaba Group, Yuque is a professional cloud knowledge base that provides knowledge management capabilities for individuals and teams. EventBridge supports fast integration with Yuque through an HTTP webhook, so you can filter, transform, and forward these events to downstream targets without building custom polling logic.
How it works
The integration connects Yuque to EventBridge in three steps:
Create an HTTP event source in EventBridge to generate a public webhook URL.
Register the webhook URL in Yuque so Yuque pushes event notifications to EventBridge.
Verify the connection by triggering a test event and confirming it appears in EventBridge.
Once connected, every Yuque event that matches your selected triggers is delivered to the custom event bus. You can then create event rules to route events to downstream targets.
Prerequisites
Before you begin, make sure you have:
Step 1: Create an HTTP event source in EventBridge
Create a custom event source of the HTTP/HTTPS Events type in the EventBridge console. For the full procedure, see Create a custom event source of the HTTP/HTTPS Events type.
Set the following parameters:
| Parameter | Value | Description |
|---|---|---|
| Request Type | HTTP & HTTPS | Accepts both HTTP and HTTPS requests from Yuque. |
| Request Method | POST | Yuque delivers webhook payloads as POST requests. |
| Security Configuration | Optional | Allows unauthenticated requests. |
After the event source is created, find it in the event source list and click Details. Copy the Internet request URL -- this is the webhook endpoint that Yuque sends events to.

Step 2: Configure a webhook in Yuque
Log on to the Yuque console and click the name of a knowledge repository.
In the upper-right corner, click the
 icon and select Settings.
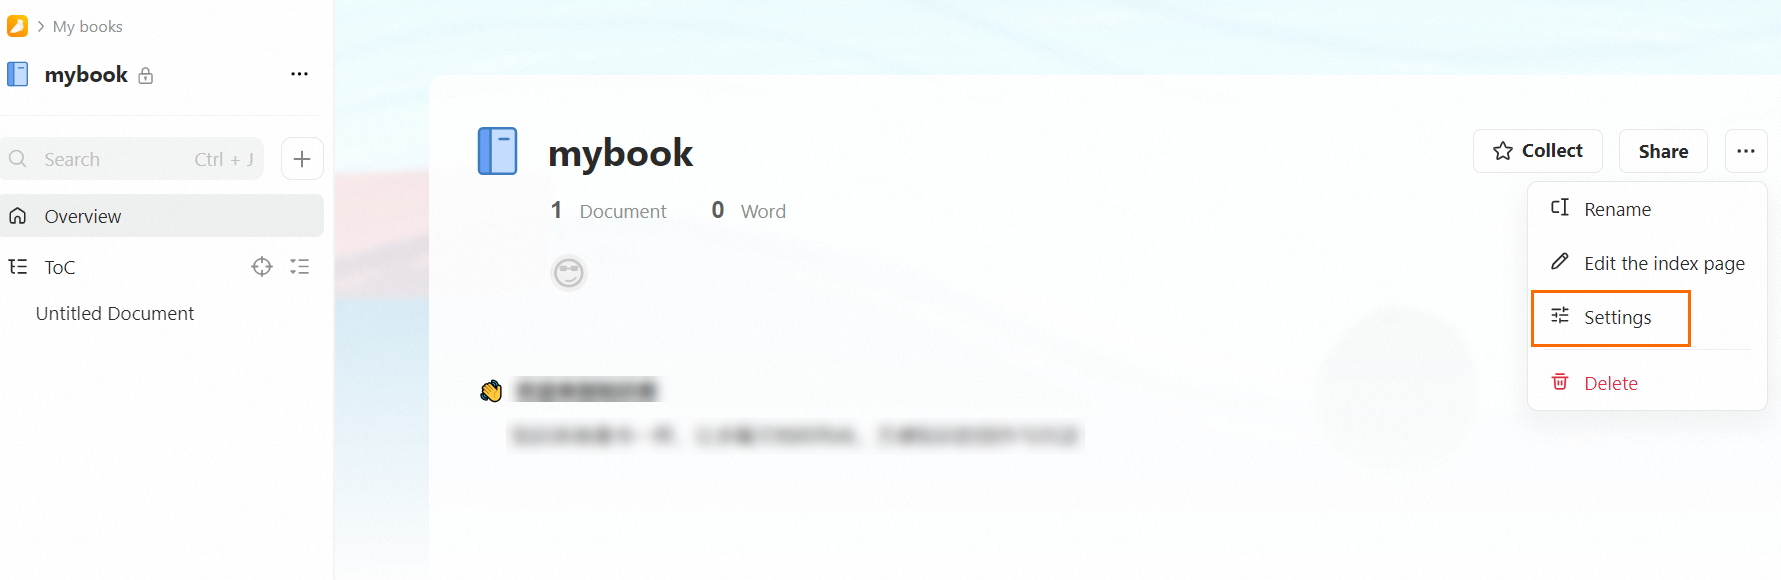
In the left-side navigation pane, click Notifications.
Set the following parameters and click Add:
Parameter Value Push to Others Robot name A descriptive name for the webhook bot, such as eventbridge-webhook.Webhook URL The Internet request URL copied from Step 1. Push when the following events occur in book One or more event types. For example, select publishDocument to trigger an event each time a document is published. 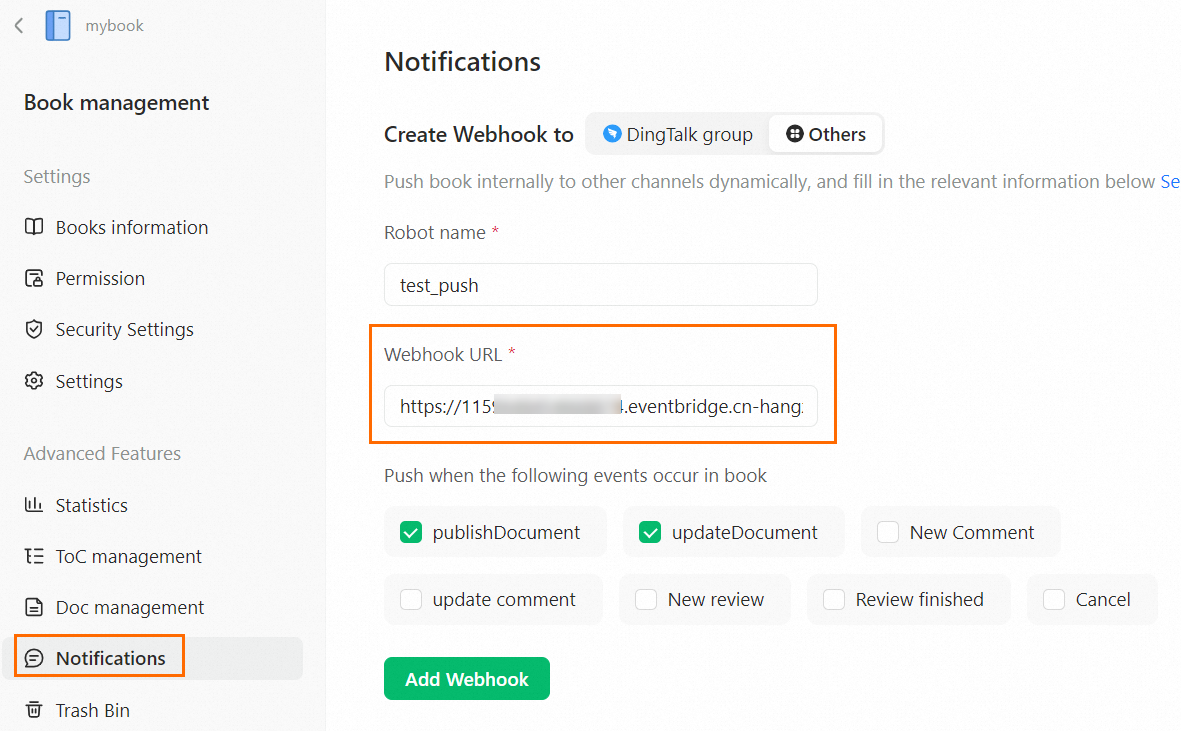
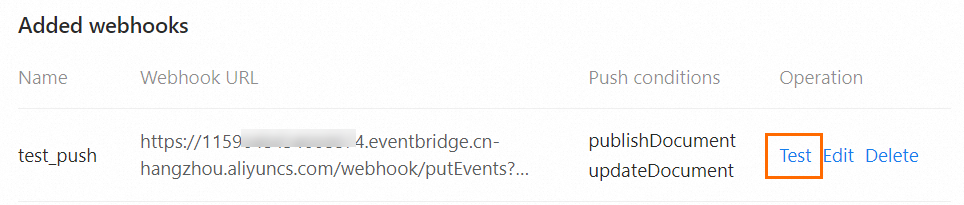
Step 3: Trigger a test event
In the Message Hook List section of the Add Web Hook page, find the webhook created in Step 2 and click Test in the Operation column.
Verify the result
Confirm that EventBridge received the test event:
Log on to the EventBridge console.
In the top navigation bar, select the region where your custom event bus is deployed.
In the left-side navigation pane, click Event Buses.
In the left-side navigation pane, click Event Tracking to view the received events.
If the test event appears in the event list, the integration is complete. All future Yuque events that match your selected triggers are delivered to this event bus automatically.