Flink CDC connectors can be used to synchronize data and table schema changes in real time. You can use a data synchronization template to quickly generate Flink SQL deployment code for data synchronization. This topic describes how to use a multi-database multi-table synchronization template or a sharded-data merging template to synchronize data.
Background information
Realtime Compute for Apache Flink supports the following data synchronization methods: multi-database multi-table synchronization and sharded-data merging. The following table describes the differences between the methods.
Synchronization method | Description |
Multi-database and multi-table synchronization | If you want to synchronize one or more business data tables from one or more databases to another database in real time, you can use the multi-database multi-table synchronization template. Flink CDC connectors can automatically synchronize the full and incremental data of an entire database. Flink CDC connectors can also synchronize the schema changes of each source table, such as added columns, to the destination table in real time. The multi-database multi-table synchronization template converts your parameters into the CREATE DATABASE AS statement. For more information about the CREATE DATABASE AS statement, see CREATE DATABASE AS (CDAS). |
Sharded-data merging | If your business data is scattered in different databases or business tables, you need to merge multiple tables in a sharded database to synchronize data from the tables that have a similar schema to one destination table. Flink CDC connectors can automatically synchronize the full and incremental data of all table shards in the sharded database from source databases. The tables include the new tables that meet regular expressions. Flink CDC connectors can also synchronize the table schema changes of each source table, such as added columns, to the destination table in real time. The sharded-data merging template converts your parameters into the CREATE TABLE AS statement. For more information about the CREATE TABLE AS statement, see CREATE TABLE AS (CTAS). |
Limits
Flink CDC connectors can synchronize data only from MySQL to Hologres.
Precautions
If you use a Flink CDC connector to synchronize data from MySQL to Hologres, the table schema changes are also synchronized. For more information, see CREATE TABLE AS (CTAS). If you want to synchronize data from MySQL to Hologres, take note of the following points:
You do not need to manually create a table in Hologres.
Realtime Compute for Apache Flink automatically creates a table in Hologres. However, if the required table already exists in Hologres, Realtime Compute for Apache Flink synchronizes data based on the destination database and table that you select during the plan creation.
Hologres does not allow you to change the data types of columns.
If the data type of the current field is different from the data type of the Hologres table, the data fails to be written. In this case, you must modify the data type of the column and synchronize the data again.
For more information about Hologres result tables, see Create a Hologres result table.
Procedure
Log on to the Realtime Compute for Apache Flink console.
Find the workspace that you want to manage and click Console in the Actions column.
In the left navigation menu, click . Click the
 icon and select New Draft with Template.
 In the New Draft dialog box, click the Flink CDC tab. Select the Data Synchronization from MySQL to Hologres card, and click Next.
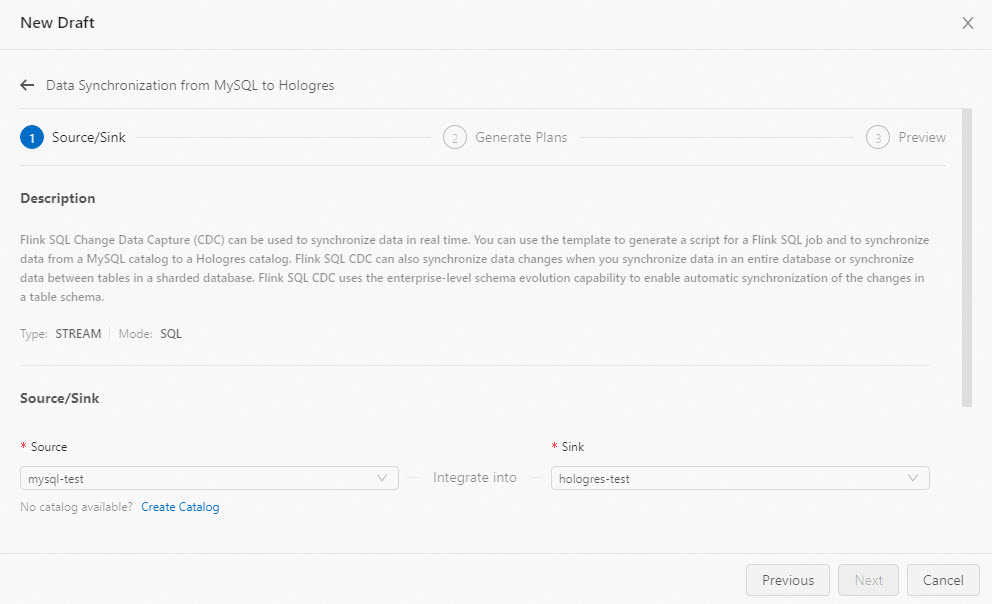
Configure the data synchronization information.
Configure the source and sink parameters and click Next.
Category
Parameter
Description
Source
MySQL Catalog
You can select the MySQL catalog that you created. If no MySQL catalog exists, click Create Catalog. For more information about how to create a MySQL catalog, see Manage MySQL catalogs.
MySQL server-id
Enter a unique ID for each MySQL database client. Valid values: 5400 to 6400. This parameter can also be set to an ID range, such as 5400-5408. If you enable parallel reading in incremental reading mode, we recommend that you set this parameter to a value range to ensure that the server ID for each parallel thread is unique.
ImportantWe recommend that you do not use the same server ID for different deployments or services that access the database.
Sink
Hologres Catalog
You can select the Hologres catalog that you created. If no Hologres catalog exists, click Create Catalog. For more information, see Manage Hologres Catalog.
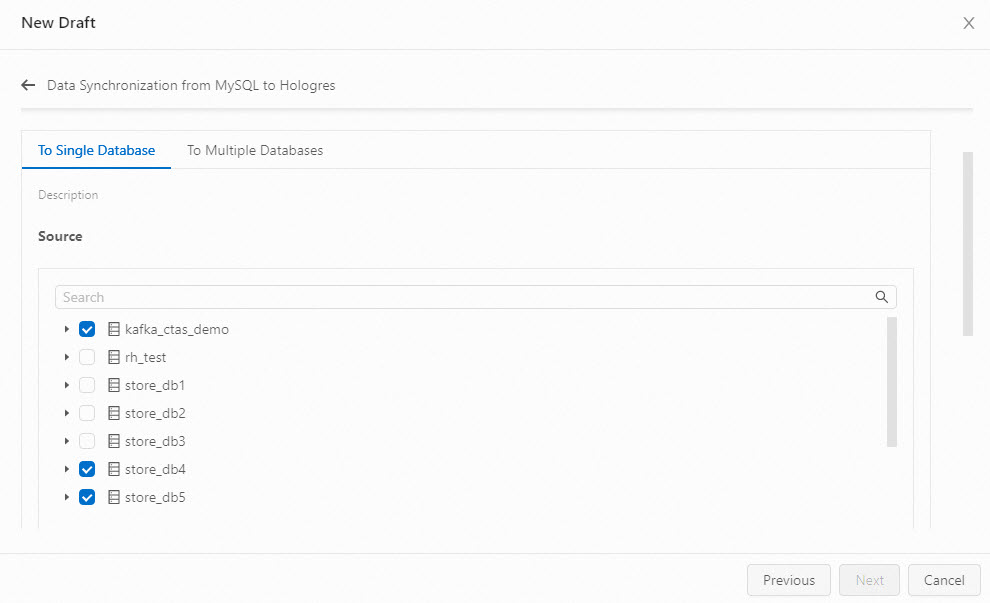
Create a plan.
Multi-database and multi-table synchronization
On the To Single Database tab, select the source database and table name.
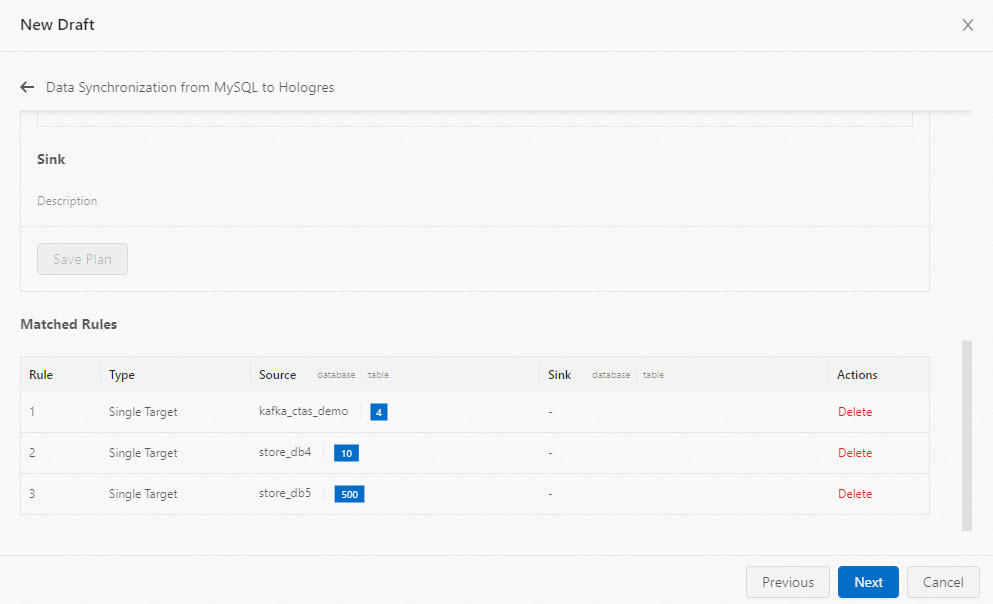
Click Save Plan to view the plan list.
 Note
NoteWhen you perform multi-database and multi-table synchronization, the system uses this template to create a database and a table whose names are the same as the names of the database and table of the source catalog in the destination catalog. By default, the created database and table are synchronized to the public schema. If you want to change the database name, table name, or schema, we recommend that you use SQL statements. For more information about how to change the name of a database or table, see CREATE TABLE AS (CTAS) and CREATE DATABASE AS (CDAS). For more information about how to specify a schema, see Using CDAS as a destination Catalog. After you specify a schema, the format of the table name changes if you use the related catalog. For more information, see Manage Hologres Catalog.
Click Next.
View the SQL code that is generated based on the destination database and table that you selected.
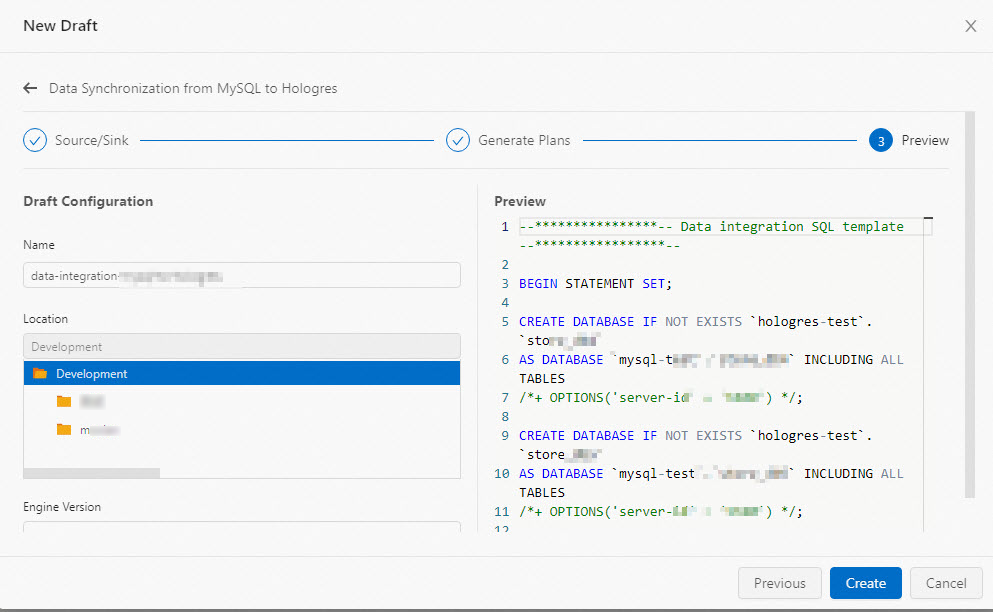
You can modify the Name, Location, or Engine Version parameter based on your business requirements.
Sharded-data merging
On the To Multiple Databases tab, select the names of the source databases and tables, or enter the names of the destination databases and tables.
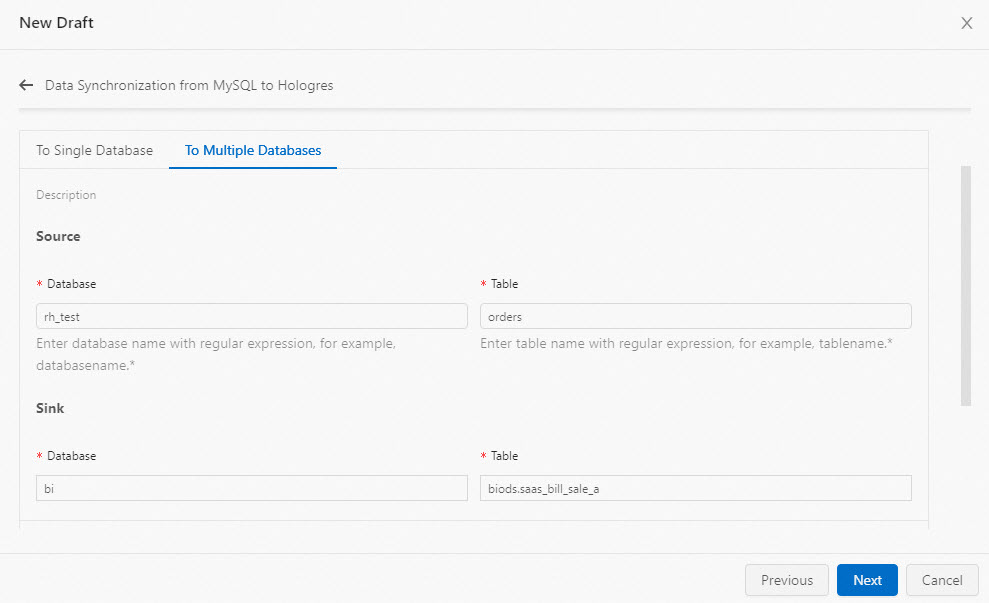 Note
NoteWe recommend that you use regular expressions to specify the source databases and source tables.
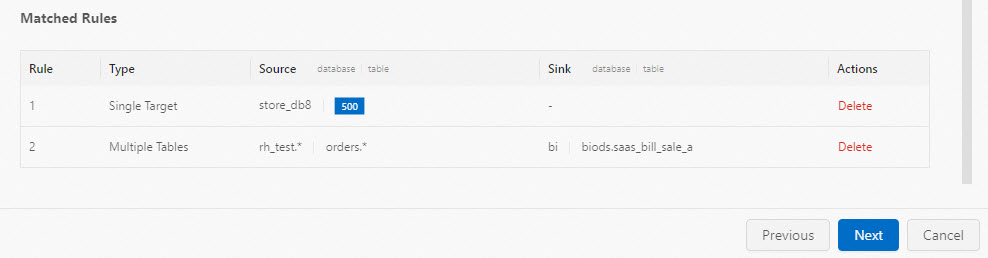
Click Save Plan and view the plan list.
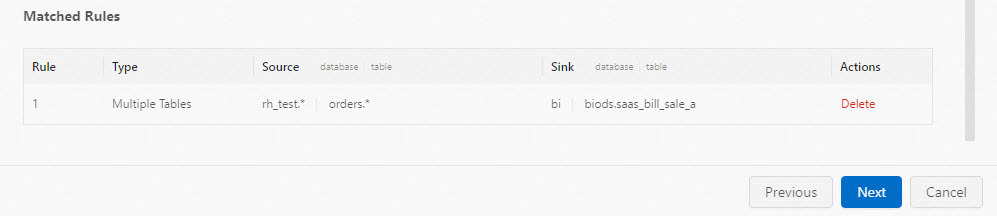
You can create multiple plans for multi-database and multi-table synchronization and sharded-data merging at the same time in a draft. The following figure shows an example.
Click Next.
View the SQL code that is generated based on the destination database and table that you selected.
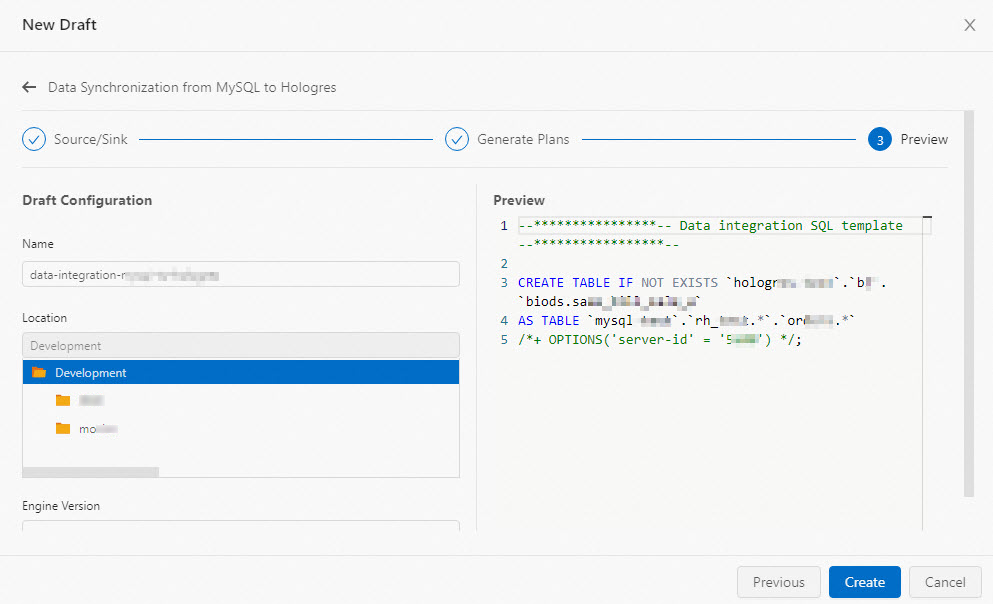
You can modify the Name, Location, or Engine Version parameter based on your business requirements.
Click Create.
After you click Create, you are redirected to the SQL Editor page. The subsequent operations are the same as the operations that are required to develop a common deployment. For more information about the parameter configurations and subsequent operations, see Job development map and Start a job deployment.