When a third-party AI application communicates with the OpenAPI MCP Server over HTTP, you can use aliyun mcp-proxy as a local authentication proxy if the application cannot handle Alibaba Cloud authentication. This proxy automatically handles OAuth authorization and token management, allowing the application to call Alibaba Cloud service APIs without handling credentials.
aliyun mcp-proxy
aliyun mcp-proxy is an MCP Server proxy tool provided by the Alibaba Cloud CLI to simplify the interaction between third-party AI applications (such as Dify and LangChain) and the OpenAPI MCP Server. You must manually complete OAuth authorization on the first launch, after which the proxy service automatically handles token refreshes.
How it works: An application sends an API request to aliyun mcp-proxy. The proxy service then adds credentials and forwards the request to the OpenAPI MCP Server.
After aliyun mcp-proxy is started, all users on the local machine can use the proxy port to access MCP Servers with the permissions of the CLI user who started the proxy. To prevent permission abuse, ensure that the proxy is used only in a trusted, single-user environment and that the proxy port is not exposed to external networks. We recommend that you use the --allowed-servers or --blocked-servers parameters to restrict the scope of accessible servers and configure minimum necessary permissions for MCP Servers. For more information, see Security Risks and Protection.
Configure and run the proxy
Step 1: Configure the Alibaba Cloud CLI
-
Install or upgrade the Alibaba Cloud CLI to version
3.2.0or later. For installation instructions, see Install the CLI (Linux). -
Configure the CLI with the credentials of an Alibaba Cloud account or a RAM user that has permissions to create OAuth applications. Alternatively, you can use the
--oauth-app-nameparameter in subsequent steps to specify an existing OAuth application.aliyun configure # Enter your AccessKey ID, AccessKey Secret, and default region as prompted.
Step 2: Initial run and OAuth authorization
When you run mcp-proxy for the first time, you must complete a one-time OAuth authorization to obtain permission to refresh the token.
-
Start the proxy in the foreground.
-
In an environment with a graphical user interface, when the
--no-browserparameter is not used, the CLI automatically launches a browser to perform the OAuth authorization flow. After the authorization is complete, you do not need to manually enter the code. You can then skip to Step 5.aliyun mcp-proxy --host 127.0.0.1 --port 8088 -
When you operate in a server environment without a graphical user interface, add the
--no-browserparameter. You will then be guided to obtain a code.aliyun mcp-proxy --host 127.0.0.1 --port 8088 --no-browser
NoteYou can use the
--oauth-app-nameparameter to specify a custom OAuth application that must meet the following conditions:-
OAuth scope: Must be
/acs/mcp-server. -
Redirect URI: Must be the same as the redirect URI used for
aliyun mcp-proxyauthentication. -
Application Type: Must be a
Nativeapplication.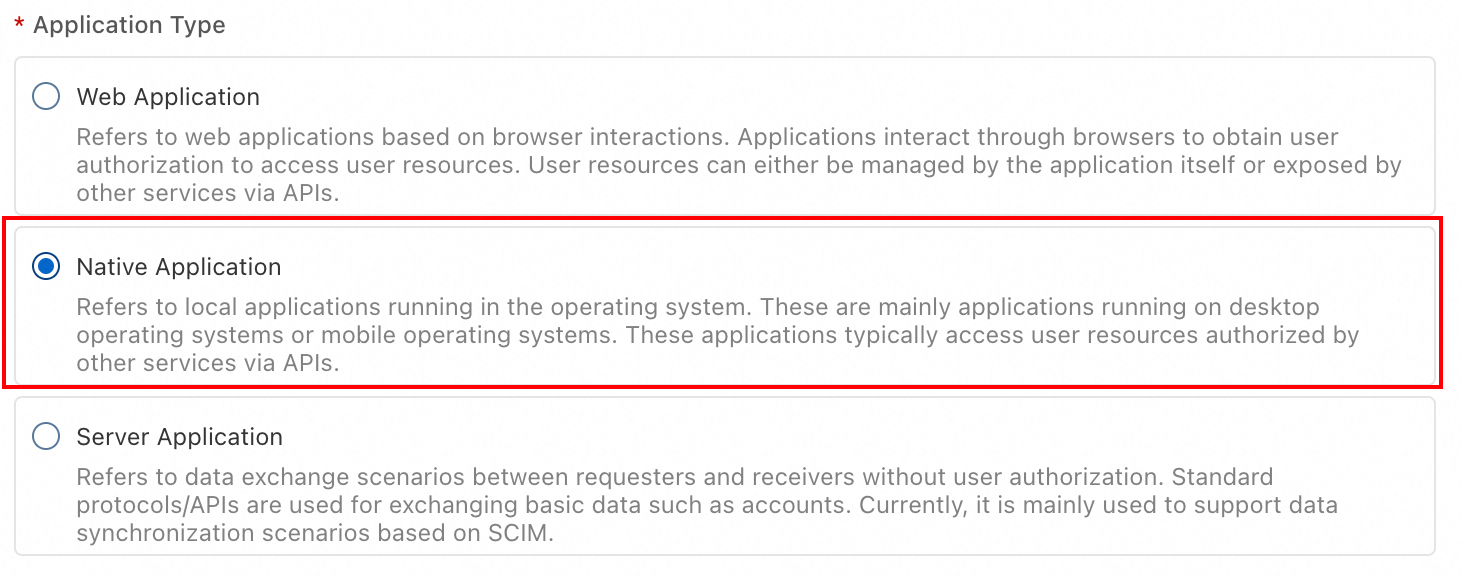
-
-
The terminal displays the authorization URL.
Setting up MCPOAuth profile 'default-mcp'... Opening browser for OAuth login... URL: https://signin.aliyun.com/oauth2/v1/auth?client_id=XXX8&response_type=code&scope=%2Facs%2Fmcp-server&redirect_uri=http://0.0.0.0:8088/callback&code_challenge=XXX&code_challenge_method=S256 Please open the authorization URL on a machine with a browser and complete the sign-in. After authorization, the browser will redirect to a callback URL. Even if the page fails to load (connection error), the authorization code is in the URL. Please copy the value of the `code` parameter from the browser's address bar. Example: If the URL is: http://127.0.0.1:8088/callback?code=abc123xyz&state=... Then copy only: abc123xyz Enter authorization code: <YOUR CODE> -
Open the URL in a browser, log in, and complete the authorization.
-
After successful authorization, the page redirects to a URL that contains the
codeparameter or directly displays the authorization code. Copy thecodevalue and paste it into the terminal, and then press the Enter key to confirm. -
When the terminal displays the
OAuth login successful!message, the authorization login is successful.2025/12/04 19:11:49 Oauth authorization successfully, code received: XXXX 2025/12/04 19:11:49 Start to exchange code for token with PKCE 2025/12/04 19:11:49 Exchange code for token with PKCE successfully OAuth login successful! -
When the terminal displays the
MCP Proxy Server Startedmessage, it indicates that the proxy has started successfully.MCP Profile 'default-mcp' configured for oauth app 'aliyun-cli-mcp-proxy' successfully! MCP Proxy Server Started Listen: 127.0.0.1:8088
Step 3: Configure as a systemd service
To ensure the proxy runs continuously, configure it as a systemd service that starts on boot.
-
Create a
systemdservice file: aliyun-mcp-proxy.Note:
-
Replace
your-userin the command with the username of the non-rootuser that you use to run this command. This user must have configured credentials by usingaliyun configure. -
The
$(which aliyun)command inExecStartautomatically locates the path to thealiyuncommand. If this process fails, you can manually replace it with the output of thewhich aliyuncommand, for example,/usr/local/bin/aliyun.
sudo tee /etc/systemd/system/aliyun-mcp-proxy.service << 'EOF' [Unit] Description=Aliyun CLI MCP Proxy After=network.target [Service] Type=simple User=your-user ExecStart=$(which aliyun) mcp-proxy --host 127.0.0.1 --port 8088 --no-browser Restart=always RestartSec=10 Environment=HOME=/home/your-user [Install] WantedBy=multi-user.target EOF -
-
Reload the
systemdconfiguration and start the service.# Reload the configuration sudo systemctl daemon-reload # Start the service sudo systemctl start aliyun-mcp-proxy # Enable the service to start on boot sudo systemctl enable aliyun-mcp-proxy
Step 4: Verify the proxy service
Verify that the service is running correctly by using one of the following methods.
-
View the service status
Run the following command to view the service status.
sudo systemctl status aliyun-mcp-proxyIf the output contains
active (running), the service has started successfully. -
Request the proxy port
Run the following command to send a request directly to the proxy port.
curl http://127.0.0.1:8088/If the proxy is working correctly, you will receive an XML-formatted error response from the MCP server. This response confirms the connection between the proxy and the server.
<?xml version='1.0' encoding='UTF-8'?><Error><RequestId>B3311876-XXXXX</RequestId><HostId>openapi-mcp.cn-hangzhou.aliyuncs.com</HostId><Code>InvalidAction.NotFound</Code><Message>Specified api is not found, please check your url and method.</Message><Recommend><![CDATA[https://api.aliyun.com/troubleshoot?q=InvalidAction.NotFound&product=OpenAPIExplorer&requestId=B3311876-XXX]]></Recommend></Error>
Use case: Dify integration
This topic uses an example of Dify, deployed on the same ECS instance by using Docker Compose, to demonstrate how to configure and use the mcp-proxy proxy in an application.
Step 1: Get host IP and start mcp-proxy
The Dify container needs to access the mcp-proxy service through the Docker bridge IP address of the host.
-
Run the following command to get and record the IP address.
ip addr show docker0 | grep "inet\b" | awk '{print $2}' | cut -d/ -f1An IP address similar to
172.17.0.1is returned. -
Start the aliyun mcp-proxy proxy service in the foreground. Alternatively, modify the startup command in
systemdand then start it as a service.aliyun mcp-proxy --host 172.17.0.1 --port 8088 --no-browser
Step 2: Configure MCP server in Dify
-
Go to the Tools > MCP configuration page in Dify.
-
Click Add MCP Server (HTTP).
-
In the Server URL field, enter your MCP proxy address.
You can obtain the original Streamable HTTP Endpoint address from the Alibaba Cloud OpenAPI MCP Server console. Replace the hostname of this address with your local or internal network proxy address.
Example conversion:
-
Original endpoint:
https://openapi-mcp.cn-hangzhou.aliyuncs.com/accounts/1234/custom/cli-proxy-test/id/1234/mcp -
Replace with the proxy address (assuming the proxy is running on
172.17.0.1:8088):http://172.17.0.1:8088/accounts/1234/custom/cli-proxy-test/id/1234/mcp
-
-
Enter other information as needed, and click Add & Authorize. Dify will communicate with your MCP service through this proxy address.
Security risks and mitigations
Once mcp-proxy is started, any user on the local machine can access all MCP servers within the permissions scope of the CLI user who started the proxy. Key risks include:
-
Internal privilege abuse: Other users on the same machine can use the proxy port to perform unauthorized actions, leading to privilege abuse or data breaches.
-
External exposure risk: If the proxy port listens on
0.0.0.0and no firewall is configured, anyone can access the MCP Server through the port.
The mcp-proxy proxies requests using the Alibaba Cloud identity of the logged-in CLI user. Always secure access to the mcp-proxy.
Mitigation measures
-
Environment isolation: Run the proxy only in a trusted, single-user environment. Avoid using it on multi-user shared servers.
-
Network access control: Bind the proxy listening address (
--host) to127.0.0.1(the default) or a specific internal IP address. Use firewall or security group rules to restrict access to the proxy port. For example, allow access only from specific application server IPs. Do not expose the port to the public internet. -
Access control: Use the
--allowed-serversor--blocked-serversparameter to restrict which MCP Servers can be accessed and prevent the proxy from being used to access unintended services. For more information, see Configure server access control. -
Principle of least privilege: Configure the minimum necessary permissions for the CLI user that the proxy uses and its associated MCP server. Grant read-only permissions whenever possible.
-
Auditing and monitoring: Regularly review the proxy service's access logs and monitor for unusual requests. Requests blocked by access control are recorded in the proxy logs.
Configure server access control
aliyun mcp-proxy supports whitelist and blacklist mechanisms to restrict the range of MCP Servers that can be accessed through the proxy.
Priority rules
Access control is evaluated in the following order:
-
Blacklist first: Requests to servers on the blacklist are denied, even if they are also on the whitelist.
-
Whitelist filtering: If the whitelist is not empty, only requests to servers on the whitelist are allowed.
-
Default allow: If no lists are configured, all servers are accessible.
Get server name and ID
After you run aliyun mcp-proxy, the terminal lists all available MCP Server names. The following is an example of the output:
Available Servers:
  - cloudphone
    MCP: http://127.0.0.1:8088/accounts/0000000000000000/system/eds-aic/cloudphone/id/XSkb9v4dXx000000/mcp
    SSE: http://127.0.0.1:8088/accounts/0000000000000000/system/eds-aic/cloudphone/id/XSkb9v4dXx000000/sse
  - multi_account
    MCP: http://127.0.0.1:8088/accounts/0000000000000000/custom/multi_account/id/OV0Qkpxh0Uodx000/mcp
SSE: http://127.0.0.1:8088/accounts/0000000000000000/custom/multi_account/id/OV0Qkpxh0Uodx000/sse-
In the output,
cloudphoneandmulti_accountare the values for the servername, which is usually located before theidkeyword. -
In the output,
XSkb9v4dXx000000andOV0Qkpxh0Uodx000are the serverID(usually located before themcpkeyword).
The URL path typically follows these patterns:
......./system/eds-aic/$server_name/id/$server_id/mcp
......./custom/$server_name/id/$server_id/mcp
Matching patterns
--allowed-servers and --blocked-servers support three matching modes, which are automatically identified by the value format:
|
Matching pattern |
Format |
Example |
Description |
|
Server name match |
A string that does not start with |
|
Exactly matches the |
|
Server ID match |
A string that does not start with |
|
Exactly matches the |
|
Path prefix match |
A string that starts with |
|
Matches the path prefix of the request URL. |
Note
-
Server name and ID matches are exact.
-
Path prefix matching uses prefix comparison. For example,
/acs/mcp-server/ecsmatches both/acs/mcp-server/ecs/mcpand/acs/mcp-server/ecs/sse. -
All three patterns can be mixed in the same parameter.
Configuration examples
-
Whitelist mode: Allow access only to specified servers
aliyun mcp-proxy --allowed-servers "ecs,oss"After startup, only
ECSandOSSare accessible. Requests to other servers return a 403 error. -
Blacklist mode: Deny access to specified servers
aliyun mcp-proxy --blocked-servers "ram"After startup, you can access all servers except for
ram. -
Use path prefix matching
aliyun mcp-proxy --allowed-servers "/acs/mcp-server/ecs,/acs/mcp-server/oss"This has the same effect as specifying by name and is useful for scenarios that require precise path control.
Verify the access control configuration
After the proxy starts, the terminal output displays the current access control configuration and the status of each server:
MCP Proxy Server Started
Listen: 127.0.0.1:8088
Region: CN

Access Control:
  Blacklist (blocked servers):
    - ram
  Whitelist (allowed servers):
    - ecs
    - oss

Available Servers:
  - ecs
    MCP: http://127.0.0.1:8088/acs/mcp-server/ecs/mcp
  - oss
    MCP: http://127.0.0.1:8088/acs/mcp-server/oss/mcp
  - ram (blocked)
Blocked requests are recorded in the proxy logs, which helps with troubleshooting.
Security incident response
If you suspect that the proxy's authentication token has been leaked or abused, take these immediate actions:
-
Stop the mcp-proxy service.
-
Delete the local configuration file:
rm ~/.aliyun/.mcpproxy_config. -
Revoke the OAuth authorization in the Alibaba Cloud console.
-
Check API call logs to identify any unauthorized operations.
-
Reconfigure the mcp-proxy and generate a new token.
Parameters
The aliyun mcp-proxy command supports different parameters for specific scenarios.
|
Parameter |
Description |
Default |
|
|
The host address on which the proxy listens. You can configure this address based on your use case. |
|
|
|
The port on which the proxy listens. |
|
|
|
Use this option for OAuth authorization in an environment without a GUI. When enabled, the authorization link is printed directly to the terminal. |
Not enabled |
|
|
Specifies the name of a pre-existing OAuth application. When this parameter is used, the CLI does not attempt to create an application automatically. |
|
|
|
Select the service site for the OpenAPI MCP Server. |
|
|
|
Manually specifies the upstream OpenAPI MCP server endpoint, overriding the default endpoint. |
China site: |
|
|
A whitelist of accessible MCP servers, with multiple values separated by commas. Supports server name, ID, or path prefix. If not specified, all servers are allowed. For more information, see Configure server access control. |
Not enabled |
|
|
A blacklist of inaccessible MCP servers, with multiple values separated by commas. Supports server name, ID, or path prefix. The blacklist has a higher priority than the whitelist. For more information, see Configure server access control. |
Not enabled |
FAQ
Why do I get an "ERROR: OAuth flow returned empty RefreshToken" error when running aliyun mcp-proxy?
This error usually occurs if the OAuth application is misconfigured or if you are using an unsupported authentication method. Ensure that:
-
The OAuth application type is set to Native.
-
Authentication must be done with a primary account or a RAM user. Assuming a RAM role is not supported for obtaining an OAuth refresh token.
Why do I get a "Connection Refused" or "Timeout" error after configuring the proxy in Dify?
Check the following:
-
When the
mcp-proxyservice starts, has the--hostparameter been set to the Docker bridge IP or the host's internal IP address to ensure that Docker containers can access it? -
Whether the cloud server security group or the host firewall allows TCP traffic from the Docker container to the proxy port (such as
8088).
How do I view mcp-proxy service logs?
If it is configured as a systemd service, you can use the following command to view the logs in real time:
sudo journalctl -u aliyun-mcp-proxy -f