Configure single sign-on (SSO) between IDaaS and Google Workspace using OpenID Connect (OIDC) or Security Assertion Markup Language (SAML). The configuration spans two systems — the IDaaS console and the Google Admin console — and ends with a verification step to confirm the SSO flow works end to end.
Prerequisites
Before you begin, ensure that you have:
Administrator permissions for the Google Admin console
An active IDaaS instance
The user email claim configured in IDaaS must match the primary email address of the Google Workspace user. A mismatch prevents SSO from working.
OIDC protocol configuration
Steps overview:
IDaaS — Configure the Google application
Google Admin console — Create an OIDC configuration
Google Admin console — Assign the SSO policy
Step 1: IDaaS — Configure the Google application
Log on to the IDaaS console, select your IDaaS instance, and click Manage in the Actions column.IDaaS consoleIDaaS console
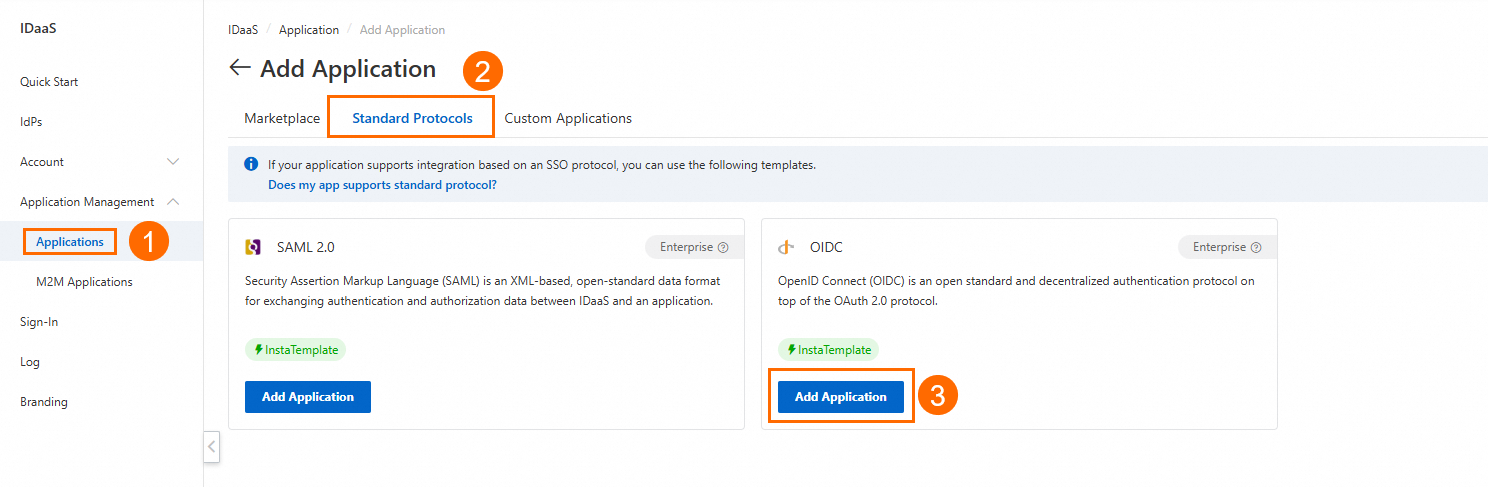
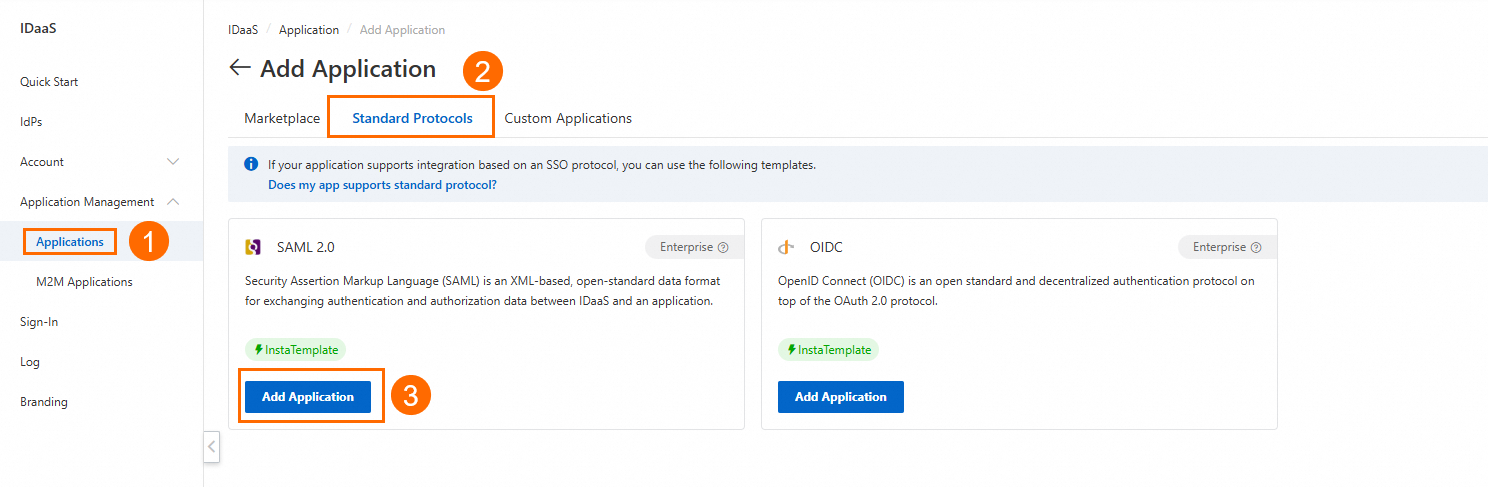
Click Application > Add Application > Standard Protocol and add an OIDC application.
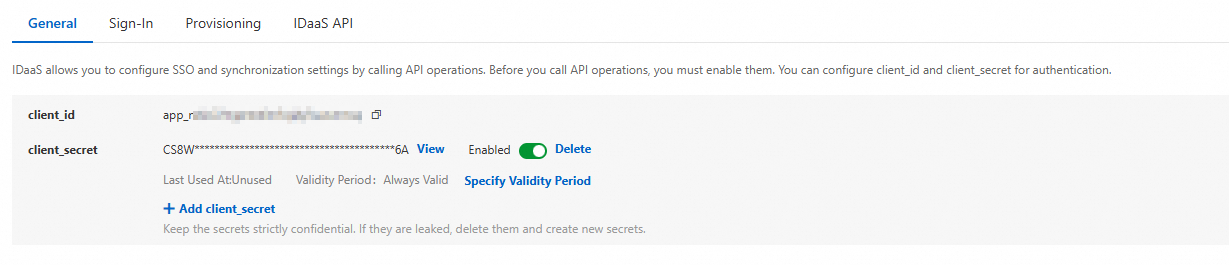
On the OIDC application details page, open the General tab and copy the client_id and client_secret. You will enter these values in the Google Admin console in Step 2.
Open the Sign-In > SSO tab. In the Application Settings section, copy the Issuer address. You will enter this value in the Google Admin console in Step 2.

Leave the Redirect URIs field blank for now. You will retrieve the redirect URI from the Google Admin console in Step 2 and return here to fill it in.

On the Sign-In > Authorize tab, add the users to grant SSO access. By default, permissions are granted manually.
Step 2: Google Admin console — Create an OIDC configuration
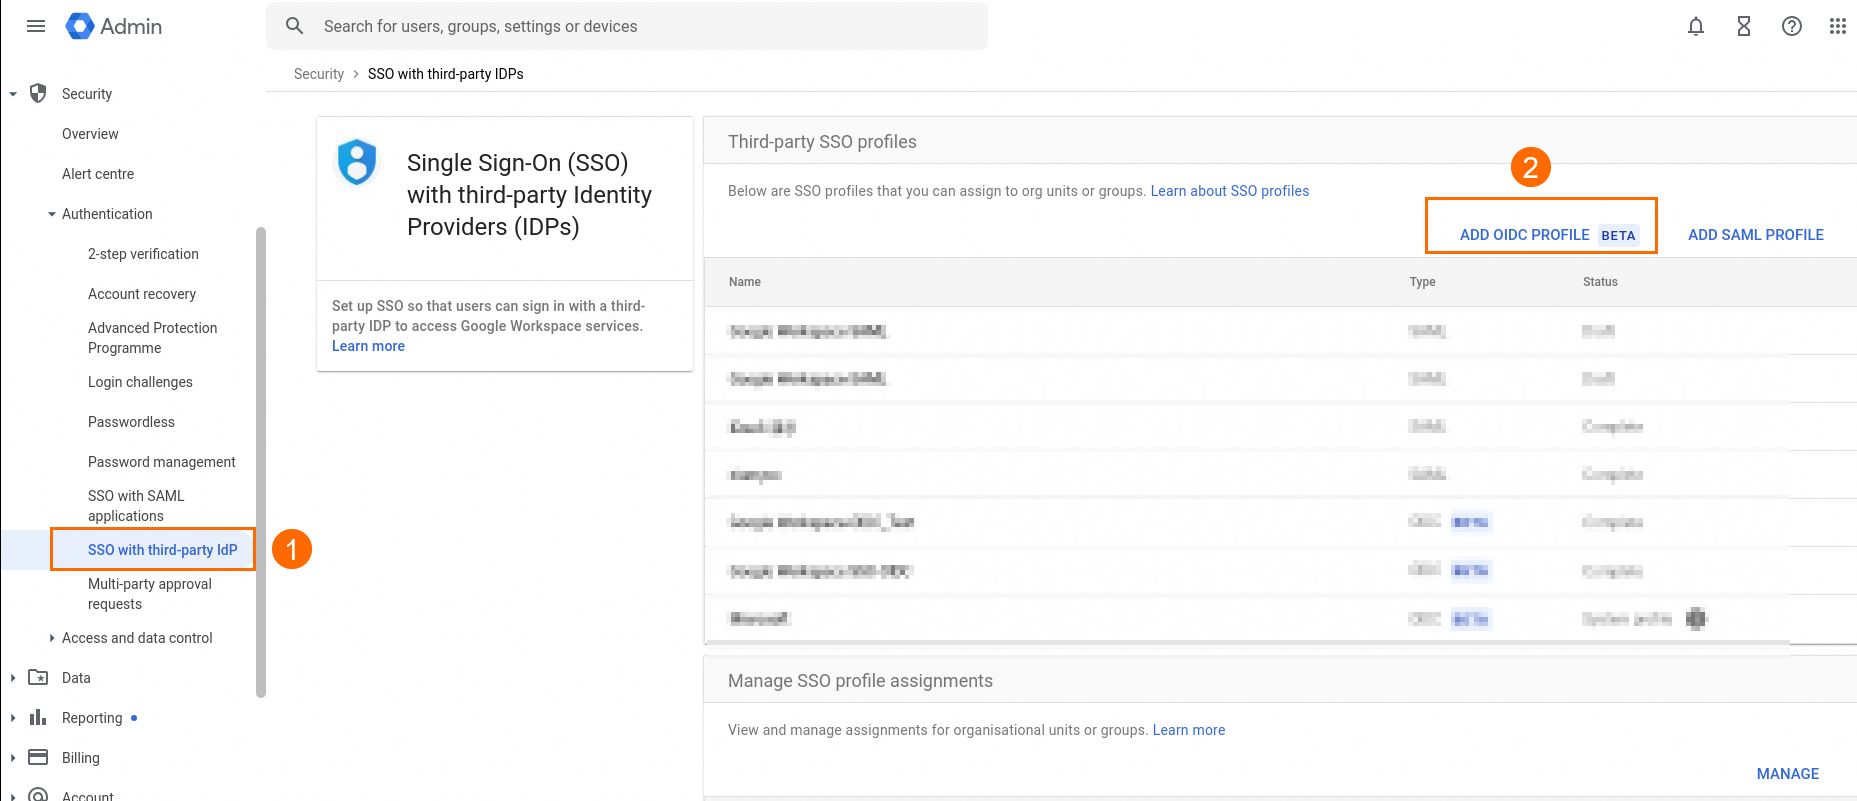
Log on to the Google Admin console. In the left navigation pane, go to Security > Authentication > SSO With Third-party IdPs.
Click ADD OIDC PROFILE (BETA).
Fill in the IDaaS parameters. All values except Change Password URL come from the IDaaS application you configured in Step 1.
Field Description Source SSO profile name A name to identify this OIDC configuration. Include the application or business system name for easier management. Define your own Client ID The client_id of the IDaaS OIDC application. Identifies the client on the authorization server. Step 1, step 3 Client secret The client_secret of the IDaaS OIDC application. Keep this credential confidential. Step 1, step 3 Issuer URL The Issuer address of the IDaaS OIDC application. Used to verify the source of the ID token. Step 1, step 4 Change Password URL (Optional) A link for users to change their password. N/A 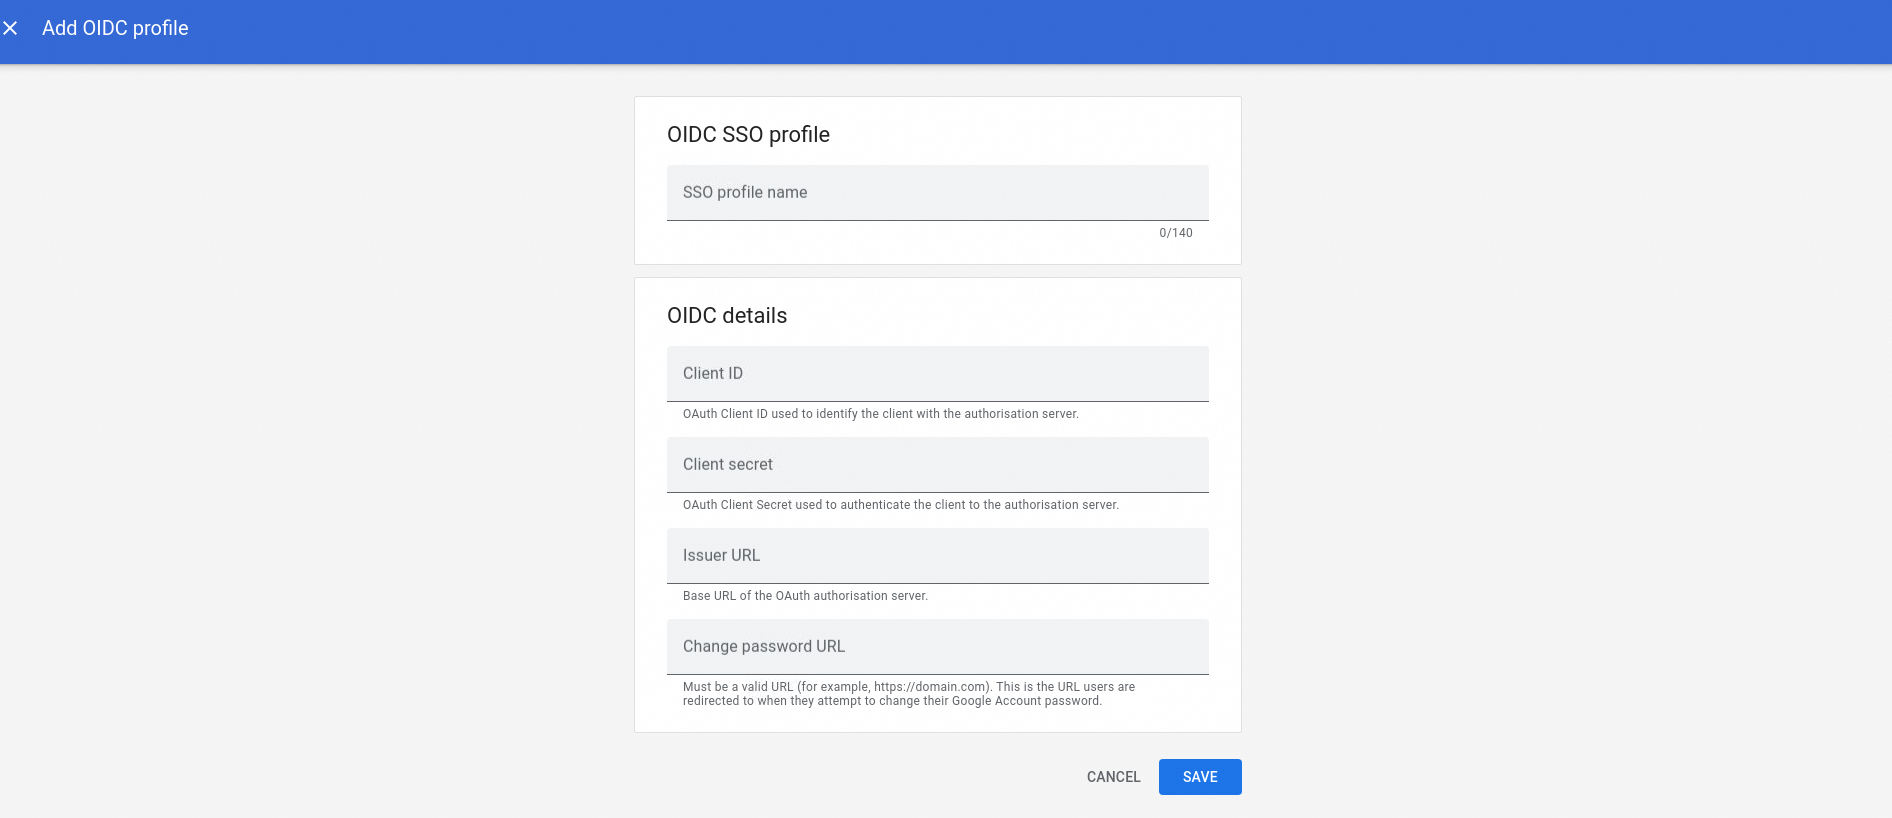
After saving, copy the Google redirect URI displayed on the confirmation page.
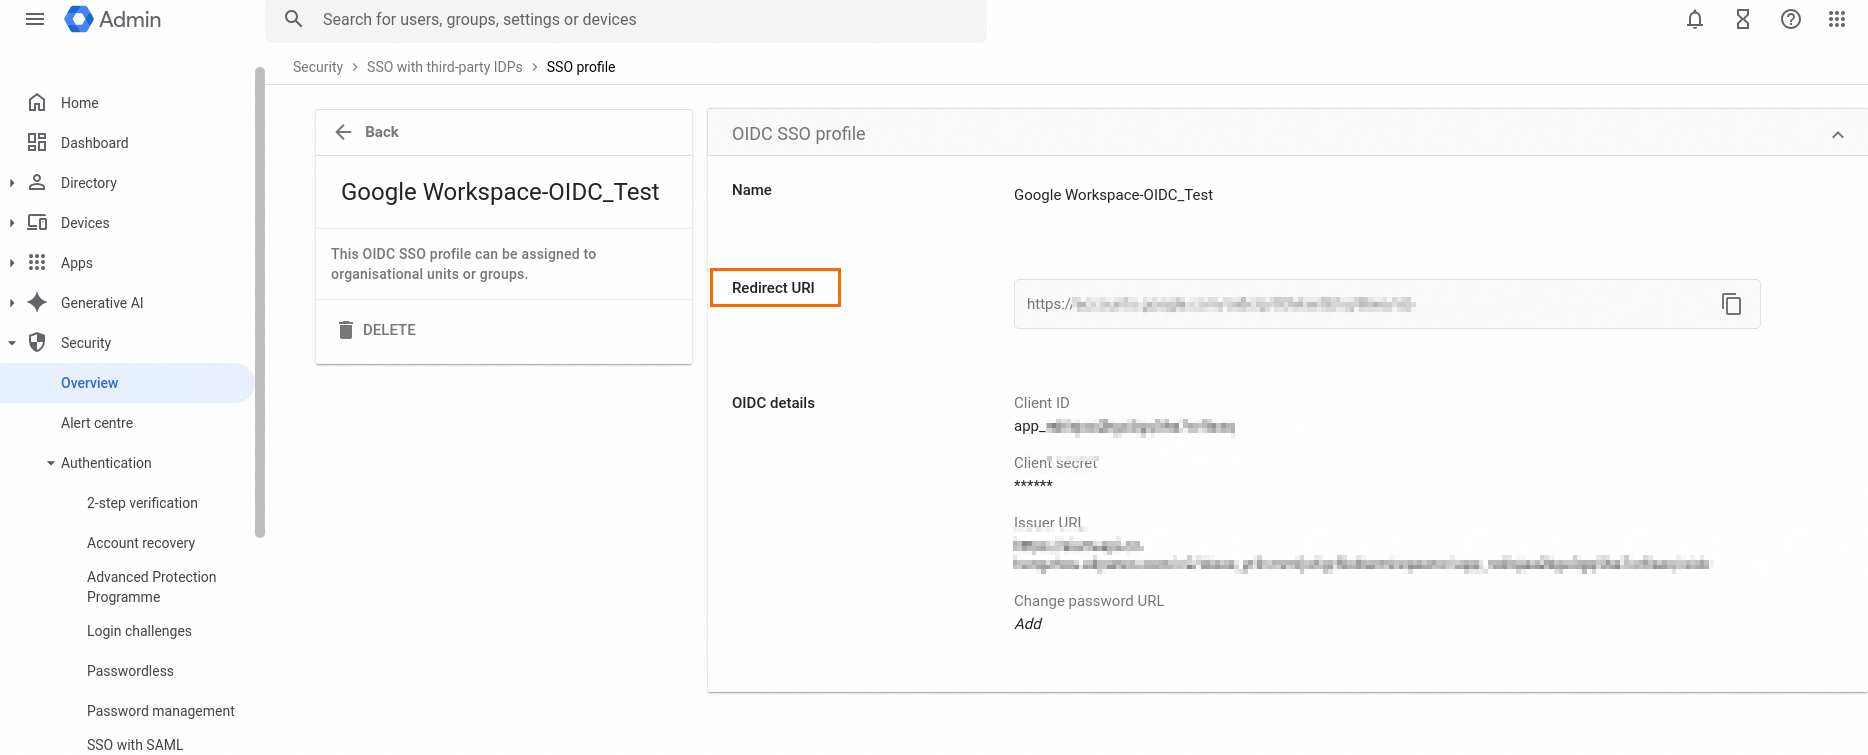
Return to the IDaaS OIDC application (Step 1, step 5) and paste the redirect URI into the Redirect URIs field.
Step 3: Google Admin console — Assign the SSO policy
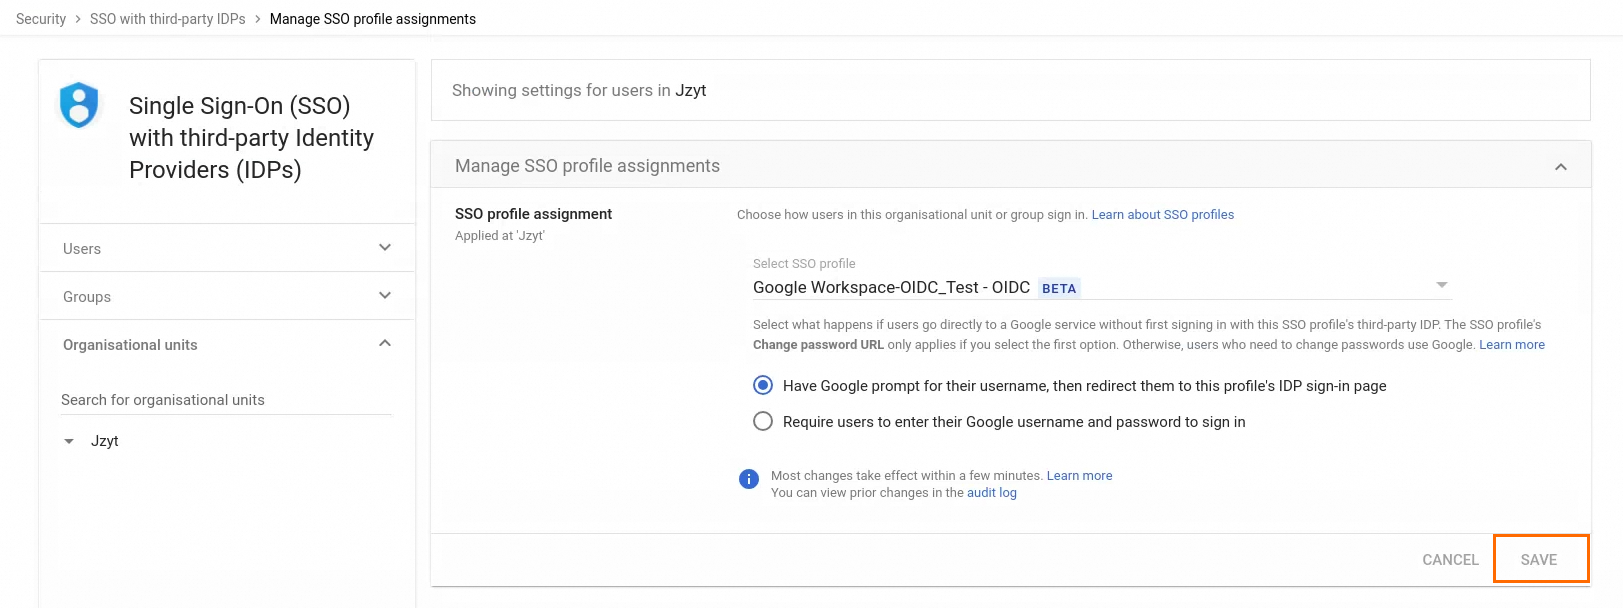
On the SSO With Third-party IdPs page, go to the Manage SSO Profile Assignments section and click Manage.
Select the OIDC SSO profile you created, then click Save in the lower-right corner.
Test the configuration. See Verify the SSO flow.
SAML protocol configuration
Steps overview:
IDaaS — Configure the Google application
Google Admin console — Create a SAML configuration
Google Admin console — Assign the SSO policy
The SAML configuration requires values from both systems. Complete Step 2 first to retrieve the service provider (SP) details from Google, then return to Step 1 to enter those values in IDaaS.
Step 1: IDaaS — Configure the Google application
Log on to the IDaaS console, select your IDaaS instance, and click Manage in the Actions column.
Click Application > Add Application > Standard Protocol and add a SAML 2.0 application.
On the SAML application details page, open the Sign-In > SSO tab and complete the SSO section. By default, permissions are granted manually.
Field Description Source ACS URL The Assertion Consumer Service (ACS) URL from the Google Workspace SP configuration. Step 2, step 3 SP Entity ID The Entity ID from the Google Workspace SP configuration. Step 2, step 3 IdP Entity ID The Identity Provider Entity ID from the Google identity provider (IdP) configuration. Google Admin console IdP Sign-In URL The Sign-in Page URL from the Google IdP configuration. Google Admin console Certificate Download the public key certificate from IDaaS, then upload it to the Verification Certificate field in the Google IdP. IDaaS (download) On the Sign-In > Application User tab, click Add Application User, then on the Authorize tab, add the users to grant SSO access.
Step 2: Google Admin console — Create a SAML configuration
Log on to the Google Admin console. In the left navigation pane, go to Security > Authentication > SSO With Third-party IdPs.
Click Add SAML Profile and enter the identity provider (IdP) details from the IDaaS SAML application you configured in Step 1. Click Save when finished.
Field Description Source SSO profile name A name to identify this SSO configuration. Include the application or business system name for easier management. Define your own Identity Provider Entity ID The IdP Unique Identifier (Entity ID) of the IDaaS SAML application. Matches the identity binding between the SP and IDaaS. IDaaS SAML application Sign-in Page URL The IdP SSO URL (IdP Sign-in URL) from the SSO configuration of the IDaaS SAML application. IDaaS SAML application Sign-out Page URL (Optional) The endpoint where the SP accepts SAML single logout requests. N/A Change Password URL (Optional) A link for users to change their password. N/A Verification Certificate The public key certificate issued by IDaaS. Used to verify the SAML response signature. Step 1, step 3 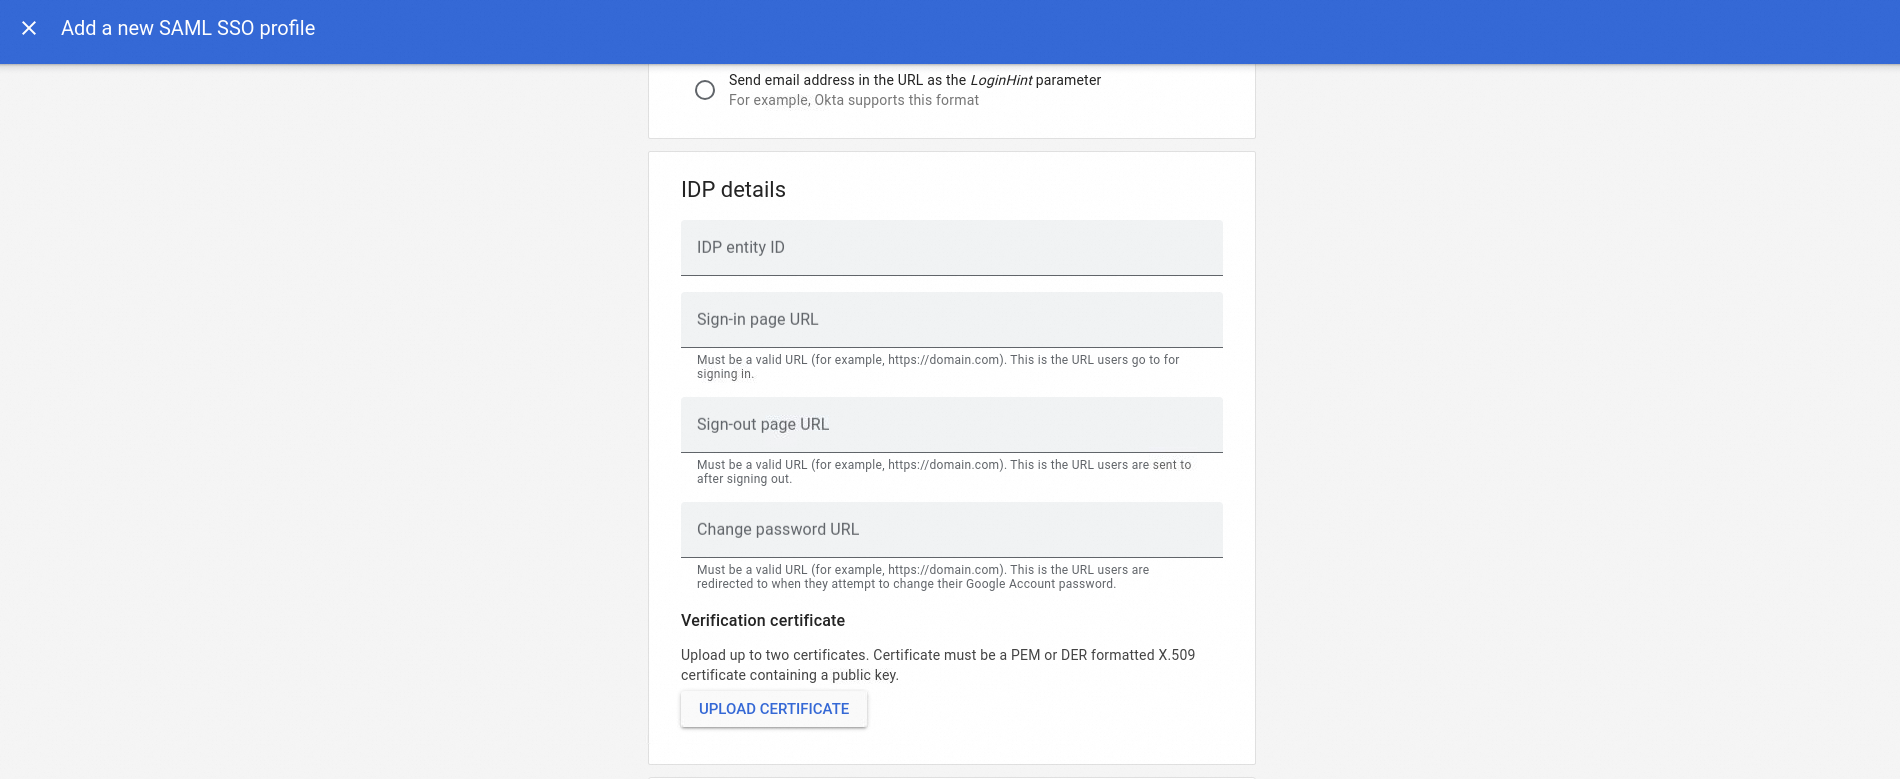
In the Service Provider Details section, copy the Entity ID and ACS URL.
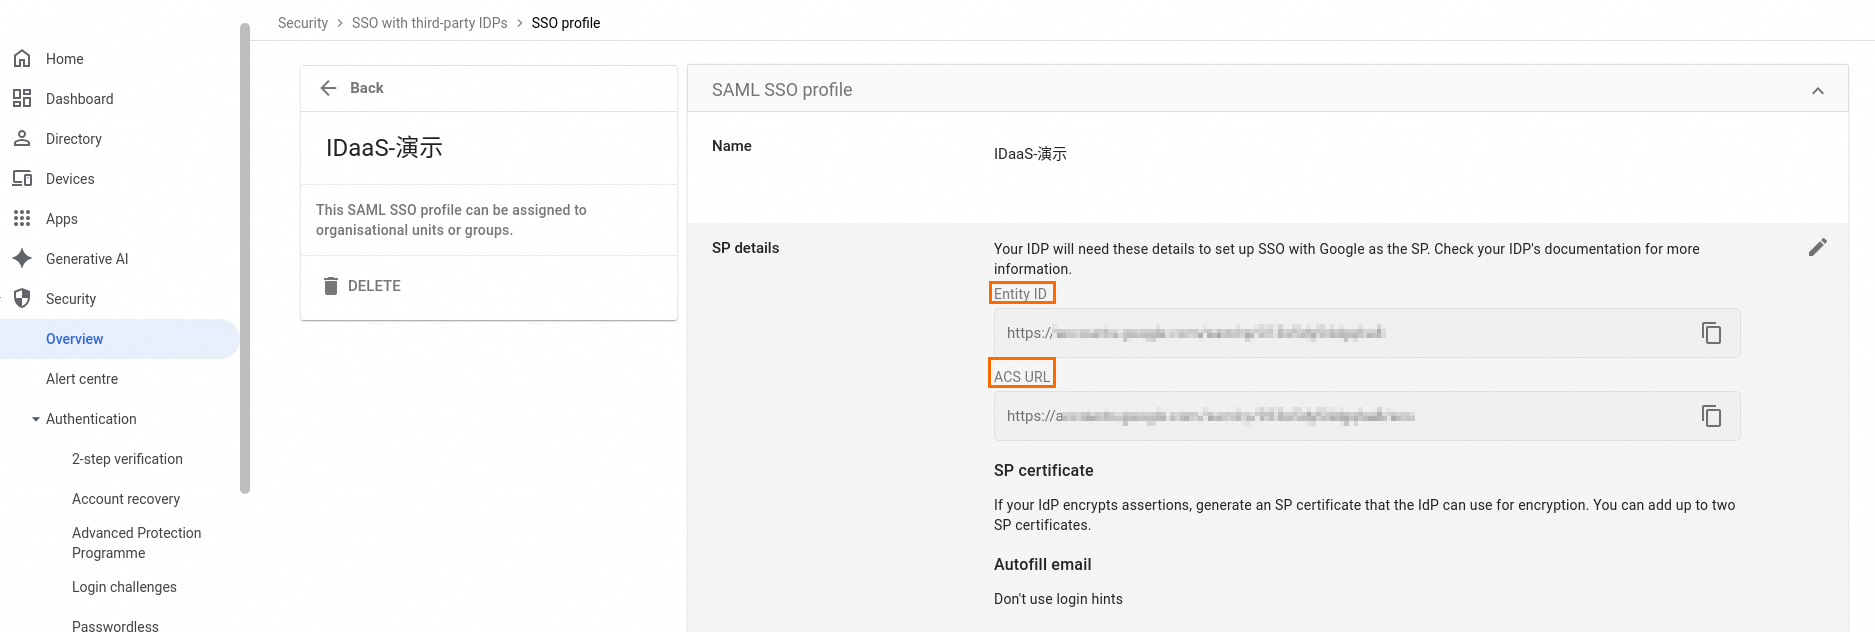
Return to the IDaaS SAML application (Step 1, step 3) and enter the Entity ID in SP Entity ID and the ACS URL in ACS URL.
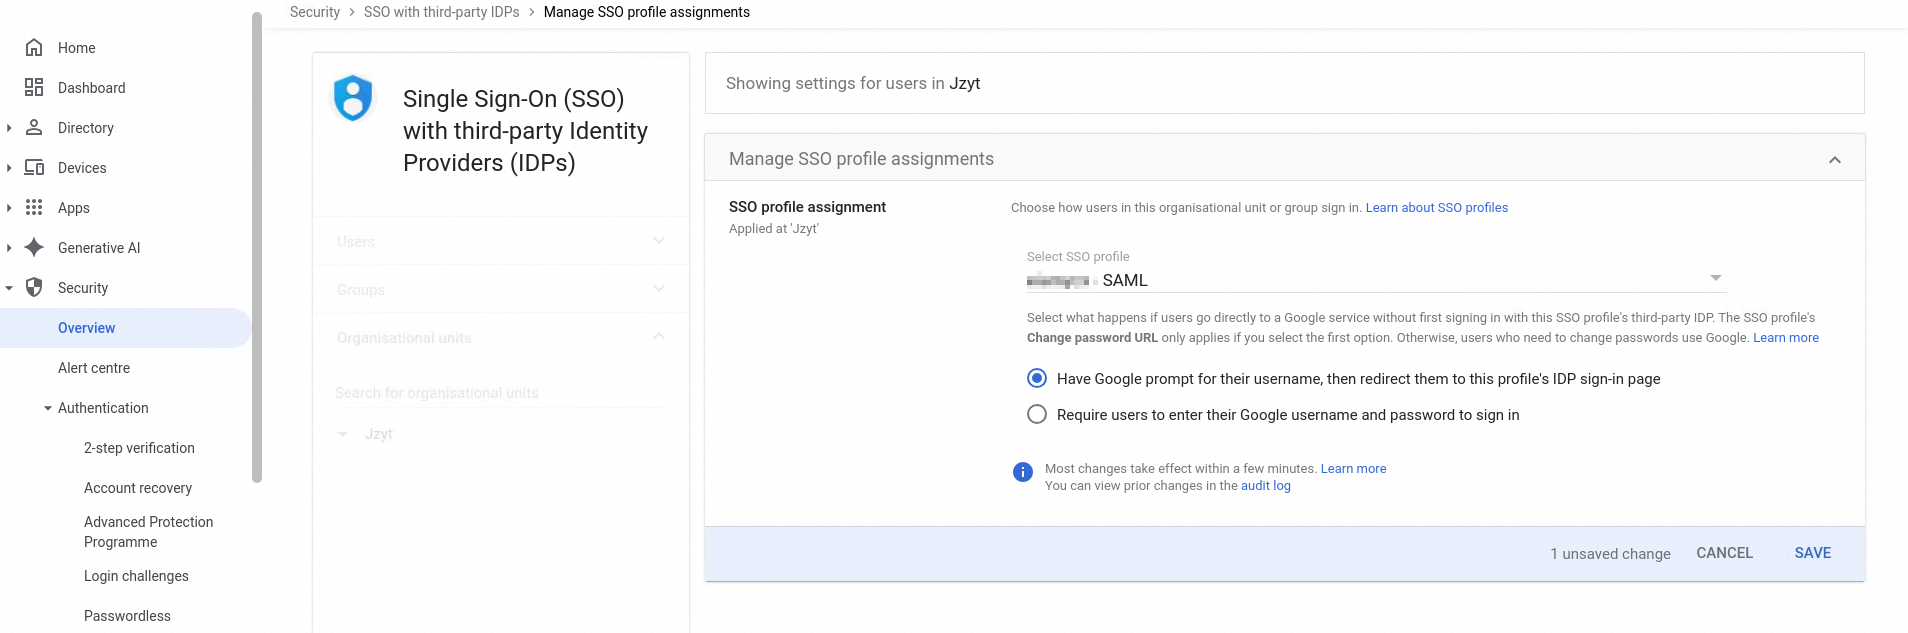
Step 3: Google Admin console — Assign the SSO policy
On the SSO With Third-party IdPs page, go to the Manage SSO Profile Assignments section and click Manage.
Select the SAML SSO profile you created, then click Save in the lower-right corner.
Test the configuration. See Verify the SSO flow.
Verify the SSO flow
Go to the Google Workspace dashboard.
Enter your email address (for example,
aliyun@example.com) and click Next.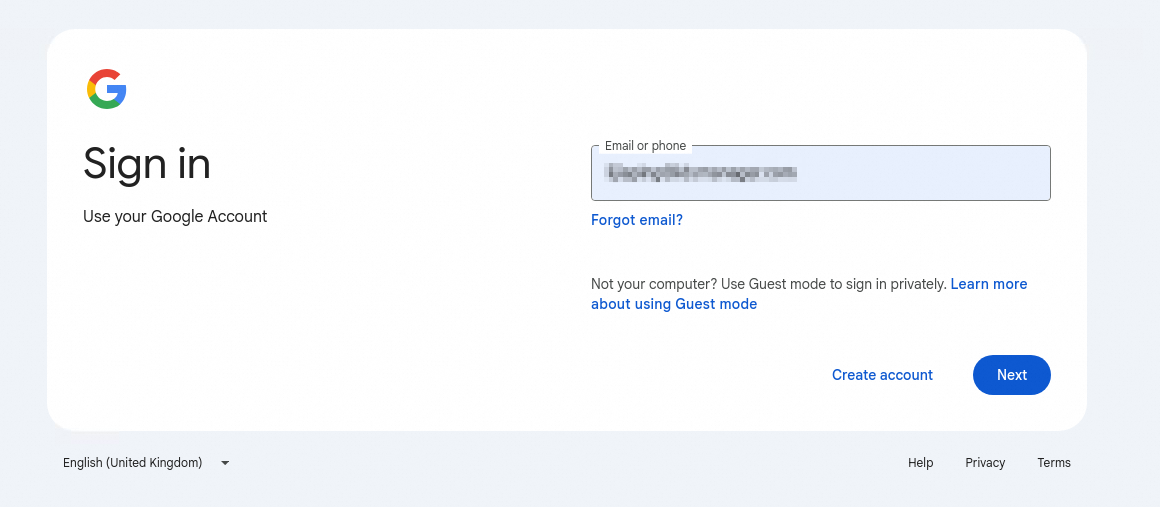
Google redirects you to the IDaaS logon page.
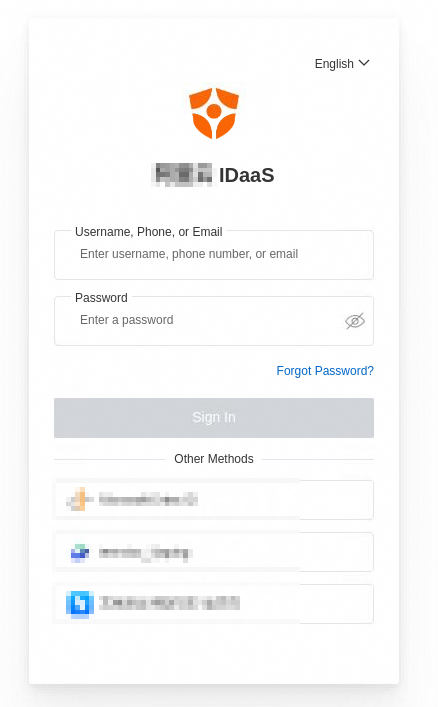
After a successful logon, you are redirected back to Google Workspace.