Wan is an open-source video generation model that supports T2V (text-to-video) and I2V (image-to-video) generations. PAI provides customized JSON workflows and API calling methods to help you use the Wan model in ComfyUI to generate high-quality videos. This topic uses I2V as an example to show how to deploy the ComfyUI service and use Wan to generate videos.
Deploy a standard ComfyUI service (for single-user use)
Deployment configuration
Follow these steps to deploy a standard ComfyUI service using Custom Deployment:
Log on to the PAI console. Select a region on the top of the page. Then, select the desired workspace and click Elastic Algorithm Service (EAS).
-
Click Deploy Service. In the Custom Model Deployment section, click Custom Deployment.
On the Custom Deployment page, configure the following parameters.
In the Environment Information section, configure the following parameters.
Parameter
Description
Image Configuration
Select from the Alibaba Cloud Images list.
NoteIn this example, 1.9 is the image version. Due to fast iterations, select the latest image version during deployment.
Mount storage
Mount an external storage data source, such as Object Storage Service (OSS) or Network Attached Storage (NAS), to the EAS service. The service automatically saves generated videos to the mounted data source. To use OSS as an example, click OSS and configure the following parameters:
Uri: Select the source directory of an OSS bucket. For information about how to create a bucket and a directory, see Get started with the OSS console. The bucket must be in the same region as the EAS service.
Mount Path: The target path to mount in the service instance. For example,
/code/data-oss.
Command
The system automatically populates the command after you select an image.
Set the--data-dirmount directory in the Command section. This directory must match the Mount Path you configured.
For the 1.9 version of the image,--data-diris pre-configured. You only need to update it to the Mount Path you configured. For example,python main.py --listen --port 8000 --data-dir /code/data-oss.In the Resource Information section, select a resource specification.
Parameter
Description
Resource Type
Select Public Resources.
Deployment Resources
Choose a Resource Type. Video generation requires more GPU memory than image generation. Select a resource specification with a single-card memory of at least 48 GB. We recommend the GU60 instance type, such as
ml.gu8is.c16m128.1-gu60.In the Network information section, set a virtual private cloud (VPC) with Internet access. For more information, see Configure Internet access for VPC.
NoteBy default, an EAS service cannot access the internet. The I2V feature requires an internet connection to download images. Therefore, you must configure a VPC with public network access for the EAS service.
After you configure the parameters, click Deploy.
Use WebUI
After the service is deployed, you can build a workflow and call the service on the WebUI page. Follow these steps:
Click View Web App in the Service Type column.
In the upper-left corner of the WebUI page, select WorkflowOpen, select a JSON workflow file, and then click Open.
PAI has integrated various acceleration algorithms into ComfyUI. The following ComfyUI JSON workflows are optimized for speed and quality:
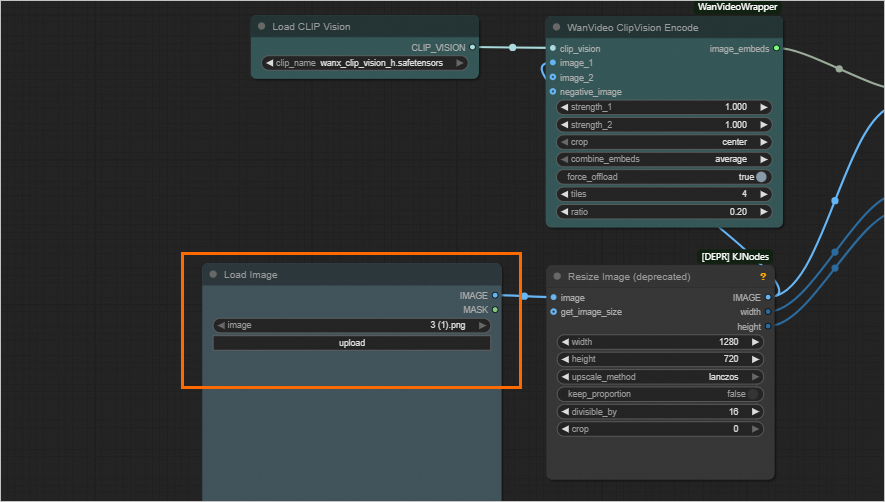
Image-to-Video (load an image from a URL): wanvideo_720P_I2V.json
After the workflow is loaded, you can click upload in the Load Image section to upload or update image files.
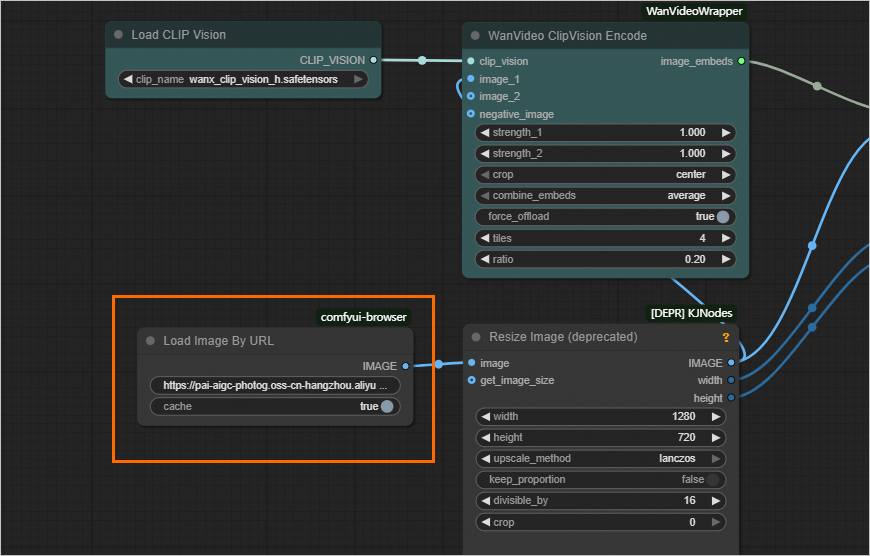
I2V (load image URL): wanvideo_720P_I2V_URL.json
After the workflow is loaded, set the image URL in the Load Image By URL section to update images.
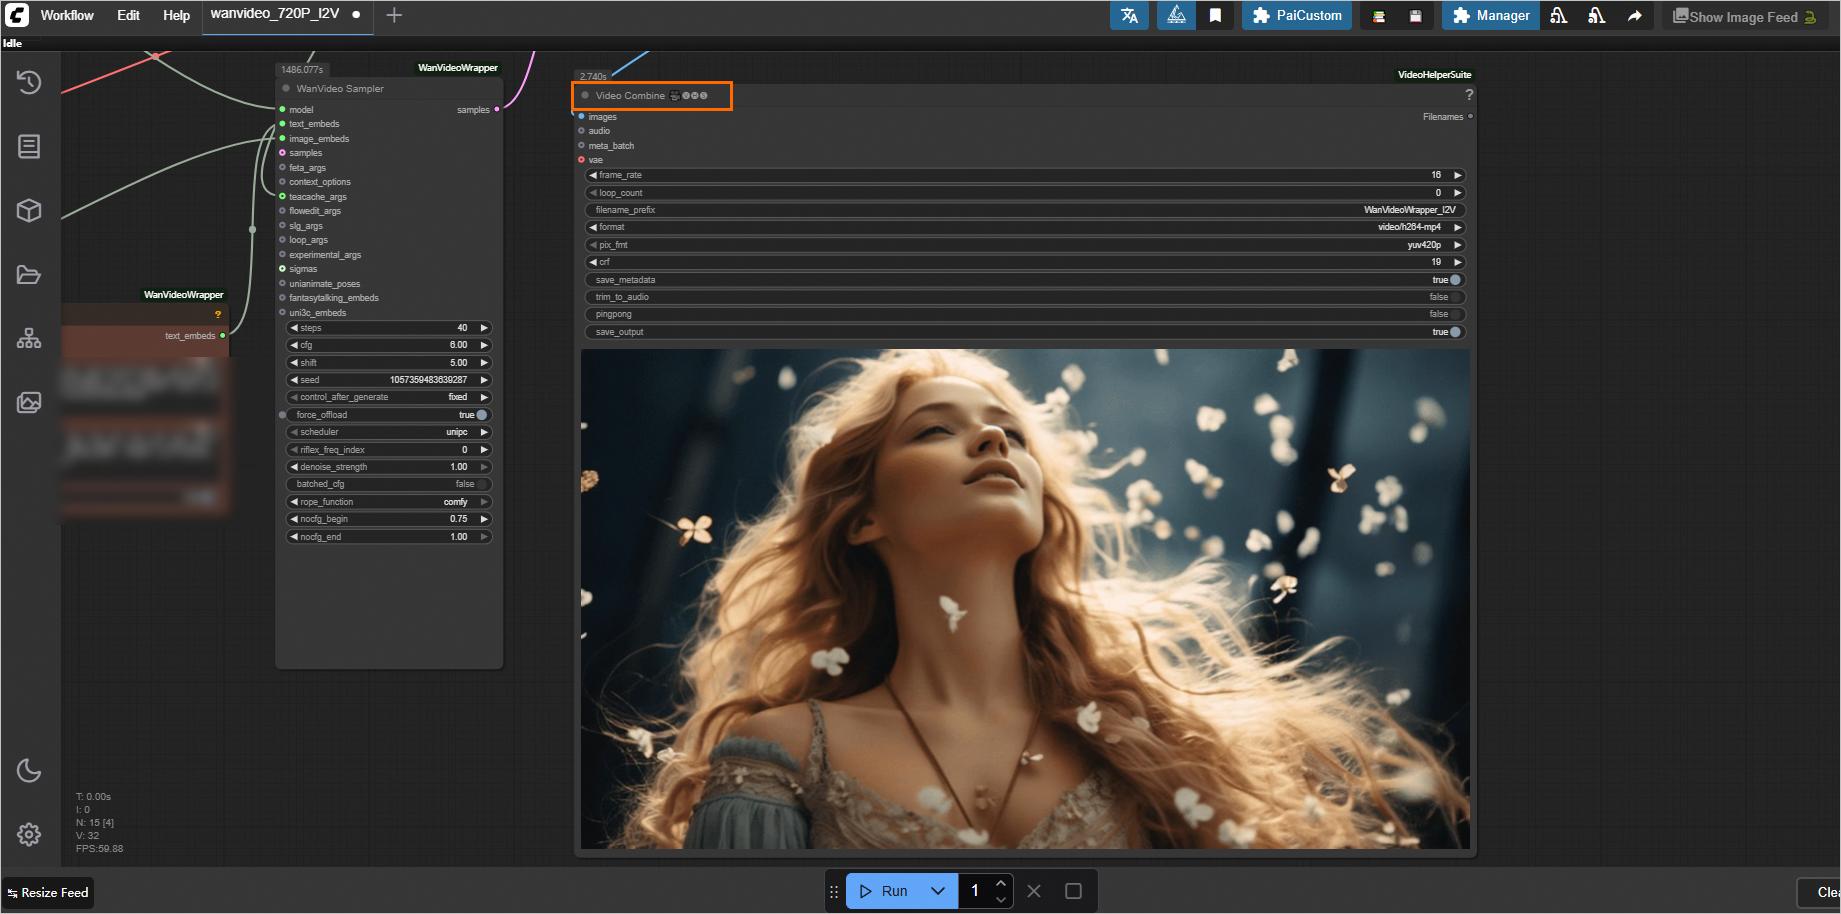
Click the Run button at the bottom of the page to generate the video.
The process takes about 20 minutes. The result appears in the Video Combine area on the right.
Make a synchronous call through the API
The standard service only supports synchronous calls. These calls request the inference instance directly, bypassing the EAS queue service. Follow these steps:
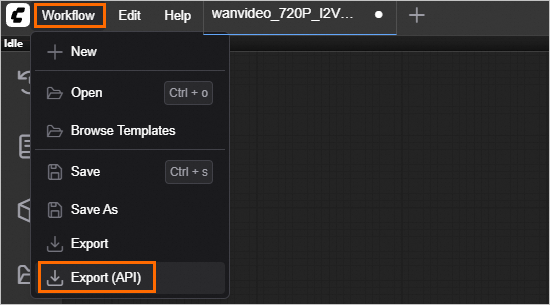
Export the workflow JSON file.
The API request body for ComfyUI depends on the workflow configuration. First, configure your workflow in the WebUI. Then, export it as a JSON file by selecting .
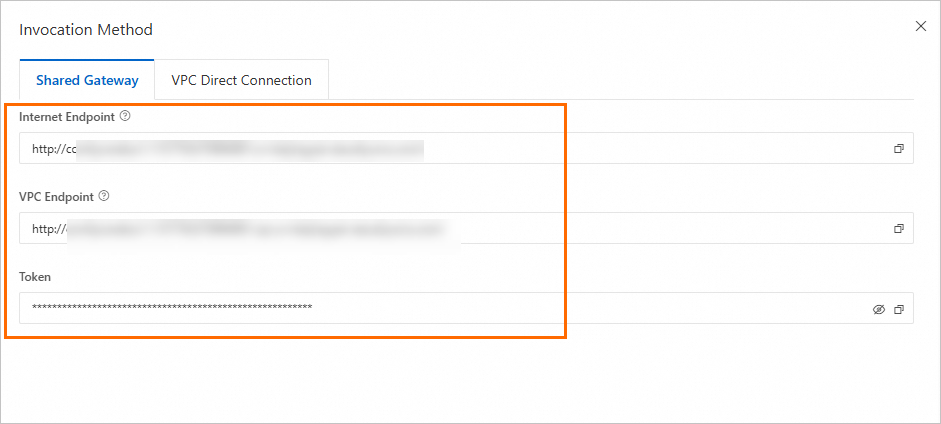
View endpoint information.
In the service list, click the service name. In the Basic Information section, click View Endpoint Information.
In the Invocation Method dialog box, obtain the endpoint and token.
NoteTo use the Internet Endpoint, the client must have public network access.
To use the VPC Endpoint, the client must be within the same VPC as the service.
Call the service.
The following code provides a complete example of how to call the service and retrieve the result. The
outputsobject of the final response includes the full OSS path of the output video. For details about the response structure, see the code breakdown section.The example code retrieves the EAS service endpoint and token from environment variables. You can run the following commands in your terminal to add temporary environment variables that are valid only for the current session:
# Set your endpoint and token.

export SERVICE_URL="http://test****.115770327099****.cn-beijing.pai-eas.aliyuncs.com/"
export TOKEN="MzJlMDNjMmU3YzQ0ZDJ*****************TMxZA=="
Deploy an API version of ComfyUI (for high-concurrency scenarios)
Deployment configuration
If you have an existing standard ComfyUI service and want to switch to the API version, we recommend deleting the standard service and creating a new one.
Use the custom deployment method to deploy the ComfyUI API service. Perform the following steps:
Log on to the PAI console. Select a region on the top of the page. Then, select the desired workspace and click Elastic Algorithm Service (EAS).
-
Click Deploy Service. In the Custom Model Deployment section, click Custom Deployment.
On the Custom Deployment page, configure the following parameters.
In the Environment Information section:
Parameter
Description
Image Configuration
Select from the Aibaba Cloud Images list.
NoteIn this example, 1.9 is the image version. Due to fast iterations, select the latest image version during deployment.
Storage mount
Mount an external storage data source, such as OSS or NAS, to the EAS service. The videos generated by calling the service are automatically saved to the corresponding data source. To use OSS as an example, click OSS and configure the parameters as described in the standard deployment section.
Command
The system automatically populates the command after you select an image.
Set the--data-dirmount directory and include the--apiflag in the Command section. This directory must match the Mount Path you configured.
For example,python main.py --listen --port 8000 --api --data-dir /code/data-oss.In the Resource Information section, select the resource specifications.
Parameter
Description
Resource Type
Select Public Resources.
Deployment Resources
Select Resource Type. Because video generation requires more GPU video memory than image generation, we recommend a type with GPU memory of no less than 48 GB per card, such as the GU60 types (for example,
ml.gu8is.c16m128.1-gu60).In the Asynchronous Queue section, set Maximum Data for A Single Input Request and Maximum Data for A Single Output. The standard value is 1024 KB.
NoteWe recommend setting a reasonable queue data size to prevent issues like request rejections, response failures, or queue blockages.
In the Network information section, set a VPC with Internet access, including the VPC, vSwitch, and Security Group parameters. For more information, see Configure Internet access for VPC.
NoteThe EAS service does not have Internet access by default. However, because the I2V function needs to download images from the internet, a VPC with Internet access is required.
After you configure the parameters, click Deploy.
Asynchronous API call
The API version only supports asynchronous calls, which are made to the /api_prompt endpoint. In an asynchronous call, you send a request to an input queue and subscribe to an output queue to receive the results. Follow these steps:
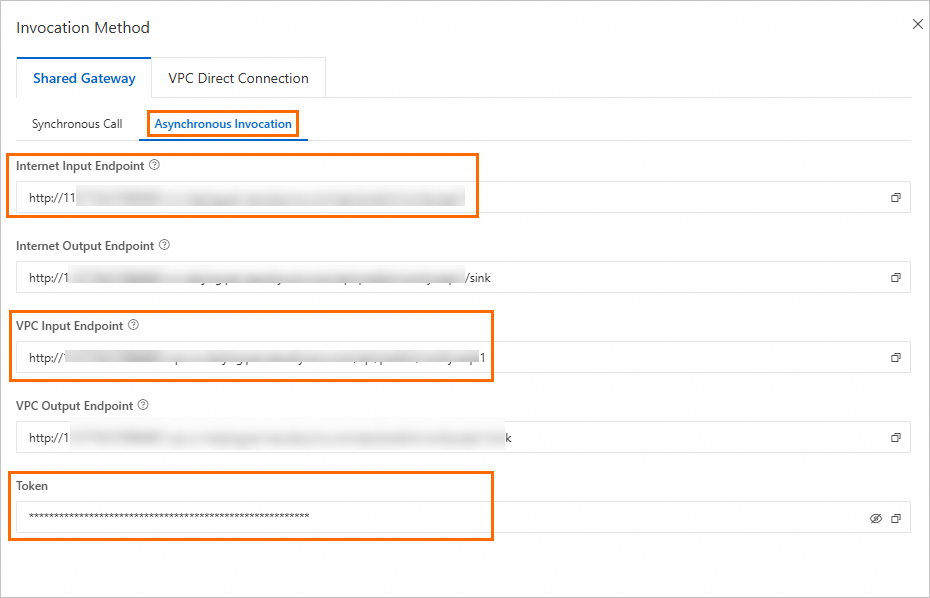
View the endpoint information.
Click Invocation Information in the Service Type column of the service. In the Invocation Method panel, view the endpoint and token on the Asynchronous Invocation tab.
NoteTo use the Internet Endpoint, the client must have public network access.
To use the VPC Endpoint, the client must be within the same VPC as the service.
Run the following command in your terminal to install the
eas_predictionSDK.pip install eas_prediction --userCall the service.
The following code provides a complete example of a call. You can get the full OSS path of the output video from
json.loads(x.data.decode('utf-8'))[1]["data"]["output"]["gifs"][0]["fullpath"]in the final result.The example code retrieves the EAS service endpoint and token from environment variables. You can run the following commands in your terminal to add temporary environment variables that are valid only for the current session:
# Set your endpoint and token.

export SERVICE_URL="http://test****.115770327099****.cn-beijing.pai-eas.aliyuncs.com/"
export TOKEN="MzJlMDNjMmU3YzQ0ZDJ*****************TMxZA=="
Appendix: More examples
The procedures for using T2V and I2V are similar. You can deploy and call the service by following the steps described in this article. However, T2V does not require a public network connection, so you do not need to configure a VPC when deploying the EAS service.
You can use the example workflow file (wanvideo_720P_T2V.json) to test the WebUI call process. Refer to Load the workflow on the WebUI page to load the workflow on the WebUI page. Then, enter a text prompt in the WanVideo TextEncode input box and click Run.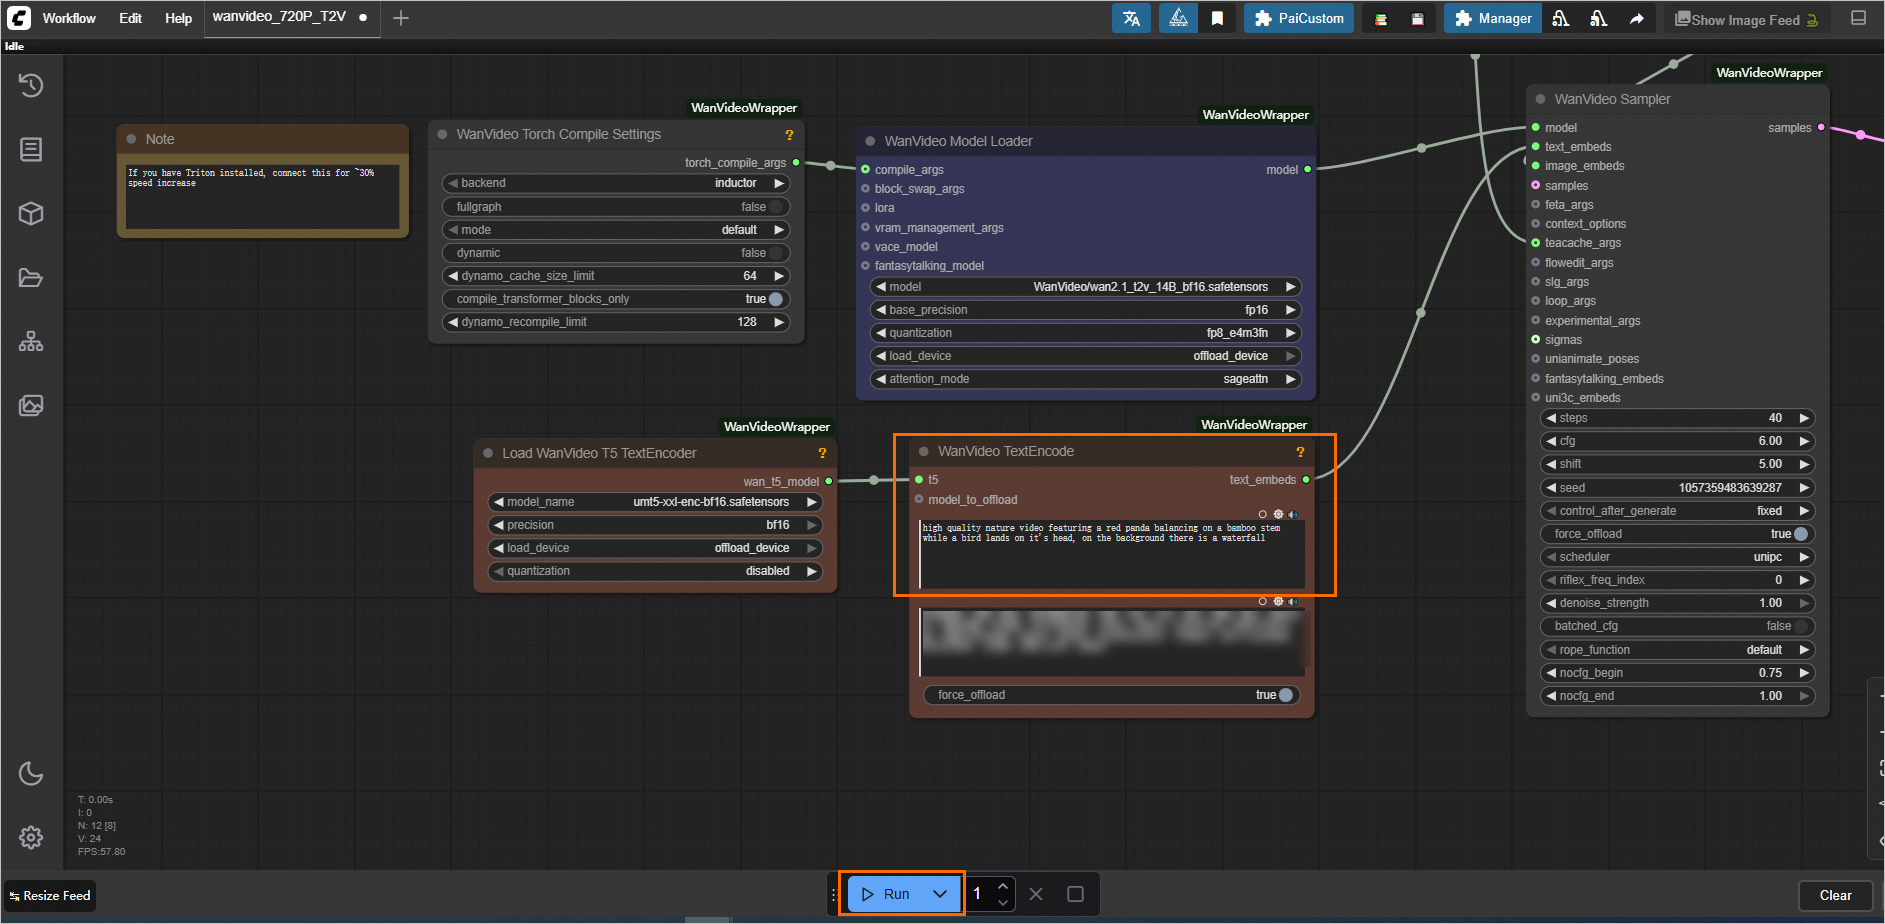 If you need to make an API call, see the complete code examples below.
The example code retrieves the EAS service endpoint and token from environment variables. You can run the following commands in your terminal to add temporary environment variables that are valid only for the current session:
# Set your endpoint and token.

export SERVICE_URL="http://test****.115770327099****.cn-beijing.pai-eas.aliyuncs.com/"
export TOKEN="MzJlMDNjMmU3YzQ0ZDJ*****************TMxZA=="
Synchronous API call
Asynchronous API call
References
To learn more about ComfyUI deployment and features, including loading custom models, integrating ComfyUI plug-ins, and common issues, see AI video generation - ComfyUI deployment.