SAML integration enables connection to the SAML authentication service used by your enterprise, facilitating single sign-on (SSO).
Applicable editions | Enterprise Dedicated |
Create users outside the synchronization scope
Enterprise administrators can manage SAML integration on the page. To create AI Coding Assistant Lingma (Lingma) users beyond the users synchronized from the integrated SAML identity provider (IdP), select Support for built-in users.

Configure SAML integration
Step 1: Configure SAML connection
To connect the service provider (SP), Lingma, with your enterprise IdP, specify the following information:
SAML IdP Metadata URL: The metadata URL of your enterprise IdP.
Public Key: The public key of the SP, which can be found in the public.crt file.
Private Key: The private key of the SP, which can be found in the rsa_private.key file.
Run the following command to generate the public key and private key:
openssl req -newkey rsa:2048 -nodes -keyout rsa_private.key -x509 -days 3650 -out public.crt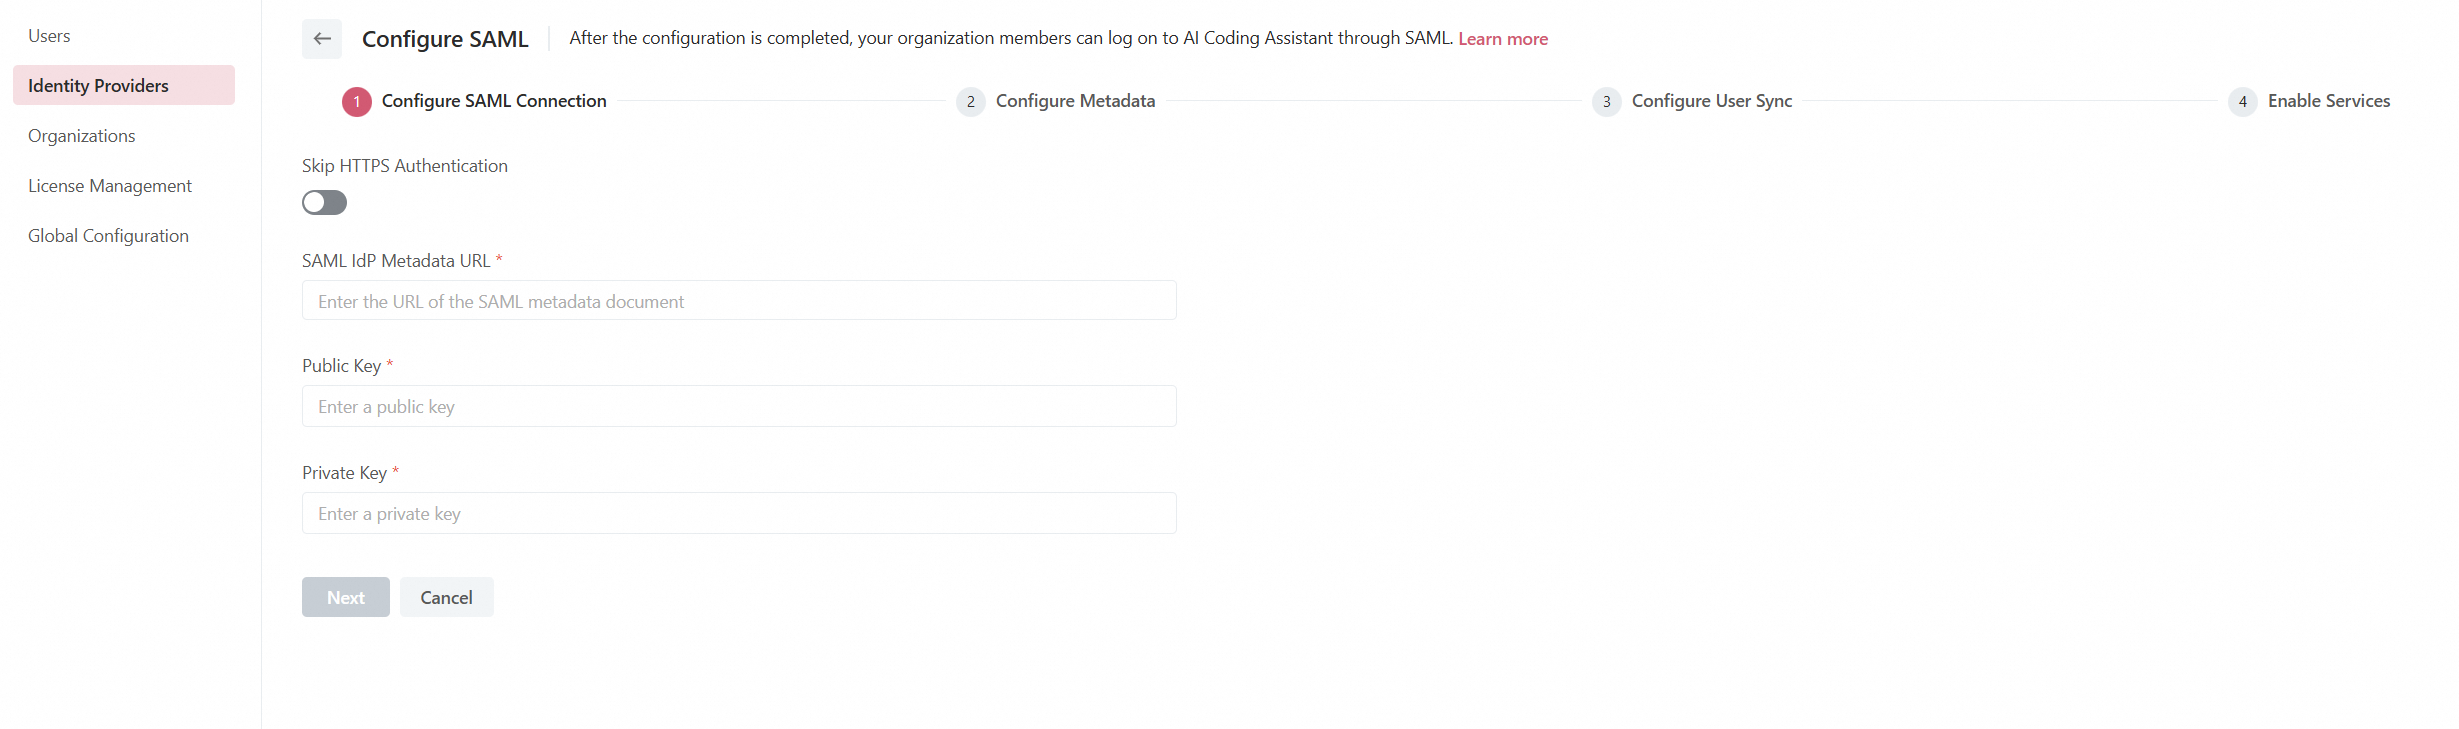
After specifying the information, click Next.
Step 2: Configure SP metadata
To establish trust between your enterprise IdP and Lingma, configure Lingma as a trusted SP in your enterprise IdP and set up SAML assertion properties. Depending on your IdP's capabilities, use one of the following methods:
Copy the displayed SP metadata URL for Lingma and add it to your IdP.
If URL configuration is not supported, download the SP metadata file and upload it to your IdP.
If metadata file upload is not supported, manually configure the following parameters:
Entity ID: The value of the entityID attribute from the md:EntityDescriptor element in the SP metadata file.
ACS URL: The value of the Location attribute from the md:AssertionConsumerService element in the SP metadata file.
SLO URL: The value of the Location attribute from the SingleLogoutService element in the SP metadata file.
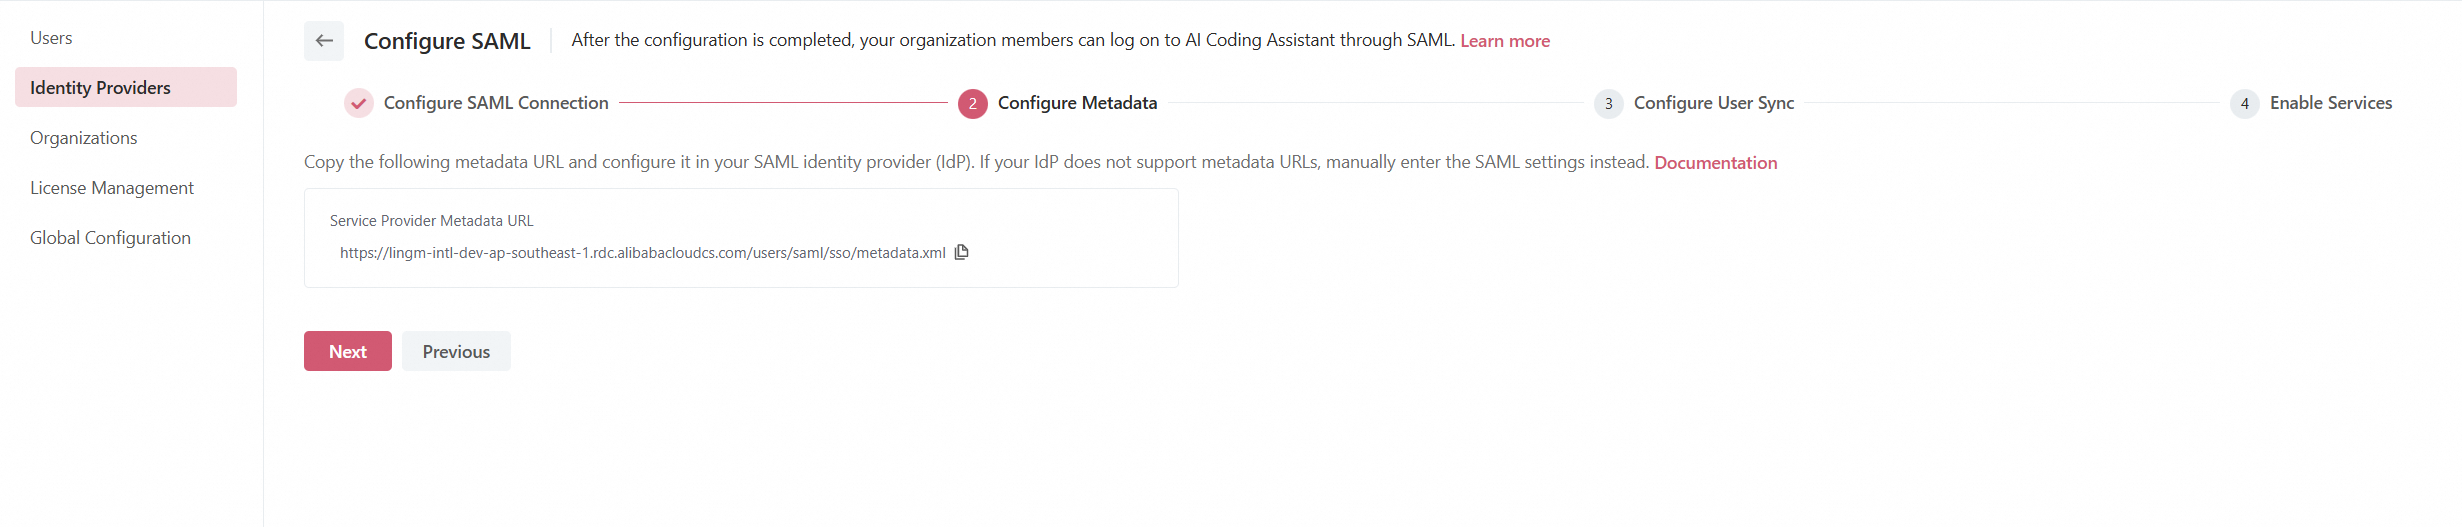
After configuration, click Next.
Step 3: Configure user synchronization
Four methods for account identification and linking are available:
Link Accounts with Same Email: Links users with identical email addresses in Lingma and your SAML IdP.
Link Accounts with Same Username: Links users with identical usernames in Lingma and your SAML IdP.
Link Accounts with Same Mobile Number: Links users with identical mobile phone numbers in Lingma and your SAML IdP.
Link Accounts with Same Employee ID: Links users with identical employee IDs in Lingma and your SAML IdP.
Regardless of the selected linking method, make sure that the corresponding attribute exists and is unique, because Lingma performs account matching in a strict one-to-one manner based on this attribute.

Next, configure the mapping of user attribute fields. Accounts in Lingma and your IdP will be matched based on the configured user attribute field mapping relationship, as shown in the following figure:
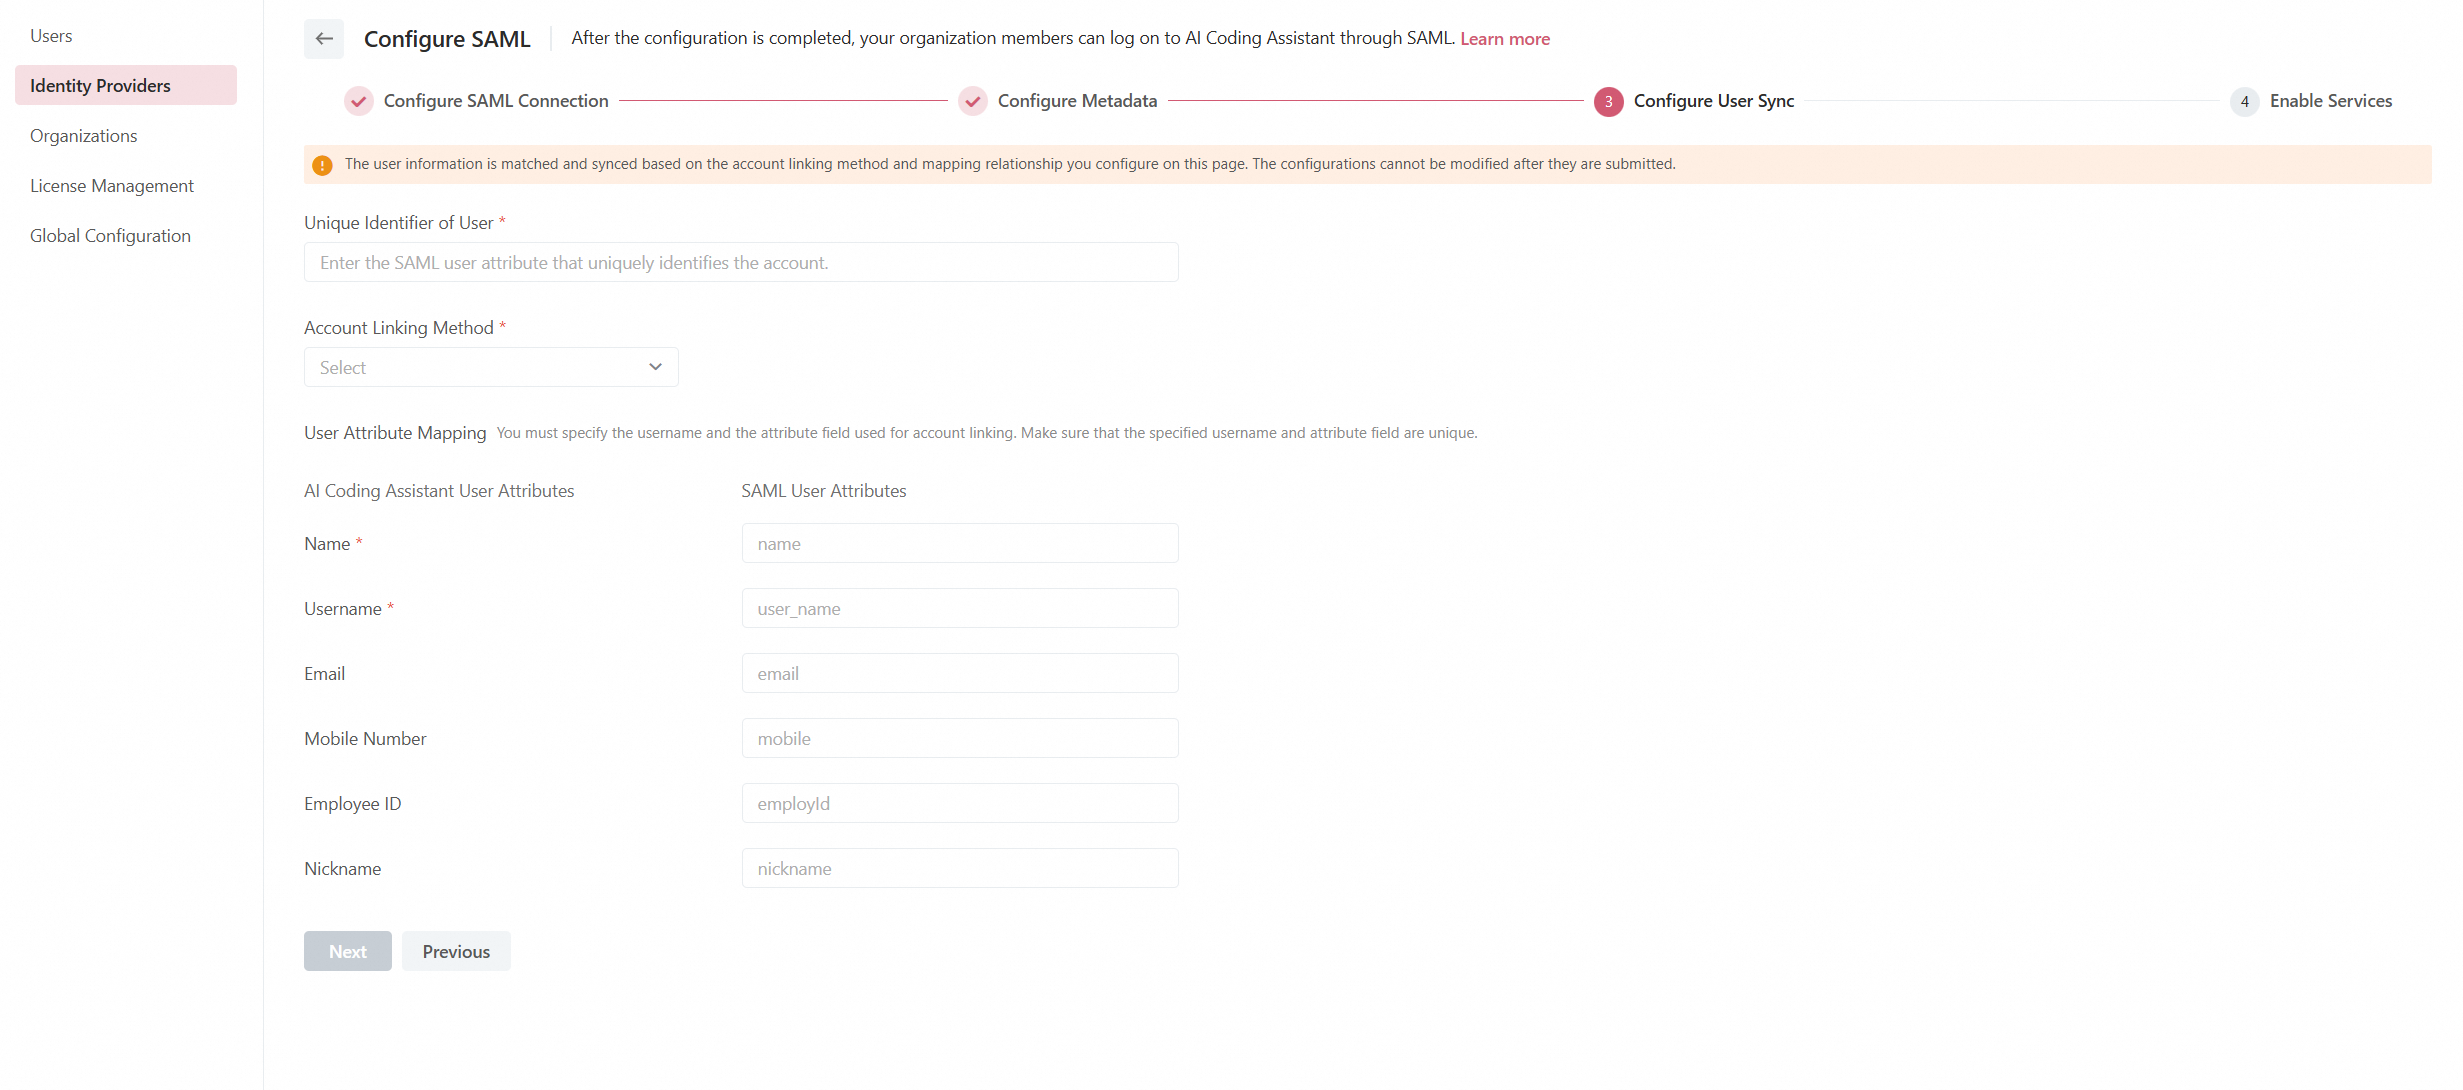
Click Next.
Step 4: Enable SSO
By default, the SSO feature is disabled. Once enabled, you can adjust SAML SSO settings:
Customize the display name and icon for the SAML logon entry point, which will be displayed on the Lingma logon page.
Enable single logout (SLO): By default, SLO is disabled. Once enabled, configure the SLO URL of Lingma in your SAML IdP to synchronize logout status.
Enable automatic creation of Lingma accounts on first logon:
By default, Automatic Account Creation is not selected. The system only links SAML accounts to their matched Lingma accounts during logon. If no matching is found, the system will not create a Lingma account for the SAML user based on the SAML credentials.
When Automatic Account Creation is selected, a new Lingma account will be automatically created and linked to the SAML account if no matching Lingma account exists.
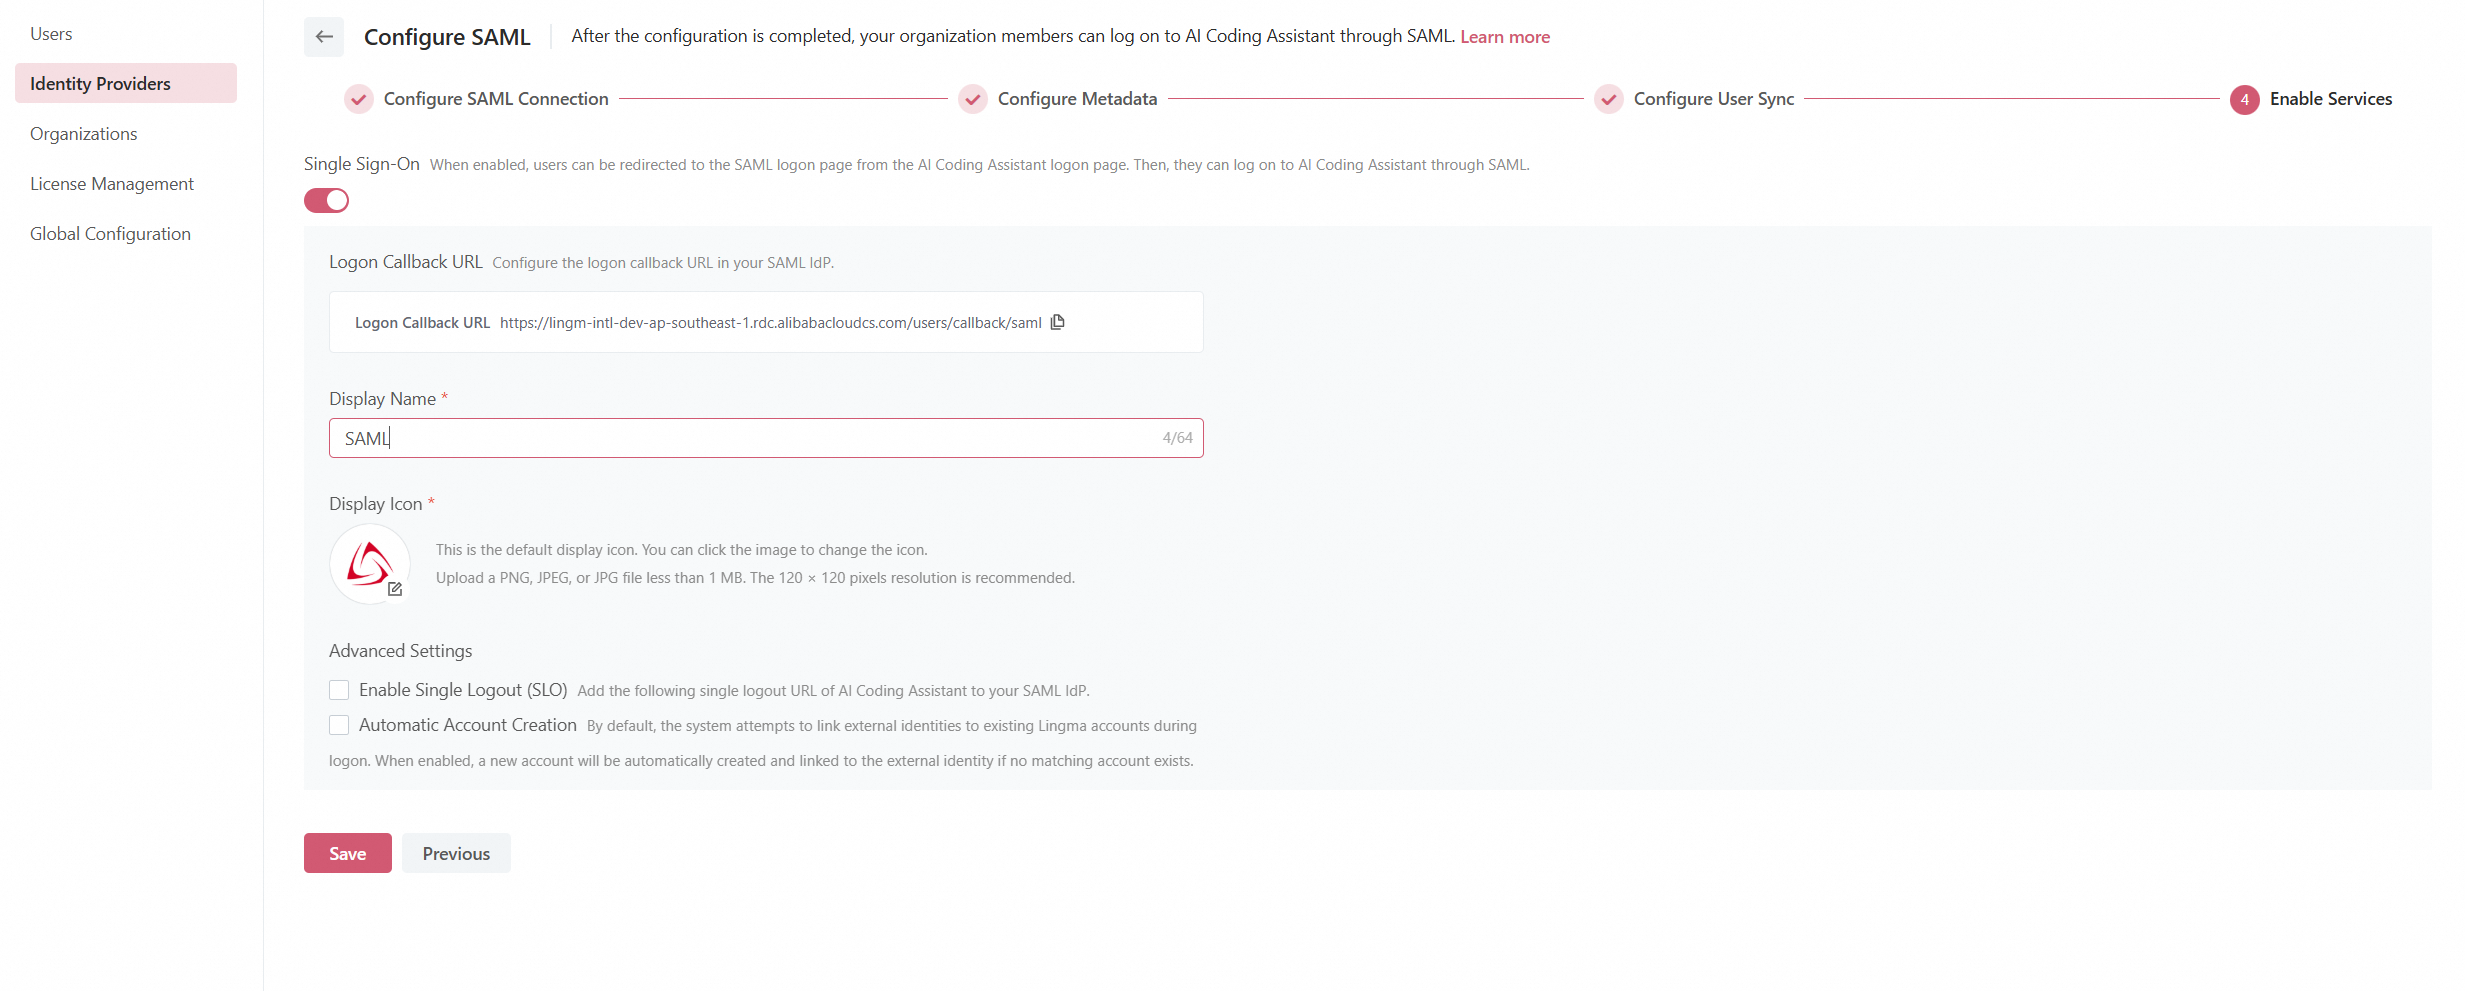
If you do not need to enable the preceding services, you can save the configuration and enable the required services later on the SAML integration details page.
After completing all configurations, click Save.
Log on to Lingma through SAML authentication
Once SSO is enabled, the Lingma logon page will include a SAML logon option. Clicking it directs users to the SAML logon page, where users with linked SAML accounts can log on using their SAML credentials.
Log off from Lingma
Logging off from Lingma will also sign you out from the SAML IdP. For simultaneous logoff from both services, see SLO setup steps in Step 4: Enable SSO.
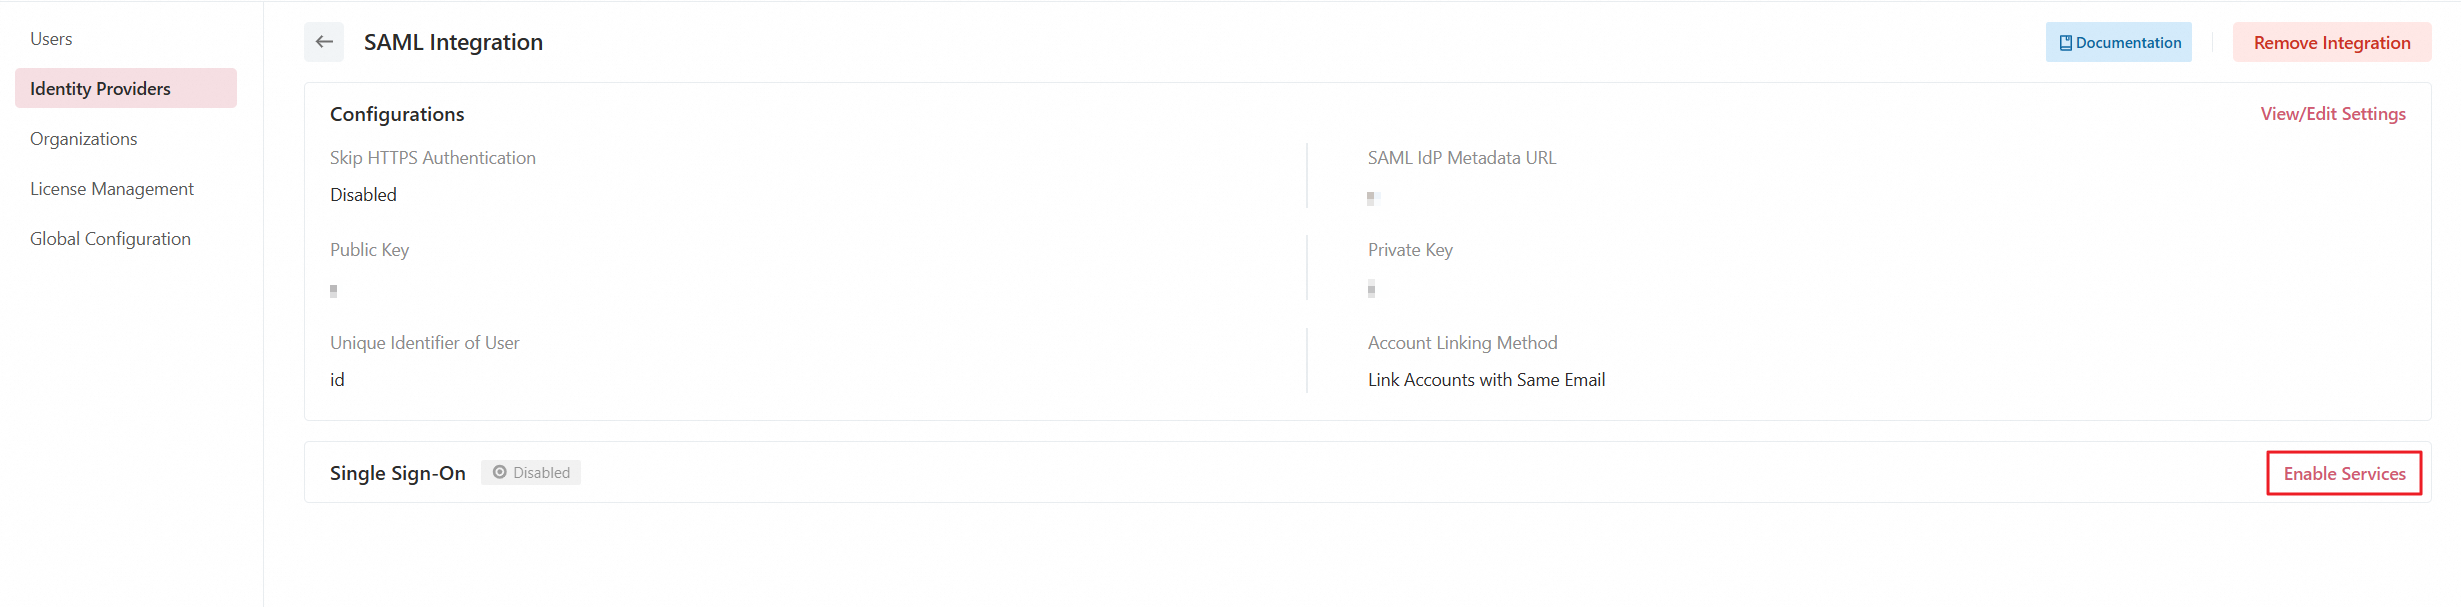
Modify the SAML integration
On the SAML integration details page, you can click View/Edit Settings to adjust the mapping of non-mandatory user attributes. Other configurations are not editable.
Disable SSO
On the SAML integration details page, you can click Edit Settings to disable SSO. In the Edit Settings panel, turn off the Single Sign-On switch. Disabling SSO will:
Preserve existing linking between Lingma and SAML accounts.
Disable logon to Lingma with SAML authentication. Users must use their Lingma logon credentials instead.
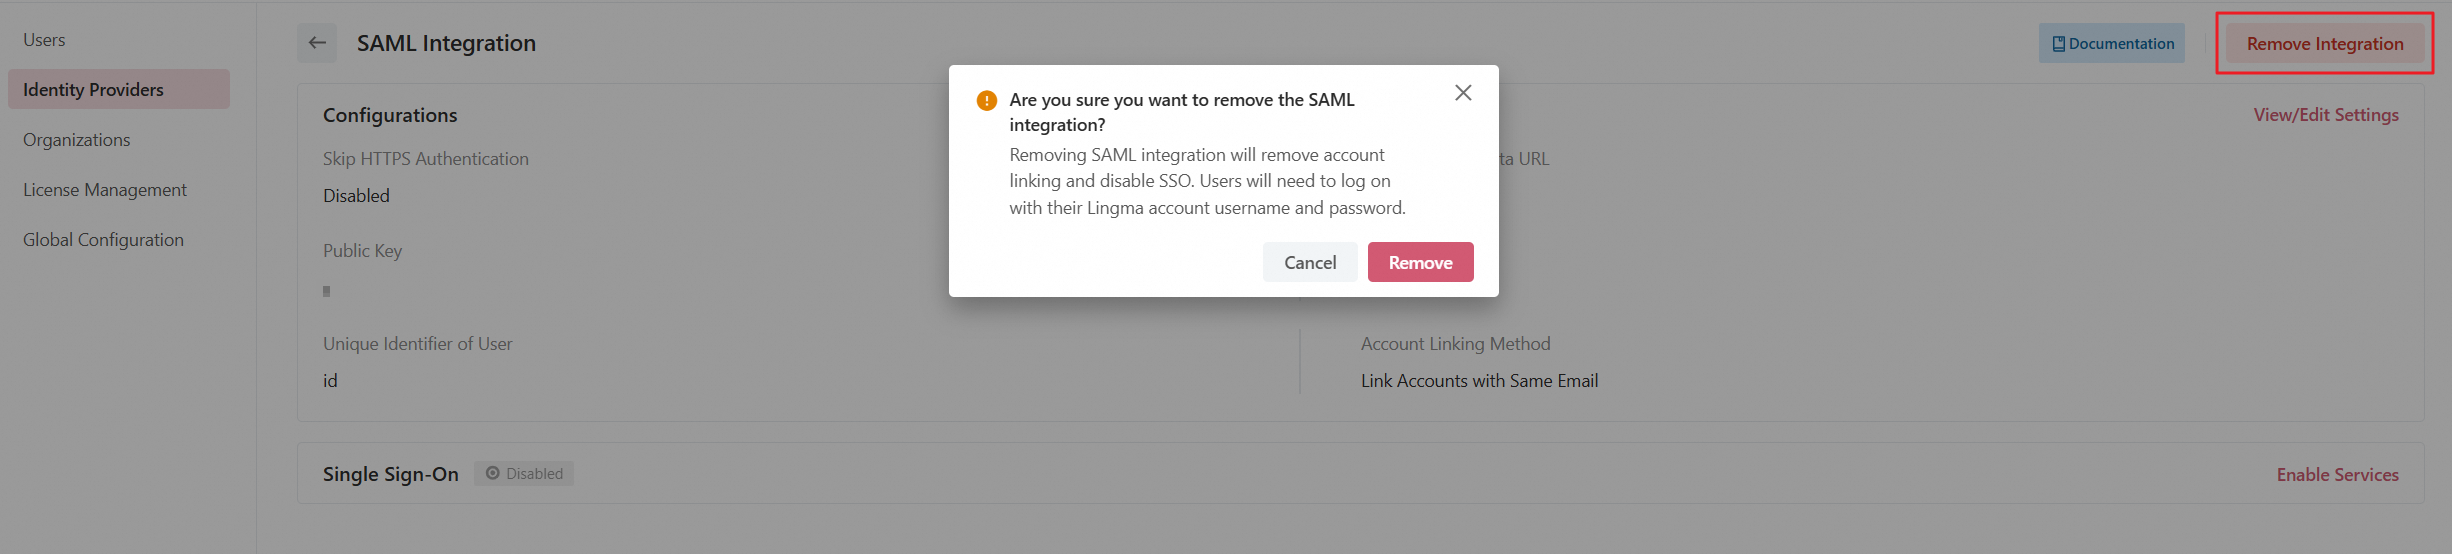
Remove the SAML integration
To remove the SAML integration, click Remove Integration on the integration details page. In the message that appears, click Remove. Removing the integration will:
Remove existing linking between Lingma and SAML accounts. Previously synced information of organizations and users is retained.
Disable logon to Lingma with SAML authentication. Users must use their Lingma logon credentials instead.