Learn the core workflow for using Dify through the Data Management (DMS) console, including workspace management, member collaboration, and LLM application development, to quickly build intelligent applications.
Prerequisites
Before you begin, ensure you have completed the setup described in One-click deployment of Dify.
Overview
Enter a workspace: Access the Dify environment from the DMS console.
Add workspace members: Add members to the workspace for collaborative development.
Develop LLM applications: Use Dify to accelerate the development of intelligent enterprise applications.
Enter a workspace
- Log on to the DMS console V5.0.
Move the pointer over the
 icon in the upper-left corner and choose . Note
If you do not use the DMS console in Simple mode, choose in the top navigation bar.
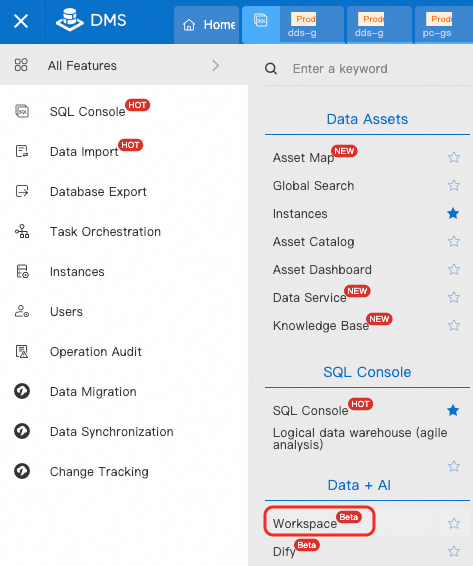
On the list of workspaces, click the name of your workspace to open it.
Add workspace members
In the lower-left corner of the Workspace page, choose .
Click Add Workspace Member, and then select the desired Member and Role.
NoteBefore adding a member, a DMS administrator must first add them as a DMS user or synchronize their RAM user. Otherwise, you cannot find the member in the Member drop-down list.

The following table describes the permissions for each workspace role.
Role
Description
Workspace Admin
NoteThe creator of a Workspace is its default administrator.
This role has the highest permissions in the Workspace, including adding and removing members, and editing member roles.
Developer
This role can develop and maintain data workflows, notebooks, and task orchestrations, as well as onboard data sources and run SQL.
NoteTo use a data source, your Alibaba Cloud account must have the necessary permissions, such as query and modification permissions.
O&M
This role has permissions to publish and maintain production tasks (publishing from the main branch and maintaining the production environment), and to view and manage task execution in the O&M interface for task orchestration.
Guest
This role has read-only permissions. Members can view SQL, Notebook file code, and the design and code of task orchestration workflows.

Click Confirm.
(Optional) Manage the Dify deployment
Modify Configuration: To change the basic configuration, you must first release the existing resources.
Redeploy: Restarts the service.
Release Computing Resource: Releases the compute resources used by Dify. After release, you will need to reconfigure the resource specifications to redeploy.
Modify Computing Resource Configuration: In the Computing Resource module, click Resource Reconfiguration to change the number of replicas, configuration method, and resource specifications.
Change Billing Method: In the Computing Resource module, find the Payment mode setting:
If the current payment mode is Subscription, click Switch to Pay-As-You-Go.
If the current payment mode is Pay-As-You-Go, click Switch to Subscription.
Develop LLM applications
Open Dify.
On the left side of the Workspace, click the Dify
 icon.
icon.Configure account and role permissions for the Dify Workspace.
Enter the Dify workspace, click your profile picture in the upper-right corner, and select Settings to manage accounts.
NoteBy default, the account used to log in to the Dify workspace is the same as your DMS account and is assigned the Owner role. The owner can modify the roles of other users.
Develop LLM applications. For detailed steps, see the official Dify documentation.
If you encounter issues when using this feature, contact DMS technical support.
FAQ
Q: What happens if I change the credentials for my ApsaraDB RDS for PostgreSQL, Tair (Redis OSS-compatible), or AnalyticDB for PostgreSQL instance, and how do I update my Dify configuration?
A: Yes. You must update the new credentials in DMS instance management and then redeploy the Dify workspace.