When a node reads from a table that another node writes to within the same scheduling cycle, configure a same-cycle scheduling dependency. The dependent node waits until its ancestor node completes successfully in that cycle before it starts.
DataWorks provides multiple configuration methods and a dependency preview feature so you can verify and adjust dependencies before issues arise.
Before configuring scheduling dependencies, read the "Configure scheduling settings" topic to understand the foundational concepts.
Understand the two dependency types
DataWorks has two distinct dependency relationships. Confusing them leads to incorrect scheduling behavior.
| Relationship | Meaning | Visual indicator in DAG |
|---|---|---|
| Same-cycle dependency | Node B in cycle N depends on Node A in cycle N | Solid lines |
| Cross-cycle dependency | Node B in cycle N depends on Node A in cycle N-1 or earlier | — |
Default behavior: By default, a node waits for all its ancestor nodes to succeed in the current cycle before it starts.
If same-cycle dependencies cannot meet your requirements — for example, when a daily node depends on an hourly node, the instance generated for the daily node depends on all instances generated for the hourly node on the current day by default. If you configure self-dependency for the hourly node, you can specify that the daily node depends on the instance generated for the hourly node in a specific scheduling cycle. For more complex scenarios, configure cross-cycle scheduling dependencies instead.
How dependencies work
Scheduling dependencies in DataWorks follow a node-to-table-to-node chain:
-
Node A runs and writes data to an output table (for example,
project.table_a). -
Node A's output is registered under an output name in
workspace_name.output_nameformat. -
Node B declares Node A's output as its input (ancestor node), forming a dependency.
-
When a scheduling cycle runs, Node B waits for Node A to complete successfully before starting.
To take full advantage of automatic dependency detection, follow these principles during development:
| Principle | Guideline |
|---|---|
| Node naming | Name each node after the output table it produces |
| Code development | Do not write data from multiple nodes to the same table |
| Dependency configuration | Register the output table as the node's output |
Configure scheduling dependencies
Open the node in Data Studio, then click the Properties tab in the right-side panel. The Scheduling Dependencies section has two parts:
-
Node Dependencies — the ancestor nodes that the current node depends on
-
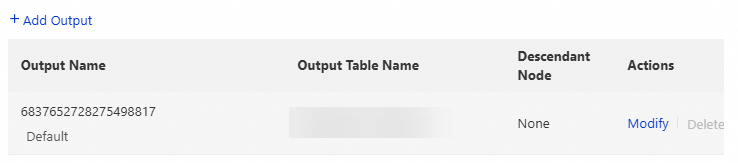
Node Outputs — the outputs that other nodes reference to depend on the current node
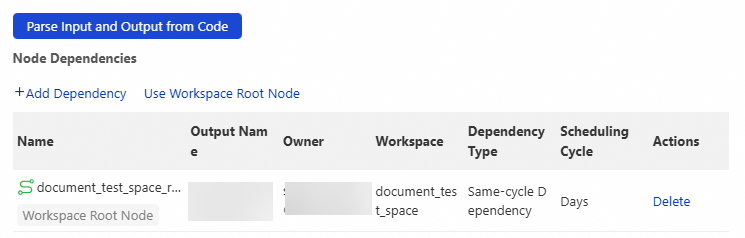
Specify ancestor nodes
Every node must have at least one ancestor node. If no table lineage exists, use the root node or zero load node of the workspace.
Make sure all ancestor nodes are committed. If you get an error saying an ancestor node's output does not exist when committing, the ancestor node has not been committed yet.
The following methods are available. Use automatic parsing as your default — it is the fastest and least error-prone approach.
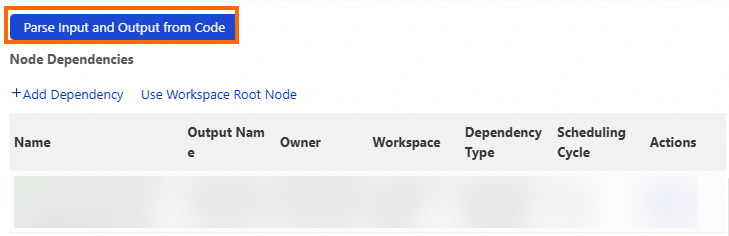
Automatic parsing (recommended)
Click Parse Input and Output from Code in the Node Dependencies section. DataWorks parses the latest code in the editor, identifies input and output tables based on table lineage, and recommends ancestor nodes automatically.
DataWorks generates output names in projectName.tableName format from code parsing results and searches for matching nodes to recommend.
Automatically recommended nodes are updated with a one-day delay. Nodes must be committed and deployed to the production environment, and data must be generated on the current day, before they appear in recommendations. Verify that recommended nodes are committed and have generated the expected table.
Draw lines on the workflow canvas
Add ancestor nodes manually
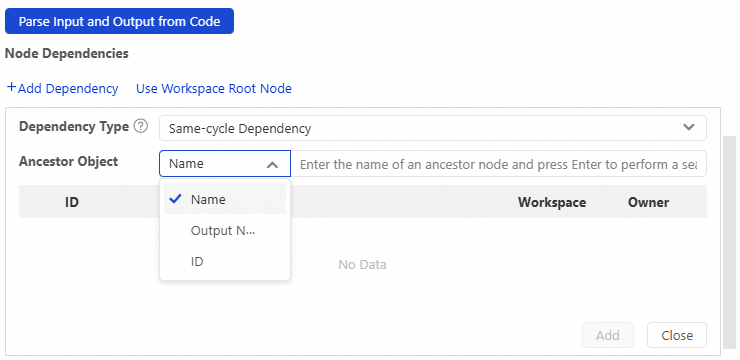
In the Scheduling Dependencies section, click Add Dependency. Select the dependency type — same-cycle scheduling dependency, cross-cycle scheduling dependency, cross-cycle self-dependency, or cross-cycle dependency on level-1 descendant nodes — then search by node name, output name, or scheduling task ID.
Use this method to adjust dependencies when automatic parsing results do not match your requirements.
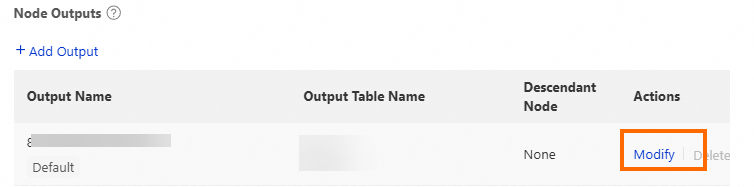
Specify the current node's output
Other nodes find and depend on the current node by referencing its output name. Configure the node's output so downstream nodes can declare a dependency on it.
The default output name is globally unique and cannot be modified or deleted. If a workspace contains nodes with the same name, duplicate output names may cause commit failures. Removing the output of a node that has descendant nodes can cause those descendant nodes to become isolated and unschedulable — see Impacts of removing or modifying a node output.
Use the default output
DataWorks generates a default output for every node. To change the output table name, click Modify in the Actions column.
When you draw lines to connect nodes on the workflow canvas, DataWorks automatically generates an output table name and output name as the input of the downstream node.
Add a custom output
In the Node Outputs section, click Add Output. Enter the output name and output table name.
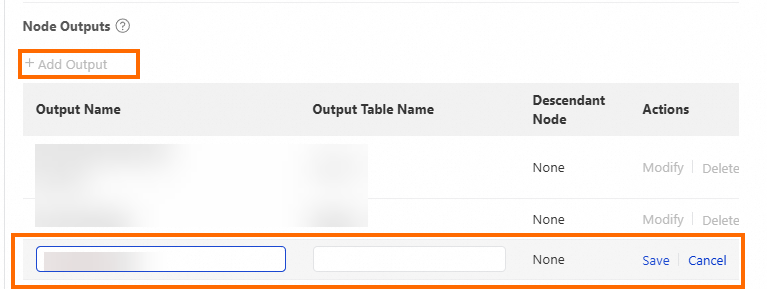
Use the format workspace_name.custom_output_name. The output name must be globally unique.
Verify scheduling dependencies
After configuring dependencies, confirm they are correct before and after deployment:
-
Before deployment: Commit the nodes and check whether DataWorks reports any dependency errors.
-
After deployment: Go to Operation Center and review the directed acyclic graph (DAG) for auto triggered nodes in the production environment. Solid lines in the DAG represent same-cycle dependencies. Verify the dependency chain matches your expectations.
Dependencies between instances are affected by the Instance Generation Mode parameter. Check this setting if the production DAG does not reflect your configuration.