This topic describes how to configure single sign-on (SSO) logon from Okta to CloudSSO.
Background information
Assume that an enterprise uses Okta as a local identity provider (IdP) that contains a large number of users and the enterprise has built a multi-account structure in a resource directory. The enterprise wants to configure settings to implement SSO logon. This way, the users in Okta can directly access specific resources within the specified members in the resource directory.
Step 1: Obtain the SP metadata file in the CloudSSO console
Log on to the CloudSSO console.
In the left-side navigation pane, click Settings.
In the SSO Logon section, copy the values of ACS URL and Entity ID for the service provider (SP).
Step 2: Create an application in Okta
Log on to the Okta portal.
In the upper-right corner of the Okta portal, click the account name and select Your Org from the drop-down list.
In the left-side navigation pane, choose .
On the Applications page, click Browse App Catalog.
Search for the application named Alibaba Cloud CloudSSO.
Click the application tile in the search result and click Add integration to add an application.
Configure the application.
In the General Settings step, set App name to CloudSSODemo and click Done.
In the settings section of the Sign on page, click Edit.
Default RelayState: Set this parameter to the URL of the page that is displayed after a user logs on to the Alibaba Cloud Management Console by using the SSO logon method. If you do not configure this parameter, the user is redirected to the CloudSSO user portal by default.
NoteTo ensure security, you are allowed to enter only a URL that contains *.alibabacloudsso.com. If you enter a URL that does not contain this domain name, the configuration is invalid.
ACS URL: Set this parameter to the value of the ACS URL parameter that you obtained in Step 1: Obtain the SP metadata file in the CloudSSO console.
Entity ID: Set this parameter to the value of the Entity ID parameter that you obtained in Step 1: Obtain the SP metadata file in the CloudSSO console.
Application username: Select Okta username.
Click Save.
Step 3: Obtain the IdP metadata file in Okta
On the CloudSSODemo details page, click the Sign On tab.
In the SAML Signing Certificates section, right-click Actions and select View IdP metadata from the drop-down list to save the IdP metadata to your computer.
Step 4: Assign users to the application in Okta
If no users are created in Okta, you must first create users. For more information, see Create an Okta user.
On the CloudSSODemo details page, click the Assignments tab.
Click Assign and select an assignment method.
Assign to People: Assign a user. In this example, select this method.
Assign to Groups: Assign a group.
In the Assign CloudSSODemo to People dialog box, click Assign on the right of the required user.
Check or modify the value of User Name. Then, click Save and Go Back.
Repeat Step 3 and Step 4 to assign other users to the application in sequence.
Click Done.
Step 5: Enable SSO logon in the CloudSSO console
In the left-side navigation pane of the CloudSSO console, click Settings.
In the SSO Logon section of the Settings page, click Configure IdP.
In the Configure IdP dialog box, select Upload Metadata File.
Click Upload Metadata File to upload the IdP metadata file that is obtained in Step 3: Obtain the IdP metadata file in Okta.
Turn on the switch for SSO logon to enable SSO logon.
NoteAfter SSO is enabled, username-password logon is automatically disabled. SSO takes effect on all users. After you enable SSO, all users must use the SSO logon method.
Step 6: Synchronize or create users
You can synchronize users from Okta to CloudSSO or create the users that have the same usernames as the users in Okta in the CloudSSO console. Prepare one of the following accounts:
Synchronize users from Okta to CloudSSO: This method is suitable for scenarios in which a large number of users exist in Okta. We recommend that you use this method. For more information, see Synchronize users or groups in Okta by using SCIM.
Create users that have the same usernames as the users in Okta in the CloudSSO console: This method is suitable for scenarios in which a small number of users exist in Okta. For more information, see Create a user.
NoteUsernames are used for user logons. When you configure SSO logon, the username of a CloudSSO user must be the same as the value of the field that is used for SSO logon in Okta. For more information, see Step 2: Create an application in Okta.
Step 7: (Optional) Assign access permissions to users
If you want a CloudSSO user to access specific resources within the specified members in a resource directory after the user logs on to the user portal by using the SSO logon method, you must create access configurations that define access permissions. Then, you must assign the access permissions on the members to the user.
Create access configurations and specify policies in the CloudSSO console.
For more information, see Create an access configuration.
Assign access permissions on the accounts in your resource directory to users.
For more information, see Assign access permissions on the accounts in a resource directory.
Verify the configuration results
After you complete the preceding configurations, you can initiate SSO logon from Alibaba Cloud or Okta.
Initiate SSO logon from Alibaba Cloud
Log on to the CloudSSO console. Go to the Overview page and copy the URL used to log on to the user portal.
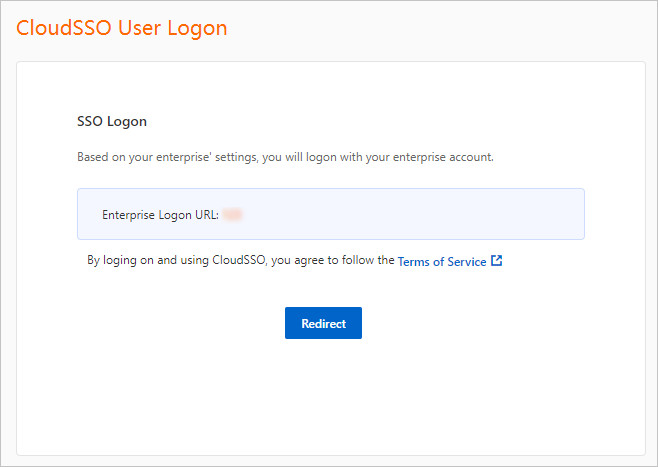
Open a browser, paste the copied URL, and then press Enter.
Click Redirect. You are redirected to the logon page of Okta.
On the page that appears, enter the username and password of the required Okta user.
After the logon succeeds, you are redirected to the page that is specified by Default RelayState. In this example, Default RelayState is not configured, and you are redirected to the CloudSSO user portal.
Initiate SSO logon from Okta
Log on to the Okta portal as an Okta user.
Click the CloudSSODemo application.
After the logon succeeds, you are redirected to the page that is specified by Default RelayState. In this example, Default RelayState is not configured, and you are redirected to the CloudSSO user portal.