When you create a notification policy, you can specify that alert notifications are sent to a custom webhook URL. The Alert Management sub-service of Application Real-Time Monitoring Service (ARMS) allows you to send alert notifications to contacts of specific instant messaging apps. This topic describes how to use a webhook to send notifications to Lark.
Step 1: Obtain a webhook URL
Configure a Lark chatbot in your computer.
Open and log on to Lark.
Click the + icon and then click New group to create a Lark group that is used to receive alert notifications.
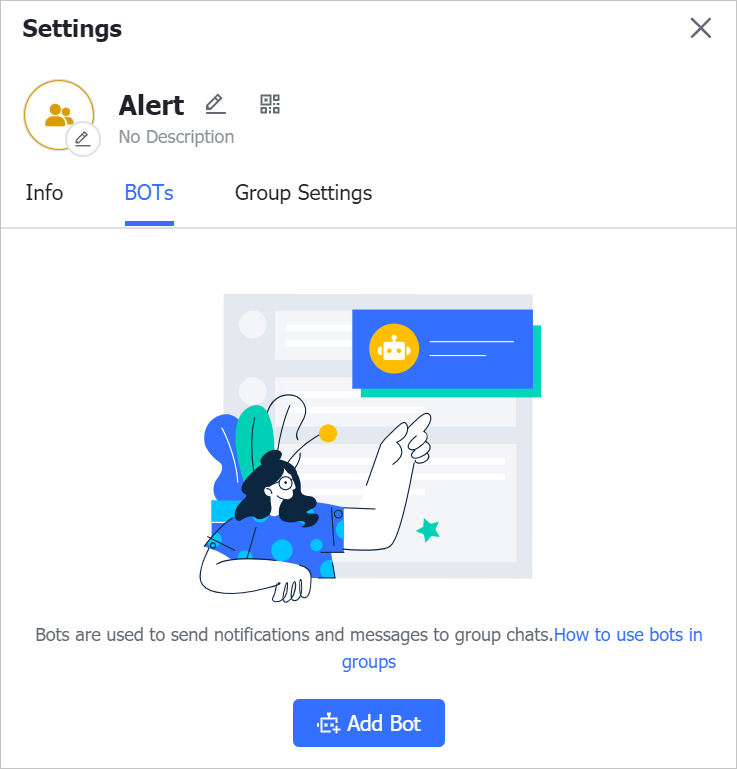
Click the Settings icon and then click the Bots tab.
On the Bots tab, click Add Bot.
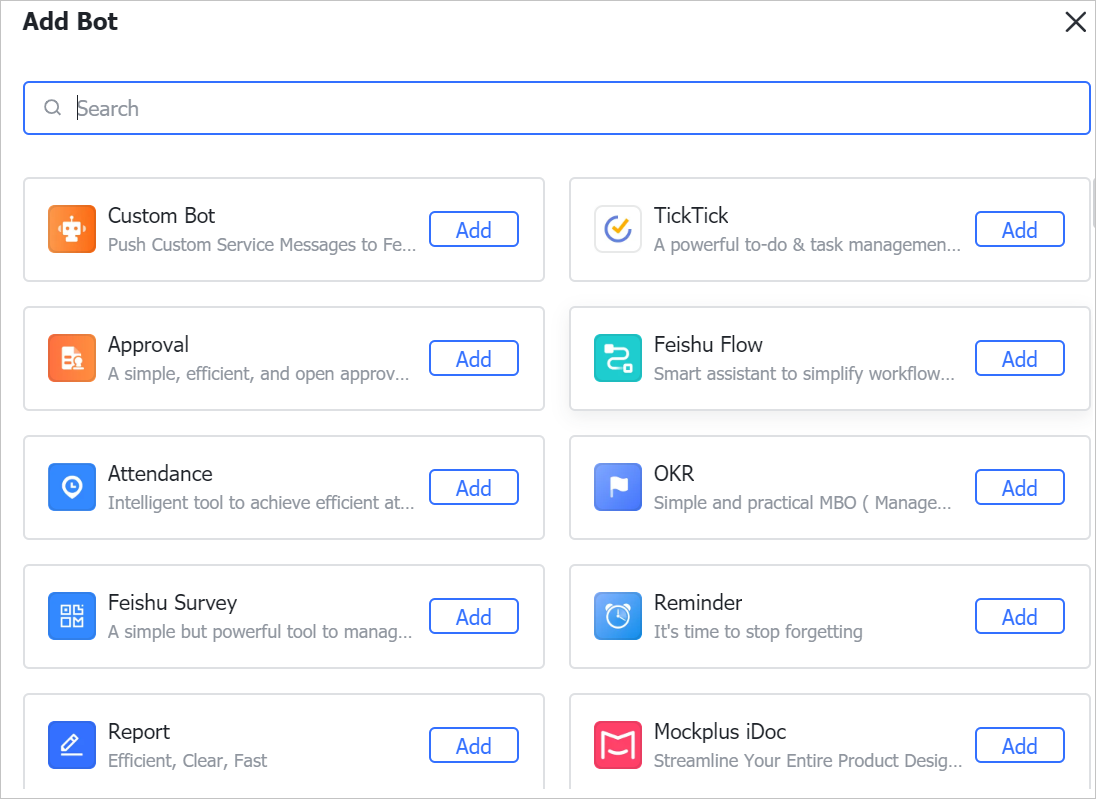
In the Add Bot dialog box, click Add in the Custom Bot section.
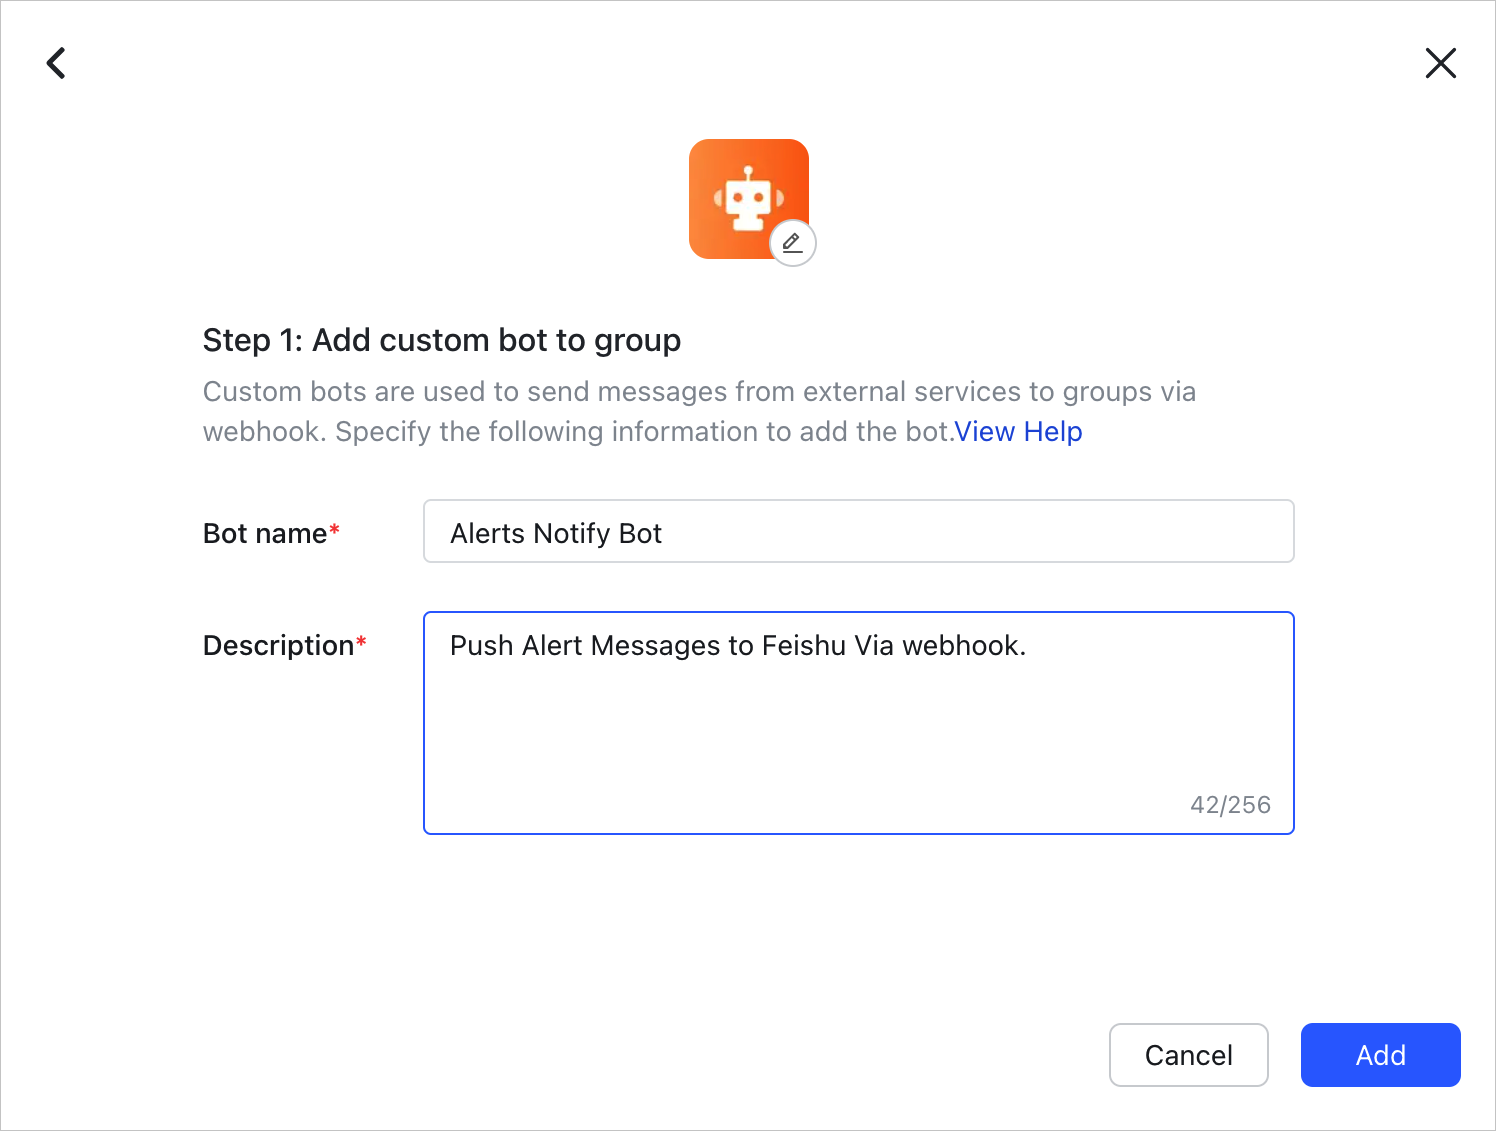
Set the Bot name and Description parameters and click Add.
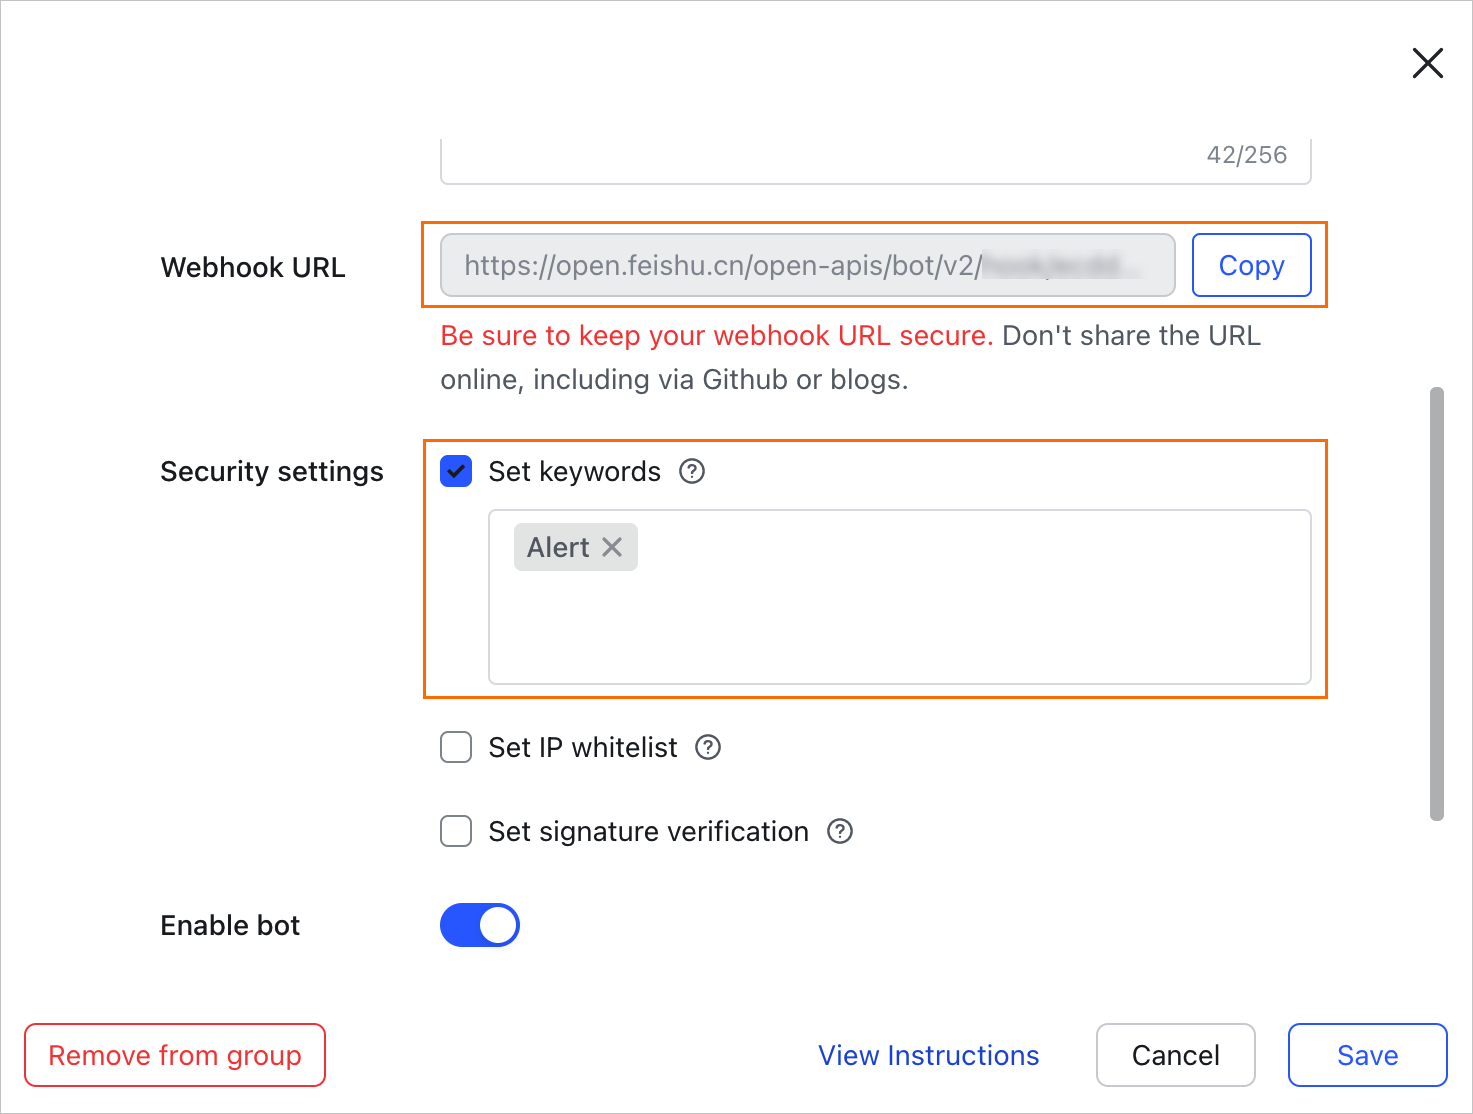
Click Copy next to Webhook URL and then click Finish.
Step 2: Create a webhook for a contact
- Log on to the ARMS console. In the left-side navigation pane, choose .
In the Edit Contact Group dialog box, click the Webhook tab and then click Add Webhook.
In the Create Webhook dialog box, configure the following parameters. The following table describes the parameters.
Parameter
Description
Webhook Name
Required. Enter a name for the webhook.
Post or Get
Required. Specify a request method and enter a URL. The URL cannot exceed 256 characters in length.
In this example, select Post and paste the webhook URL that is saved in Step 1: Obtain a webhook URL to the field.
Header or Param
Optional. Specify a request header. The request header cannot exceed 200 characters in length. Click Add to add a header or a parameter. The default request header is Content-Type: text/plain; charset=UTF-8. The total number of headers and parameters cannot exceed 6.
In this example, set the following two headers:
Arms-Content-Type : json
Content-Type : application/json
Notification template
Optional. Specify the content that you want to send when the alert is triggered. This parameter appears only if you select Post. You can use the $content placeholder to specify the notification content. The content cannot exceed 500 characters in length. For more information, see Configure a notification template and a webhook template.
Specify the notification content in the following format:
{
"Alert name":"{{ .commonLabels.alertname }}{{if .commonLabels.clustername }}",
"Cluster name":"{{ .commonLabels.clustername }} {{ end }}{{if eq "app" .commonLabels._aliyun_arms_involvedObject_kind }}",
"Application name":"{{ .commonLabels._aliyun_arms_involvedObject_name }} {{ end }}",
"Notification policy":"{{ .dispatchRuleName }}",
"Alert time":"{{ .startTime }}",
"Notification content":"{{ for .alerts }} {{ .annotations.message }} {{ end }}"
}
In this example, the following template is used:
{
  "msg_type": "text",
  "content": {
    "text": "Alert name: {{ .commonLabels.alertname }}\n{{if .commonLabels.clustername }}Cluster name: {{ .commonLabels.clustername }}\n{{ end }}{{if eq "app" .commonLabels._aliyun_arms_involvedObject_kind }}Application name: {{ .commonLabels._aliyun_arms_involvedObject_name }}\n{{ end }}Notification policy: {{ .dispatchRuleName }} \nAlert time: {{ .startTime }} \nNotification content: {{ for .alerts }} {{ .annotations.message }}\n {{ end }}"
  }
}
Template to Clear Alerts
Optional. Specify the content that you want to send when the alert is resolved. This parameter appears only if you select Post. You can use the $content placeholder to specify the notification content. The content cannot exceed 500 characters in length. For more information, see Configure a notification template and a webhook template.
Specify the notification content in the following format:
{
"Alert name":"{{ .commonLabels.alertname }}{{if .commonLabels.clustername }}",
"Cluster name":"{{ .commonLabels.clustername }} {{ end }}{{if eq "app" .commonLabels._aliyun_arms_involvedObject_kind }}",
"Application name":"{{ .commonLabels._aliyun_arms_involvedObject_name }} {{ end }}",
"Notification policy":"{{ .dispatchRuleName }}",
"Time when the alert is resolved":"{{ .endTime }}",
"Notification content":"{{ for .alerts }} {{ .annotations.message }} {{ end }}"
}
In this example, the following template is used:
{
  "msg_type": "text",
  "content": {
    "text": "Alert name: {{ .commonLabels.alertname }}\n{{if .commonLabels.clustername }}Cluster name: {{ .commonLabels.clustername }}\n{{ end }}{{if eq "app" .commonLabels._aliyun_arms_involvedObject_kind }}Application name: {{ .commonLabels._aliyun_arms_involvedObject_name }}\n{{ end }}Time when the alert is resolved: {{ .startTime }} \nNotification policy: {{ .dispatchRuleName }} \nNotification content: {{ for .alerts }} {{ .annotations.message }}\n {{ end }}"
  }
}
Optional: Click Test to verify whether the configurations are valid.
Click OK.
Step 3: Configure a notification policy
When you create or modify a notification policy, you can set the Notification Object parameter to Universal Webhook, and then select a webhook. For more information, see Create and manage a notification policy.
The timeout period for an alert notification that is sent by using a webhook is 5 seconds. If the webhook receives no response within 5 seconds after a notification is sent, the notification fails to be sent.