To make the endpoint more secure, you can enable SSL encryption for your instance and install an SSL certificate that is issued by a certificate authority (CA) for applications based on your business requirements. SSL encrypts the network connections at the transport layer. This enhances the security and integrity of data during transmission and increases the response time.
Prerequisites
The version of your PolarDB-X instance is 5.4.10 or later. You can view the instance version information on the Basic information page in the PolarDB-X console.
Note
The validity period of an SSL certificate is one year. Before an SSL certificate expires, update the validity period of the SSL certificate and download and configure the SSL certificate again. Otherwise, clients cannot connect to your instance over encrypted connections. For more information about how to update the validity period of an SSL certificate, see Update the validity period of an SSL certificate.
SSL encryption can cause a significant increase in CPU utilization. We recommend that you enable SSL encryption only for connections to the public endpoint of your instance. In most cases, connections to the private endpoint are secure and do not require SSL encryption.
Each time you enable or disable SSL encryption for an instance, the instance is restarted. Proceed with caution.
Enable SSL encryption
Log on to the PolarDB for Xscale console.
In the top navigation bar, select the region where the target instance is located.
On the Instances page, click the PolarDB-X 2.0 tab.
Find the target instance and click its ID.
In the left-side navigation pane, choose .
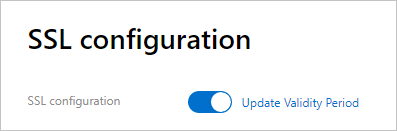
Click the SSL configuration tab.
Turn on the switch next to SSL configuration.
 Note
NoteAfter you turn on the switch, the value of SSL protected address that is displayed on the page is the private endpoint. You can change the value to the public endpoint. For more information, see Change the protected endpoint for SSL encryption.
In the message that appears, click OK.
ImportantAfter you click OK, the instance is restarted. We recommend that you enable or disable your instance during off-peak hours and make sure that your applications can automatically reconnect to the instance.
After SSL encryption is enabled, click Download CA certificate.
The downloaded package contains the following files.
The .p7b file is used to import the SSL certificate to Windows systems.
The .pem file is used to import the SSL certificate to non-Windows systems and applications.
The .jks file stores truststore certificates for Java. The password is apsaradb. The file is used to import the CA certificate chain to Java programs.
NoteWhen you use the .jks file in Java Development Kit (JDK) 7 or JDK 8, go to the
jre/lib/security/java.securitydirectory on the host where your application resides and run the following code to modify the default values of two configuration items:jdk.tls.disabledAlgorithms=SSLv3, RC4, DH keySize < 224 jdk.certpath.disabledAlgorithms=MD2, RSA keySize < 1024Otherwise, the following error is returned. In most cases, similar errors are also caused by invalid Java security configurations.
javax.net.ssl.SSLHandshakeException: DHPublicKey does not comply to algorithm constraints
Configure an SSL certificate
After you enable SSL encryption, configure an SSL certificate to allow your application or your client to connect to PolarDB-X. This section provides examples to show how to configure an SSL certificate. In the examples, MySQL Workbench and Navicat are used. If you use other applications or clients, see the corresponding instructions.
Configure an SSL certificate on MySQL Workbench
Start MySQL Workbench.
Choose .
Select If available in the Use SSL drop-down list and import the SSL certificate file.
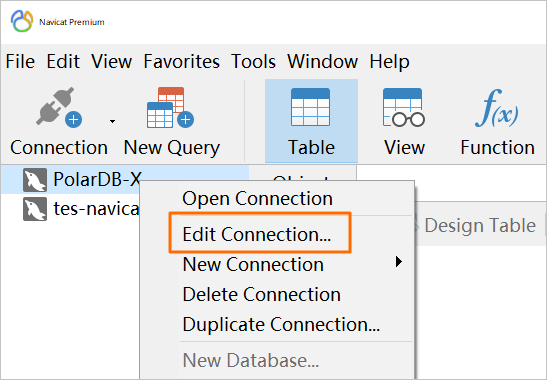
Configure an SSL certificate on Navicat
Start Navicat.
Right-click the database that you want to connect and select Edit Connection.
Click the SSL tab and select the path of the .pem SSL certificate file.
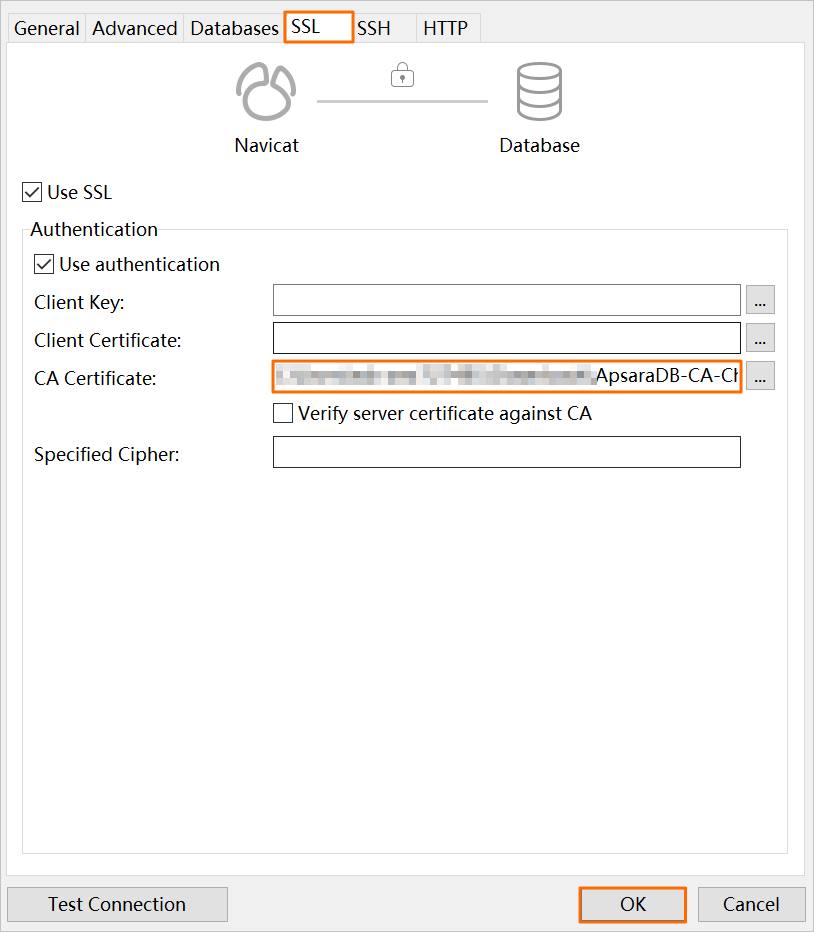
Click OK.
NoteIf the
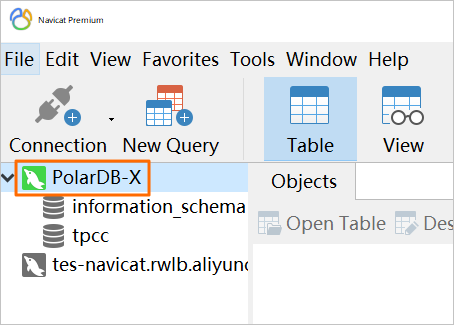
connection is being usederror message is returned, the previous session is active. In this case, you must restart Navicat.Double-click the database to check whether the database is connected.
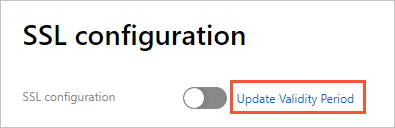
Update the validity period of an SSL certificate
After you update the validity period of an SSL certificate for an instance, the instance is restarted. We recommend that you perform this operation during off-peak hours and make sure that your application can automatically reconnect to the instance.
After you update the validity period of an SSL certificate, you must download and configure the SSL certificate again.
Change the protected endpoint for SSL encryption
Log on to the PolarDB for Xscale console.
In the top navigation bar, select the region where the target instance is located.
On the Instances page, click the PolarDB-X 2.0 tab.
Find the target instance and click its ID.
In the left-side navigation pane, choose .
Click the SSL configuration tab.
Click Set SSL.
In the dialog box that appears, select the endpoint to which the connections you want to encrypt.
NoteAfter you turn on the switch next to the SSL configuration parameter, the value of SSL protected address that is displayed on the page is the private endpoint. You can change the private endpoint to the public endpoint.
After you change the endpoint to which connections are encrypted by the SSL certificate, the instance is restarted. We recommend that you perform this operation during off-peak hours and make sure that your application can automatically reconnect to the instance.
After you change the endpoint for SSL encryption, you must download and configure the SSL certificate again.
Click OK.
Disable SSL encryption
After you disable SSL encryption for an instance, the instance is restarted. We recommend that you perform this operation during off-peak hours and make sure that your application can automatically reconnect to the instance.
After SSL encryption is disabled, the performance of your database is increased but the security is compromised. We recommend that you disable SSL encryption only in secure environments.
Log on to the PolarDB for Xscale console.
In the top navigation bar, select the region where the target instance is located.
On the Instances page, click the PolarDB-X 2.0 tab.
Find the target instance and click its ID.
In the left-side navigation pane, choose .
Click the SSL configuration tab.
Disable the SSL configuration.
In the message that appears, click OK.