Before you can access data in File Storage NAS, you must create a NAS file system and mount the file system on an Elastic Compute Service (ECS) instance. This topic describes how to create a General-purpose Network File System (NFS) file system in the NAS console. This topic also describes how to mount the NFS file system on an ECS instance that runs CentOS 7.9 in a virtual private cloud (VPC). After you mount the file system on the ECS instance, you can upload data to or download data from the file system.
Prerequisites
NAS is activated.
The first time you visit the product page of NAS, follow the instructions to activate the service.
An ECS instance is created in the China (Hangzhou) region. The operating system of the instance is CentOS 7.9. For more information, see Create an ECS instance.
Step 1: Create an NFS file system and create a mount target for the file system
Log on to the NAS console.
On the Overview page, click Create General-purpose NAS File System.
On the General-purpose NAS (Pay-as-you-go) page, configure the parameters. The following table describes the parameters. For the parameters that are not described in the following table, select values based on your business requirements or use the default values.
For more information, see Create a file system.
Parameter
Description
Region
Select China (Hangzhou).
Zone
Select Hangzhou Zone F. The file system and the ECS instance must reside in the same zone.
Protocol Type
Select NFS.
Network Type
Select VPC.
VPC
Select the VPC where the ECS instance resides.
vSwitch
Select a vSwitch that resides in the VPC.
Click Buy Now and follow the instructions to complete the payment.
After you purchase the file system, a mount target is automatically generated for the file system and a permission group named "VPC default permission group (all allowed)" is attached to the mount target. You can also create permission groups and add mount targets based on your business scenarios. For more information, see Procedure and Create a mount target.
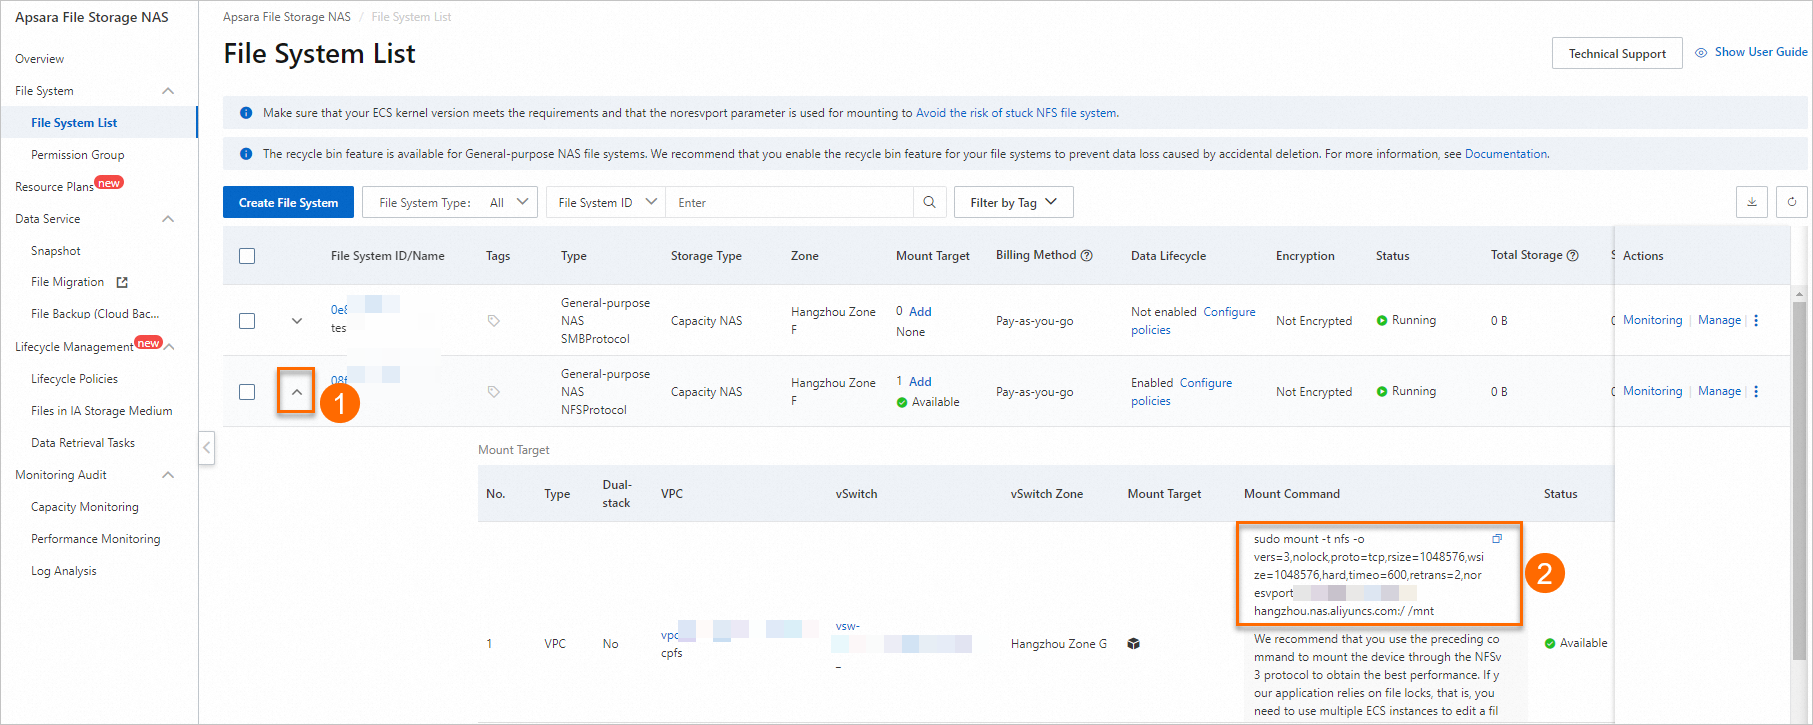
Go to the NAS console. In the left-side navigation pane, choose
On the File System List page, click the
 icon in front of the name of the file system that you created.
 In the Mount Command column of the Mount Target list, copy the mount command for later use.
Step 2: Mount the file system
Connect to the ECS instance. For more information, see Connection methods.
Run the following command to install an NFS client:
sudo yum install nfs-utilsRun the following code to set the number of concurrent NFS requests to
128:if (lsmod | grep sunrpc); then (modinfo sunrpc | grep tcp_max_slot_table_entries) && sysctl -w sunrpc.tcp_max_slot_table_entries=128 (modinfo sunrpc | grep tcp_slot_table_entries) && sysctl -w sunrpc.tcp_slot_table_entries=128 fi (modinfo sunrpc | grep tcp_max_slot_table_entries) && echo "options sunrpc tcp_max_slot_table_entries=128" >> /etc/modprobe.d/alinas.conf (modinfo sunrpc | grep tcp_slot_table_entries) && echo "options sunrpc tcp_slot_table_entries=128" >> /etc/modprobe.d/alinas.confRun the mount command that you copied in Step 1.
Run the
mount -lcommand to view the mount result.
Step 3: Verify the mount result
After you mount the file system on the ECS instance, you can use the file system in the same way as you use a local directory. The following figure shows an example.
Remotely connect to the ECS instance by referring to Connection methods, and run the following commands to access the file system:
mkdir /mnt/dir1
mkdir /mnt/dir2
touch /mnt/file1
echo 'some file content' > /mnt/file2
ls /mnt
If an output similar to the following example appears, you have accessed the General-purpose Capacity NFS file system.
