During the application process of an Internet Content Provider (ICP) filing and after the ICP filing is obtained, Alibaba Cloud notifies the specified users of the application progress, application review results, and review results for specific items by using multiple methods. We recommend that you determine the contacts and notification methods and configure the settings by referring to this topic before you apply for an ICP filing. This ensures that the ICP filing application is not affected by delayed receipt of notifications.
Background information
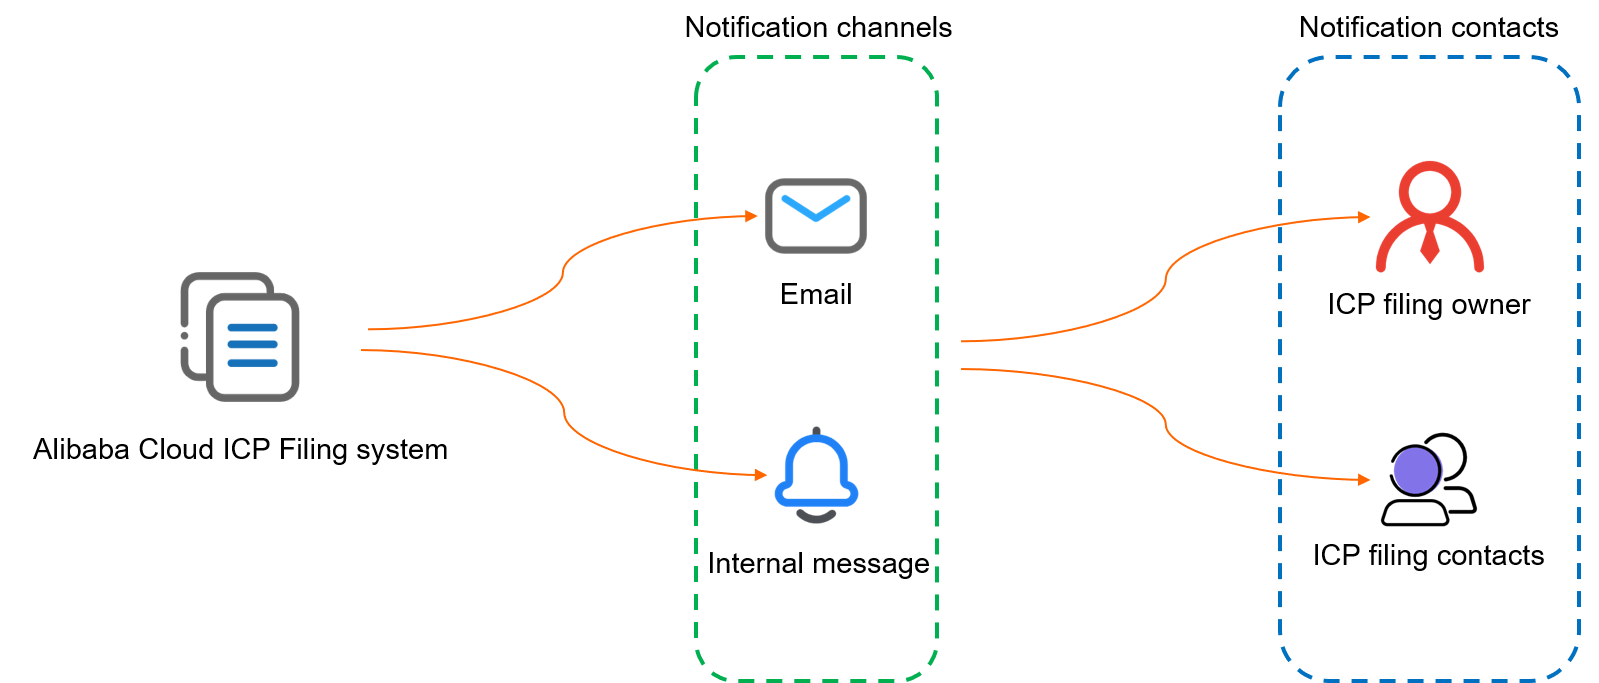
During the application process of an ICP filing and after the ICP filing is obtained, Alibaba Cloud sends notifications of the application review results, application progress, and review results for specific items to the ICP filing owner and ICP filing contacts by using emails and internal messages. Before you apply for an ICP filing, you must configure the contacts and notification methods in the Message Center console. This ensures that no notifications are missed. Delayed receipt of notifications may affect subsequent application operations.
Configure notification methods
- Log on to the Alibaba Cloud Management Console. Click the
 icon in the upper-right corner to go to the Message Center console.
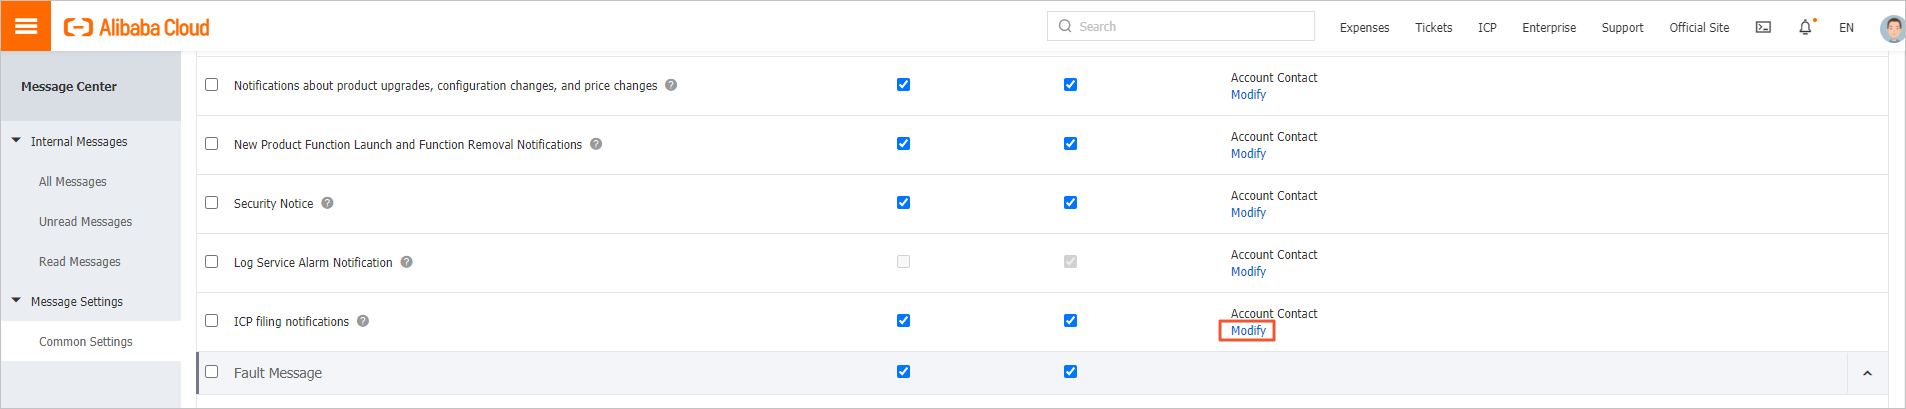
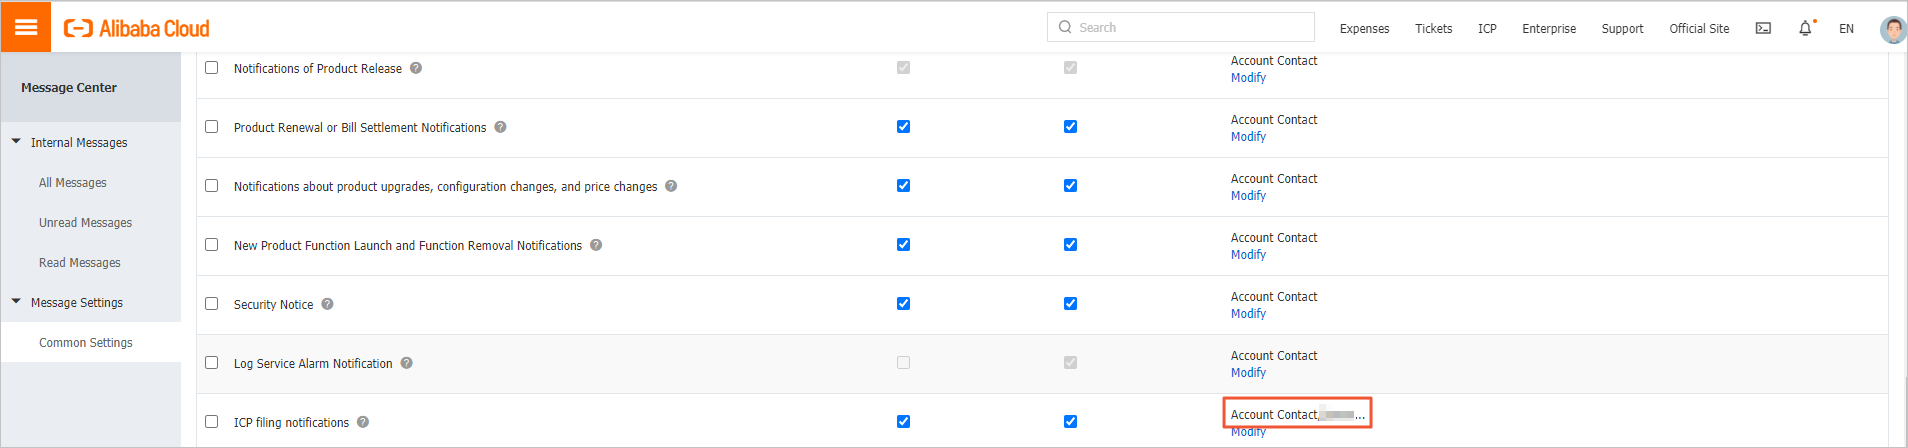
 - Choose in the left-side navigation pane. On the Common Settings page, find ICP filing notifications in the Product Message section.
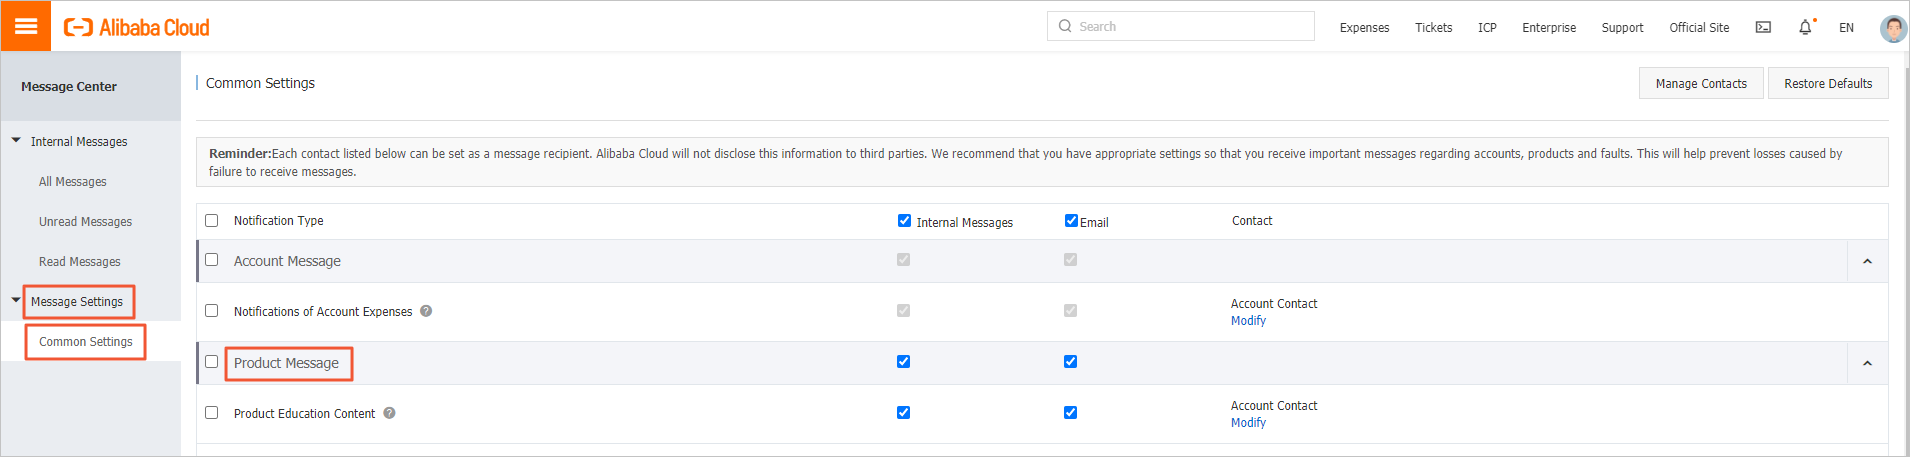
- Select Email, Internal Messages, or both for ICP filing notifications based on your business needs.

Configure contacts
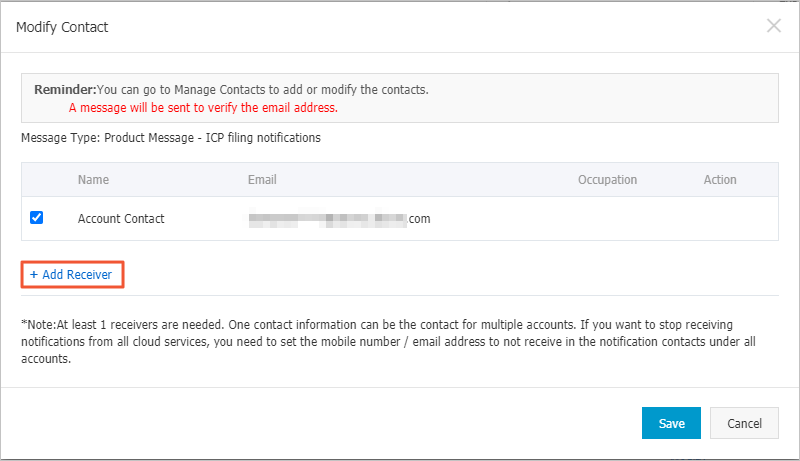
- In the Message Center console, choose in the left-side navigation pane. On the Common Settings page, find ICP filing notifications in the Product Message section. Click Modify in the Contact column. The Modify Contact dialog box appears.
- In the Modify Contact dialog box, view the information about current contacts. To add another contact,
click Add Receiver.
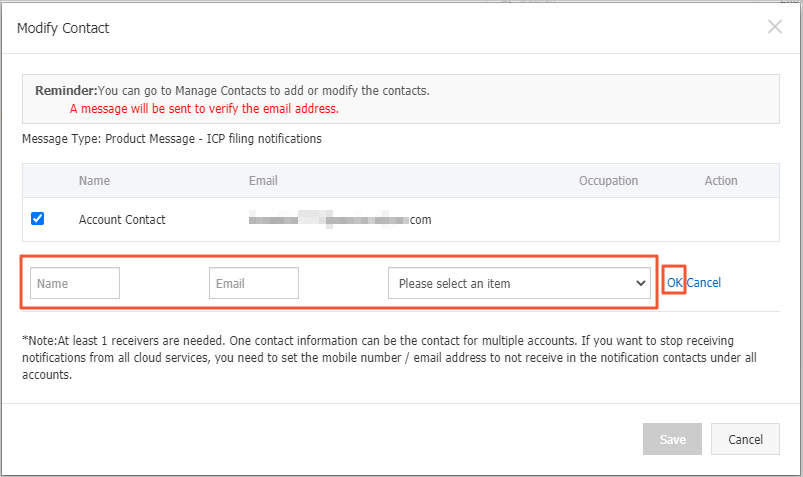
- Enter the name, email address, and title of the contact as required in the fields
that appear and click OK.
 Note You can configure up to 15 contacts.
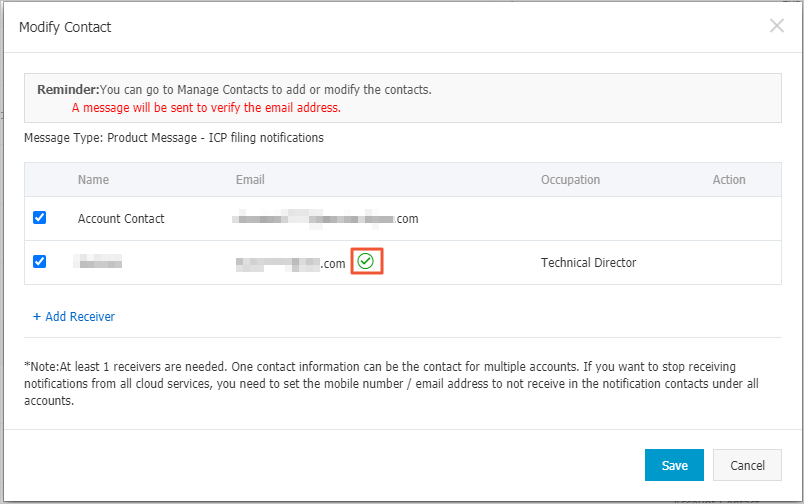
 - After you click OK, Alibaba Cloud sends a verification email to the email address of the newly added
contact. The contact must click the link therein to complete the verification. You
can refresh the page to check whether the verification is complete.
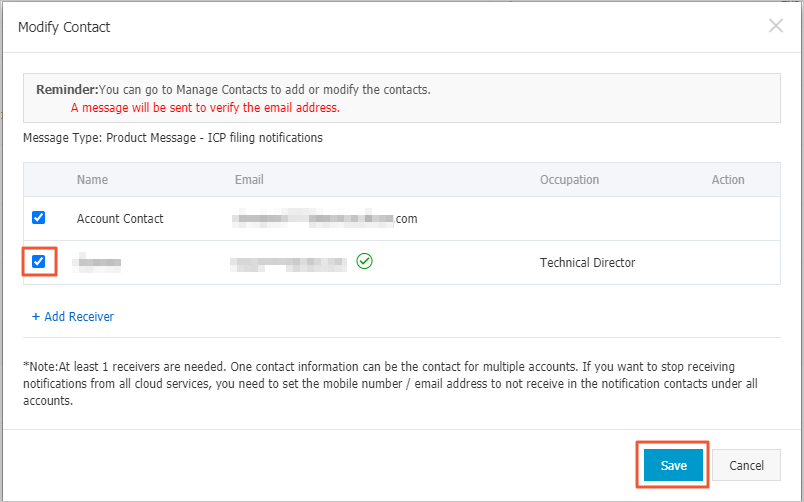
- To specify the newly created contact as a receiver, select the check box to the left
of the corresponding record and click Save.
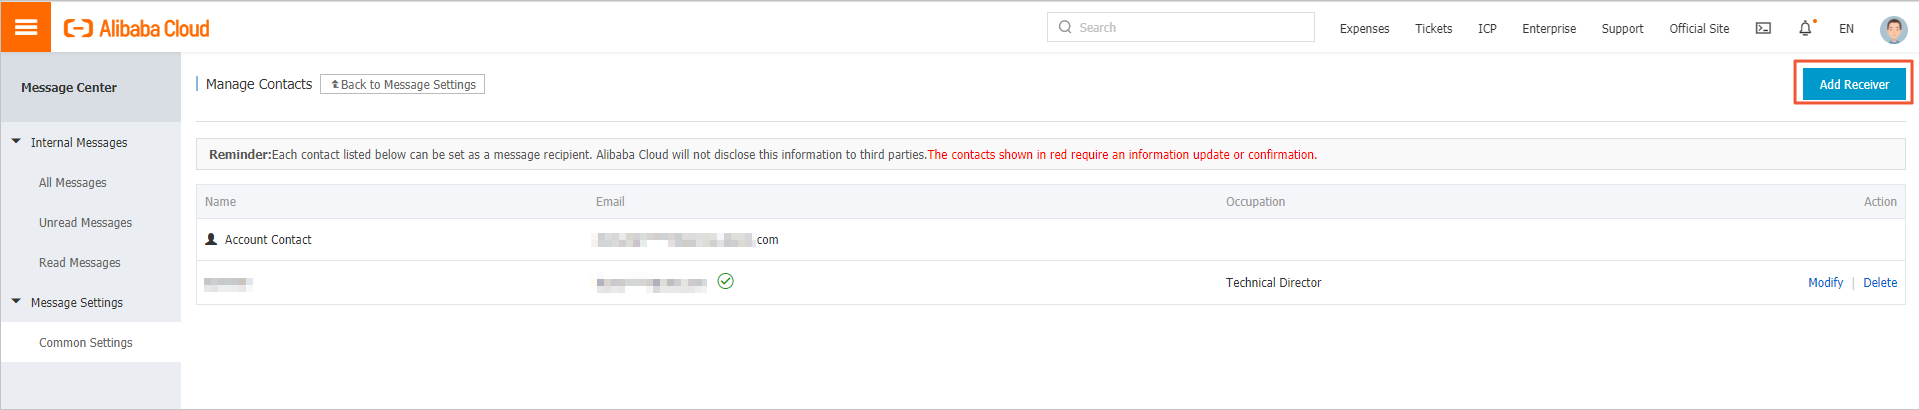
Manage contacts
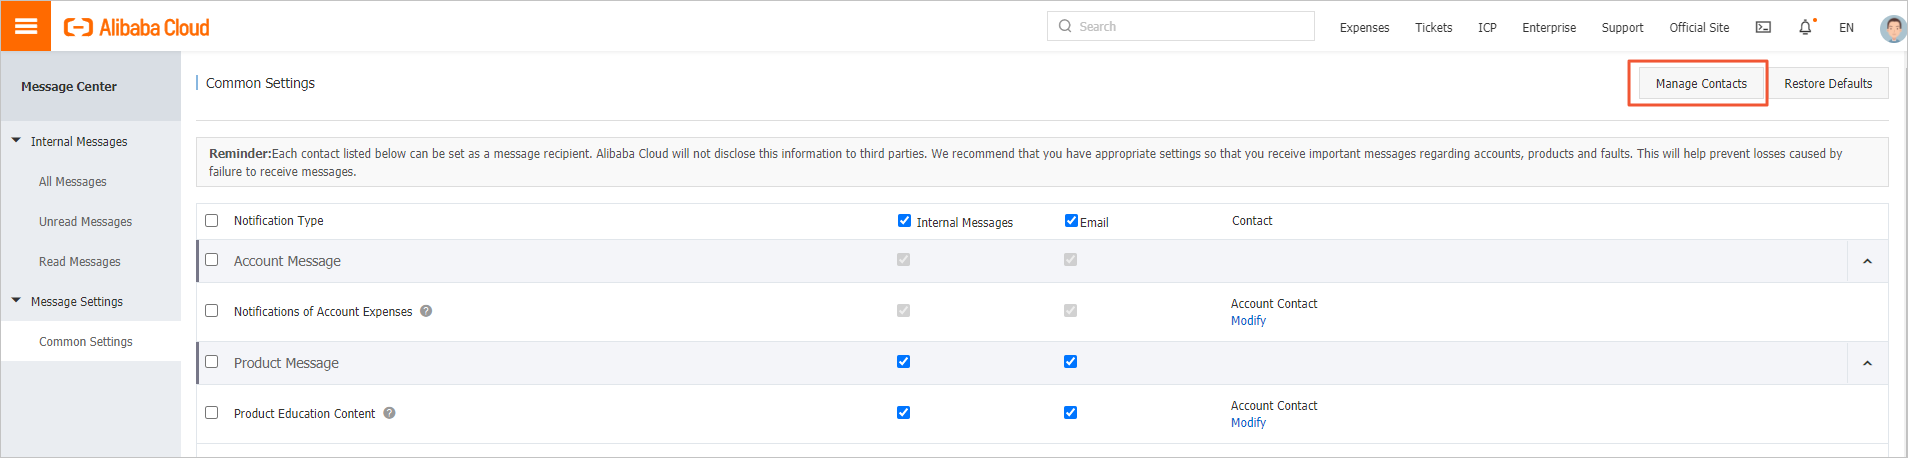
- On the Common Settings page of the Message Center console, click Manage Contacts in the upper-right corner. The Manage Contacts page appears.
- On the Manage Contacts page, find the contact that you want to manage and click Modify or Delete in the Action column.
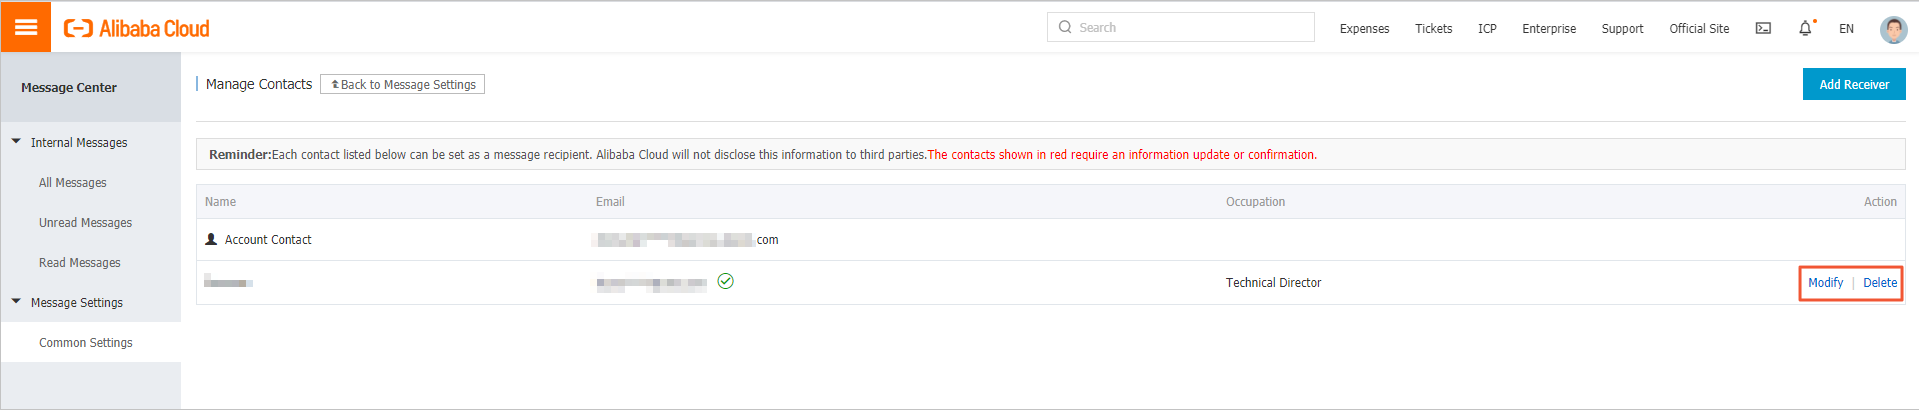 Note If you modify the information about a contact, the updated information must be verified before the contact can receive notifications.
 - To add a contact, click Add Receiver in the upper-right corner of the Manage Contacts page.