DataHub synchronizes data from TUPLE and BLOB topics to MaxCompute tables in append or upsert mode.
Preparations
Create a MaxCompute table
DataHub synchronizes data to partitioned and non-partitioned MaxCompute tables. Partitioned tables are recommended for easier data processing.
DataHub supports synchronizing TUPLE and BLOB topics to MaxCompute.
-
For TUPLE topics, the MaxCompute table data types must match the DataHub data types.
MaxCompute
DataHub
BIGINT
BIGINT
STRING
STRING
BOOLEAN
BOOLEAN
DOUBLE
DOUBLE
DATETIME
TIMESTAMP
DECIMAL
DECIMAL
TINYINT
TINIINT
SMALLINT
SMALLINT
INT
INTEGER
FLOAT
FLOAT
MAP
Not supported
ARRAY
Not supported
Create the MaxCompute table schema using only the supported data types listed above.
-
For BLOB topics, the MaxCompute table must contain only one STRING column. DataHub writes data to this column by default.
DataHub
MaxCompute
BLOB
STRING
-
To enable data tracking, add a
__rowkey__ STRINGfield to the MaxCompute table schema. DataHub automatically writes trace information to this column.
Prepare an account and grant permissions
-
The sync task requires valid credentials to access the MaxCompute table. A RAM user is usually sufficient.
-
Grant the account
CreateInstance,Describe,Alter, andUpdatepermissions on the MaxCompute table.Manage permissions in the DataWorks console: Configure MaxCompute Engine PermissionsConfigure MaxCompute Engine Permissions. Alternatively, use the MaxCompute CLI: MaxCompute Usage and Authorization Management.
Confirm the TimestampUnit
-
The TimestampUnit parameter specifies the unit for converting TIMESTAMP data before writing it to date-type fields in the downstream system.
-
Set TimestampUnit to match the TIMESTAMP column unit: "SECOND", "MILLISECOND", or "MICROSECOND".
Too many partitions slow down data synchronization due to MaxCompute writing standards. Limit partition count, especially in USER_DEFINE mode.
-
Keep data within each partition as continuous as possible.
-
Minimize the number of partitions.
If the whitelist feature is enabled for a MaxCompute project, add the sync service IP addresses to the whitelist. Overview.
Sync modes
Append mode
Appends data to the destination table without updating existing records.
Upsert mode
Upsert combines Update and Insert operations:
-
If a matching primary key exists, the record is updated.
-
If no matching primary key exists, a new record is inserted.
Upsert keeps the destination table current by handling both updates and insertions.
For more information about the MaxCompute Upsert feature, see Terms.
Scenarios
-
Update data based on a primary key: Data may change over time and must be updated based on its primary key.
-
Maintain data uniqueness in the destination table: Ensure that each record in the destination table is unique to avoid data duplication.
-
Process duplicate data: Remove duplicates from large amounts of data based on a primary key.
Configuration
-
DataHub topic type: Must be a TUPLE topic.
-
DataHub Topic Schema: The following two types are supported:
-
The schema type for data synchronized from DTS to DataHub, which is referred to as the DTS format.
-
In a schema that you create, you must select a String column as the operation column. This defines the schema as a custom format.
-
-
ODPS destination table: Must be a Transactional Table 2.0.
Sync rules
1. DTS format
When you synchronize data from DTS to DataHub, DataHub uses the operation_flag, before_flag, and after_flag columns in the schema to determine how to synchronize data to the ODPS destination table. The rules are as follows:
|
operation_flag |
before_flag |
after_flag |
OperationType |
Sync to destination table |
|
I |
* |
* |
UPSERT |
Update the record in the destination table based on the primary key. |
|
U |
Y |
N |
DELETE |
Delete the record from the destination table based on the primary key. |
|
U |
N |
Y |
UPSERT |
Update the record in the destination table based on the primary key. |
|
D |
* |
* |
DELETE |
Delete the record from the destination table based on the primary key. |
2. Custom format
For custom data, DataHub determines how to synchronize data to the ODPS destination table based on the operation column that you select.
|
ddddd |
OperationType |
Sync to destination table |
|
U |
UPSERT |
Update the record in the destination table based on the primary key. |
|
D |
DELETE |
Delete the record from the destination table based on the primary key. |
Create a sync task
-
In DataHub, click a topic to go to its details page.
-
On the topic details page, click Sync in the upper-right corner.

-
Select the MaxCompute job type.
Configuration item description:
-
Parameter
Options
Required
Description
Project Name
/
Yes
The name of the MaxCompute project.
Schema
/
No
The name of the MaxCompute schema.
NoteTo use this feature, enable schema syntax development. Schema operations.
Table
/
Yes
The name of the MaxCompute table.
NoteIf you use the Upsert mode, the destination table must be a Transactional Table 2.0.
Sync mode
Append
Yes
Appends data to the MaxCompute destination table.
Upsert
Updates or deletes records in the MaxCompute transactional table based on the primary key.
The Sync modes section above describes both modes.
Upsert method
SYNC_CUSTOM
Required if you set Sync mode to Upsert. Not applicable if you set Sync mode to Append.
A custom field for the upsert operation.
SYNC_NONE
All data is written to the destination table as an upsert operation.
SYNC_DTS
Used when data is written to DataHub from DTS and the new DTS attachment column rule is enabled.
SYNC_DTS_OLD
This applies to scenarios where you use DTS to write data to DataHub and enable the new attachment column rule.
Primary key field
/
The primary key column that you specify when you create the downstream table for the Upsert sync mode.
Upsert operation field
/
Required if you set Upsert method to SYNC_CUSTOM.
Select a STRING column as the operation column. This column indicates whether the data is synchronized to the downstream table as an upsert or delete operation.
The Upsert mode section above describes the sync rules.
-
Import fields: Select the columns to synchronize to the MaxCompute table.
-
Partition mode: Determines which MaxCompute partition receives the data.
Partition mode
Partition basis
Supported topic type
Description
USER_DEFINE
Value of the partition key column in the record. The column must have the same name as the partition field in MaxCompute.
TUPLE
(1) The DataHub schema must contain the MaxCompute partition field. (2) The value of this column must be a
UTF-8 string. The value can be empty, which indicates that the data is not partitioned.SYSTEM_TIME
Time when the record is written to DataHub.
TUPLE / BLOB
(1) In the partition configuration, set the time format for the MaxCompute partition. (2) Set the time zone.
EVENT_TIME
Value of the
event_time(TIMESTAMP)column in the record.TUPLE
(1) In the partition configuration, set the time format for the MaxCompute partition. (2) Set the time zone.
META_TIME
Value of the
__dh_meta_time__attribute field of the record.TUPLE / BLOB
(1) In the partition configuration, set the time format for the MaxCompute partition. (2) Set the time zone.
SYSTEM_TIME,EVENT_TIME, andMETA_TIMEmodes partition data by timestamp and time zone. The default timestamp unit is microsecond. -
Partition configuration: Timestamp-based partition settings. The console uses a fixed partition format by default.
Partition
Time Format
Description
ds
%Y%m%d
day
hh
%H
hour
mm
%M
minute
-
The partition interval converts timestamps into MaxCompute partitions. Range:
15 minutes to 1440 minutes (1 day), step:15 minutes. -
Time zone (TimeZone): The time zone for timestamp-based partitioning.
-
Separator: A hexadecimal delimiter to split BLOB data before synchronization. For example,
0Arepresents aline feed (\n). -
Base64 encoding: BLOB data is binary but the MaxCompute column is STRING, so the console Base64-encodes data by default. Use the SDK for custom encoding options.
-
-
View a sync task
Click a connector to view its sync status, checkpoints, and available operations (restart, stop).
Synchronization examples
1. USER_DEFINE sync mode
-
Create a DataHub topic.
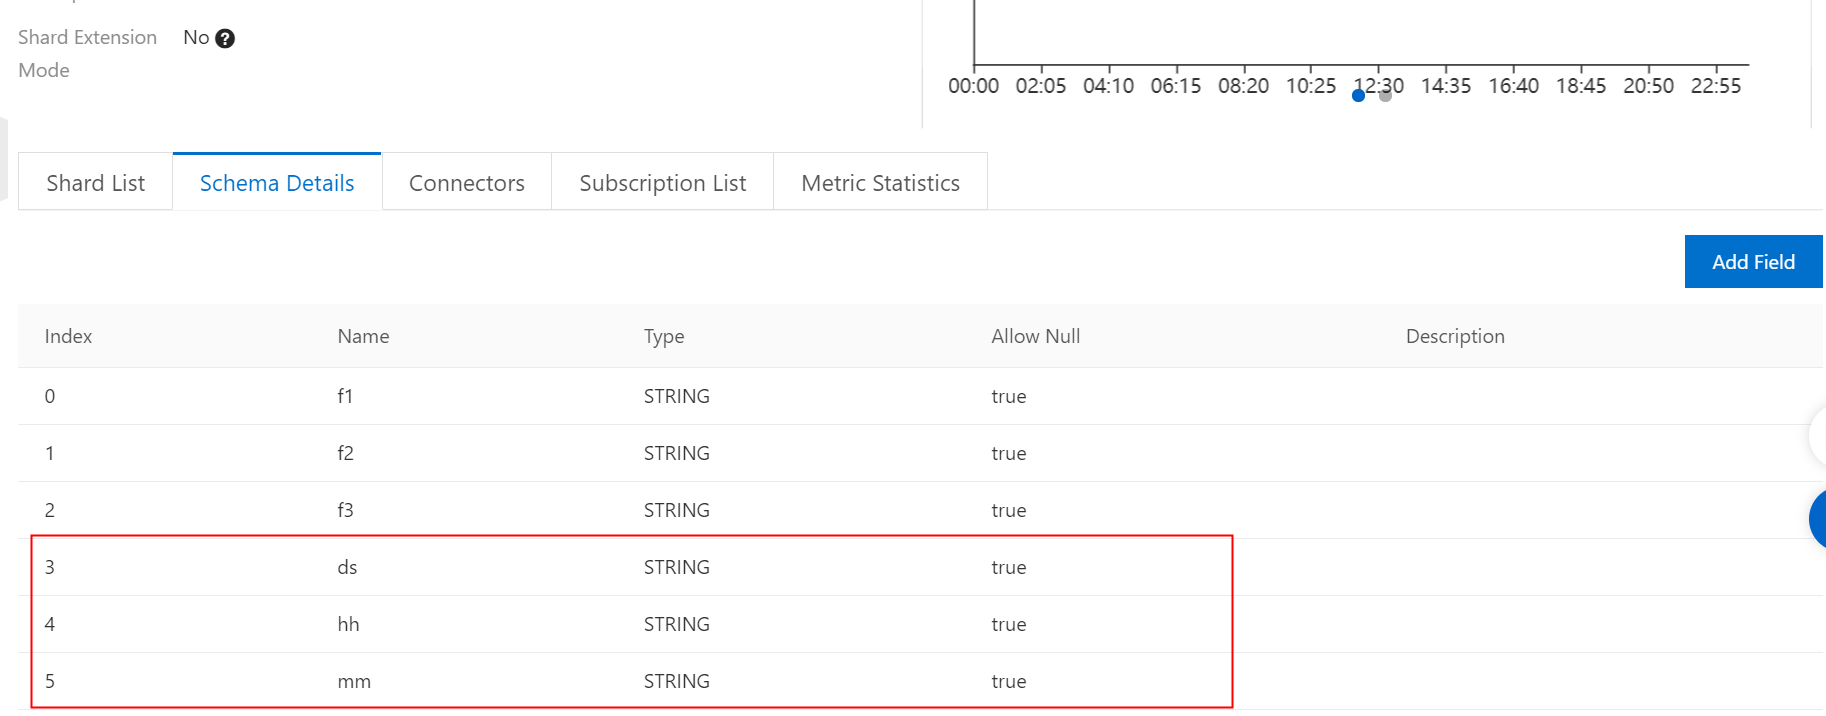
Note: The topic schema must contain the MaxCompute partition field. The field must be of the STRING type, as shown in the following figure:
-
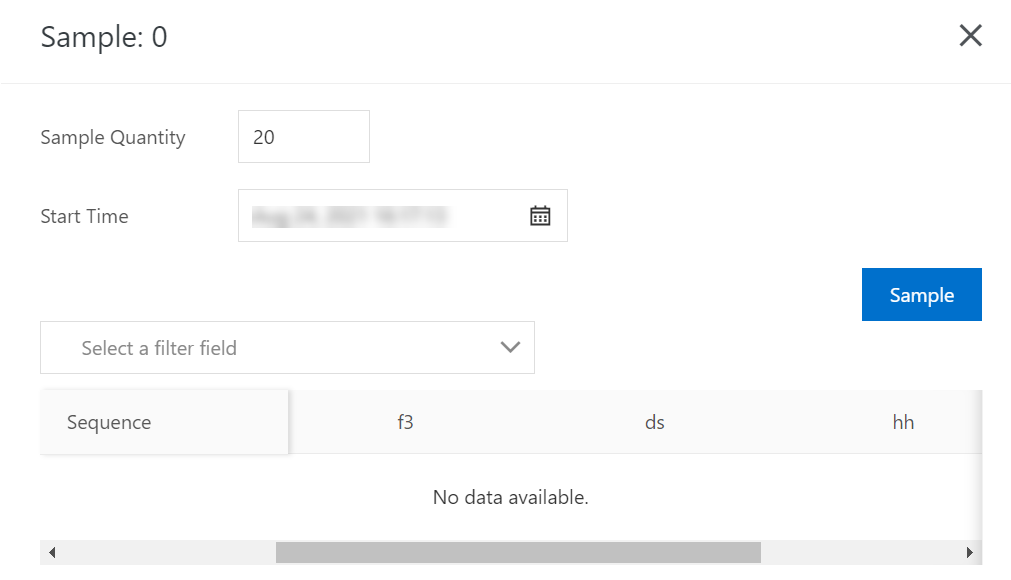
Write data to the DataHub topic. You can use a DataHub SDK to write the data.
During the test, use the SDK to write several records. The values for [ds,hh,mm] are [20210304,01,15] and [20210304,02,15]. The data is as follows:
3. Create a sync task.
In USER_DEFINE partition mode, you can set the partition configuration fields during synchronization. If a corresponding table does not exist in MaxCompute, it is automatically created.
In this example, the f1 and f2 fields are imported. The f3 field is not synchronized.
4. Confirm the synchronized data.
You can view the synchronization information for the sync task in the DataHub console. Query the data in MaxCompute. The result is as follows: 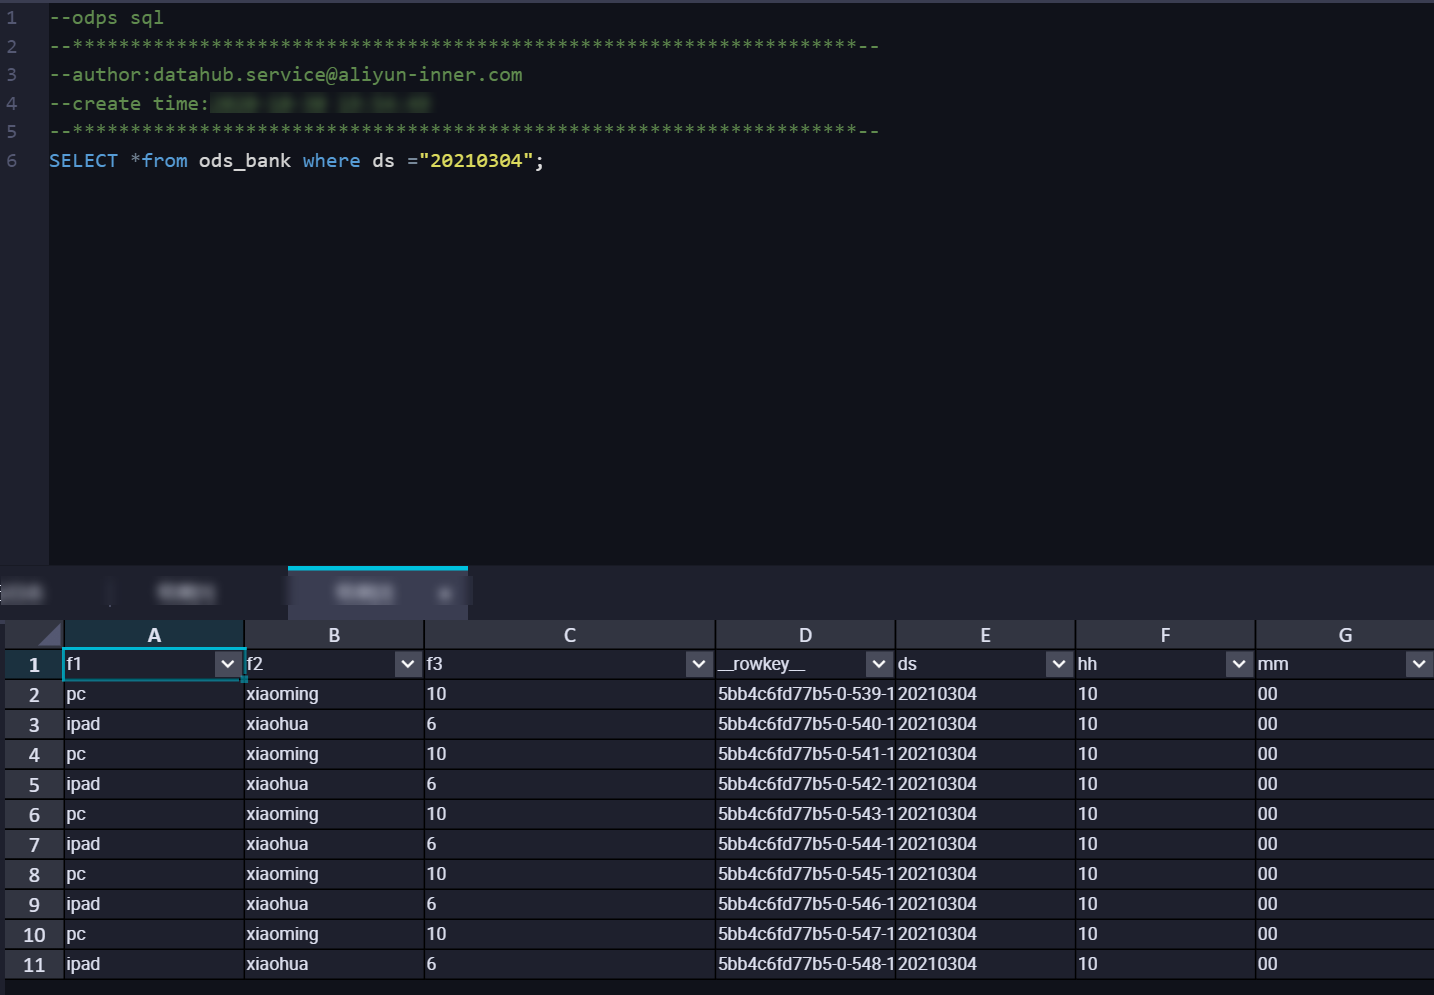 In USER_DEFINE mode, DataHub synchronizes data to the corresponding partition based on the
 value of the MaxCompute grouping field.
2. SYSTEM_TIME sync mode
-
Create a DataHub topic.
Note: The partition is calculated based on the time when data is written to DataHub. Therefore, the topic schema only needs to contain data fields, not partition fields, as shown in the following figure:

-
Write data to the DataHub topic. You can use a DataHub SDK to write the data.
During the test, use the SDK to write several records. The time when the data is written to DataHub is
2021-03-04 14:02:45. The data is as follows: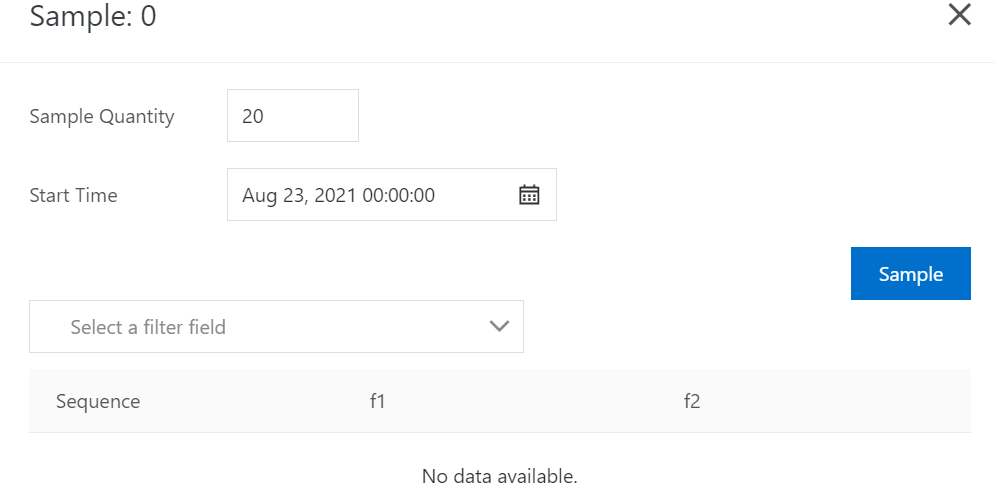
-
Create a sync task.
-
Make sure that the partition configuration is consistent with the MaxCompute table partitions.
-
4. Confirm the synchronized data.
You can view the synchronization information for the sync task in the DataHub console, such as DoneTime. Query the data in MaxCompute. The result is as follows: 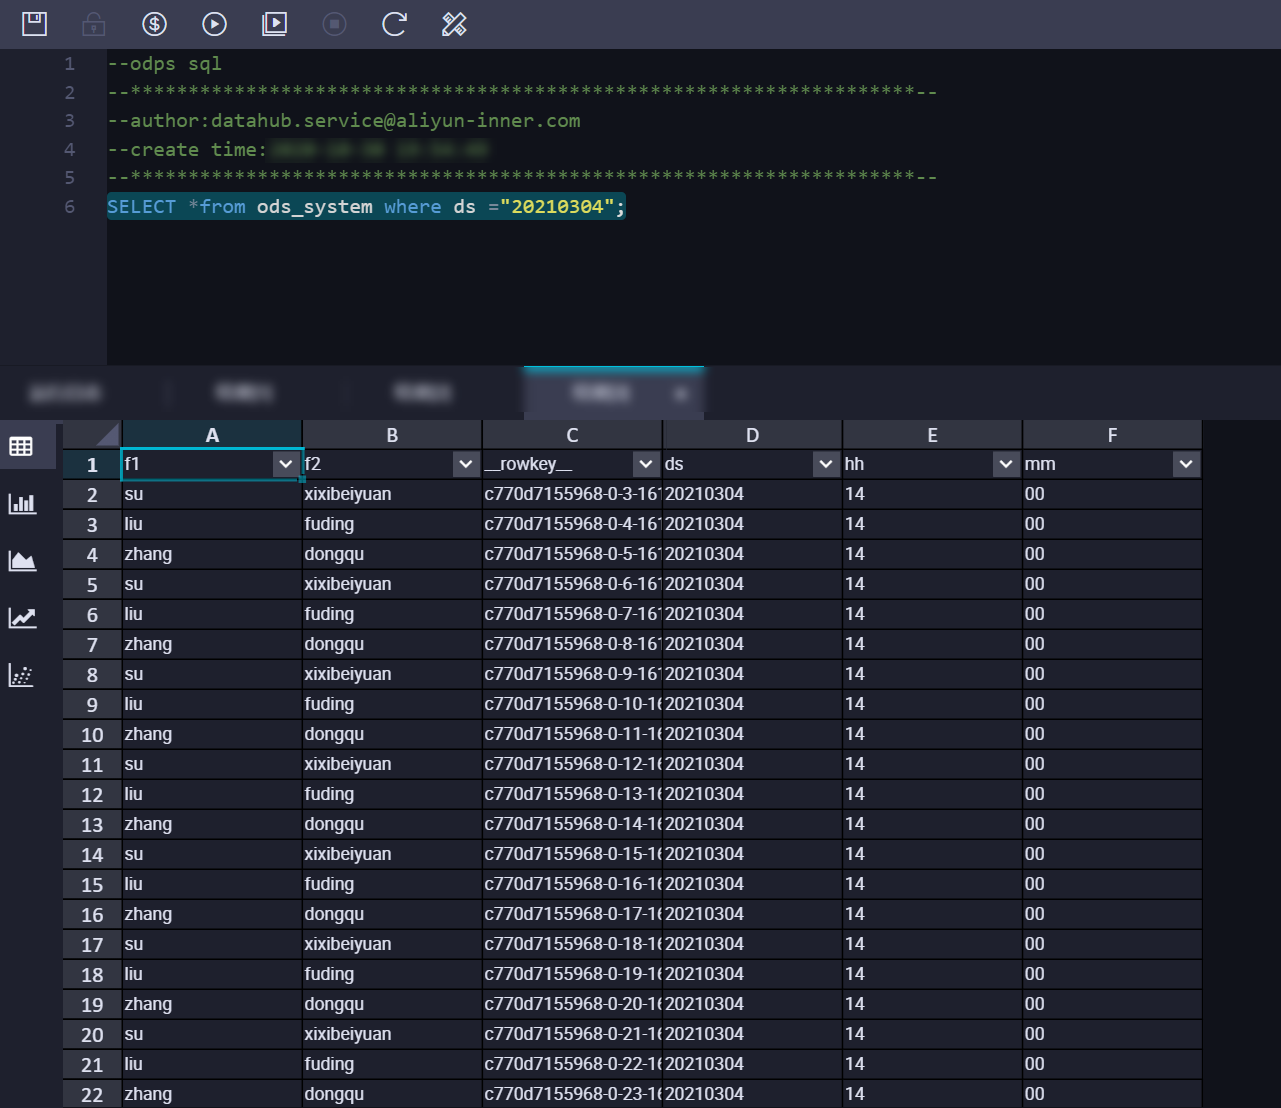 In SYSTEM_TIME mode, DataHub synchronizes data to the corresponding partition based on the
 time when the data was written to DataHub.
FAQ
-
The time of the timestamp field synchronized to MaxCompute becomes 1970-01-19.
Cause: DataHub uses microseconds by default, but the timestamp was written in milliseconds. Solution: Write timestamps in microseconds.