When you need to develop, deploy, and monitor multiple related data pipelines as a group, create a solution. A solution lets you bundle one or more workflows, deploy them together, and view their runtime instances in a single place — without duplicating workflows that are shared across business units.
DataWorks organizes data development into three tiers: workspaces, solutions, and workflows. A workspace is the base unit where members share development and O&M permissions. Solutions and workflows have a many-to-many relationship: a solution can contain multiple workflows, and the same workflow can be used by multiple solutions. After you develop a solution and add a workflow to it, other users can reference and modify this workflow in their own solutions for collaborative development.
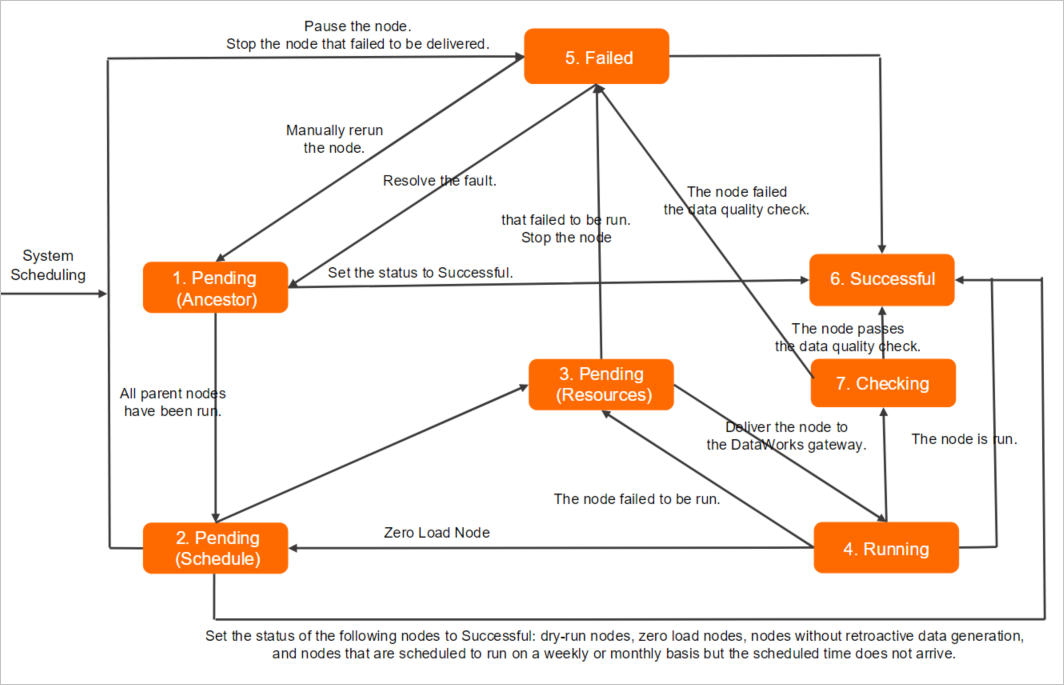
The node status model defines six states that a node passes through during its lifecycle.
Enable solution configuration
Before creating a solution, enable solution configuration in DataStudio. If you have already enabled it, skip to Create a solution.
Log on to the DataWorks console. In the top navigation bar, select a region. In the left-side navigation pane, choose Data Development and Governance > Data Development. Select a workspace from the drop-down list and click Go to Data Development.
In the lower part of the left-side navigation pane of the DataStudio page, click the
 icon.
icon.On the Personal Settings tab of the Settings page, select Show Solution.
Create a solution
Log on to the DataWorks console. In the top navigation bar, select a region. In the left-side navigation pane, choose Data Development and Governance > Data Development. Select a workspace from the drop-down list and click Go to Data Development.
In the Scheduled Workflow pane of the DataStudio page, click +Create and select Create Solution.
In the Create Solution dialog box, configure the following parameters and click OK.
Parameter Description Solution Name A name for the solution. Maximum 128 characters. Description A description of the solution. Maximum 256 characters. Workflows One or more workflows to include in the solution. 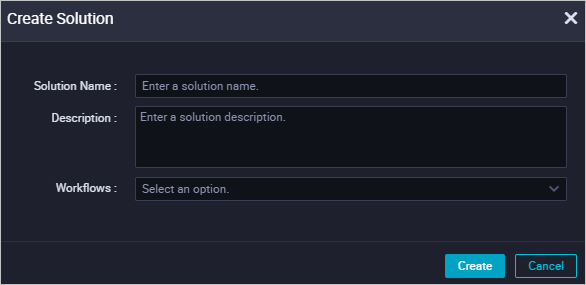
View and manage a solution
After creating the solution, click Solution in the Scheduled Workflow pane to find it. From there, you can:
View workflows: Double-click the solution name to see all workflows in the solution. Click a workflow name to open and edit it. For more information, see Create a workflow.
Open the Solution Board: Right-click the solution name and select Solution Board to see all workflows and their nodes in a single view. Click Change Solution on the board to update the solution configuration.
Deploy a solution
Deploying a solution deploys all workflows it contains. If all workflows in the solution have already been deployed as part of other solutions, you do not need to deploy again. The execution order of workflows depends on the scheduling time of their nodes — you cannot set a custom execution order.
Move the pointer over the solution name in the Scheduled Workflow pane. The ![]() and
and ![]() icons appear.
icons appear.
Click
 to open the Create Deploy Task page, where you can review and deploy all undeployed nodes in the solution. For more information, see Deploy nodes.
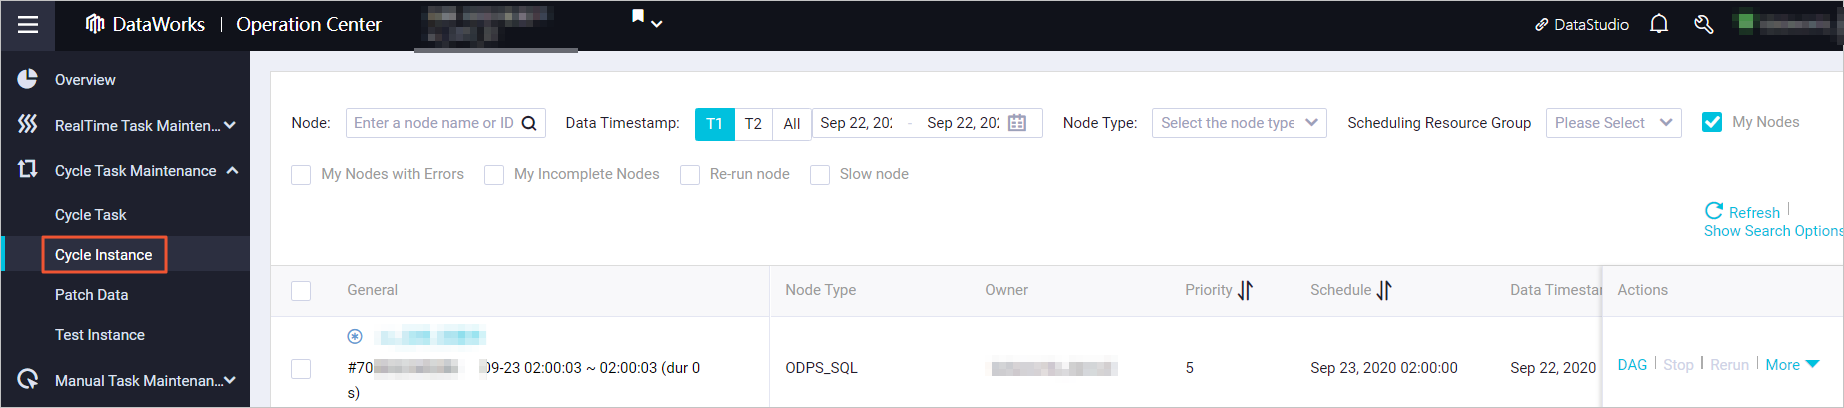
Click
 to go to the Cycle Instance page under Cycle Task Maintenance in Operation Center. This page shows all auto triggered instances of nodes in the solution.