This topic describes how to connect to and use an iSCSI volume on a Windows system.
Prerequisites
An Internet Small Computer System Interface (iSCSI) gateway is created. For more information, see Create an iSCSI gateway.
A cache disk is added. For more information, see Add a cache disk.
An iSCSI volume is created. For more information, see Create an iSCSI volume.
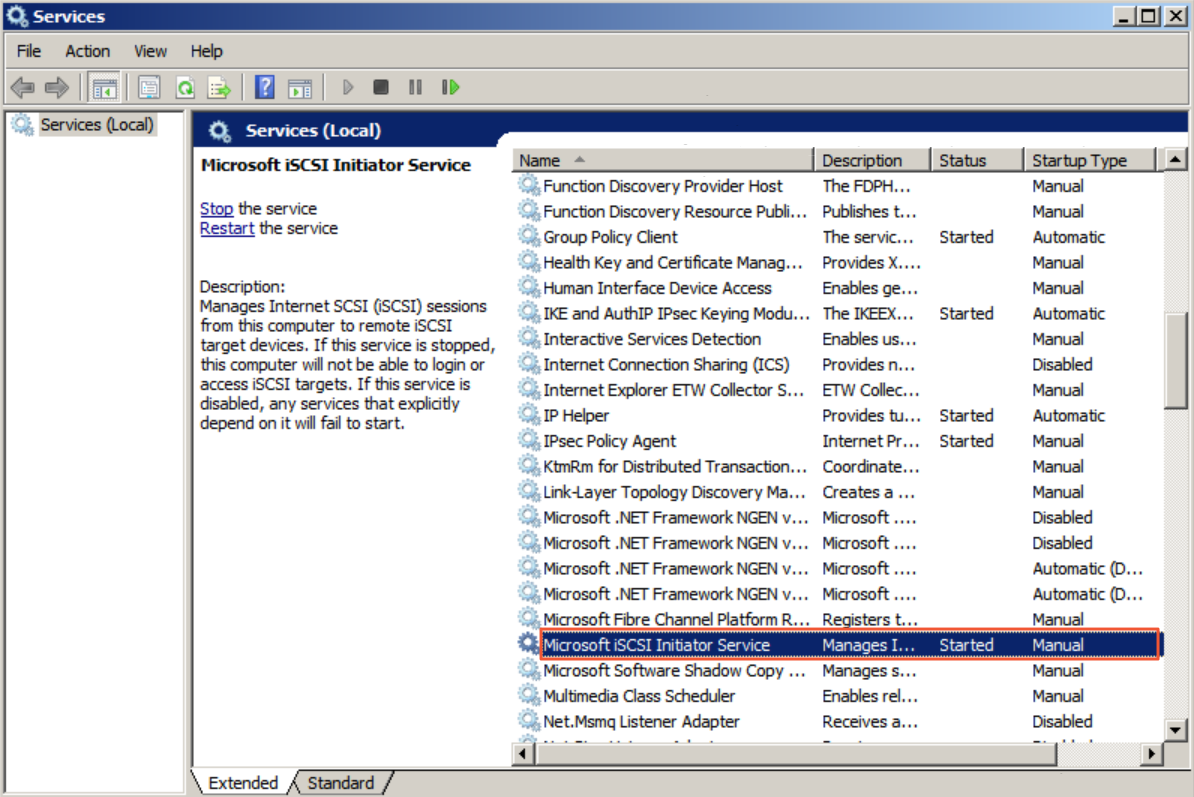
The Microsoft iSCSI initiator service is enabled on the Elastic Compute Service (ECS) instance that runs Windows.
Connect to the iSCSI volume
Log on to the ECS console.
NoteIf your on-premises host is connected to a virtual private cloud (VPC) over an Express Connect circuit, you can also perform the following steps by using the host.
The ECS instance must use the same VPC as the iSCSI gateway.
Connect to your Windows ECS instance. For more information, see Connect to an instance.
Search for the iSCSI Initiator in the search box and start the iSCSI Initiator.
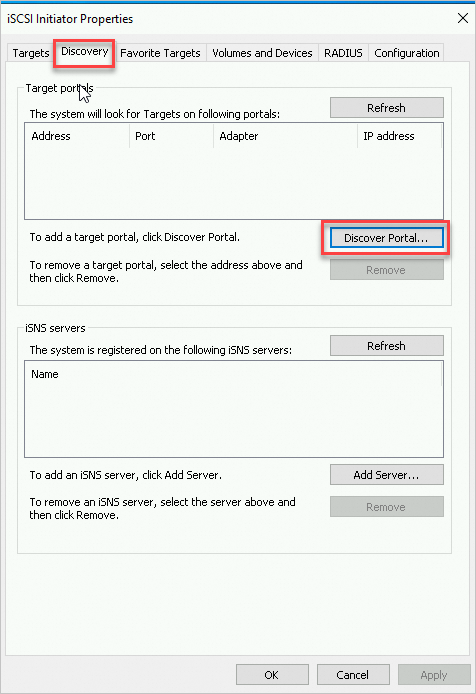
Set up an iSCSI portal.
In the iSCSI Initiator Properties dialog box, click the Discovery tab and click Discovery Portal.
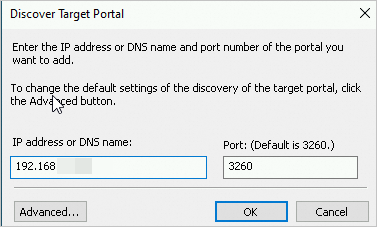
In the Discover Target Portal dialog box, enter the IPv4 address or IPv6 address of the gateway. Click OK.
You can query the IP address of the gateway in the Service IP Address column of the gateway list in the CSG console. If IPv6 is enabled for the VPC of the gateway, the first line in the column shows the IPv4 address, and the second line shows the IPv6 address.

Enter the IPv4 address in the IP address or DNS name text box.
Enter the IPv6 address in the IP address or DNS name text box.
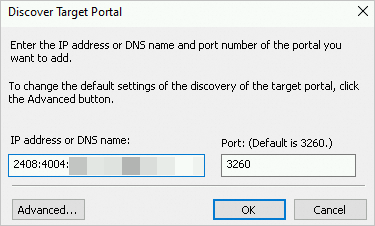
In the preceding figures, 3260 is the port number, 10.0.0.0 is the IPv4 address of the gateway, and 2408:4004:110:6000:4656:f88e:1c14:e578 is the IPv6 address of the gateway.
NoteCSG V1.6.0 and later support IPv6.
You can mount iSCSI volumes over IPv6 only in the China (Hohhot) region. Make sure that the VPC and vSwitch of the gateway support IPv6.
If you mount iSCSI volumes over IPv6, make sure that an IPv6 address is configured for the ECS client.
If the VPC and vSwitch of an existing gateway support IPv6, you can enable IPv6 for the gateway in the gateway list and obtain the IPv6 address of the gateway from the second line. A gateway that is created afterward under the VPC automatically has an IPv6 address.
Connect to an iSCSI volume.
In the iSCSI Initiator Properties dialog box, click the Targets tab and then click Connect.
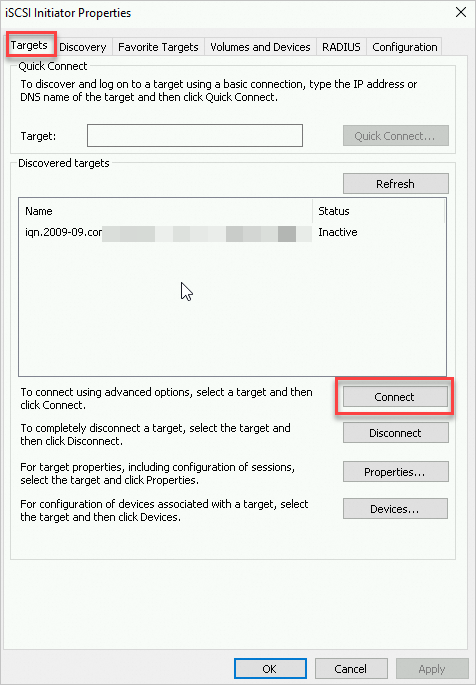
In the Connect to Target dialog box, select the target iSCSI volume and select Add this connection to the list of Favorite Targets.
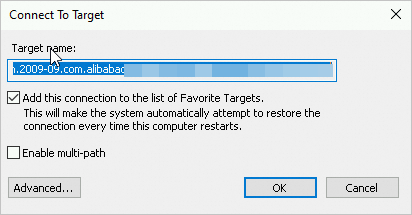
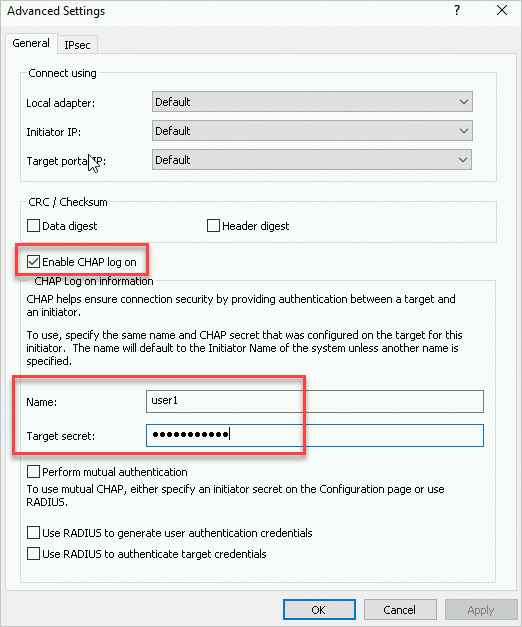
(Optional) In the Connect to Target dialog box, click Advanced to configure CHAP settings. After CHAP settings are configured, click OK.
NoteIf you enabled CHAP when you created the iSCSI volume, you must configure CHAP settings in the Advanced Settings dialog box before you can use the iSCSI volume.
In the Advanced Settings dialog box, select the Enable CHAP log on check box and enter the name and target secret.
In the Name field, enter the CHAP username that you set when you created the iSCSI volume.
In the Target secret field, enter the CHAP secret that you specified when you created the iSCSI volume.
Verify the connection status. If the iSCSI volume is in the Connected state, the connection is established.
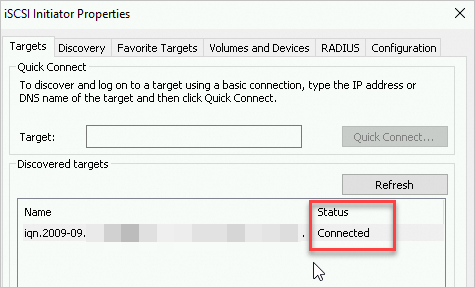
After the connection is established, you can use the iSCSI volume from your on-premises host.
View the iSCSI volume
To view a connected iSCSI volume, perform the following steps:
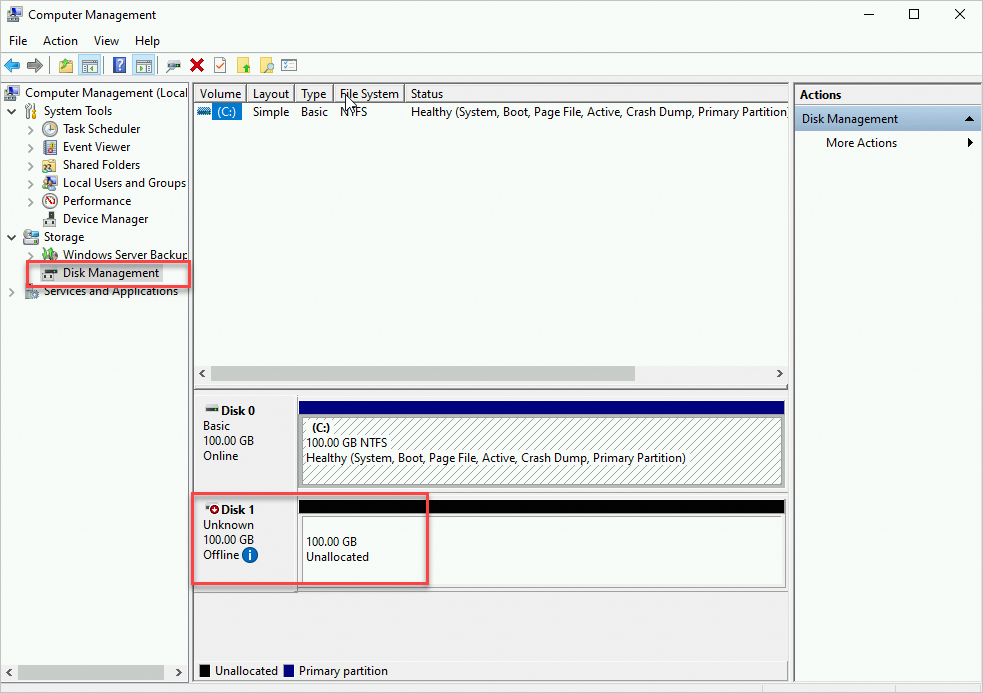
Open Computer Management.
Right-click Disk Management and select Rescan Disks to view the newly connected iSCSI volume.
Delete the iSCSI volume
If you do not need an iSCSI volume, you can disconnect the iSCSI volume. A disconnected iSCSI volume no longer appears on the local computer.
In the iSCSI Initiator Properties dialog box, click the Targets tab, and then click Disconnect.
Verify the disconnection result.
If the iSCSI volume is in the Inactive state, the iSCSI volume is disconnected.