By Ilhan Adiyaman, Alibaba Cloud Tech Share Author. Tech Share is Alibaba Cloud's incentive program to encourage the sharing of technical knowledge and best practices within the cloud community.
This post features a walkthrough on how to set up and get started with a trial version of Chef Automate in minutes on your Alibaba Cloud Elastic Compute Service (ECS) Ubuntu machine.
Chef Automate is a full suite of an enterprise platform to enable continuous automation for delivering infrastructure, compliance, applications effortlessly. It provides actionable insights into the state of your compliance, configurations with an auditable history of every change that's been applied to your environments.
Chef Automate integrates with the open-source products Chef, InSpec and Habitat and it comes with a comprehensive 24×7 support services for the entire platform, including open source components.
In this walkthrough, we will guide you to install Chef Automate on Ubuntu machine and introduce the core features of it.
You should have an Alibaba Cloud account. If you don't have one already, visit the Free Trial page for a free account.
Chef Automate requires the following minimum system resources in order to work on Ubuntu 16.04 instance:
In order to match with these requirements, we will launch ecs.t5-lc1m2.large instance which has 2 vCPU+4Gib memory with 40 GiB Ultra Cloud Disks. Follow the steps below to launch an instance with this configuration.
1. Login to your Alibaba Cloud ECS Management Console, where you will be redirected to the main dashboard.
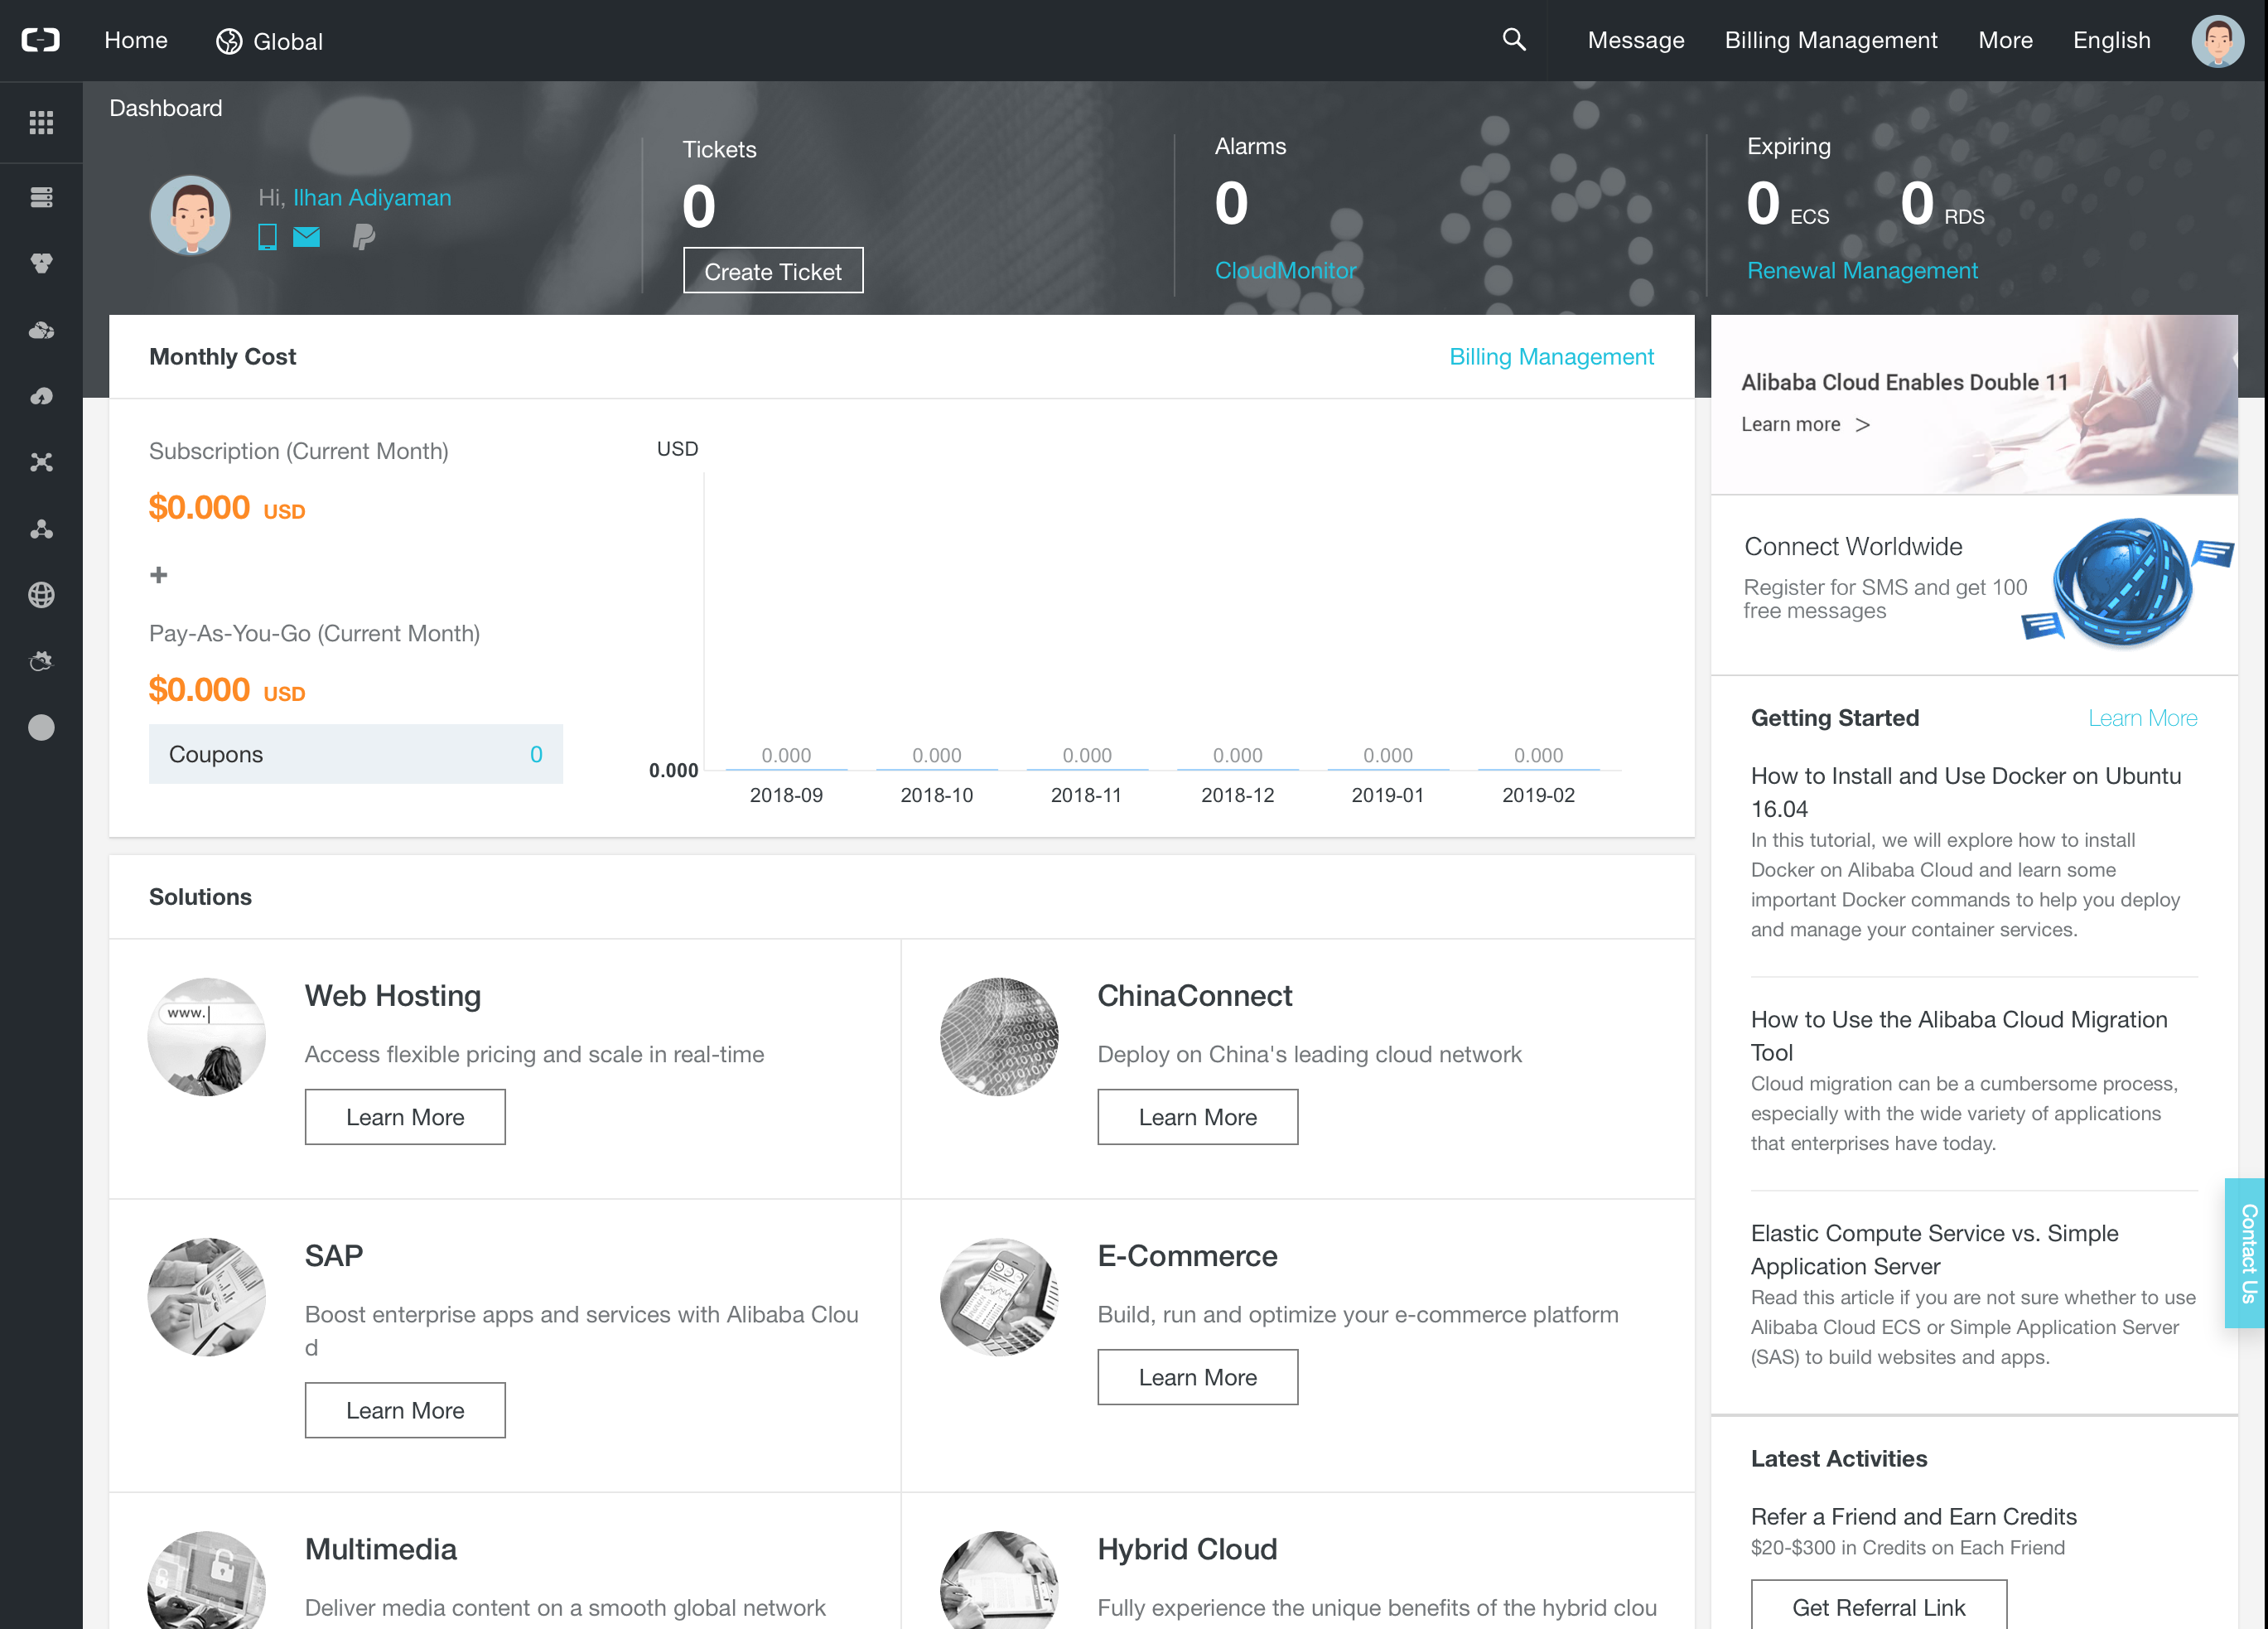
2. Click Elastic Compute Service under the Products section. This will take you to the ECS overview dashboard.
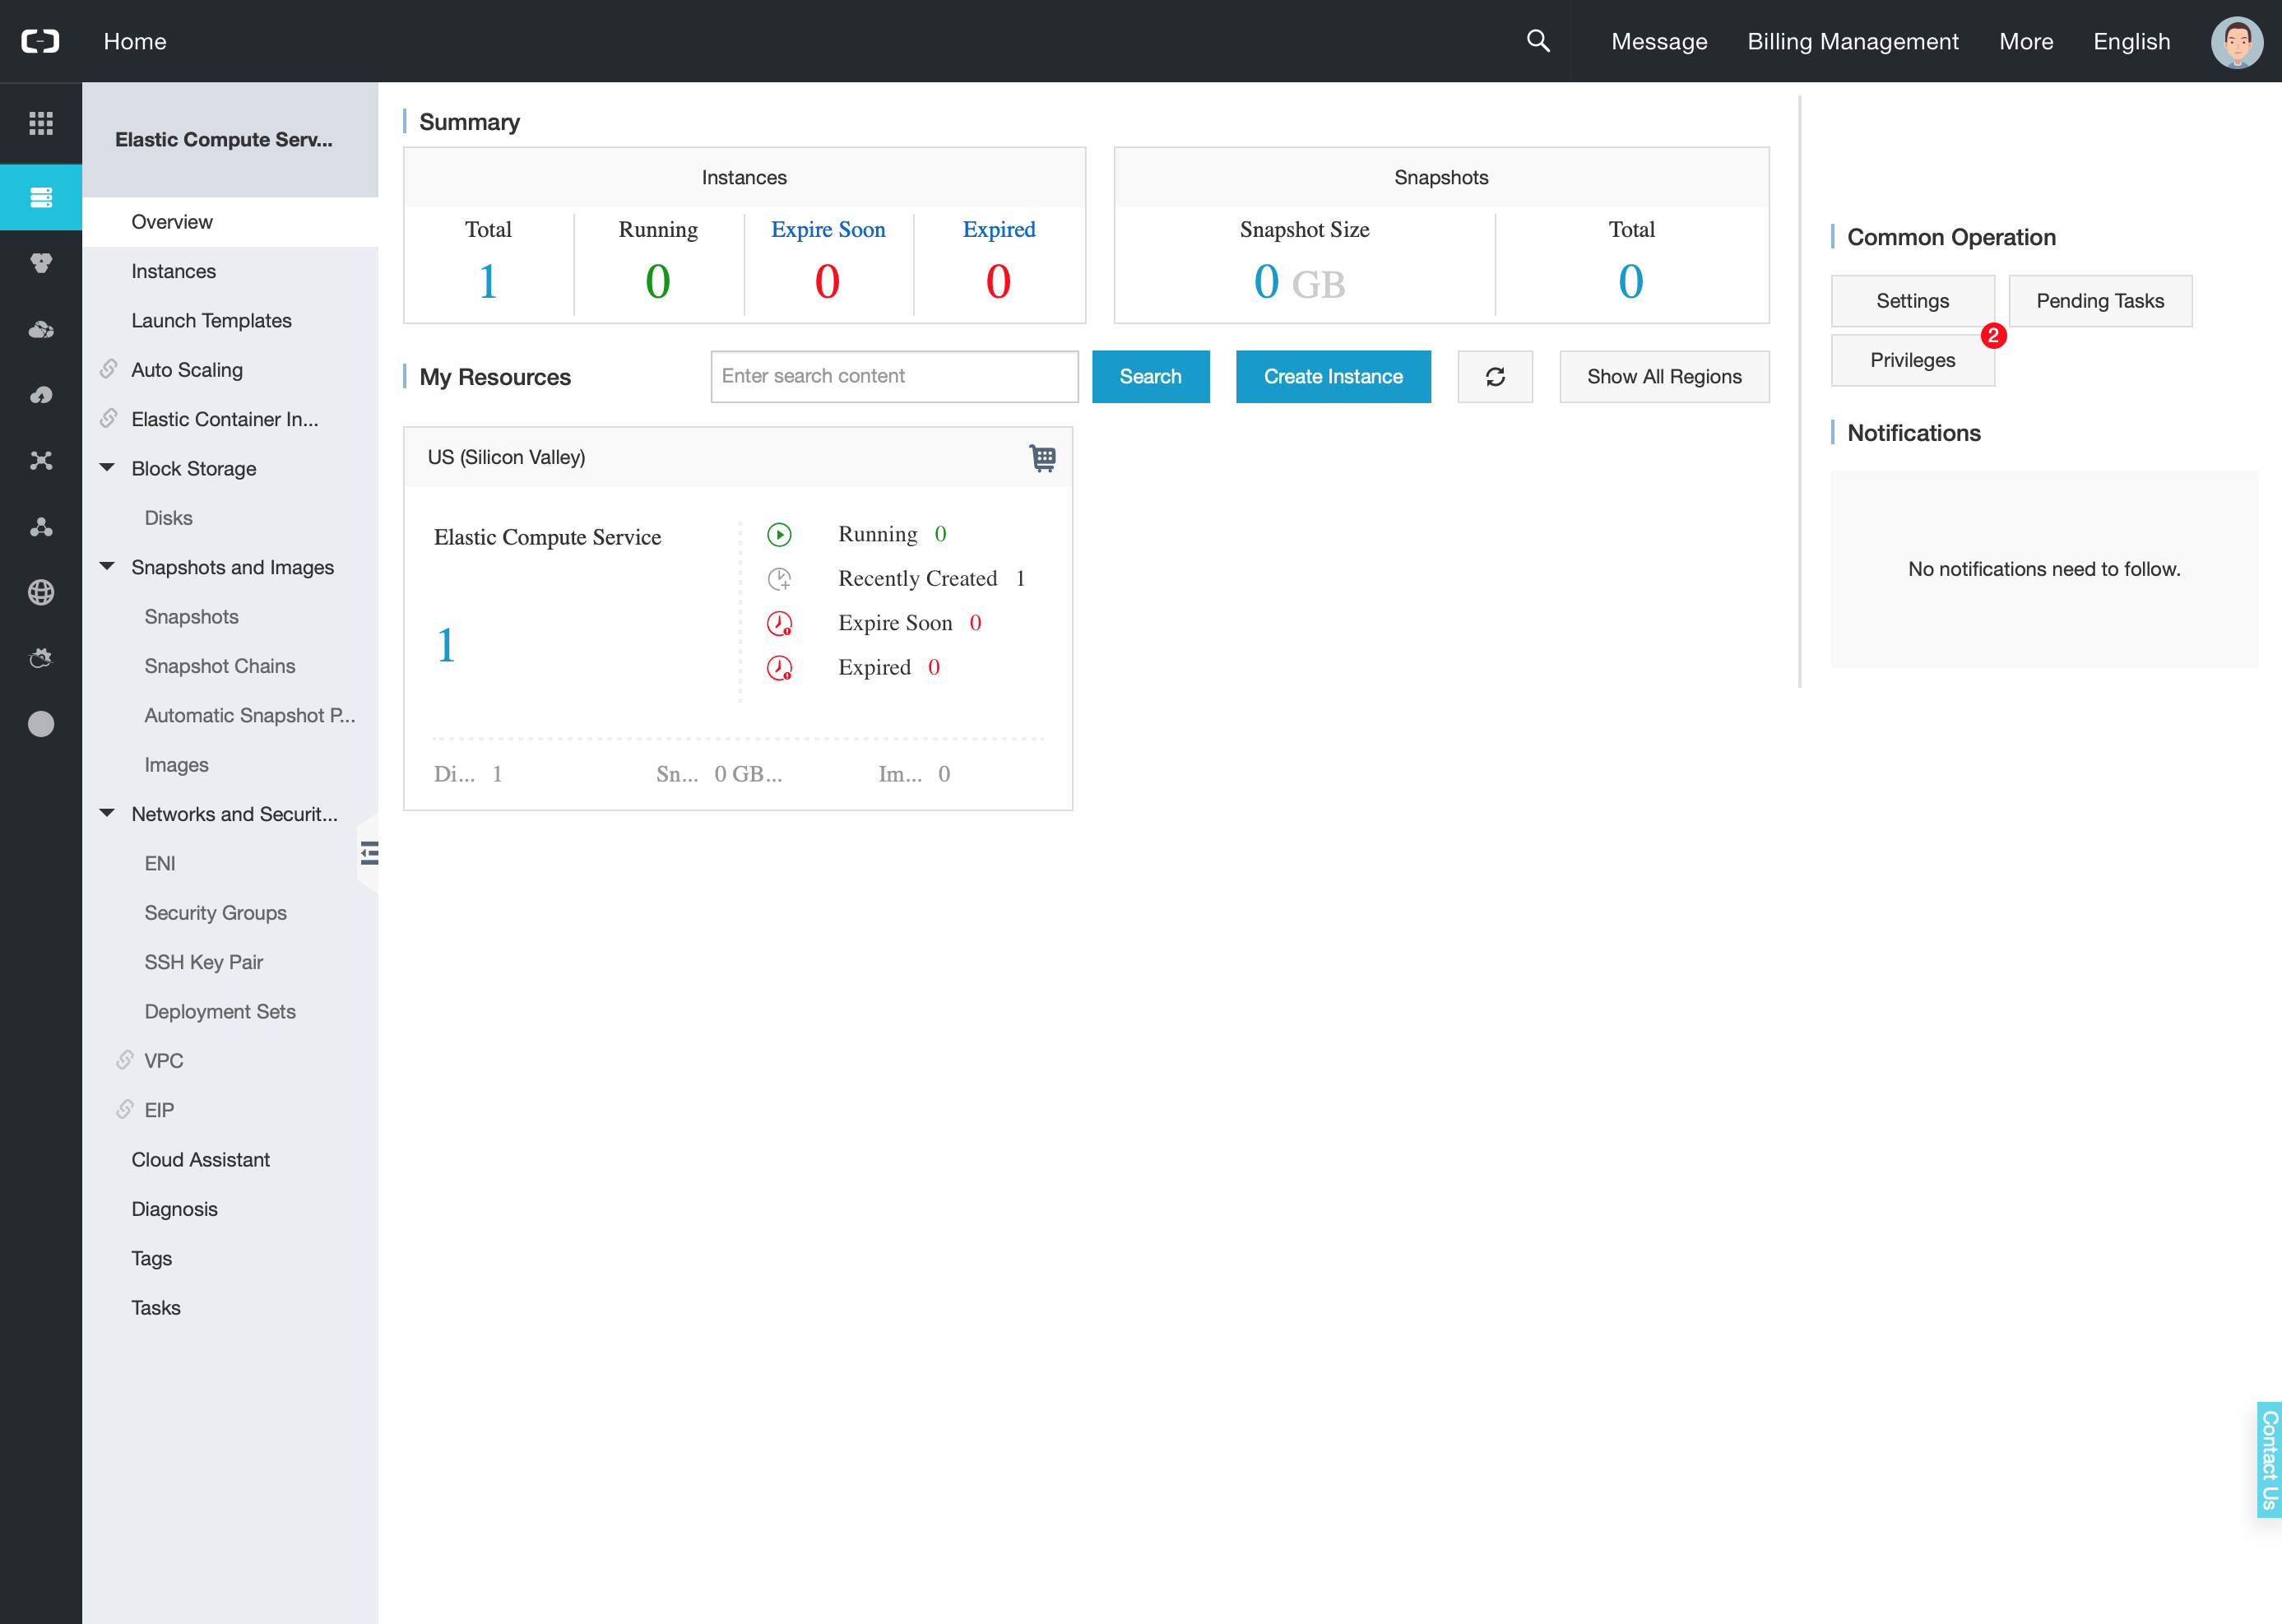
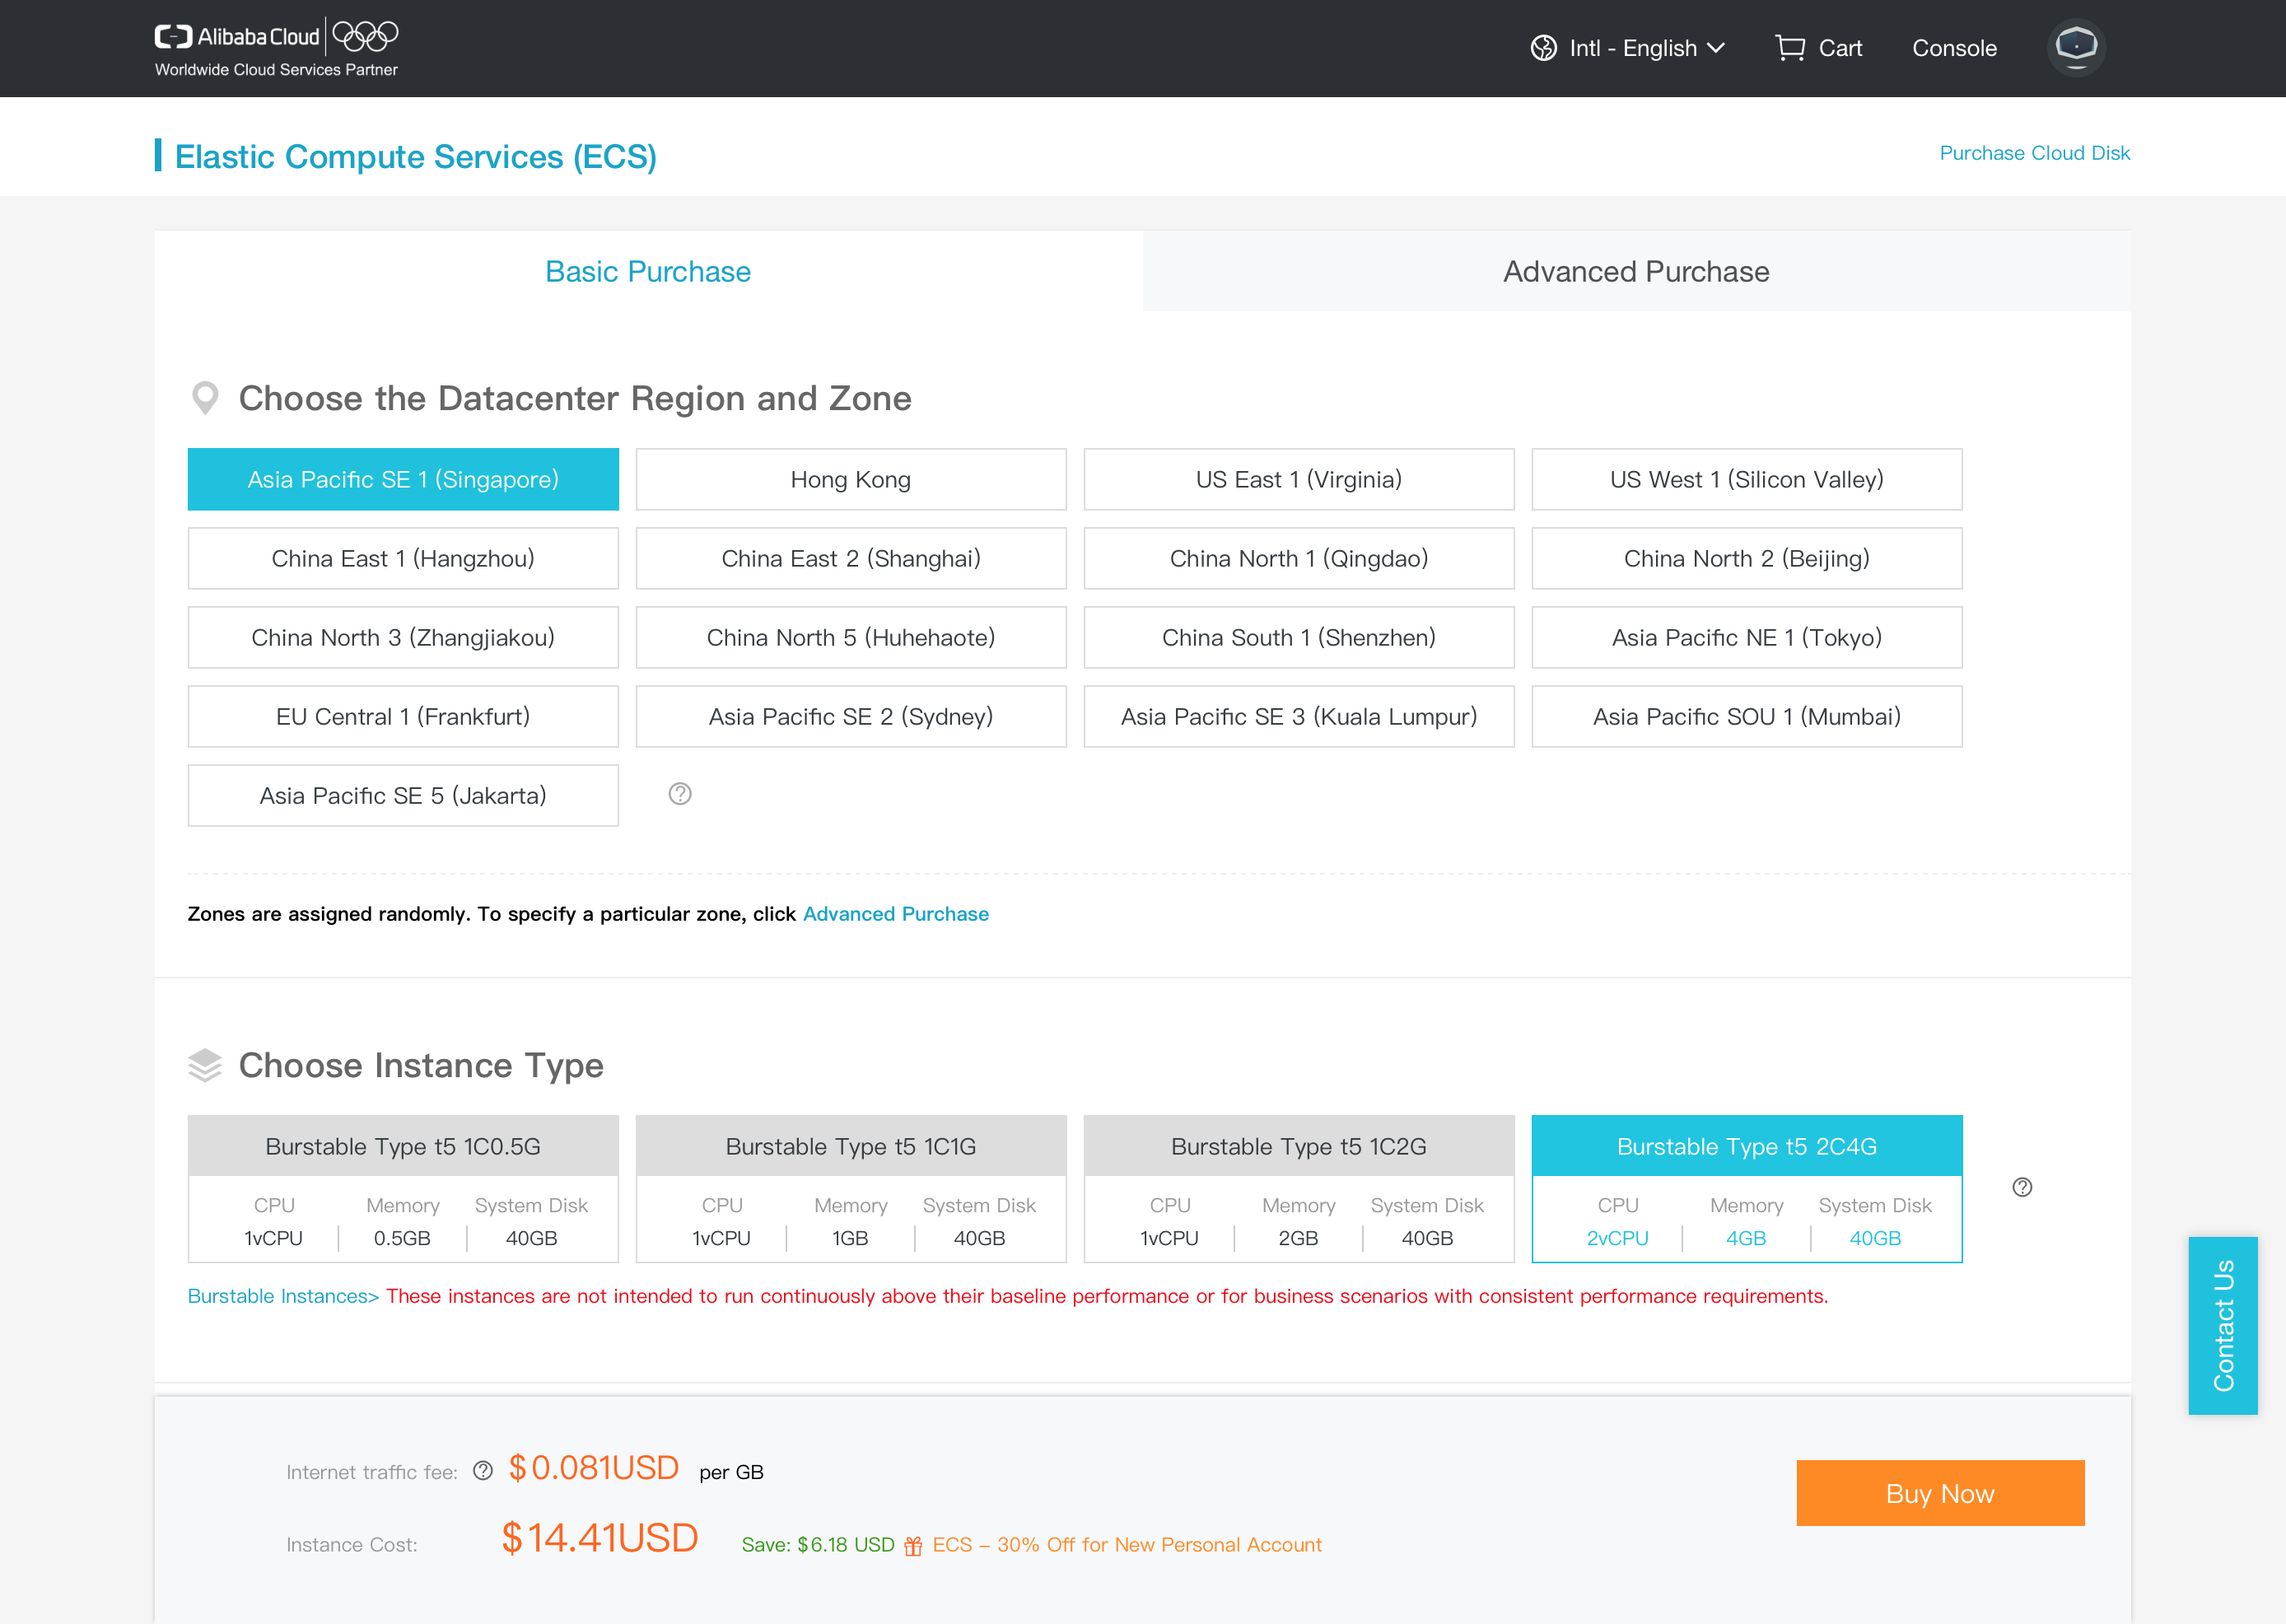
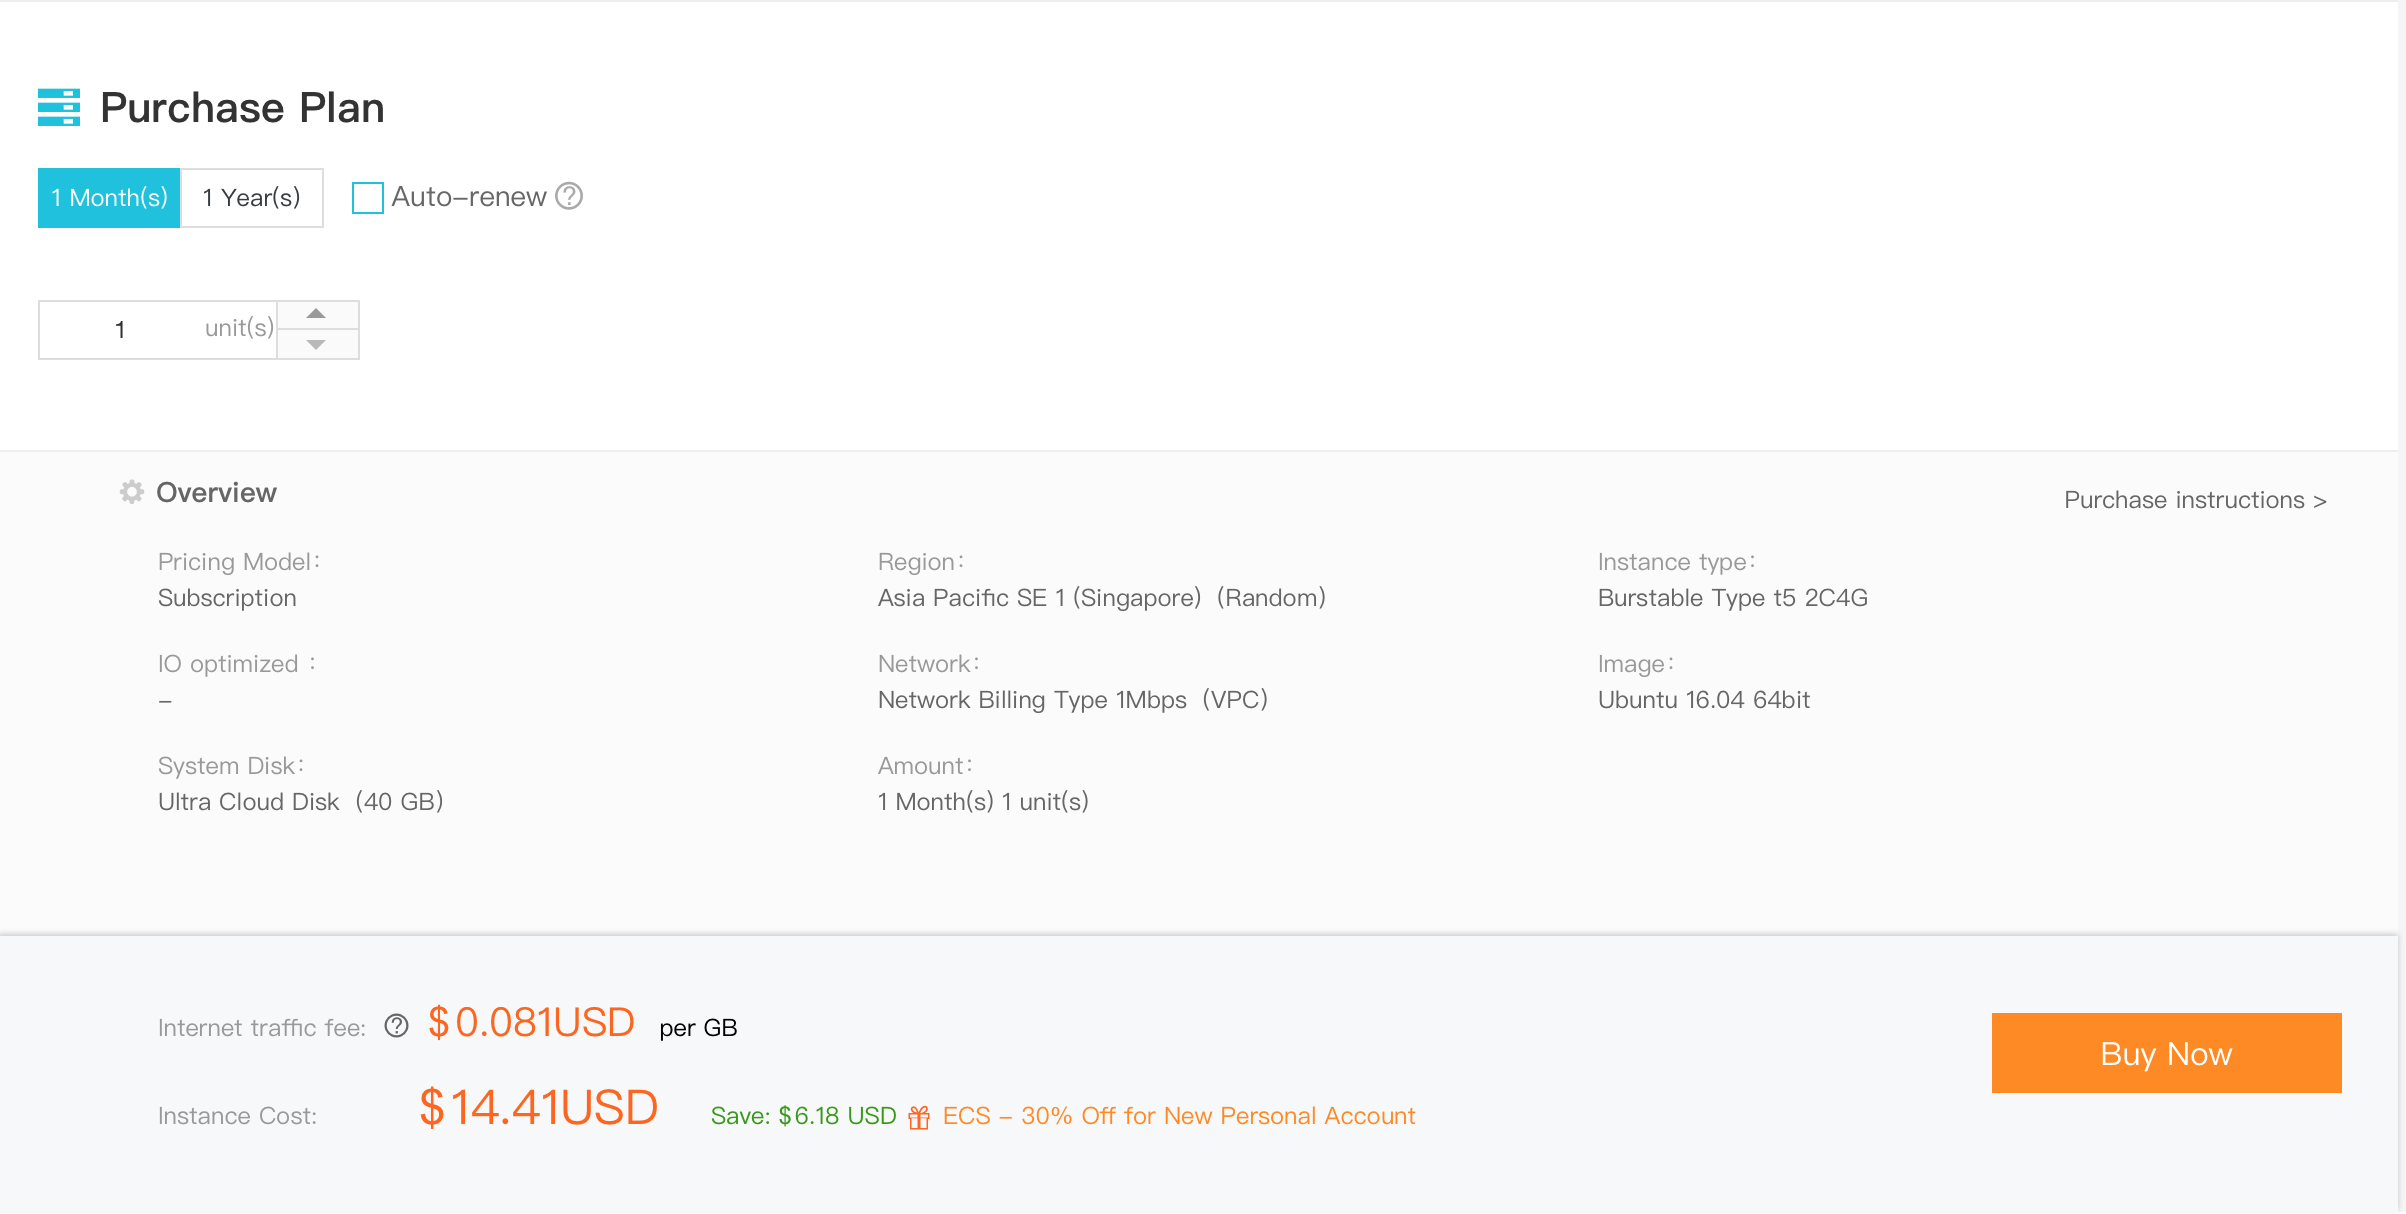
3. Click Create Instance button. It will redirect you to ECS instance creating wizard. Here, you will have two types of purchase depending on your needs: Basic Purchase and Advanced Purchase. For the sake of the guide, we'll pick Basic Purhcases. Pick a data center region launch your ECS instance. Choose instance type as Burstable Type t5 2C4G where it perfectly matches with Chef Automate minimum system requirements.
4. You will now select the Operating System from the dropdown menu. Select Ubuntu as operating system and 16.04 64bit for the version.

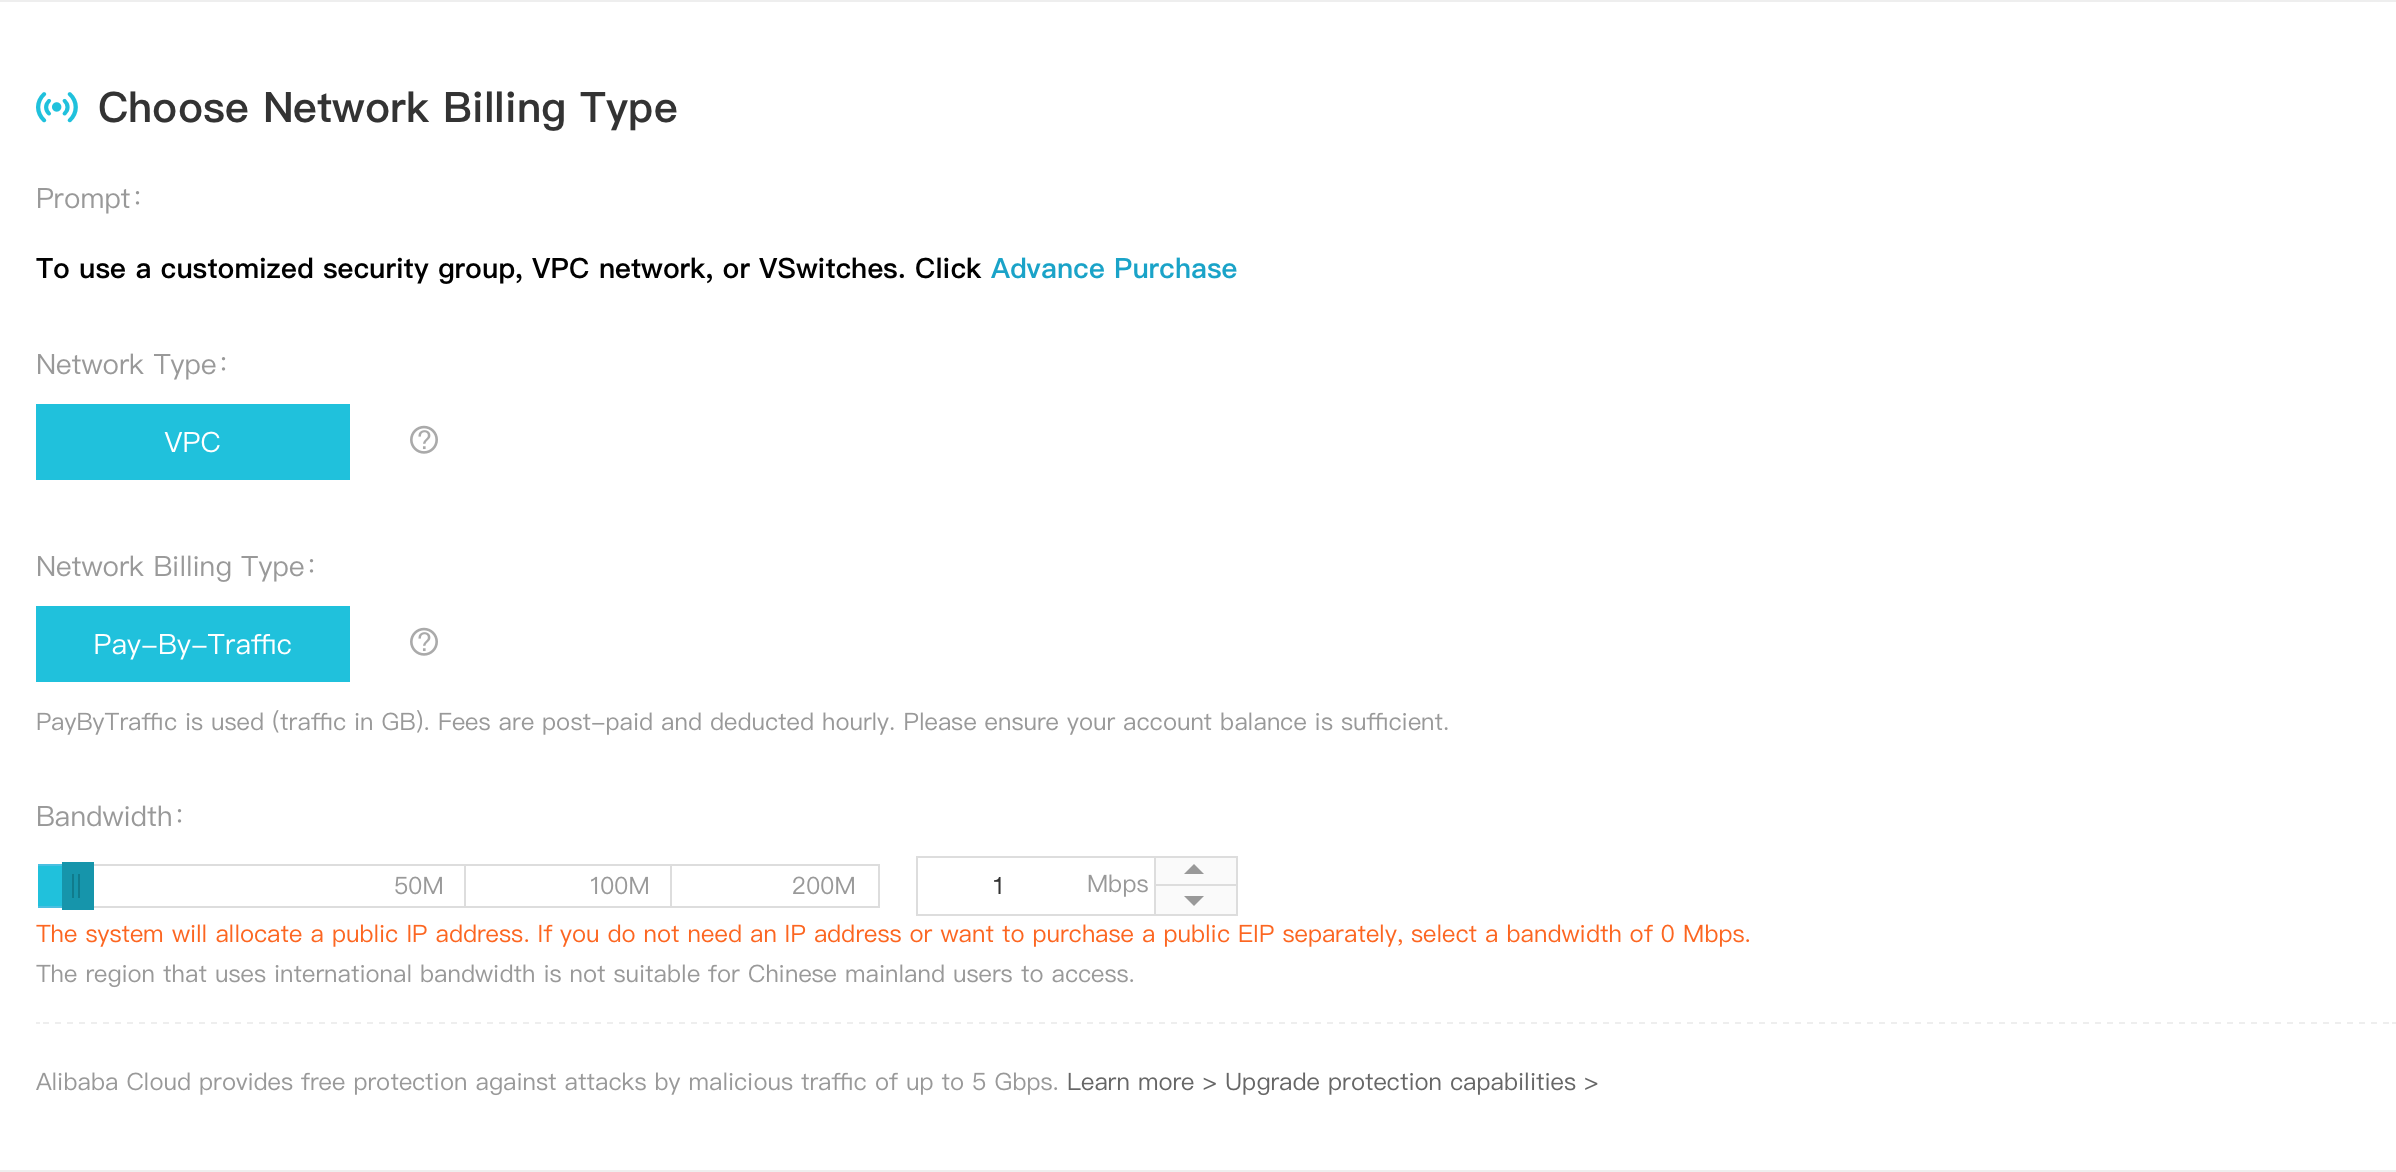
5. We'll use VPC network type and pay-by-traffic billing type for the demo, therefore we don't need to customize them. However, to be able to connect Chef Automate from the local computer, we'll need a public IP address. Therefore, increase the bandwidth 1Mbps or more to allocate a public IP address for your instance.
6. Review the details of your purchase configuration, and make changes if needed. Click Buy Now to confirm and launch your server.
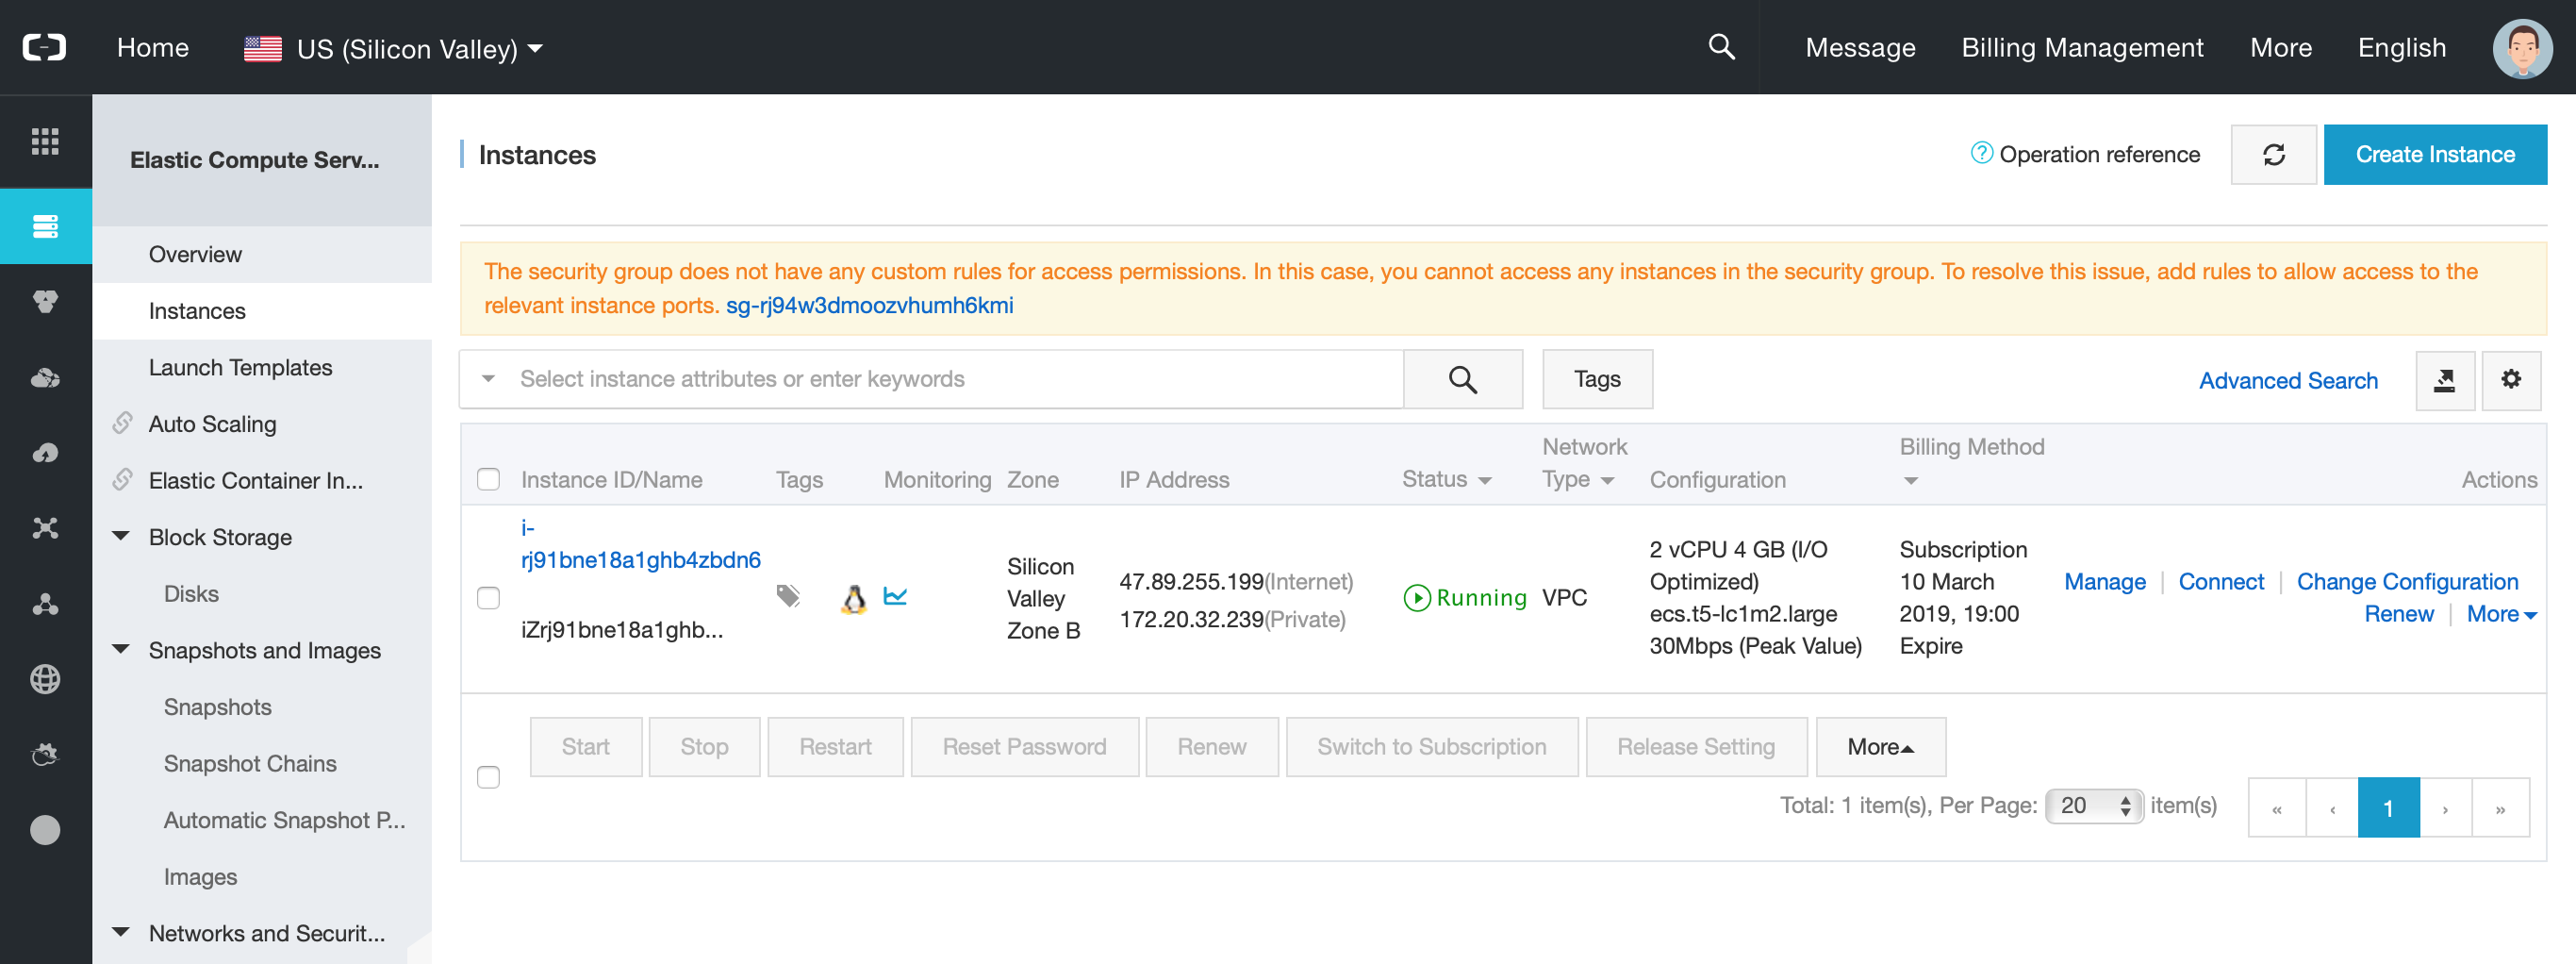
7. You will see your instances in the Instances section of ECS dashboard.
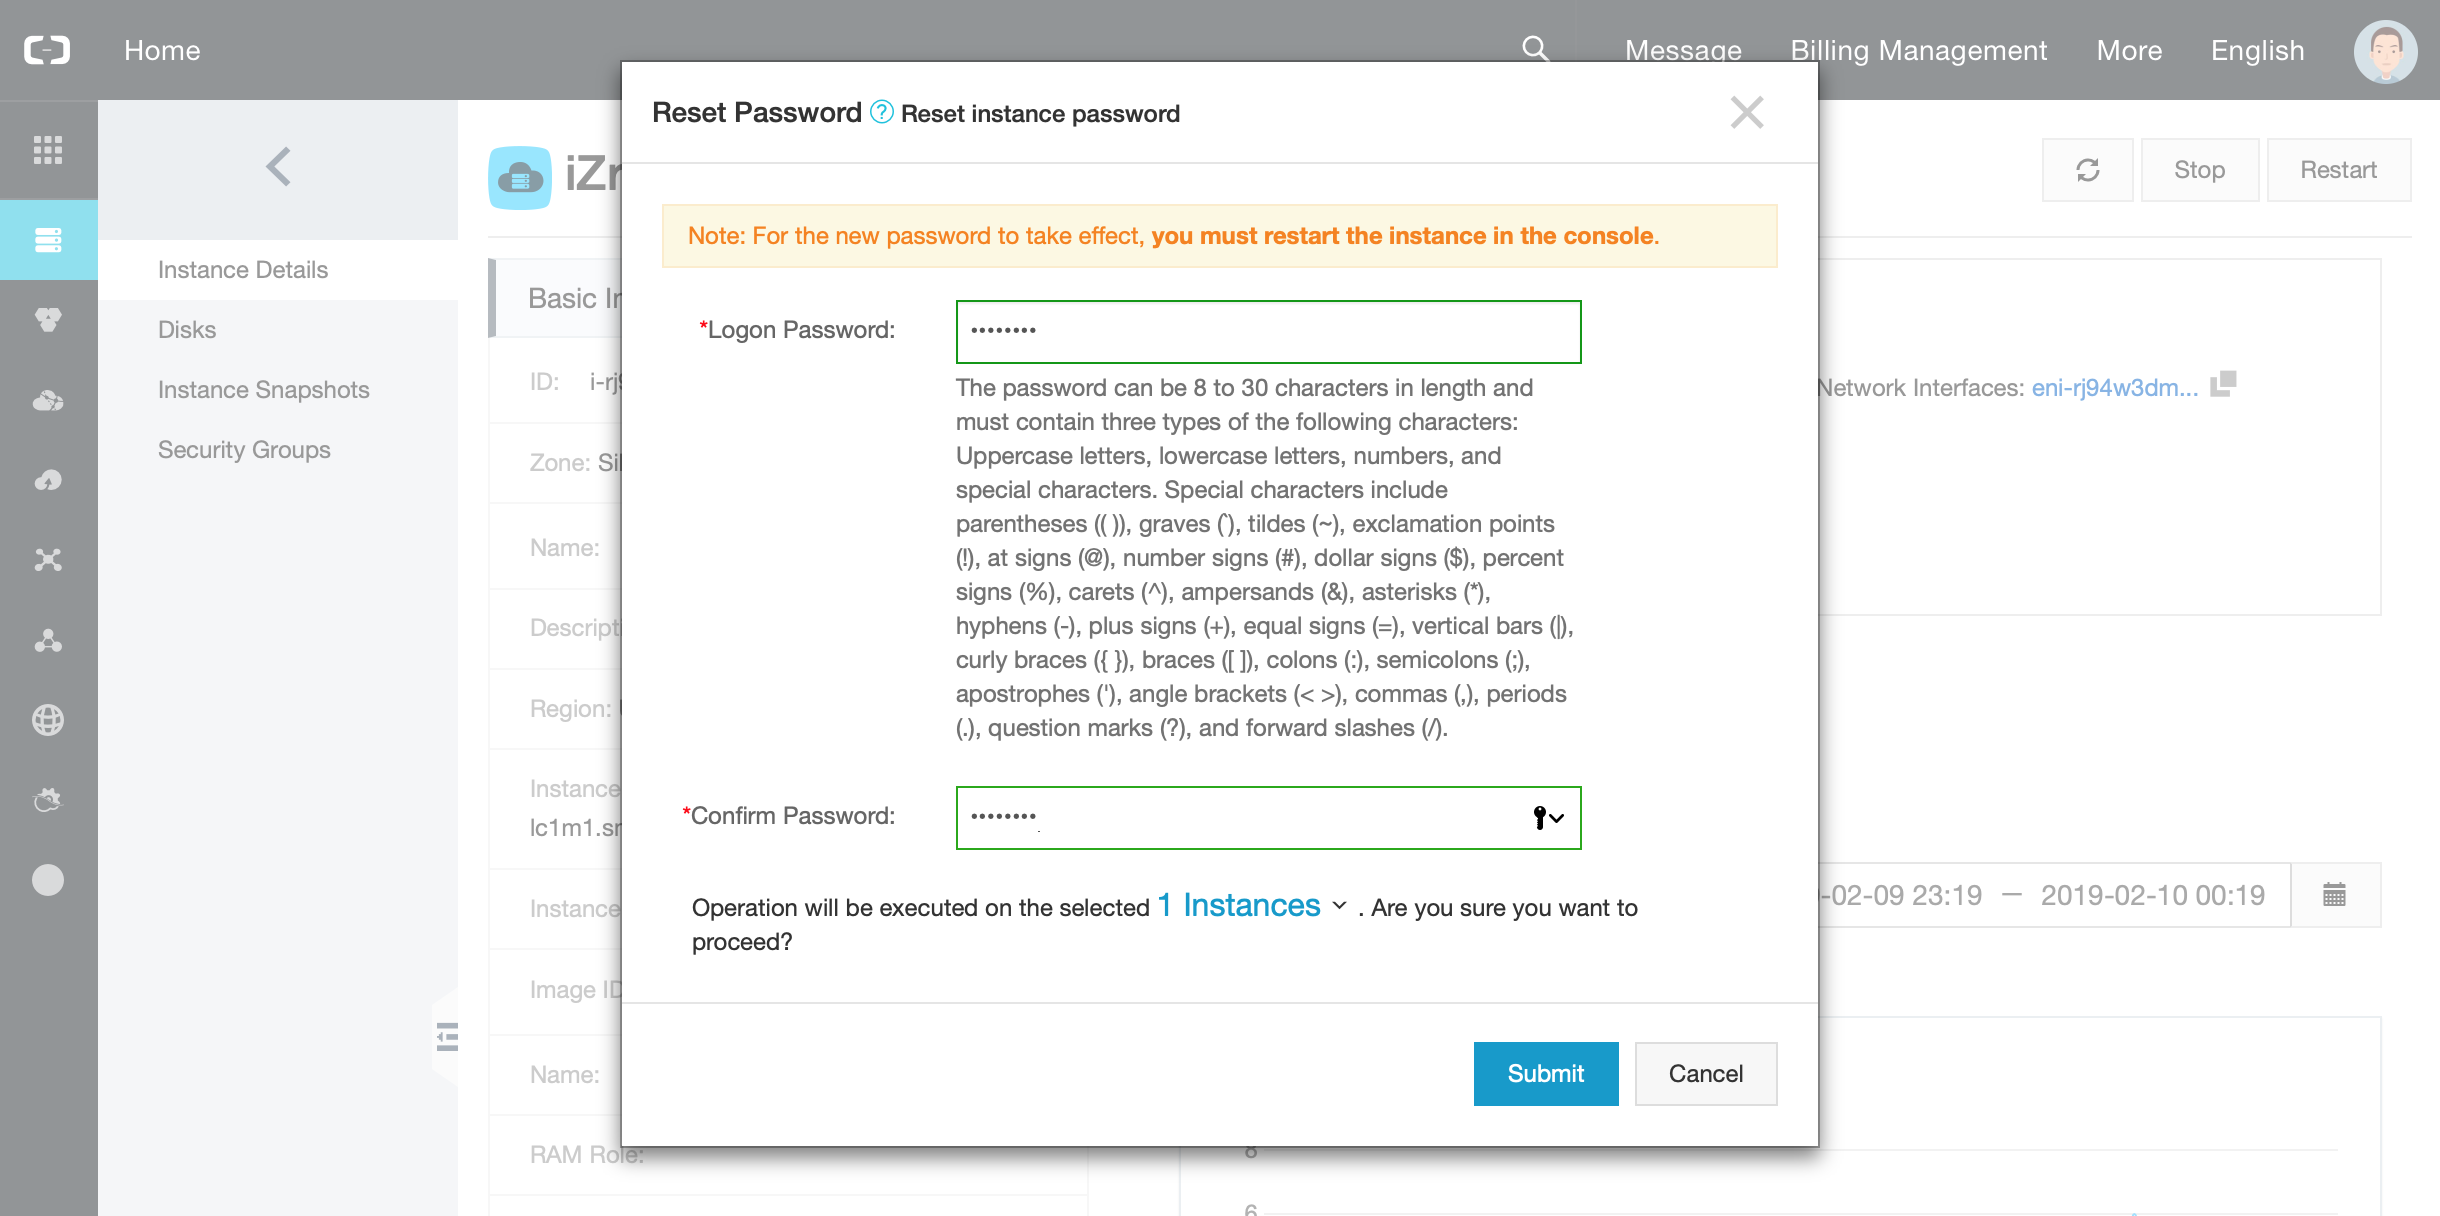
8. Click Manage to see detailed informations about your instance. We'll use SSH for connecting our instance. First, save your instance's public IP address. Next, change the login password of the instance by clicking More and Reset Password from the Basic Information section.

9. Enter a new password and restart the instance for the new password to take effect.
10. Navigate to Security Groups from the left panel and select Add Rules.

11. We'll use Port 22 to connect the instance and Port 443 to reach the Chef Automate Web UI. Check whether the instance is already set to allow inbound traffic from Port 22 and 443.
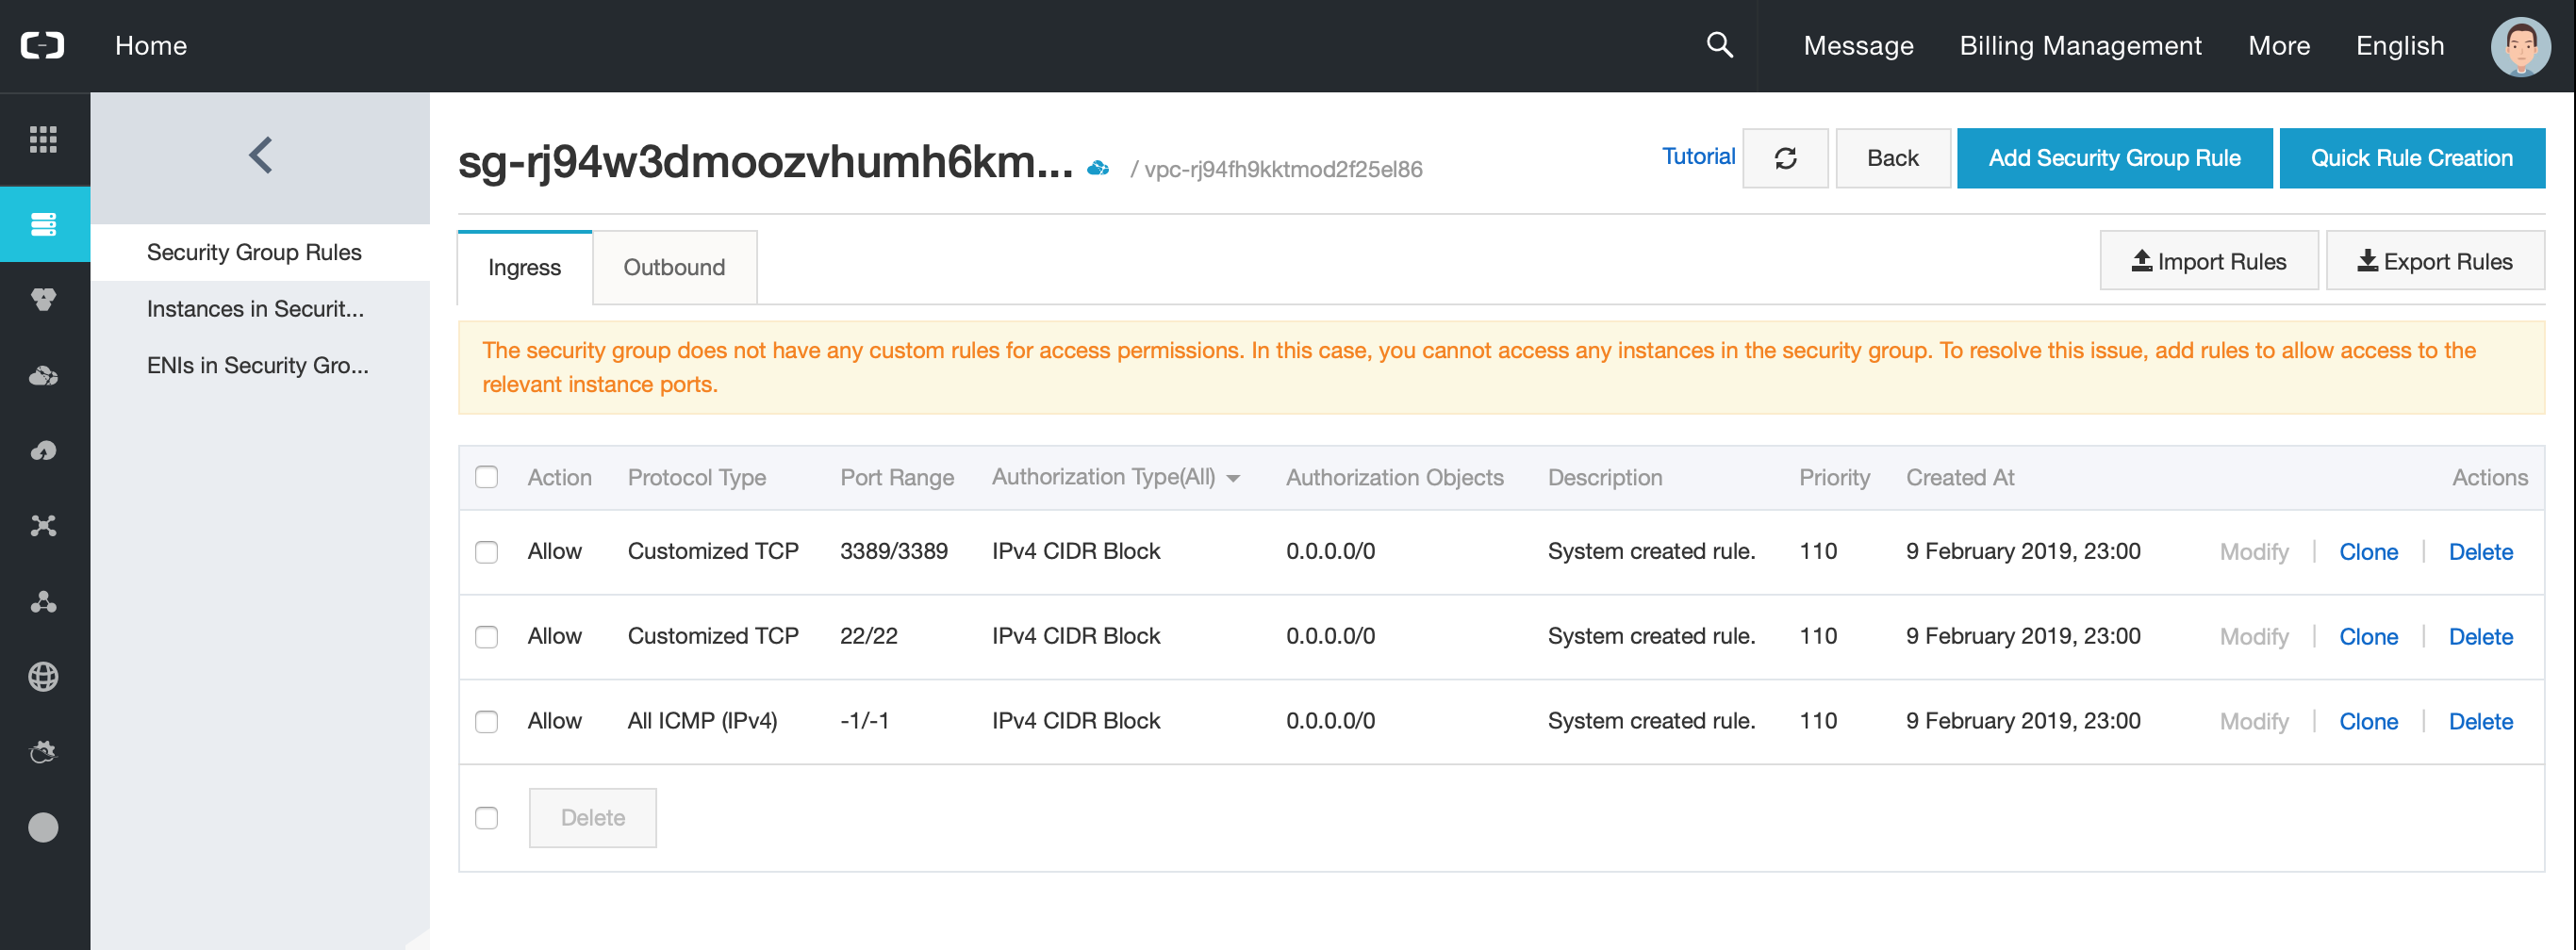
If not, select Add Security Group Rules to create a new rule.
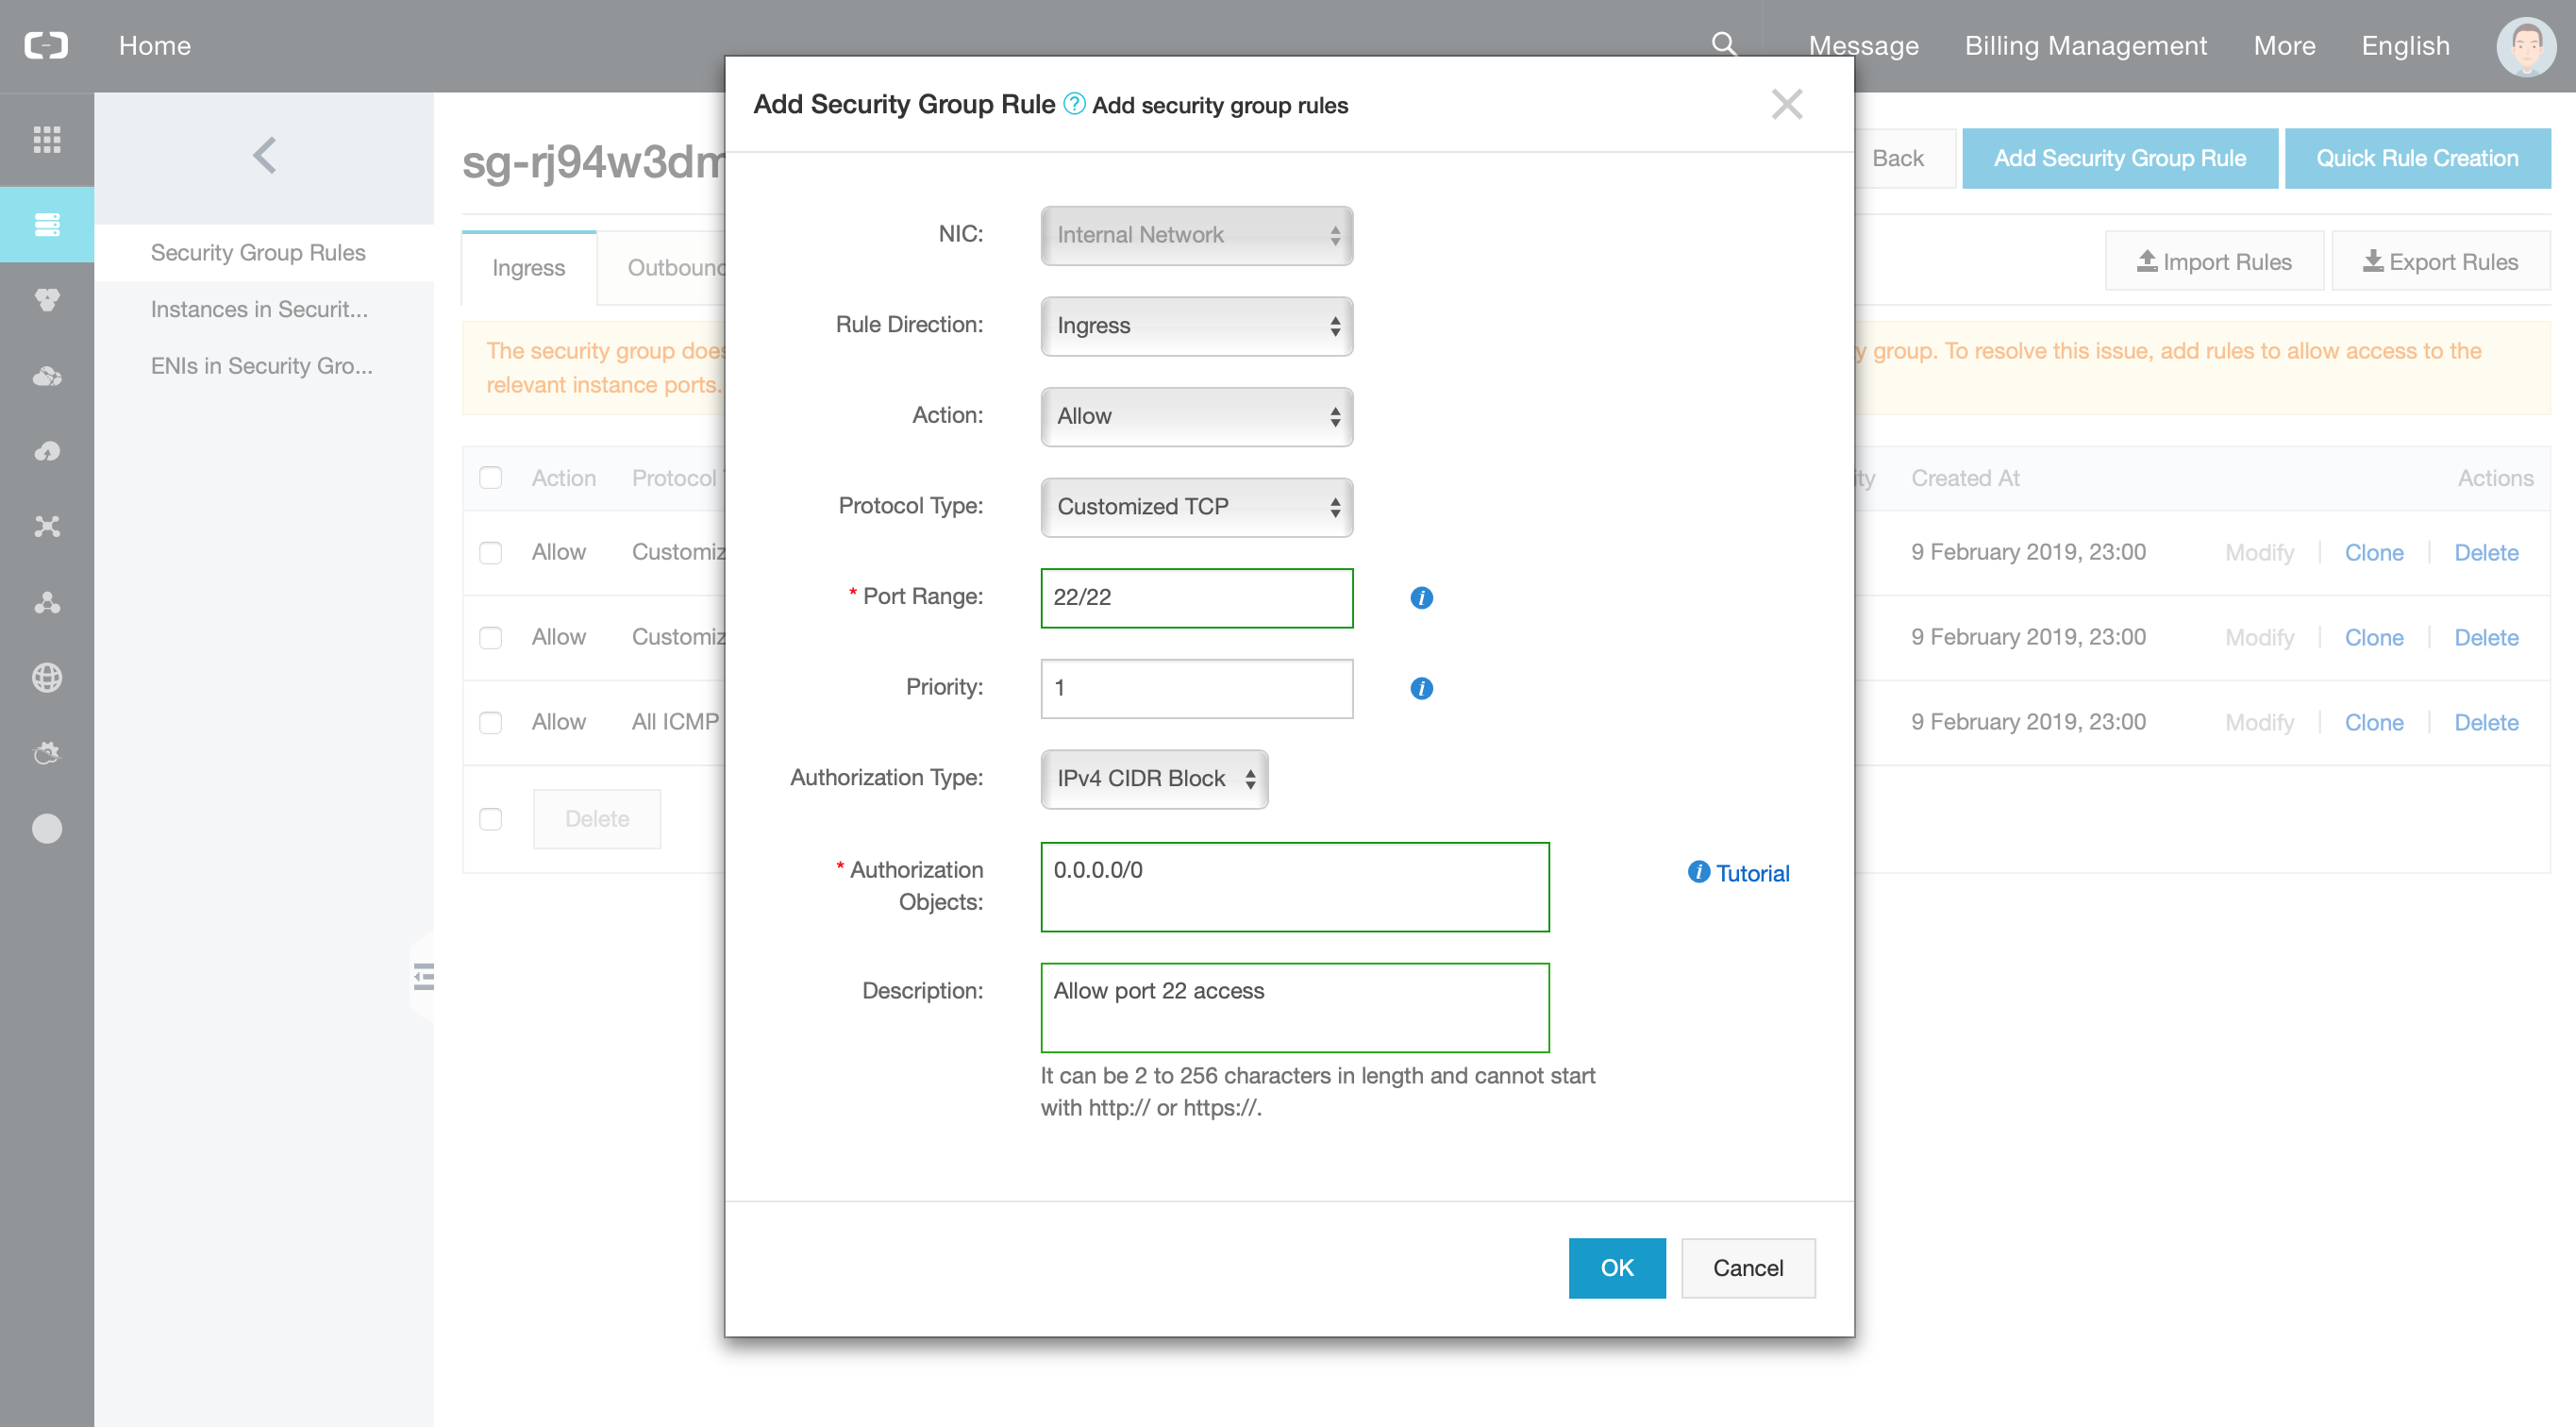
Here we'll show you how to connect ECS instance using terminal on Mac or Linux. If you are using Windows computer to connect the instance, please follow Alibaba's comprehensive guide about it.
Open terminal and run ssh root@[your-instance-public-ip] firstly. Then it will ask you to add host key fingerprint to local storage, write yes. Finally, enter your logon password that you setup at step 9 above. The outputs will look as similar below:
LocalMacbook:~ local$ ssh root@47.89.255.199
The authenticity of host '47.89.255.199 (47.89.255.199)' can't be established.
ECDSA key fingerprint is SHA256:mIPEqy7CFf6Xv9/5NDxTksbX+t/4IY6+hB0D6+8+NFE.
Are you sure you want to continue connecting (yes/no)? yes
Warning: Permanently added '47.89.255.199' (ECDSA) to the list of known hosts.
root@47.89.255.199's password:
Welcome to Alibaba Cloud Elastic Compute Service !
Last login: Sun Feb 10 05:16:29 2019 from *********
root@iZrj91bne18a1ghb4zbdn6Z:~#
At this stage, you are successfully logged in your Ubuntu 16.04 instance run on Alibaba Cloud. Let's first update the package list before starting to install anything else. Run the command shown as below.
root@iZrj91bne18a1ghb4zbdn6Z:~# sudo apt-get updateIn order to install Chef Automate, run curl command as shown below. It will download latest Chef Automate Linux Package installer from the Chef's official package distribution service and unzip the executable installer file.
root@iZrj91bne18a1ghb4zbdn6Z:~#  curl https://packages.chef.io/files/current/automate/latest/chef-automate_linux_amd64.zip | gunzip - > chef-automate && chmod +x chef-automate
  % Total    % Received % Xferd  Average Speed   Time    Time     Time  Current
                                 Dload  Upload   Total   Spent    Left  Speed
100 8689k  100 8689k    0     0  17.3M      0 --:--:-- --:--:-- --:--:-- 17.3M
Run the command below to setup Chef Automate on your instance.
root@iZrj91bne18a1ghb4zbdn6Z:~# sudo ./chef-automate deployYou will be prompted to accept Chef's Terms of Service and Master License and Services Agreement. Once you've accepted these agreements, the installer will make a pre-flight checks. If everything works well, then it will download, configure, and deploy Chef Automate. Otherwise, try to solve the failed checks by reading the information provided by the installer.
When installer completes, it will return an URL address to access the Web UI. However, it won't work as we didn't set up fully qualified domain name (FQDN) of the instance. For the sake of the demo installation, we'll change the FQDN with our instance's public ip address. However, in production environment, you should prefer obtaining a domain name for your services.
To change the FQDN of your Chef Automate installation with your instance's public ip address, create a .toml file that contains the partial configuration:
[global.v1]
  fqdn = "your-instance-s-public-ip-address"
Then run chef-automate config patch </path/to/your-file.toml> to deploy your change. Now from your web browser, you can navigate to https://your-instances-public-ip-address to reach Chef Automate Web UI. It might take a minute or so for the site to become available after launch.
The first time you connect you will be presented with a screen saying Your connection is not private. The reason for this is you are using HTTPS, but there is no SSL certificate. That's OK in our test environment, so click on Advanced then Proceed to your-instance-public-ip-address (unsafe).
You will be prompted for login credentials. You can find these credentials in the file automate-credentials.toml within the instance, so connect to the instance and cat that file.
root@iZrj91bne18a1ghb4zbdn6Z:~# sudo cat automate-credentials.toml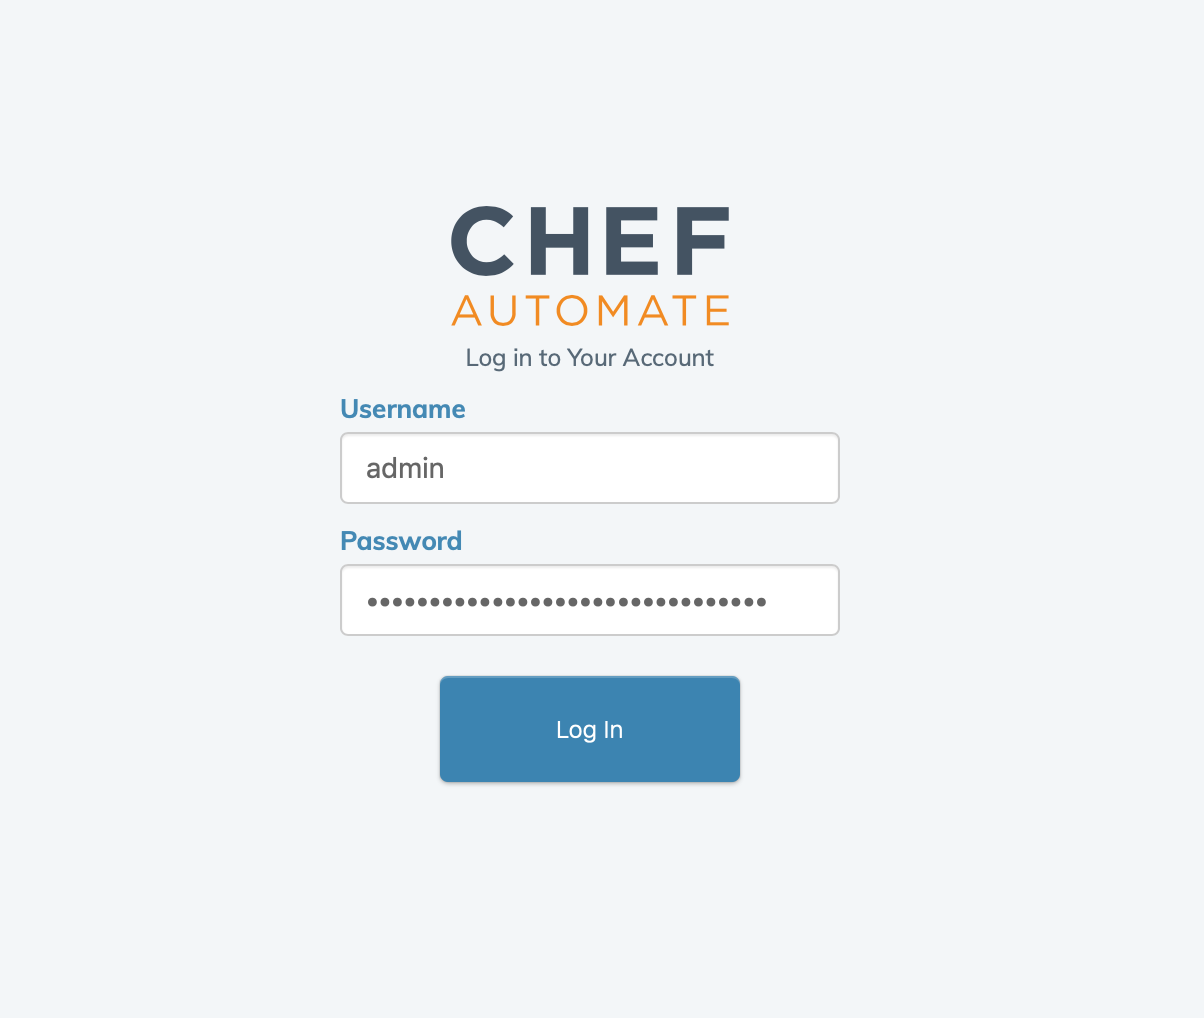
You will then be prompted to register for a 60 day trial license. Fill in the form as appropriate, click to agree the Terms and Conditions and click Sign Up.
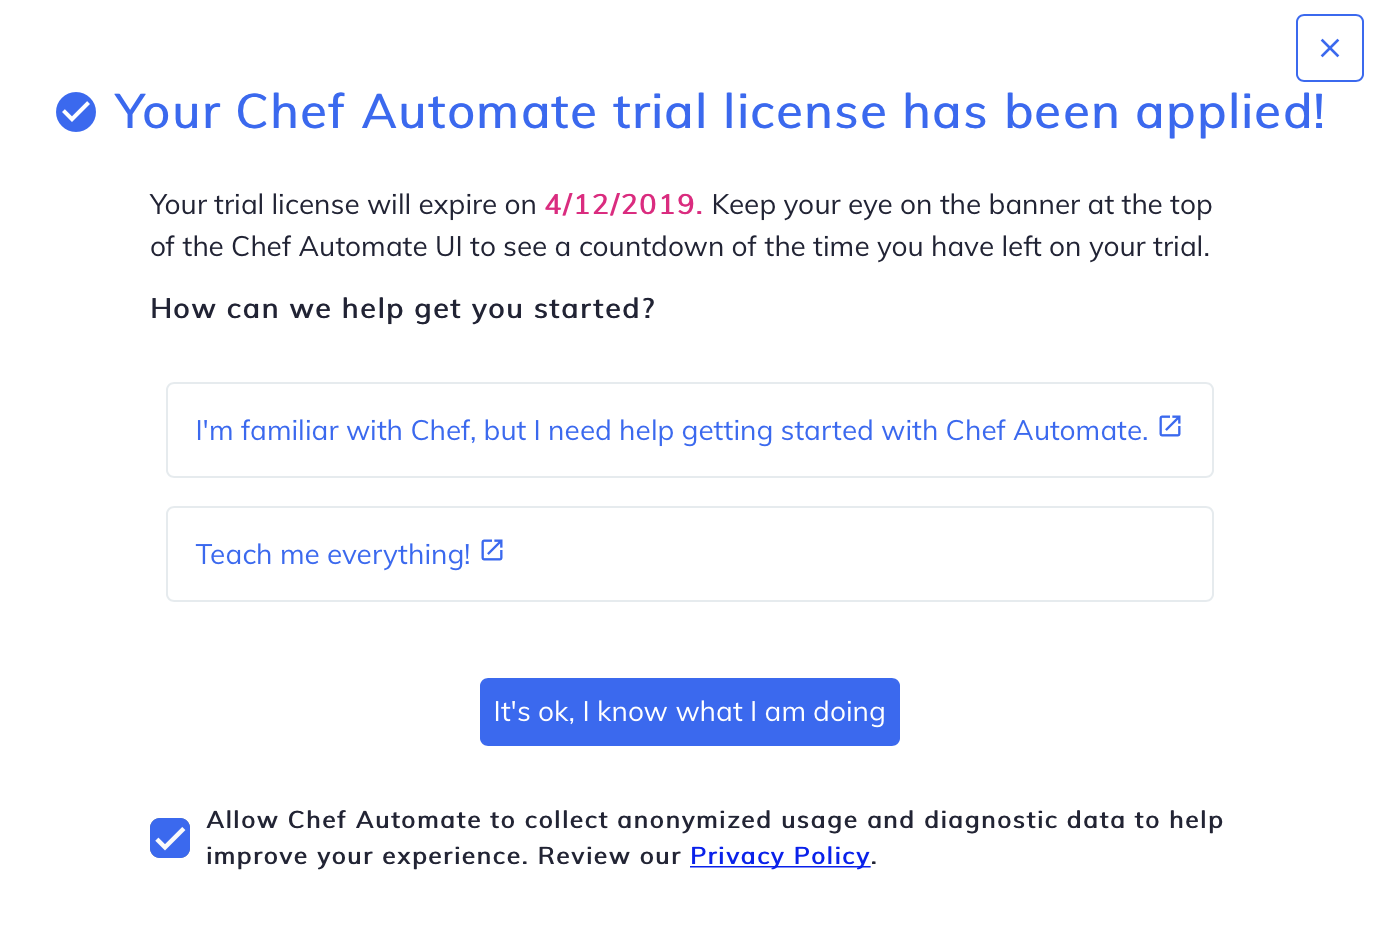
It will show you a date for when the trial license will expire. Click It's ok, I know what I am doing to see the main Chef Automate screen.
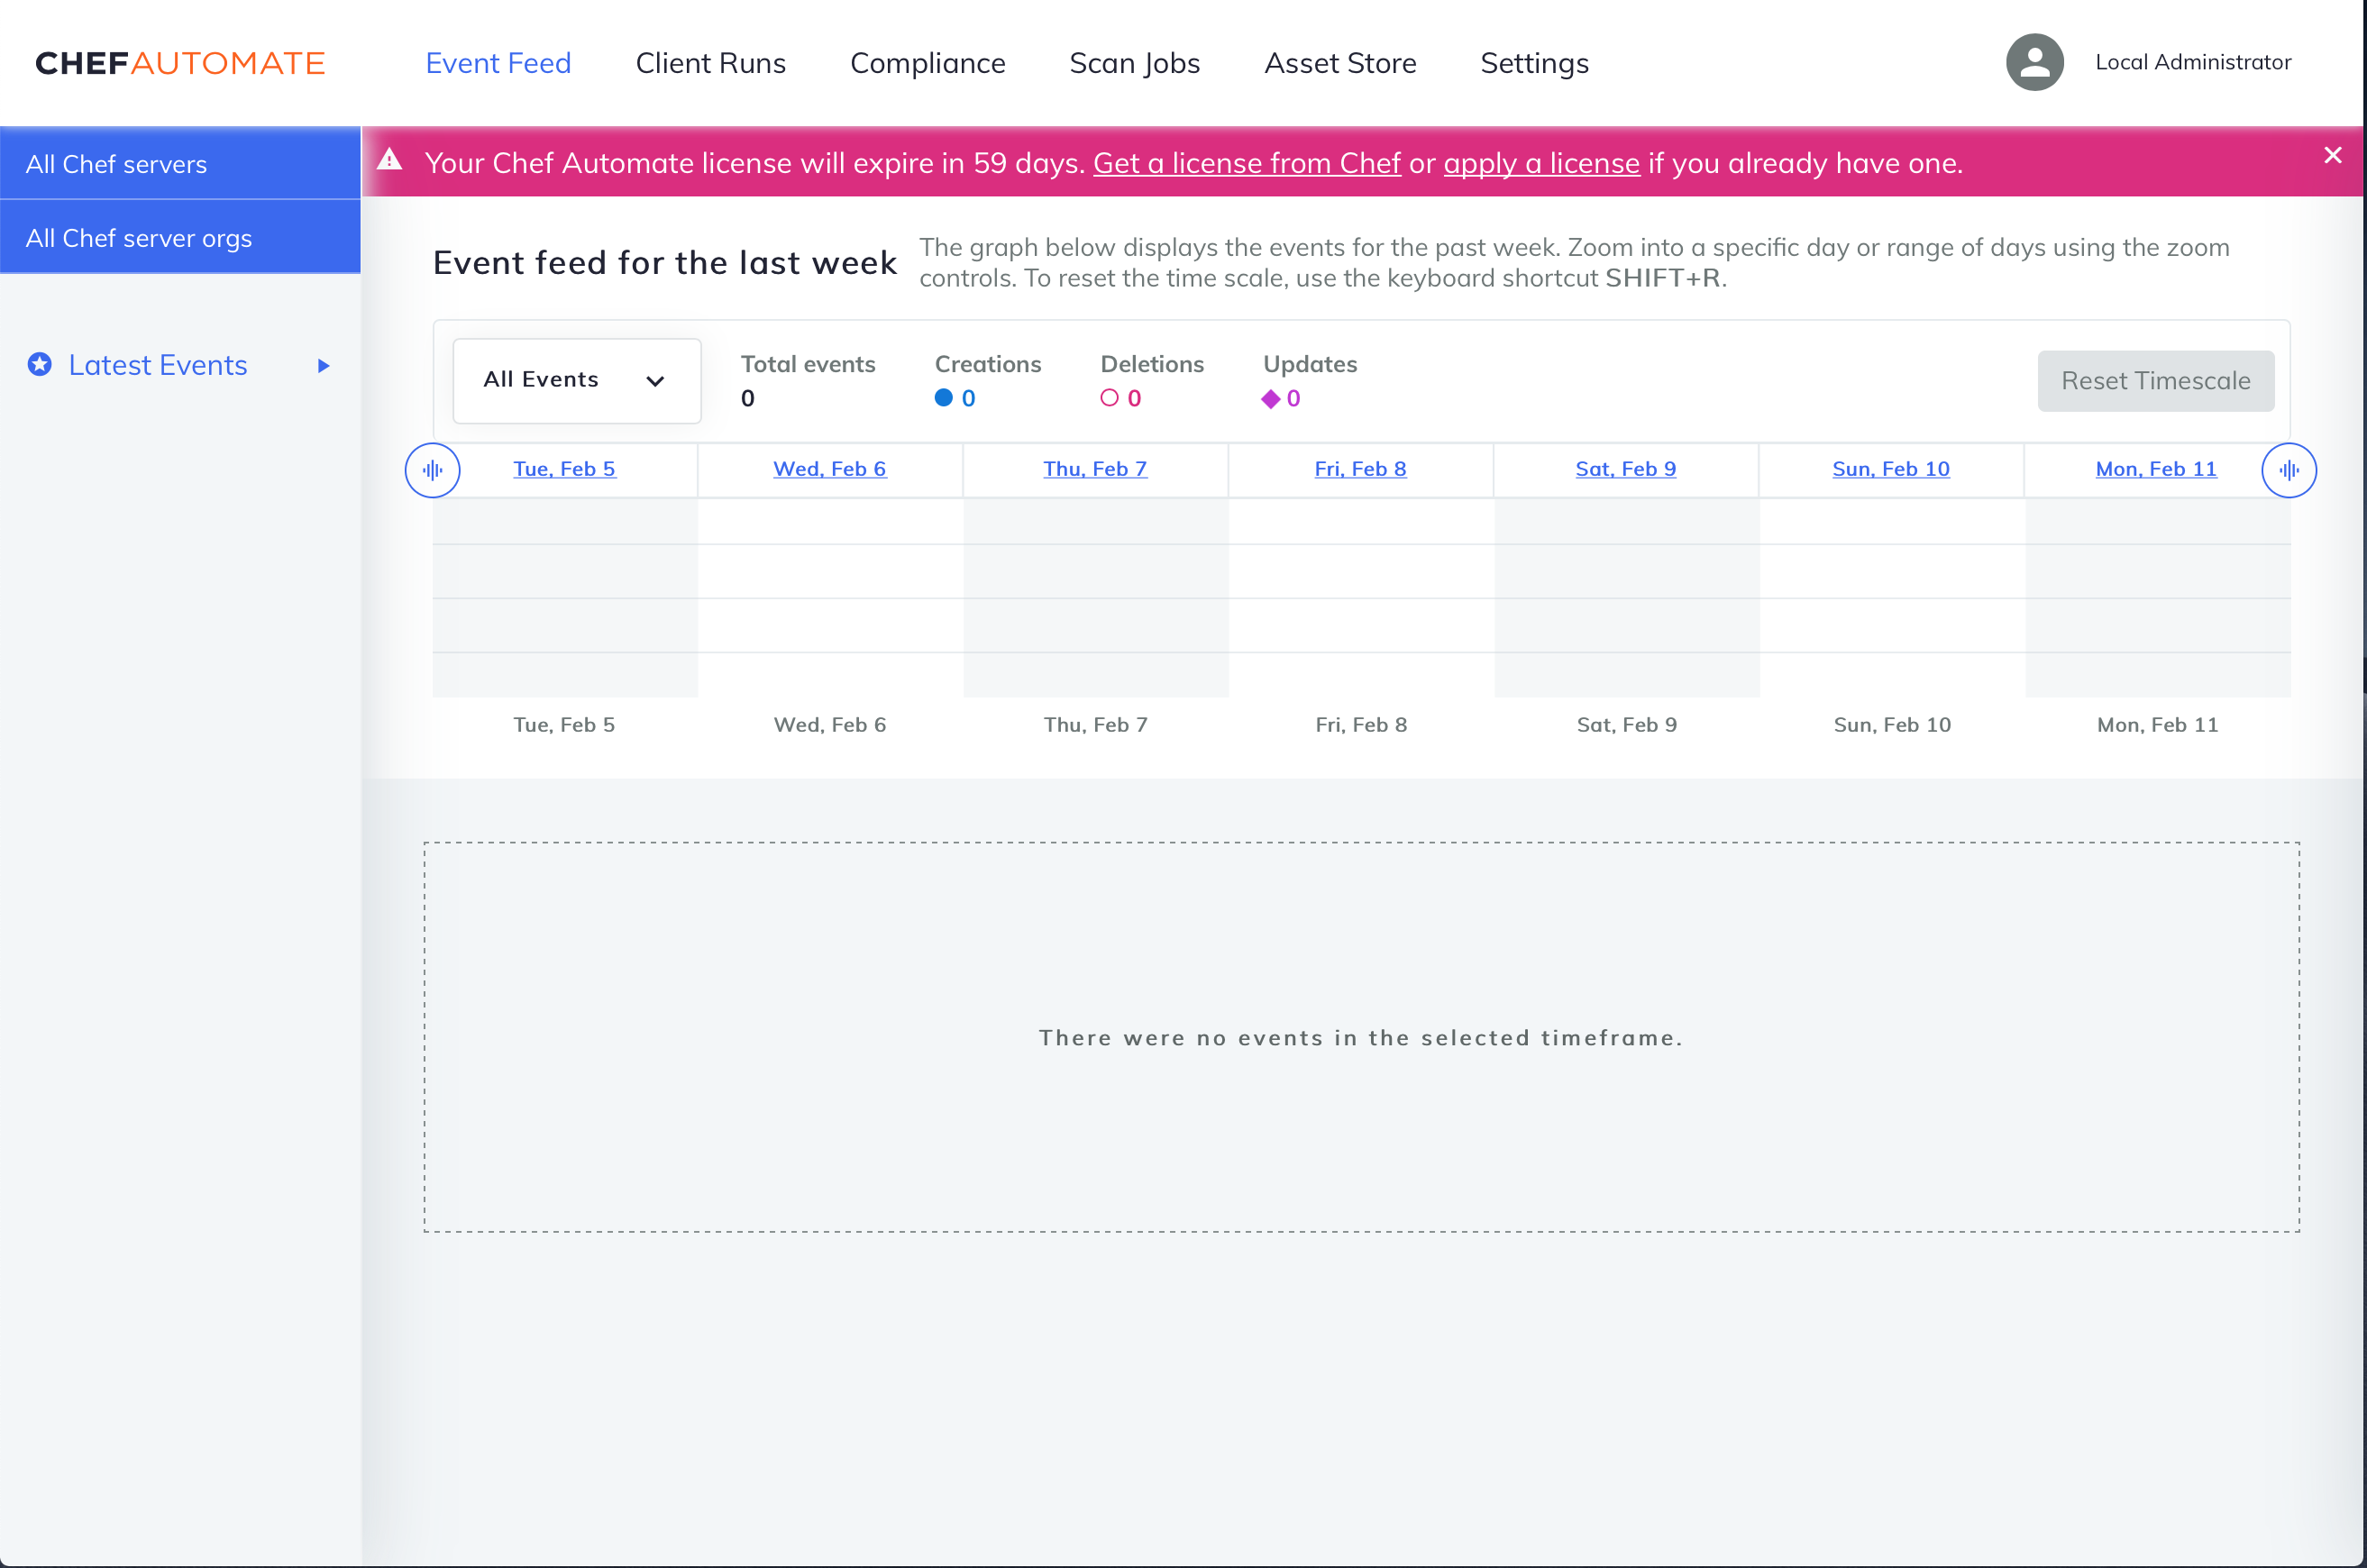
At the top, you will see six tabs – Event Feeds, Client Runs, Compliance, Scan Jobs, Asset Store, and Settings. The default view upon login is the Event Feeds tab. This tab shows a timeline representing Chef Server and Compliance events.
Chef Automate installs a chef-automate CLI to provide some configuration commands to help you work and configure your existing Chef Automate installation. Above, at Step 3, we already used it to configure FQDN settings of our installation. Here, we'll explain some more use cases where you can work with it.
Important: The commands below might require sudo privileges.
chef-automate config show shows you your current Chef Automate settings with the exception of default configurations..toml file extension. Then use chef-automate patch </path/to/partial-config.toml> to apply any changes into your existing configuration. This command is sufficient in most situations while dealing with Chef Automate settings.If you want to replace the current Chef Automate settings with completely new one, use chef-automate config set </path/to/full-config.toml> command. To be able to generate the configuration file with minimum settings needed to deploy Chef Automate, you can use chef-automate init-config command. Below we'll describe those settings and how to change them.
.toml file that contains the partial configuration as shown below: [global.v1]
fqdn = "example.fqdn.com"then run chef-automate config patch </path/to/fqdn-patch-file.toml> to apply changes.
Update Strategy: It allows you to decide how Chef Automate will be upgraded. The default option is at-once which upgrades the installation when new packages are detected. If you want to freeze the installation with current set of packages, create a .toml file that contains the partial configuration as shown below:
[deployment.v1]
    [deployment.v1.svc]
      upgrade_strategy = "none"
then run chef-automate config patch </path/to/update-strategy-patch-file.toml> to apply changes.
Load Balancer Certificate and Private Key: When we try to open Chef Automate Web UI, the browser returned an error regarding SSL certificate. In order to fix this error, you should update Load Balancer Certificate and Private Key regarding your FQDN settings. Create a .toml file that contains the partial configuration which contains the SSL certificate and its private key as shown below:
[load_balancer]
[[load_balancer.v1.sys.frontend_tls]]
# The TLS certificate for the load balancer frontend.
cert = """-----BEGIN CERTIFICATE-----
<your certificate>
-----END CERTIFICATE-----
"""
# The TLS RSA key for the load balancer frontend.
key = """-----BEGIN RSA PRIVATE KEY-----
<your private key>
-----END RSA PRIVATE KEY-----
"""
then run chef-automate config patch </path/to/load-balancer-patch-file.toml> to apply changes.
Global Log Level: By default, Chef Automate will initialize all services at the info log level, but there are following settings available: debug, info, warning, panic and fatal. In order to change the logging level of services, create a .toml file that contains the partial configuration for logging level as shown below:
[global.v1.log]
level = "debug"
then run chef-automate config patch </path/to/log-level-patch-file.toml> to apply changes.
Here, we explain only the minimal configurations that you might need during the first baby steps of using Chef Automate. If you want to learn more about the configuration options of Chef Automate, please check the comprehensive documentation that explains all other configuration options in detail.

2,605 posts | 747 followers
FollowAlibaba Clouder - June 14, 2019
Alibaba Clouder - July 5, 2019
Alibaba Clouder - September 7, 2020
Alibaba Clouder - October 12, 2019
Alibaba Clouder - January 11, 2021
Alibaba Clouder - October 12, 2019

2,605 posts | 747 followers
Follow ECS(Elastic Compute Service)
Elastic and secure virtual cloud servers to cater all your cloud hosting needs.
Learn More Message Service
A message queuing and notification service that facilitates smooth transfer of messages between applications
Learn MoreLearn More
More Posts by Alibaba Clouder