By Kunal Relan, Alibaba Cloud MVP
Neo4j is a rapidly growing Graph Database choice, as claimed by Neo4j Inc. Neo4j is the world's leading graph database. Neo4j is designed for optimising fast management, storage and fast traversal of nodes and relationships and thus relationships as described as first class citizens in Neo4j. Neo4j can store trillions of entities for the largest dataset imaginable while being sensitive to compact storage. Neo4j is a highly scalable and consistent database with features like hot backups and extensive monitoring. Neo4j has two editions, namely community edition which is fully functional edition and is suitable for single instance deployments and on the other hand Enterprise edition which has all the features of community edition and extended features for performance and scalability such as clustering and online backup functionality. Neo4j has a lot of use cases like fraud detection, Recommendation Engine, Network and Database Infrastructure Monitoring system, Social Media, Identity & Access Management and Artificial Intelligence.
In this tutorial, we'll show you how to install Neo4j on an Alibaba Cloud Elastic Compute Service (ECS) instance with Ubuntu 16.04.
To follow this tutorial, you will need a machine running Ubuntu 16.04 ready. For the purpose of this tutorial we'll be using Ubuntu Server 16.04 but you can use any version of Ubuntu .
To install Neo4j on Ubuntu, we must install Java first. Java might not be installed by default. We can verify it using this command.
bash
java -version
After running this command, if you get similar output like below, you need to install Java in the instance and if Java is already installed in your instance, you can skip this step.
bash
The program 'java' can be found in the following packages:
 * default-jre
 * gcj-5-jre-headless
 * openjdk-8-jre-headless
 * gcj-4.8-jre-headless
 * gcj-4.9-jre-headless
 * openjdk-9-jre-headless
Ask your administrator to install one of them
To install Java in the instance, use the following command:
bash
sudo add-apt-repository ppa:webupd8team/java
sudo apt-get update
sudo apt-get install oracle-java8-installer
In the last step, you'll be prompted to accept the agreement, so go ahead and comply with the terms to continue further.
Once these commands finish running, you should have Java installed in your machine, lets verify the same using the command below.
bash
java -version
Now you should have similar output in your terminal after running the command.
bash
java version "1.8.0_191"
Java(TM) SE Runtime Environment (build 1.8.0_191-b12)
Java HotSpot(TM) 64-Bit Server VM (build 25.191-b12, mixed mode)
After Install Java, we can now go ahead and install Neo4j on the instance.
After we are done installing Java, we can now safely install Neo4j. To start with we need to add the Neo4j repository to the apt package manager of your instance since it doesn't come in your apt by default.
To do so, run the following command:
bash
wget -O - https://debian.neo4j.org/neotechnology.gpg.key | sudo apt-key add -
echo 'deb https://debian.neo4j.org/repo stable/' | sudo tee -a /etc/apt/sources.list.d/neo4j.list
sudo apt-get update
The above command should add Neo4j to the apt package manager and now we need to run the following command to install the community edition of Neo4j.
bash
sudo apt-get install neo4j=<current stable version>
The command above should install the current stable version of Neo4j in your instance, and now you can start the Neo4j using the following command.
bash
sudo service neo4j start
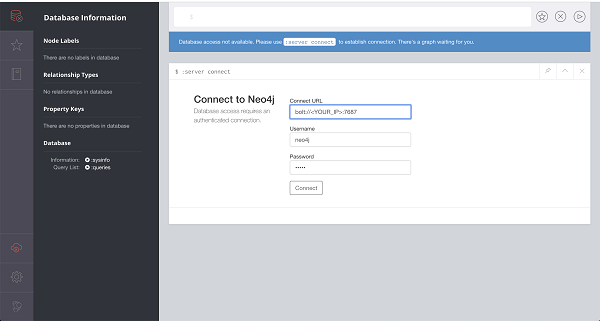
Now, if everything went well Neo4j should be up and running. Neo4j can be accessed using the web application which comes in the package, to access the same open your browser and enter the following address.
http://<YOUR_IP>:7474/browserBy default the Neo4j server doesn't listen over the internet and in order to do so we'll need to edit the Neo4j conf file to enable the Neo4j to listen on all the network ports.
First, open the neo4j.conf in /etc/neo4j using the following command.
bash
sudo nano /etc/neo4j/neo4j.conf
Now in the nano editor, find the line that says #dbms.connectors.default_listen_address=0.0.0.0 and uncomment it and now save the file and exit.
Neo4j should now be able to listen on all ports, to finalise the changes restart the neo4j server using the following command.
bash
sudo service neo4j restart
Note: If you are using a cloud ubuntu server, it might not have a browser and you'll have to use the public IP address of the instance and make sure port 7474 is allowed in the firewall.
Neo4j should now be accesible in your browser, and you should be able to login using default username and password neo4j.

Neo4j is a fast growing platform and has extensive use cases; there are endless possibilities that can be achieved using Neo4j. You can dig deeper into it using Neo4j by visiting its official docs to solve your own use case with one of its features. However, if you are planning on using it for production workloads, you should consider getting the enterprise edition.
Protect against Web Crawlers with Alibaba Cloud's Anti-Bot Service

2,605 posts | 747 followers
FollowAlibaba Clouder - November 13, 2019
Alibaba Clouder - November 27, 2019
Alibaba Clouder - June 13, 2019
Alibaba Clouder - April 23, 2019
Alex - December 26, 2018
Farruh - January 12, 2024

2,605 posts | 747 followers
Follow ECS(Elastic Compute Service)
Elastic and secure virtual cloud servers to cater all your cloud hosting needs.
Learn MoreLearn More
 Marketplace
Marketplace is an online market for users to search and quickly use the software as image for Alibaba Cloud products.
Learn MoreMore Posts by Alibaba Clouder
Raja_KT March 14, 2019 at 2:15 pm
Good share. Lots of attractions to use LPG or RDF. Lots of data governance tools start falling back on graph or graph DBs....:)