By Hitesh Jethva, Alibaba Cloud Tech Share Author. Tech Share is Alibaba Cloud's incentive program to encourage the sharing of technical knowledge and best practices within the cloud community.
ConfigServer Firewall (CSF) is a free, open source and powerful software firewall application based on iptables that provides high level of security to Linux servers. CSF is a Stateful Packet Inspection that can protect your server against different types of attacks, such as brute force, SYN flood, port scan, DOS and improve server security.
CSF allows you to configure your server's firewall to lock down public access to services and only allow certain connections, such as logging in to FTP, checking your email, or loading your websites. CSF continues watches your user activity for login failures; if a large amount of login failures are seen coming from the same IP address, that IP will immediately be temporarily blocked from all services on your server. You can manually add and remove whitelist or blacklist IPs in your firewall through ConfigServer interface.
In this tutorial, we will learn how to install and configure CSF on an Alibaba Cloud Elastic Compute Service (ECS) Ubuntu 16.04 server.
First, Login to your https://ecs.console.aliyun.com/?spm=a3c0i.o25424en.a3.13.388d499ep38szx">Alibaba Cloud ECS Console. Create a new ECS instance, choosing Ubuntu 16.04 as the operating system with at least 2GB RAM. Connect to your ECS instance and log in as the root user.
Once you are logged into your Ubuntu 16.04 instance, run the following command to update your base system with the latest available packages.
apt-get update -yBy default, CSF is not available in the Ubuntu 16.04 default repository. So, you will need to download and install CSF from their source. You can download the CSF source with the following command:
wget http://download.configserver.com/csf.tgzOnce the download is completed, extract the downloaded file with the following command:
tar -xvzf csf.tgzNext, change the directory to csf and install CSF by running the following script:
cd csf
bash csf.sh
Once the installation has been completed. You should see the following output:
Created symlink from /etc/systemd/system/firewalld.service to /dev/null.
'csf/LICENSE.txt' -> 'webmin/csf/images/LICENSE.txt'
'csf/bootstrap/js/bootstrap.min.js' -> 'webmin/csf/images/bootstrap/js/bootstrap.min.js'
'csf/bootstrap/css/bootstrap.min.css.map' -> 'webmin/csf/images/bootstrap/css/bootstrap.min.css.map'
'csf/bootstrap/css/bootstrap.min.css' -> 'webmin/csf/images/bootstrap/css/bootstrap.min.css'
'csf/bootstrap/fonts/glyphicons-halflings-regular.eot' -> 'webmin/csf/images/bootstrap/fonts/glyphicons-halflings-regular.eot'
'csf/bootstrap/fonts/glyphicons-halflings-regular.woff2' -> 'webmin/csf/images/bootstrap/fonts/glyphicons-halflings-regular.woff2'
'csf/bootstrap/fonts/glyphicons-halflings-regular.svg' -> 'webmin/csf/images/bootstrap/fonts/glyphicons-halflings-regular.svg'
'csf/bootstrap/fonts/glyphicons-halflings-regular.ttf' -> 'webmin/csf/images/bootstrap/fonts/glyphicons-halflings-regular.ttf'
'csf/bootstrap/fonts/glyphicons-halflings-regular.woff' -> 'webmin/csf/images/bootstrap/fonts/glyphicons-halflings-regular.woff'
'csf/bootstrap-chosen.css' -> 'webmin/csf/images/bootstrap-chosen.css'
'csf/chosen-sprite.png' -> 'webmin/csf/images/chosen-sprite.png'
'csf/chosen-sprite@2x.png' -> 'webmin/csf/images/chosen-sprite@2x.png'
'csf/chosen.min.css' -> 'webmin/csf/images/chosen.min.css'
'csf/chosen.min.js' -> 'webmin/csf/images/chosen.min.js'
'csf/configserver.css' -> 'webmin/csf/images/configserver.css'
'csf/csf-loader.gif' -> 'webmin/csf/images/csf-loader.gif'
'csf/csf.svg' -> 'webmin/csf/images/csf.svg'
'csf/csf_small.png' -> 'webmin/csf/images/csf_small.png'
'csf/jquery.min.js' -> 'webmin/csf/images/jquery.min.js'
'csf/loader.gif' -> 'webmin/csf/images/loader.gif'
'/etc/csf/csfwebmin.tgz' -> '/usr/local/csf/csfwebmin.tgz'

Installation Completed
Next, you will need to verify whether all of the required firewall modules are available in the server. You can test it with the following command:
perl /usr/local/csf/bin/csftest.plOutput:
Testing ip_tables/iptable_filter...OK
Testing ipt_LOG...OK
Testing ipt_multiport/xt_multiport...OK
Testing ipt_REJECT...OK
Testing ipt_state/xt_state...OK
Testing ipt_limit/xt_limit...OK
Testing ipt_recent...OK
Testing xt_connlimit...OK
Testing ipt_owner/xt_owner...OK
Testing iptable_nat/ipt_REDIRECT...OK
Testing iptable_nat/ipt_DNAT...OK

RESULT: csf should function on this server
All the configuration files of csf are located under /etc/csf directory. Following file are the main configuration file of CSF:
csf.conf : The main configuration file.
csf.allow : The list of allowed IP's and CIDR addresses on the firewall.
csf.deny : The list of denied IP's and CIDR addresses on the firewall.
csf.ignore : The list of ignored IP's and CIDR addresses on the firewall.
The default CSF configuration file is located at /etc/csf directory. First, enable the CSF and add basic incoming and outgoing ports with the following command:
nano /etc/csf/csf.confMake the following changes:
# lfd will not start while this is enabled
TESTING = "0"

# Allow outgoing TCP ports
TCP_OUT = "20,21,22,25,53,80,110,113,443,587,993,995"

# Allow incoming UDP ports
UDP_IN = "20,21,53"

# Allow outgoing UDP ports
# To allow outgoing traceroute add 33434:33523 to this list
UDP_OUT = "20,21,53,113,123"

# Allow incoming PING. Disabling PING will likely break external uptime
# monitoring
ICMP_IN = "1"

# Set the per IP address incoming ICMP packet rate for PING requests. This
# ratelimits PING requests which if exceeded results in silently rejected
# packets. Disable or increase this value if you are seeing PING drops that you
# do not want
#
# To disable rate limiting set to "0", otherwise set according to the iptables
# documentation for the limit module. For example, "1/s" will limit to one
# packet per second
ICMP_IN_RATE = "1/s"

# Allow outgoing PING
#
# Unless there is a specific reason, this option should NOT be disabled as it
# could break OS functionality
ICMP_OUT = "1"
Save and close the file. Then reload the CFS firewall with the following command:
csf -rYou can see the list of default rules by running the following command:
csf -lCSF allows you to block the login failure of various services like SSH, FTP and SMTP. You can also configure CSF to prevent the server from DDOS attacks. You can do this by configuring csf.conf file as below:
nano /etc/csf/csf.confMake the following changes:
#Set the PERM setting to "1" to permanently block the IP address, or LF_TRIGGER_PERM can be set to
#value greater than  "1" and the IP address will be blocked temporarily for that value in seconds.

LF_TRIGGER_PERM = 1

#Block the users on the 22, 21 and 25 port after a 3 failed connection attempt.

LF_SSHD = 3
LF_FTPD = 3
LF_SMTPAUTH = 3

#To prevent Distributed Attacks from making multiple failed attempts from different IP addresses. You can set #the minimum amount of unique IP addresses allowed to log in with the same credentials is 3 as below:
LF_DISTATTACK = 1
LF_DISTATTACK_UNIQ = 3

# Distributed FTP Logins. This option will keep track of successful FTP logins.
# If the number of successful logins to an individual account is at least
# LF_DISTFTP in LF_DIST_INTERVAL from at least LF_DISTFTP_UNIQ IP addresses,
# then all of the IP addresses will be blocked

LF_DISFTP = 1
LF_DISTFTP_UNIQ = 3
LF_DISTFTP_PERM = 1

#Limit the number of connections allowed from a single host
CT_LIMIT = "20"

#Connection Tracking interval in seconds.
CT_INTERVAL = "10"

#Set this to 1 to block ips permanent.
CT_PERMANENT = 1

#Sent email alerts for each blocked ip.
CT_EMAIL_ALERT =1

#If you opt for temporary IP blocks for CT, then the following is the interval
#in seconds that the IP will remain blocked
CT_BLOCK_TIME = 1800

#The number of connections to port 80 exceeds 30 in five seconds, all the new connections will be blocked.
PORTFLOOD = "80;tcp;30;5"
Save and close the file, when you are finished.
You can also monitor critical system files for changes by checking md5 sums periodically and will alert you of changes. You can do this by editing /etc/csf/csf.dirwatch file.
nano /etc/csf/csf.dirwatchAdd important files which would indicate a security breach:
/root/.ssh/authorized_keys
/etc/ssh/sshd_config
/etc/shadow
Save and close the file. Then reload CFS and lfd to apply the changes:
csf -r
service lfd restartYou can also allow, deny, remove and doing other task using the CFS command line.
To allow an IP address:
csf -a 192.168.0.103To deny an IP address:
csf -d 192.168.0.103To remove a blocked IP address:
csf -dr 192.168.0.103To check whether an IP is blocked by CSF:
csf -g 192.168.0.103To disable csf and lfd completely:
csf -xTo enable CSF firewall:
csf -eTo flush CSF firewall:
csf -fTo remove an IP from allow list:
csf -ar 192.168.0.103To restart CSF firewall:
csf -rCSF Web UI requires some perl modules to be installed on your system. You can install all of them by running the following command:
apt-get install libio-socket-ssl-perl libcrypt-ssleay-perl libnet-libidn-perl libio-socket-inet6-perl libsocket6-perl -yNext, enable the CSF Web UI by editing /etc/csf/csf.conf file:
nano /etc/csf/csf.confMake the following changes:
# 1 to enable, 0 to disable
UI = "1"

# Set this to the port that want to bind this service to. You should configure
# this port to be >1023 and different from any other port already being used
## Do NOT enable access to this port in TCP_IN, instead only allow trusted IP's
# to the port using Advanced Allow Filters (see readme.txt)
UI_PORT = "8080"

# Leave blank to bind to all IP addresses on the server
UI_IP = ""

# This should be a secure, hard to guess username
#
# This must be changed from the default
UI_USER = "admin"

# This should be a secure, hard to guess password. That is, at least 8
# characters long with a mixture of upper and lowercase characters plus
# numbers and non-alphanumeric characters
#
# This must be changed from the default
UI_PASS = "admin"
Save and close the file. Then, all your IP address to /etc/csf/ui/ui.allow to allow access to CSF UI:
nano /etc/csf/ui/ui.allowAdd your IP address
192.168.0.103Save and close the file. Next, you will need to start lfd daemon to apply the changes:
service lfd restartYou can check the status of lfd with the following command:
service lfd statusOutput:
   lfd.service - ConfigServer Firewall & Security - lfd
   Loaded: loaded (/usr/lib/systemd/system/lfd.service; enabled; vendor preset: enabled)
   Active: active (running) since Sat 2018-09-08 20:19:49 IST; 5s ago
  Process: 7741 ExecStart=/usr/sbin/lfd (code=exited, status=0/SUCCESS)
 Main PID: 7756 (lfd - sleeping)
   CGroup: /system.slice/lfd.service
           ├─7756 lfd - sleepin
           ├─7763 lfd U
           ├─7764 lfd - retrieving countrycodelookups list
           ├─7765 lfd - checking system integrit
           ├─7767 sh -c /usr/bin/md5sum /usr/bin/* /usr/sbin/* /bin/* /sbin/* /usr/local/bin/* /usr/local/sbin/* /etc/init.d/* /etc/xinetd.d/*
           └─7769 /usr/bin/md5sum /usr/bin/2to3 /usr/bin/2to3-2.7 /usr/bin/2to3-3.5 /usr/bin/Mail /usr/bin/NF /usr/bin/[ /usr/bin/aa-enabled /u

Sep 08 20:19:47 mail.example.com systemd[1]: Starting ConfigServer Firewall & Security - lfd...
Sep 08 20:19:49 mail.example.com systemd[1]: Started ConfigServer Firewall & Security - lfd.
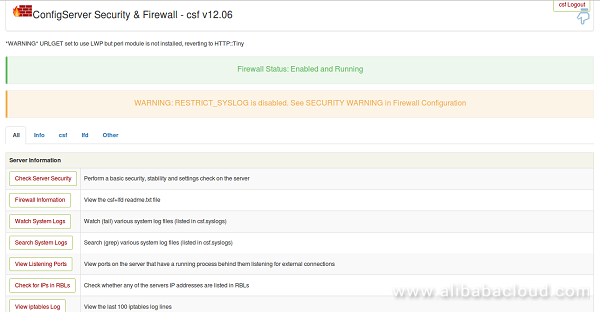
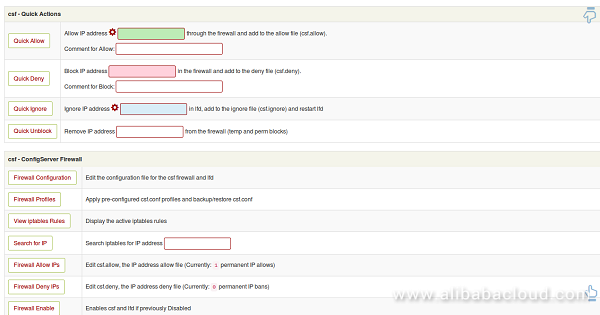
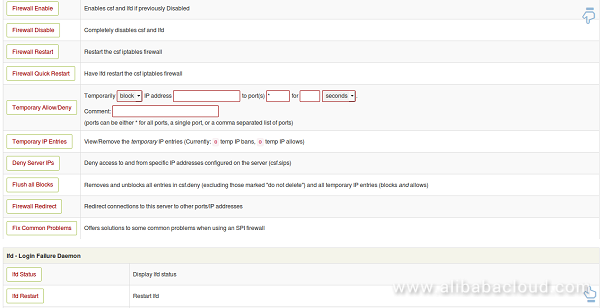
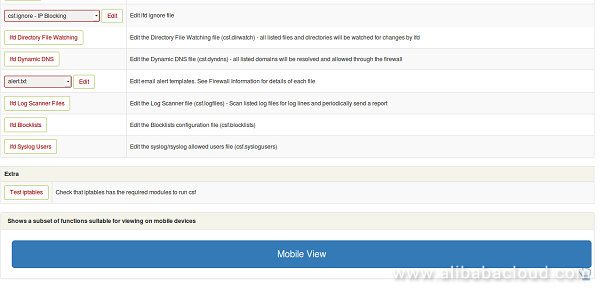
Now, open your web browser and type the URL https://your-ip-address:8080. You will be redirected to the CSF Web UI login page. Here, provide the username and the password which you have specified earlier. You will be redirected to the CSF Web UI:


Congratulations! You have successfully installed and configured CSF firewall on your Alibaba Cloud Elastic Compute Service (ECS) Ubuntu 16.04 server. You can now easily configure and manage CSF firewall through CSF Web UI.

2,605 posts | 747 followers
FollowAlex - January 22, 2020
Alibaba Clouder - June 11, 2019
Alibaba Clouder - June 19, 2018
francisndungu - May 29, 2019
Alibaba Clouder - August 27, 2020
Alibaba Clouder - June 13, 2019

2,605 posts | 747 followers
Follow ECS(Elastic Compute Service)
Elastic and secure virtual cloud servers to cater all your cloud hosting needs.
Learn More Anti-DDoS
A comprehensive DDoS protection for enterprise to intelligently defend sophisticated DDoS attacks, reduce business loss risks, and mitigate potential security threats.
Learn More WAF(Web Application Firewall)
A cloud firewall service utilizing big data capabilities to protect against web-based attacks
Learn MoreMore Posts by Alibaba Clouder