By: Jeremy Pedersen
Alibaba Cloud users with some experience on AWS often compare Alibaba Cloud's Object Storage Service (OSS) to Amazon's S3.
This is a fair comparison, as both are designed to fulfill similar roles, and they offer similar features, such as:
...and a lot more.
However they are not identical. There are a few unique OSS features which aren't present in S3, including:
.ZIP filesOf course, some of these things can be implemented on AWS by pairing S3 with other services (like Lambda). The advantage of OSS is that these are built-ins that work without any external dependencies!
In particular, the image processing built-ins are a powerful way to work with image content.
In today's blog post we'll dive into this feature and learn how it can be used to perform a variety of common image processing tasks. Let's go!
To test out the image processing features built into OSS, we first need to set up an OSS bucket (of course!) and add some images.
Here, I create a bucket in Singapore:
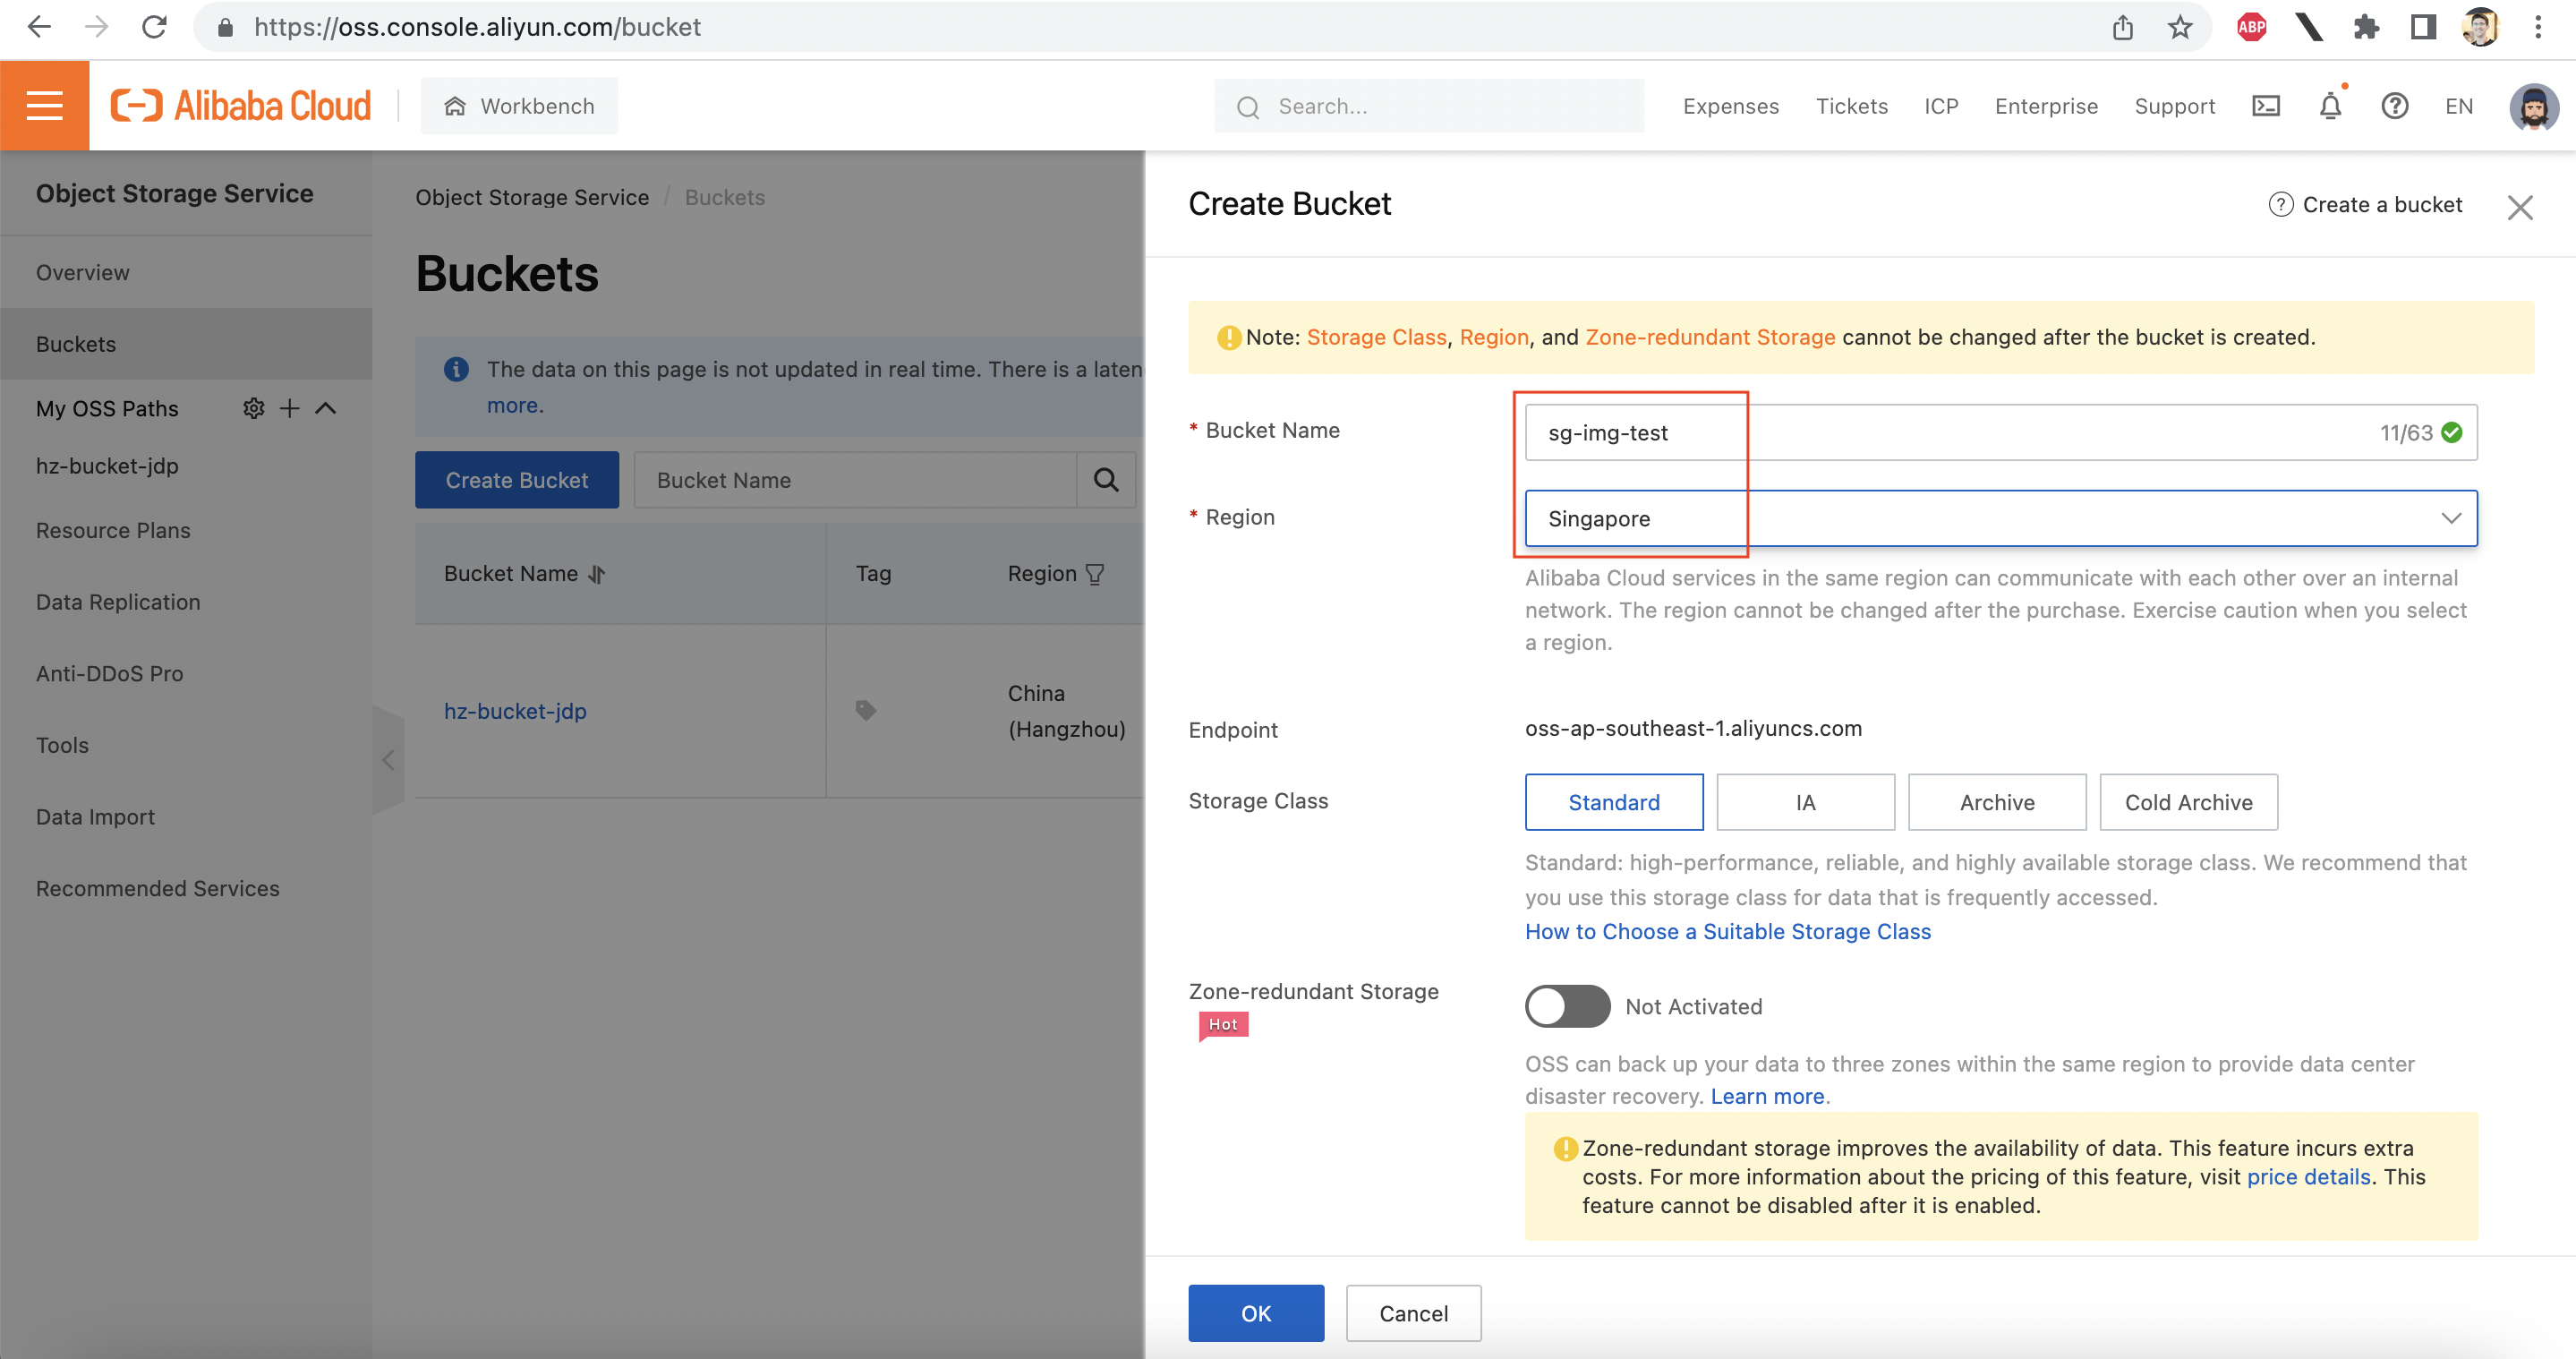
Note that the image processing feature won't be affected by your logging, versioning, or storage redundancy (LRS/ZRS) settings. In my case, I set up my bucket to use LRS (local redundant storage), and I have turned off real-time log search and object versioning. Feel free to turn those on if you like. Again, it won't affect the image processing functionality.
Next we need to find some images to work with. To avoid copyright issues, I'll use a few of my own images (feel free to reuse them for your own OSS tests!):
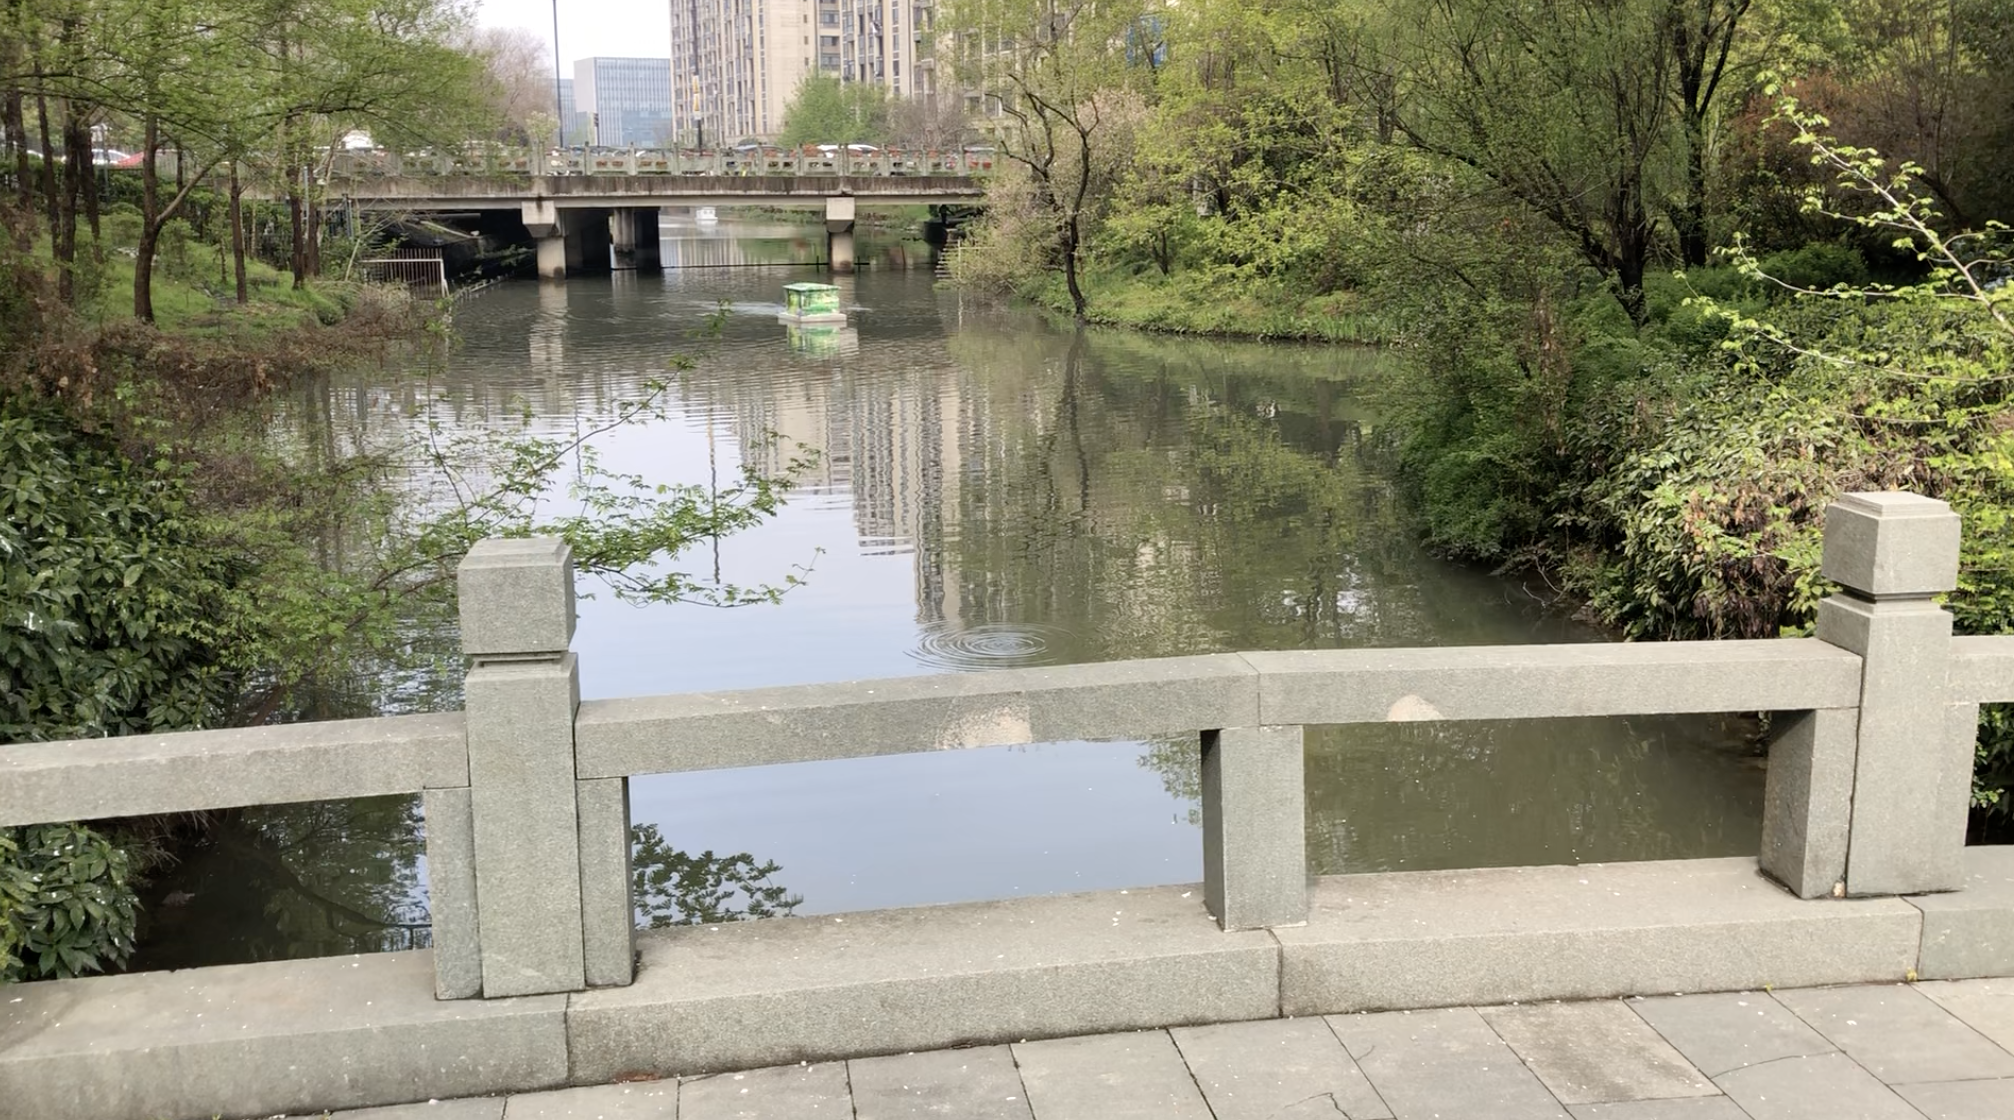
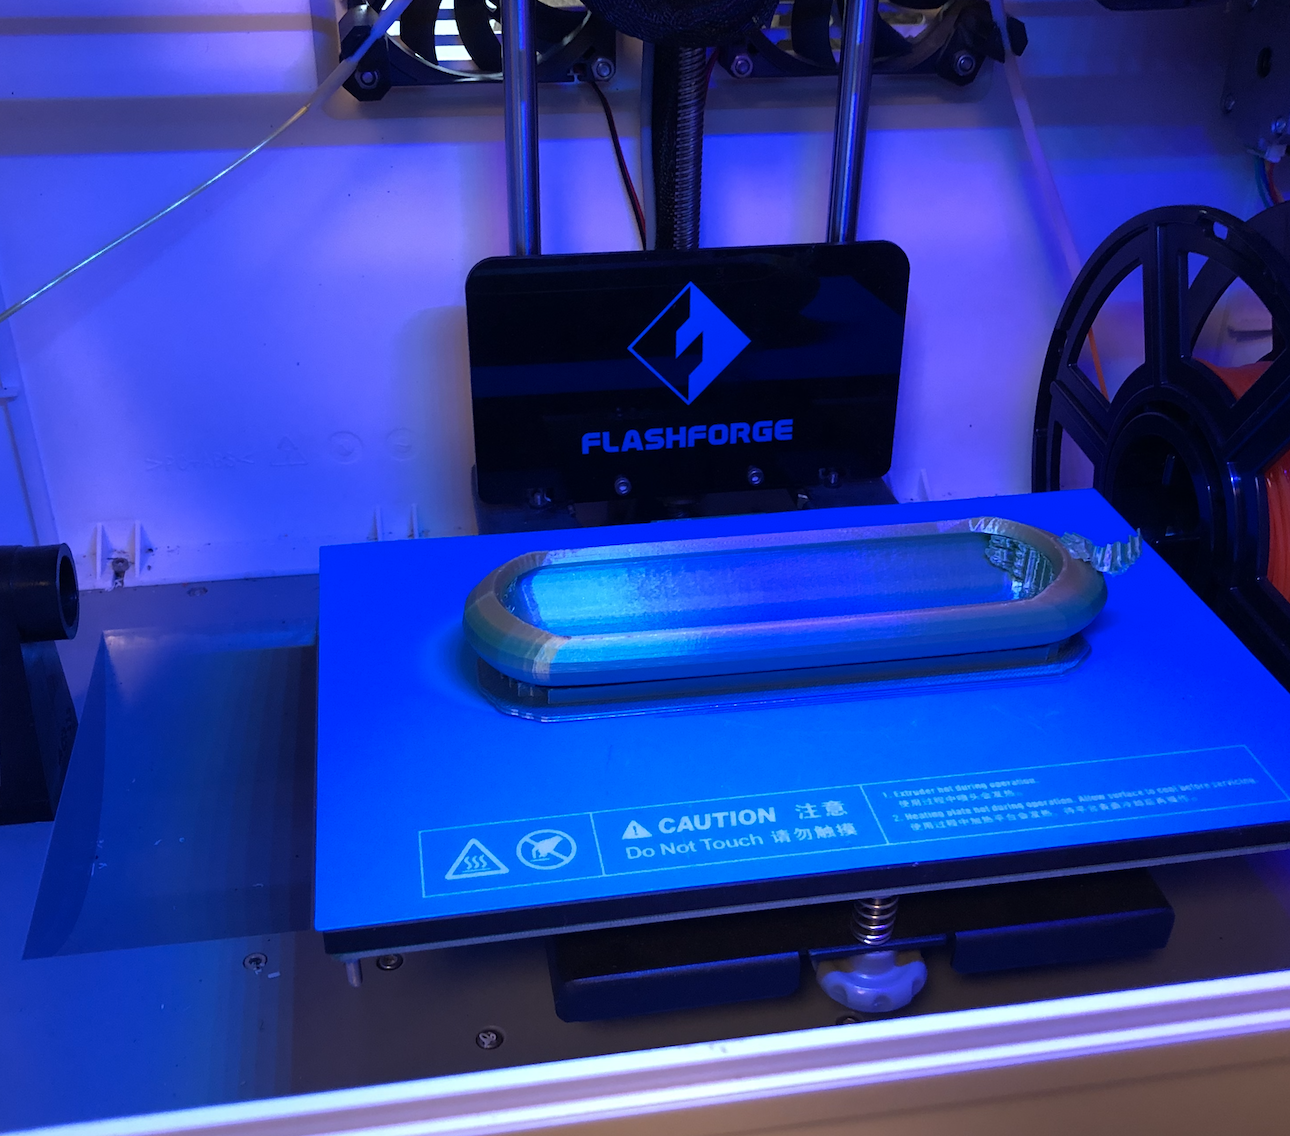
Next, I upload these images to my OSS bucket:
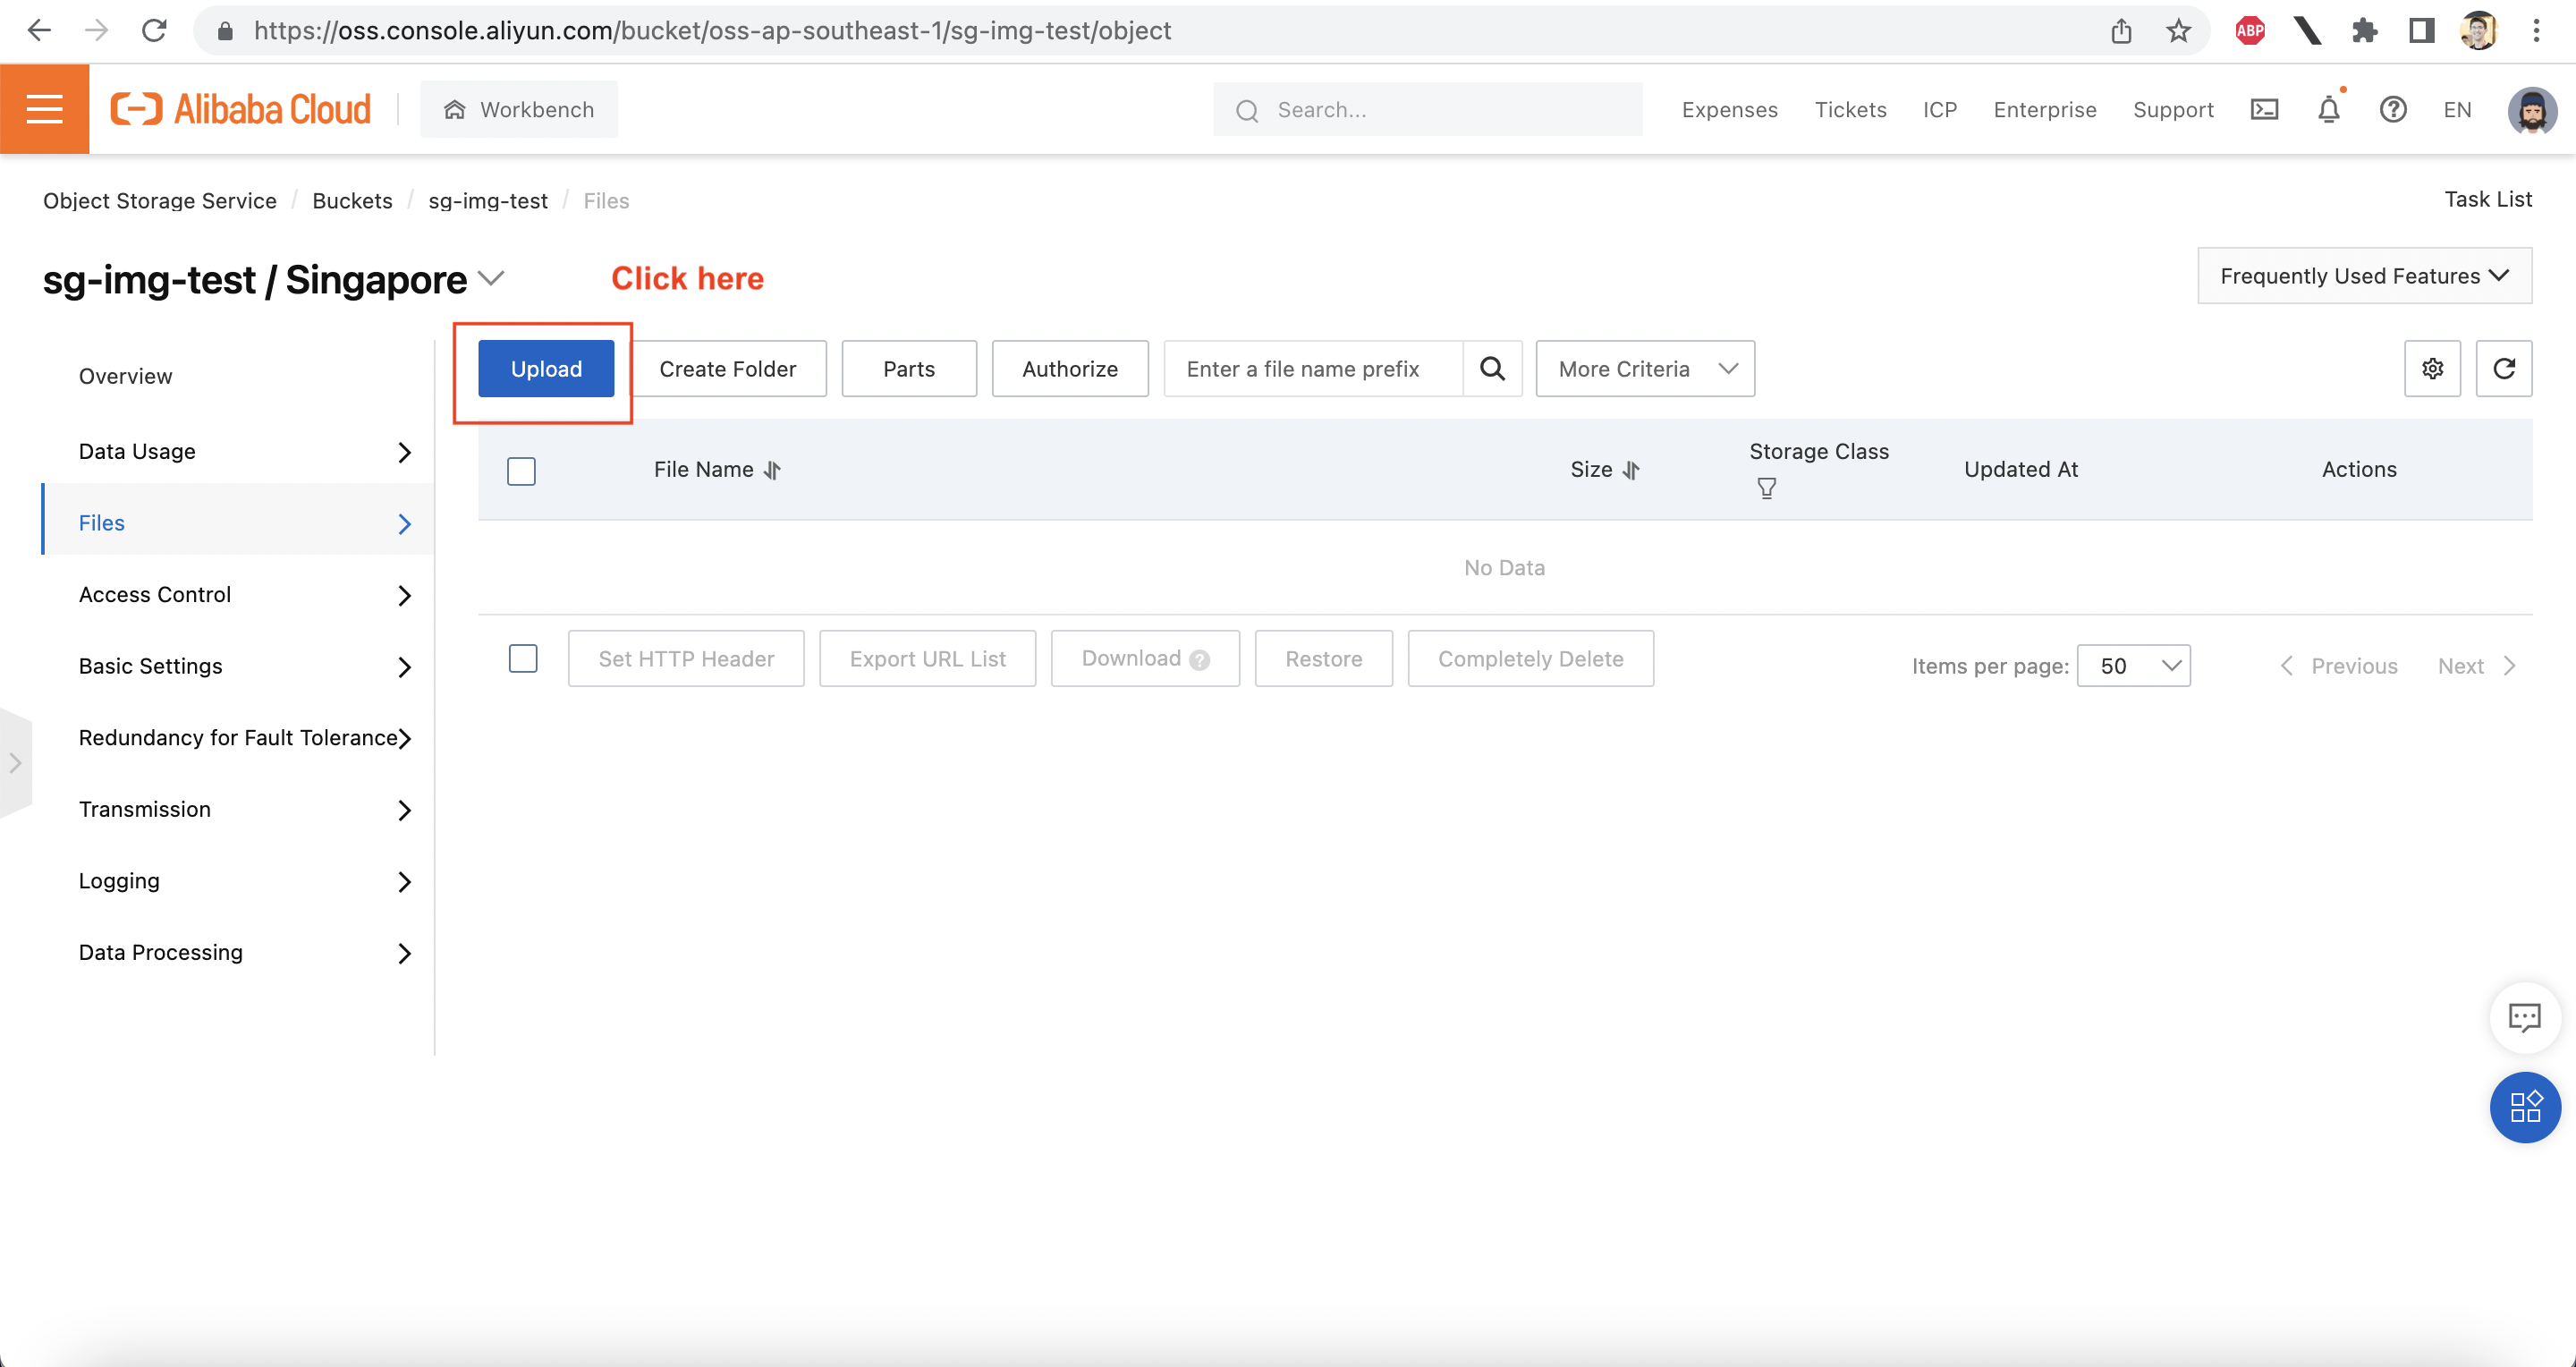
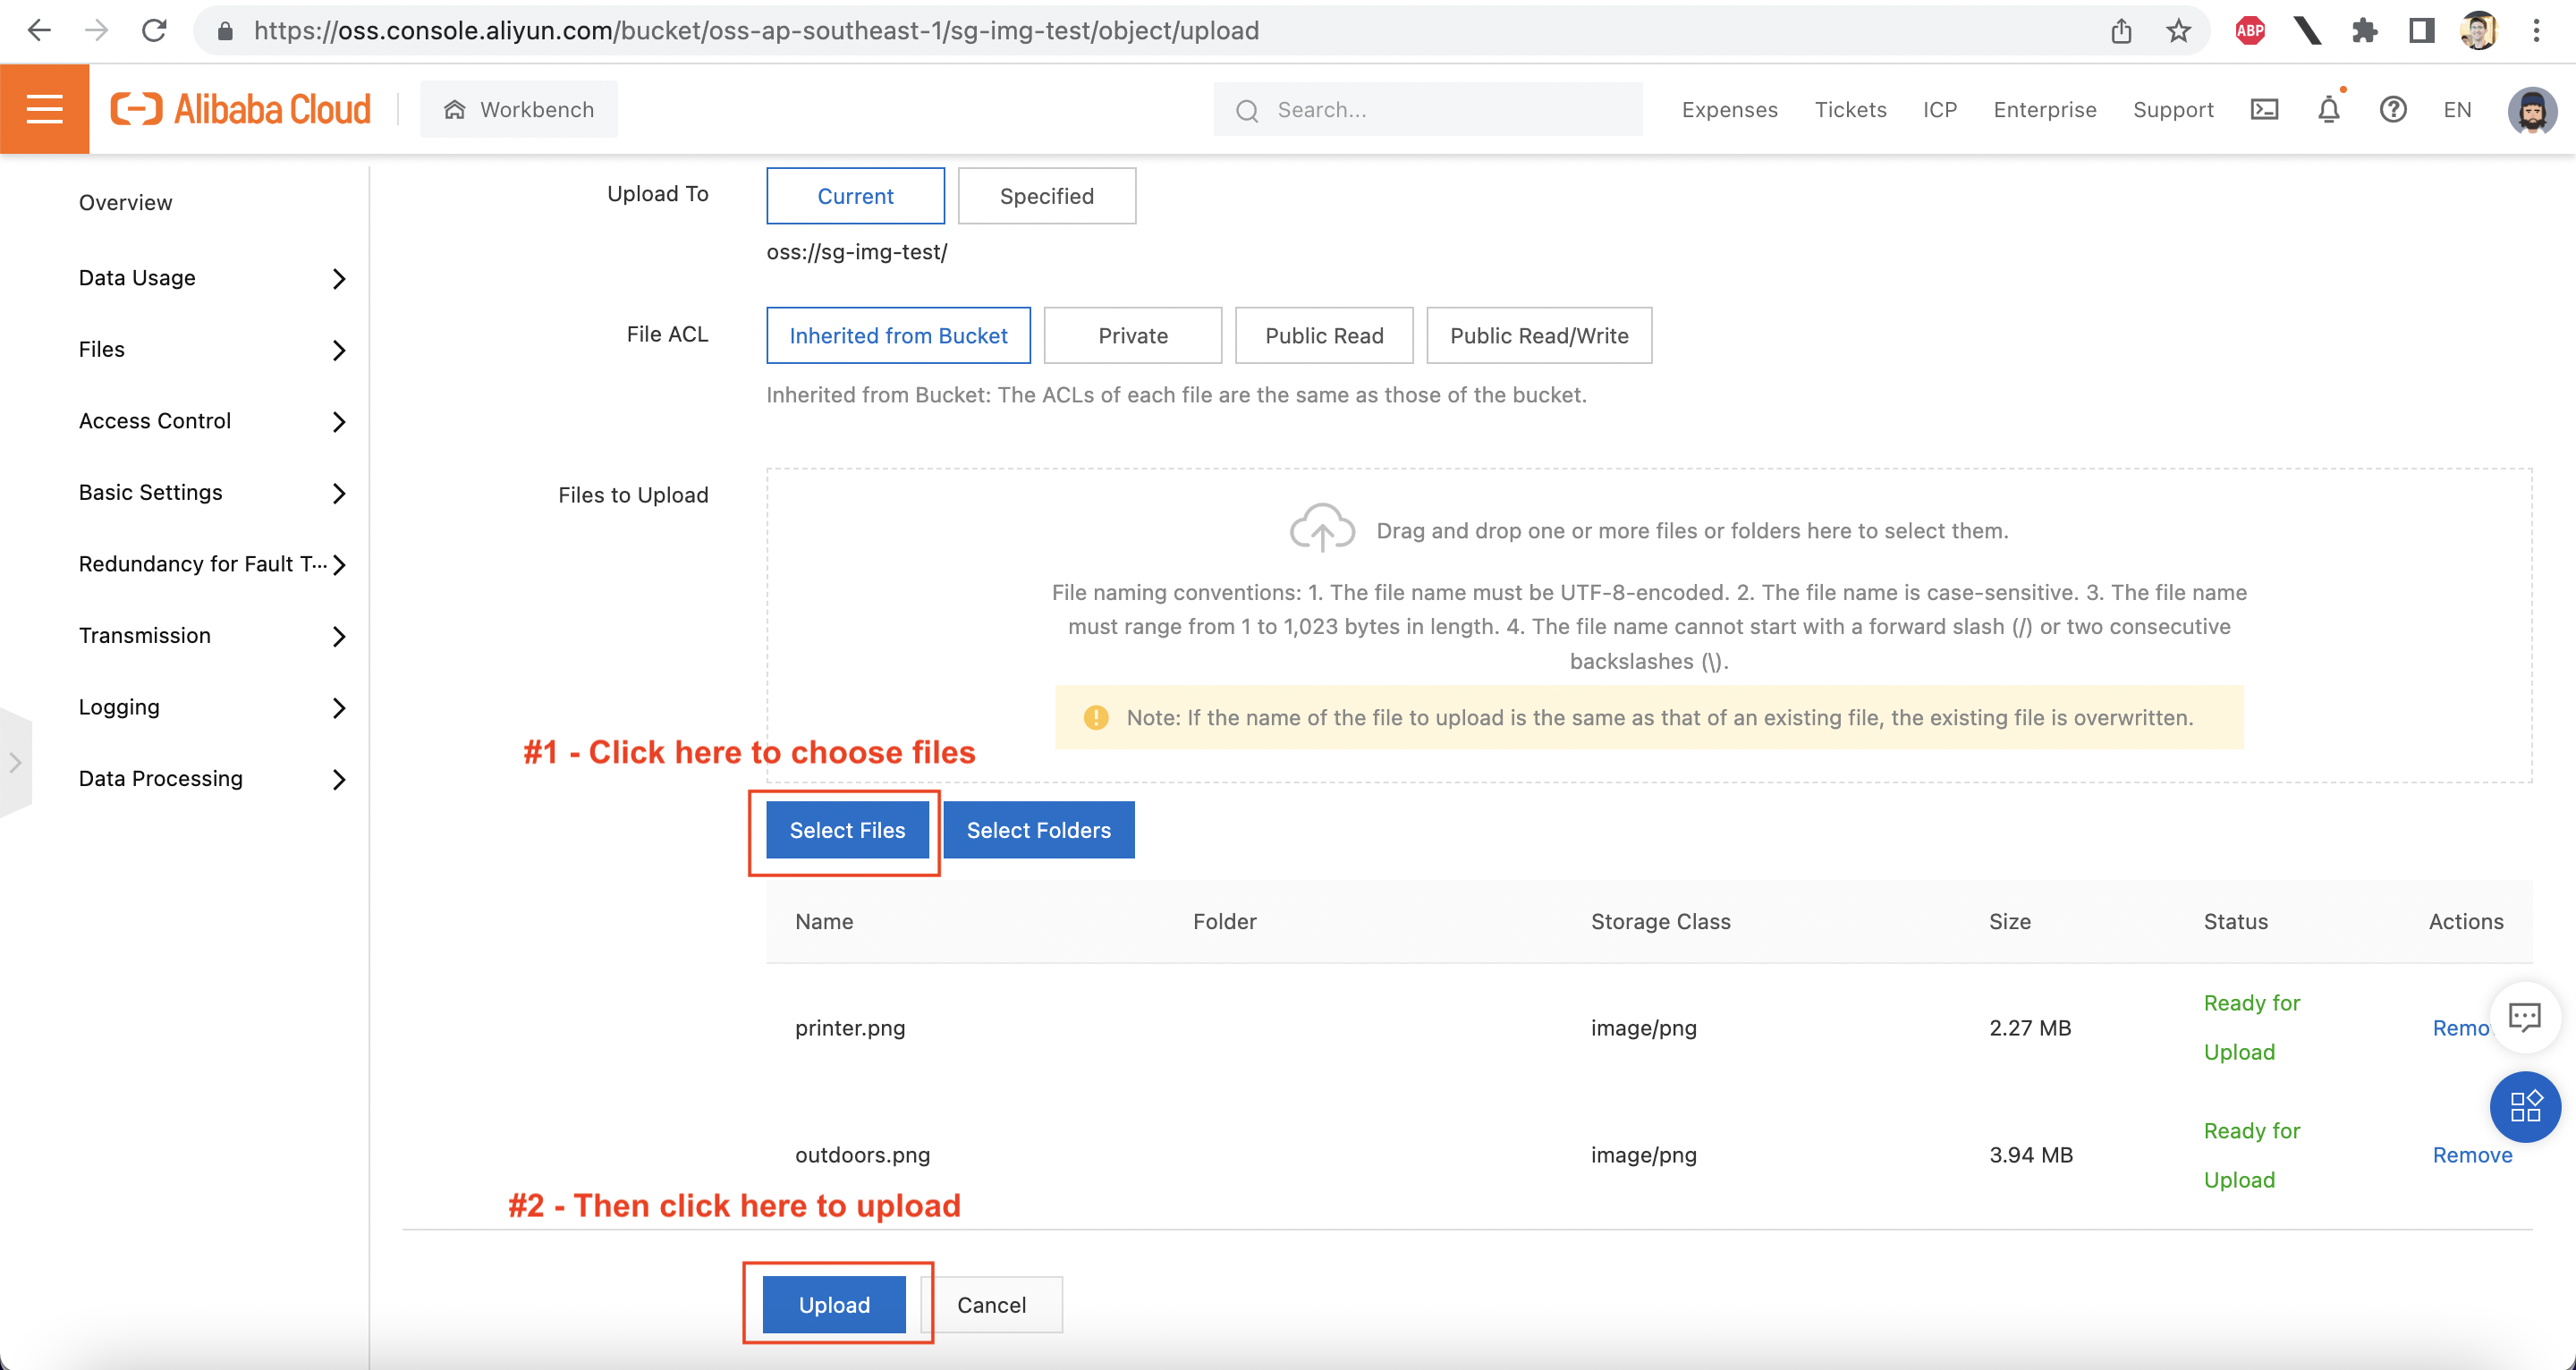
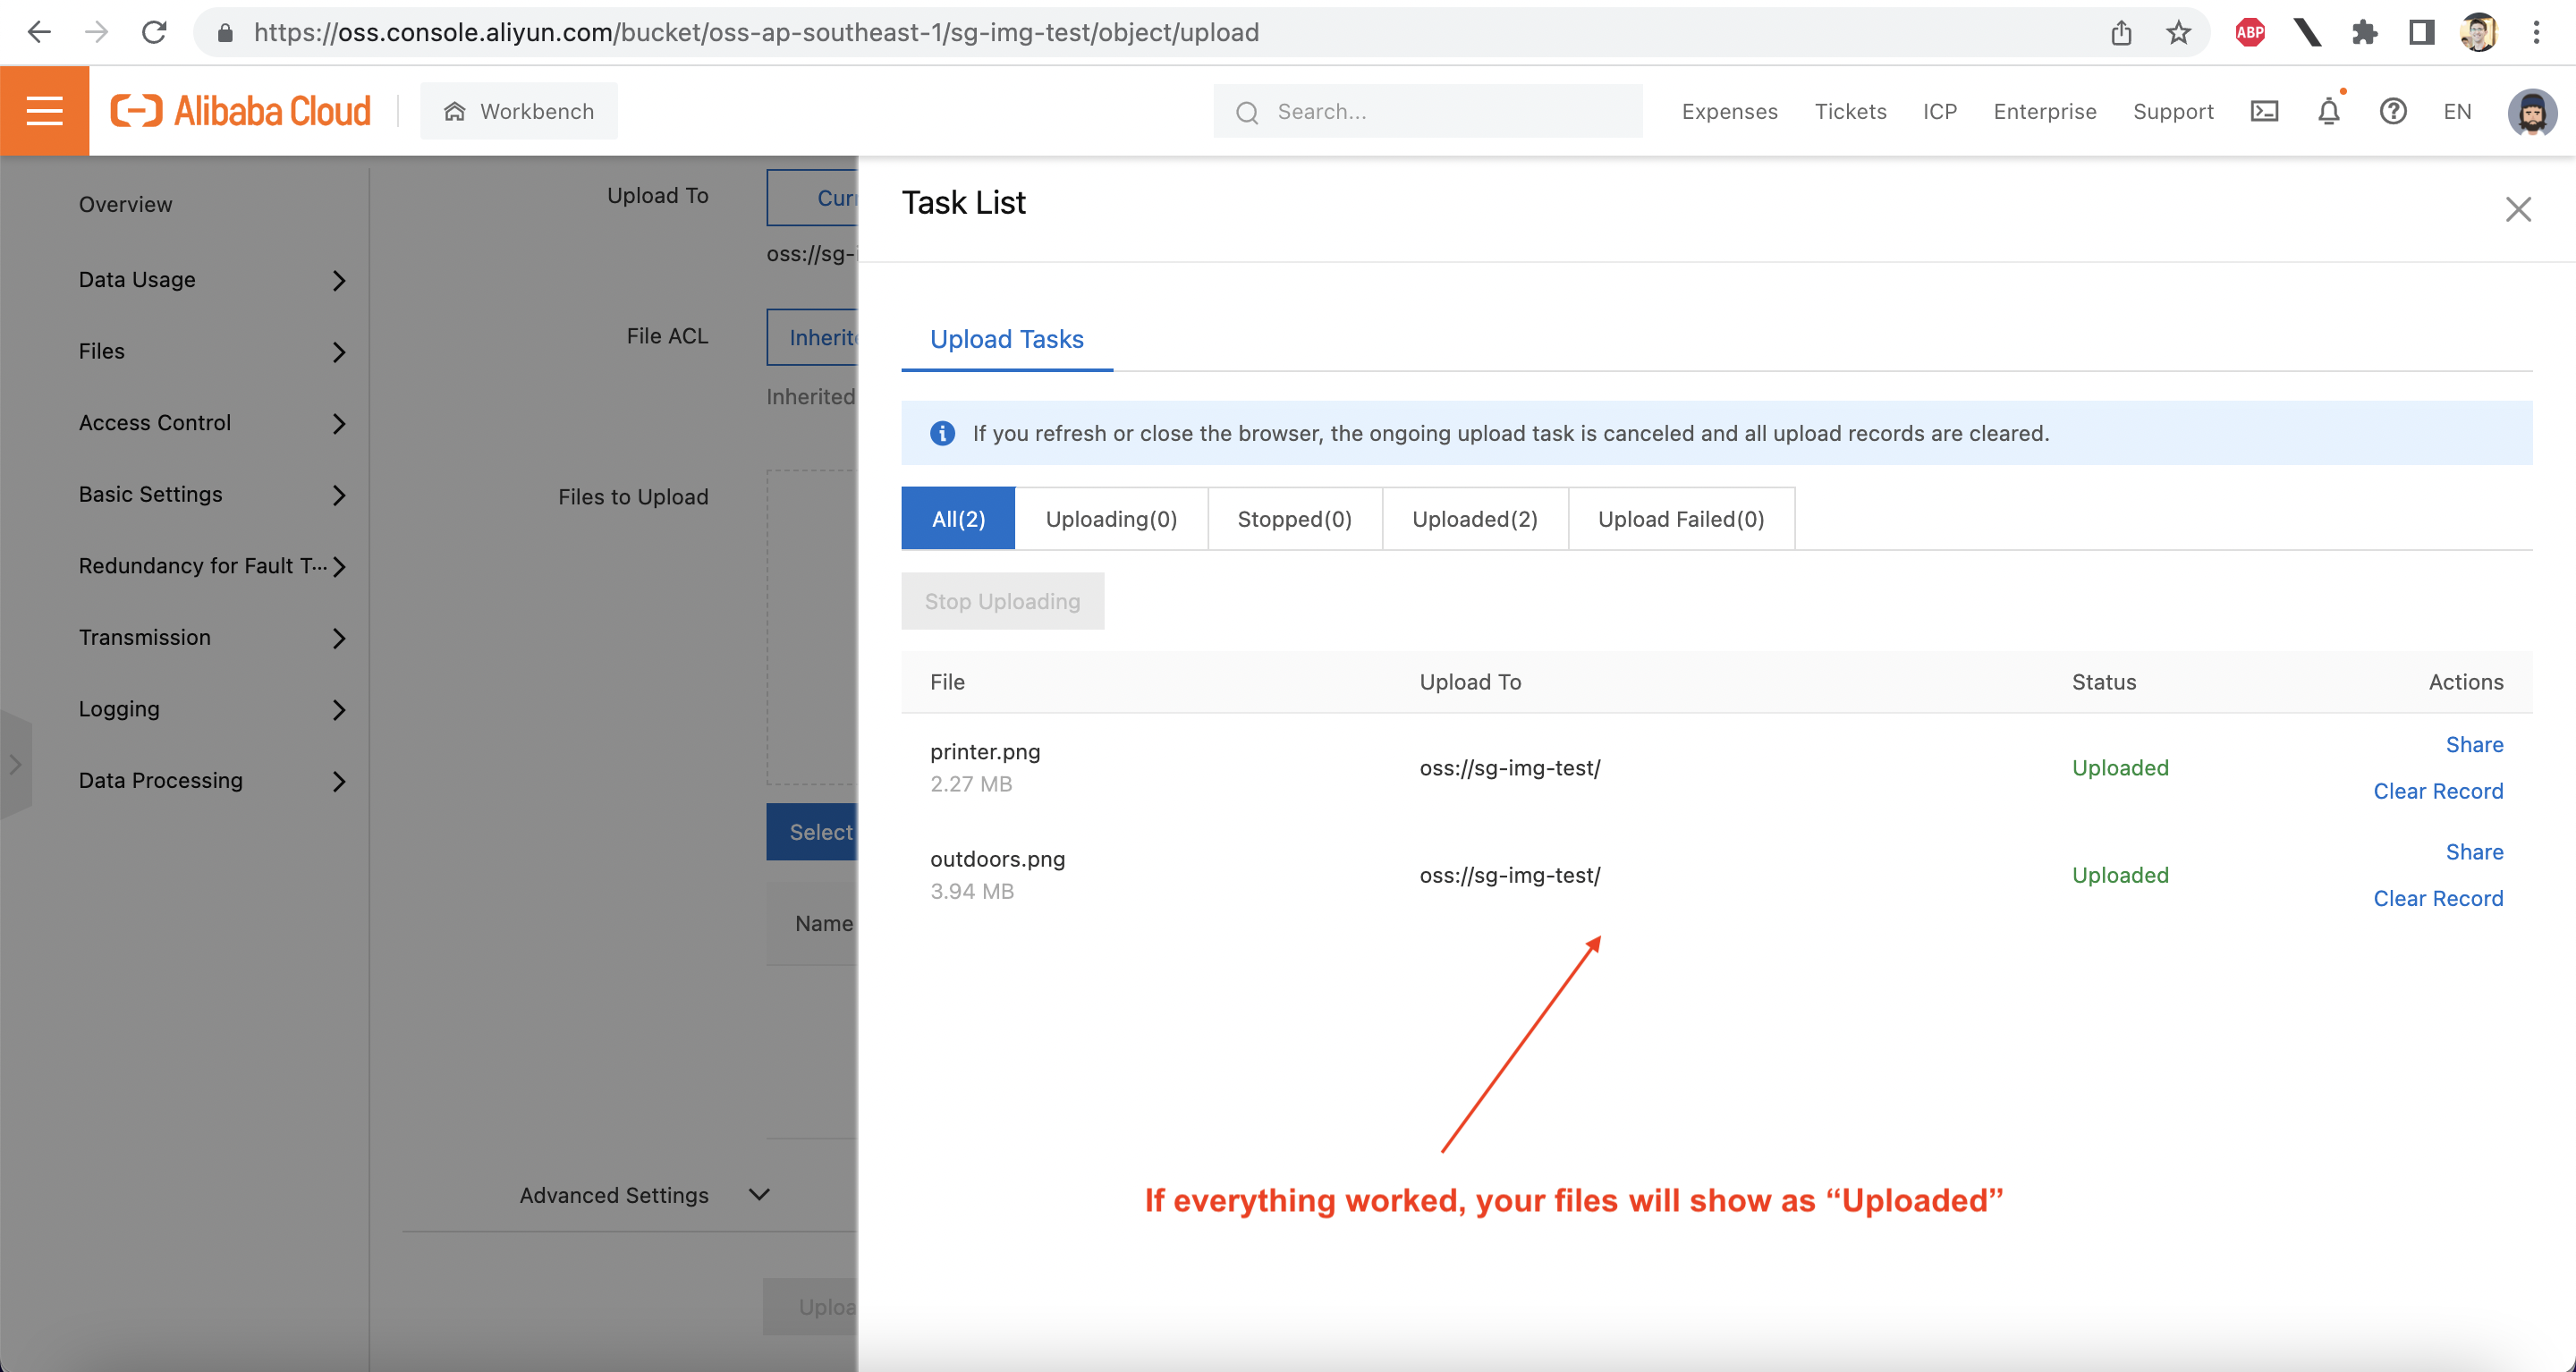
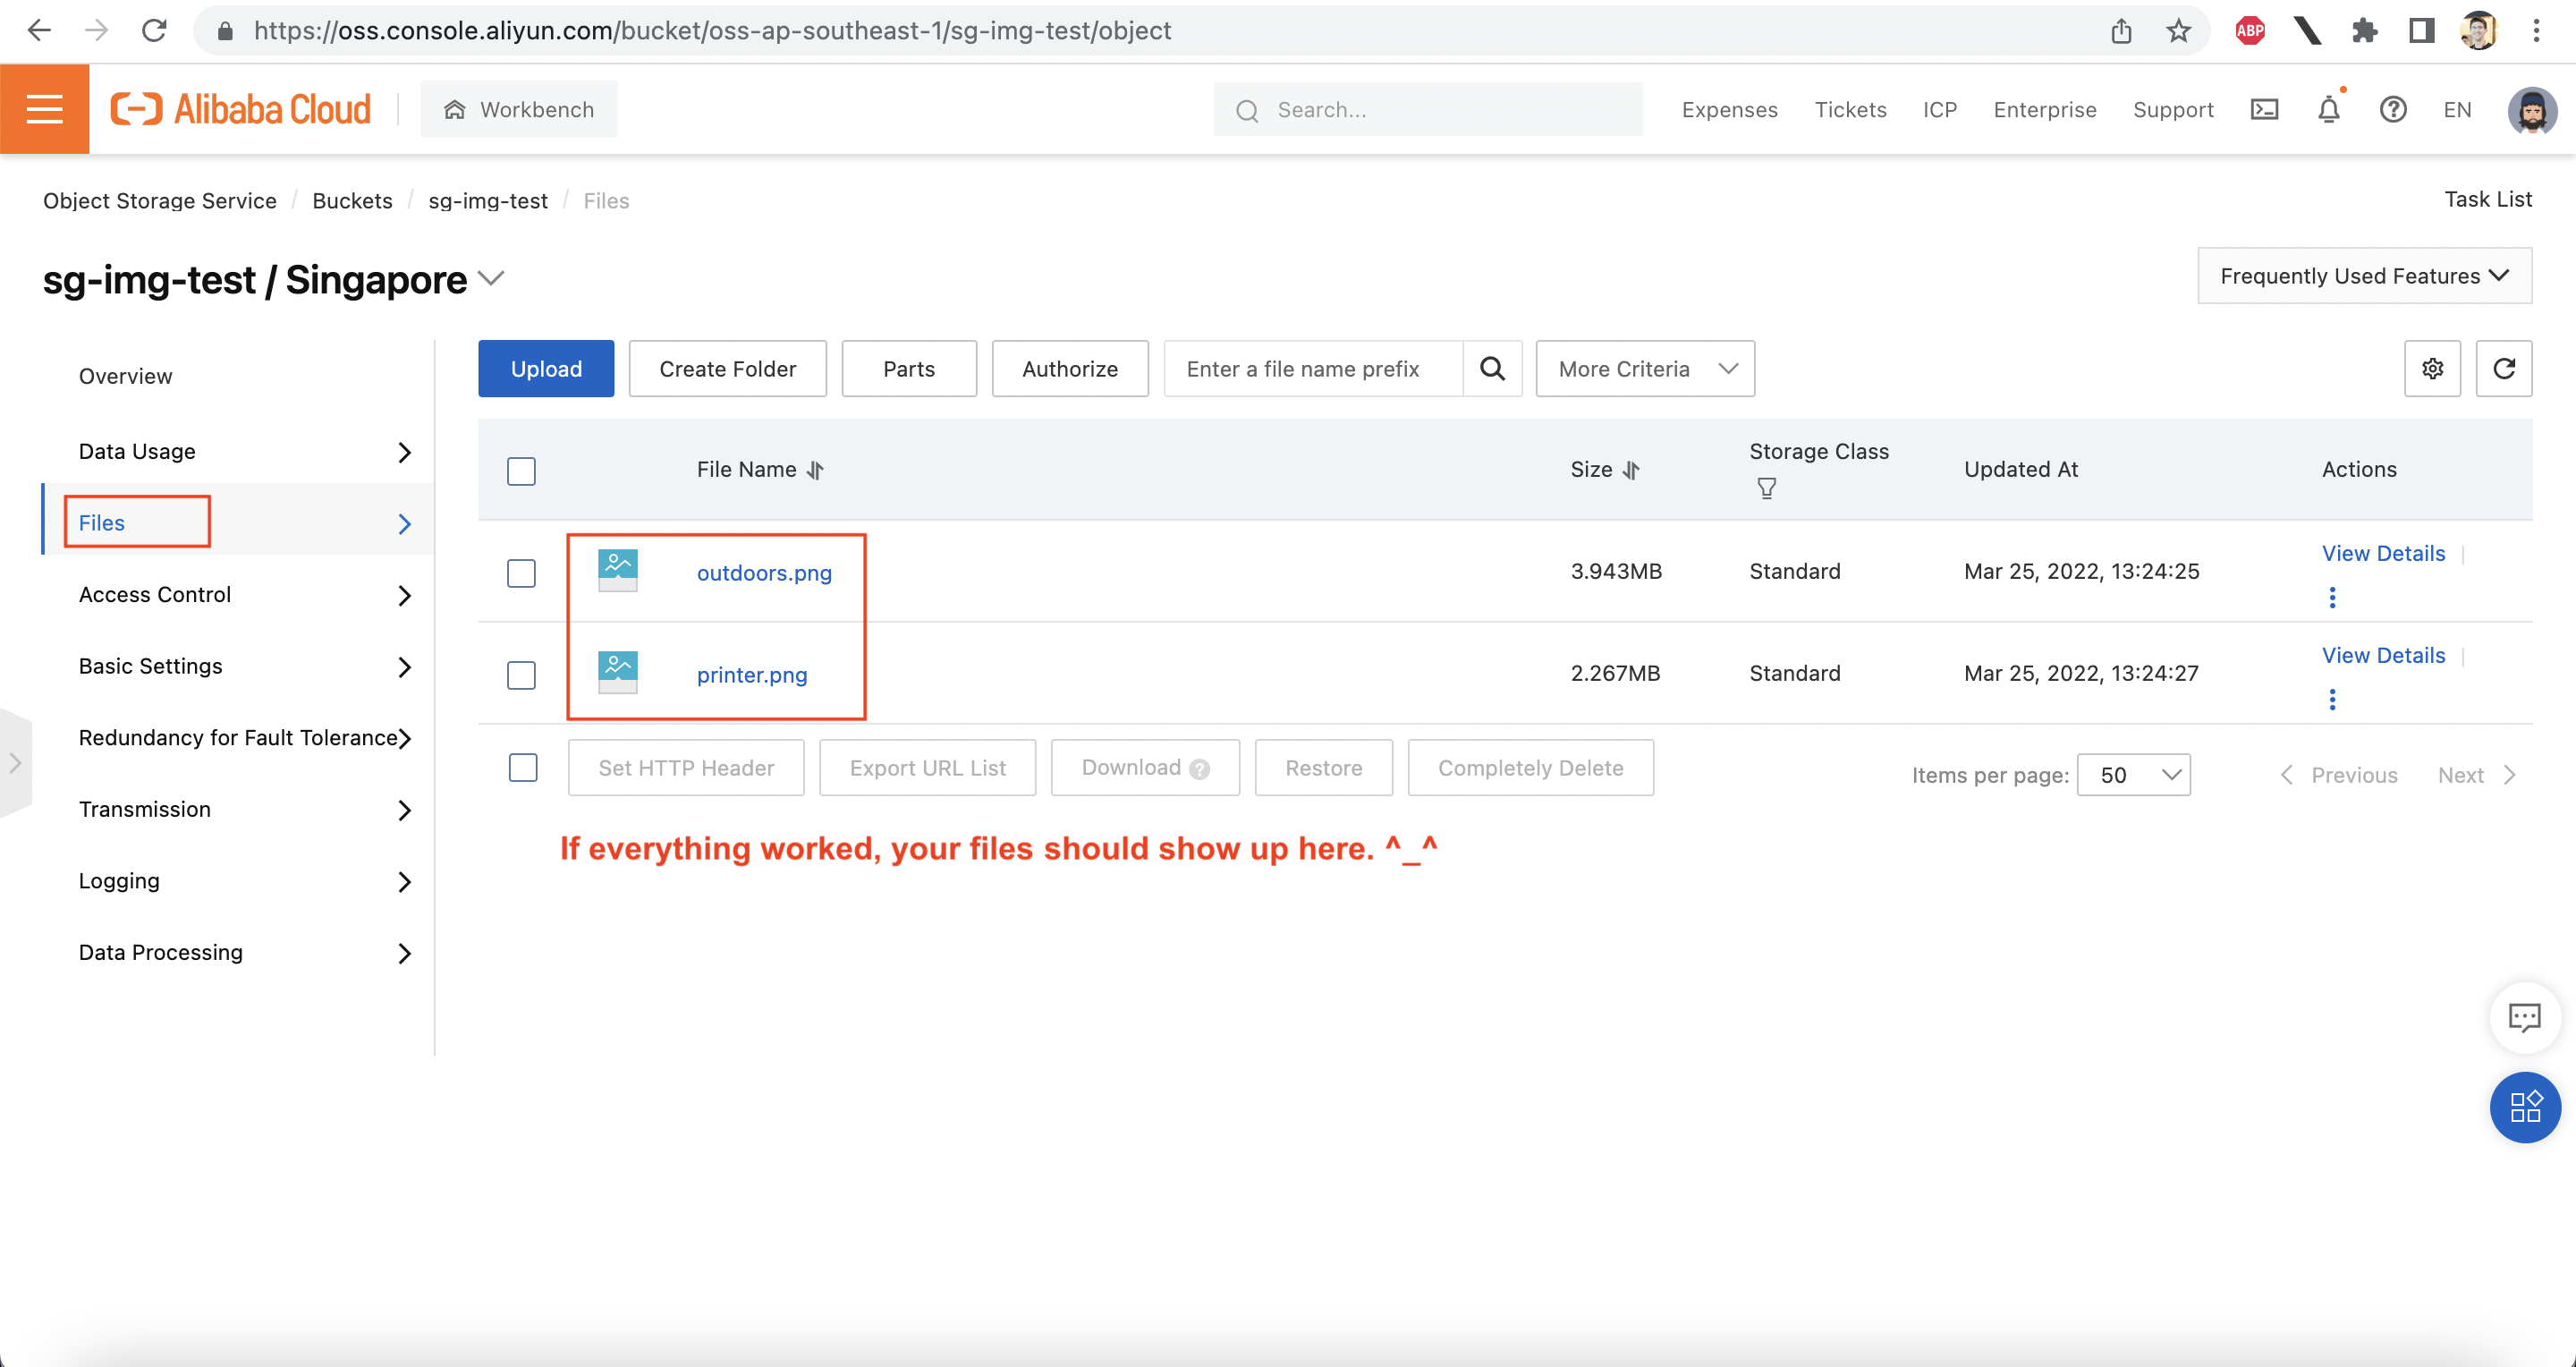
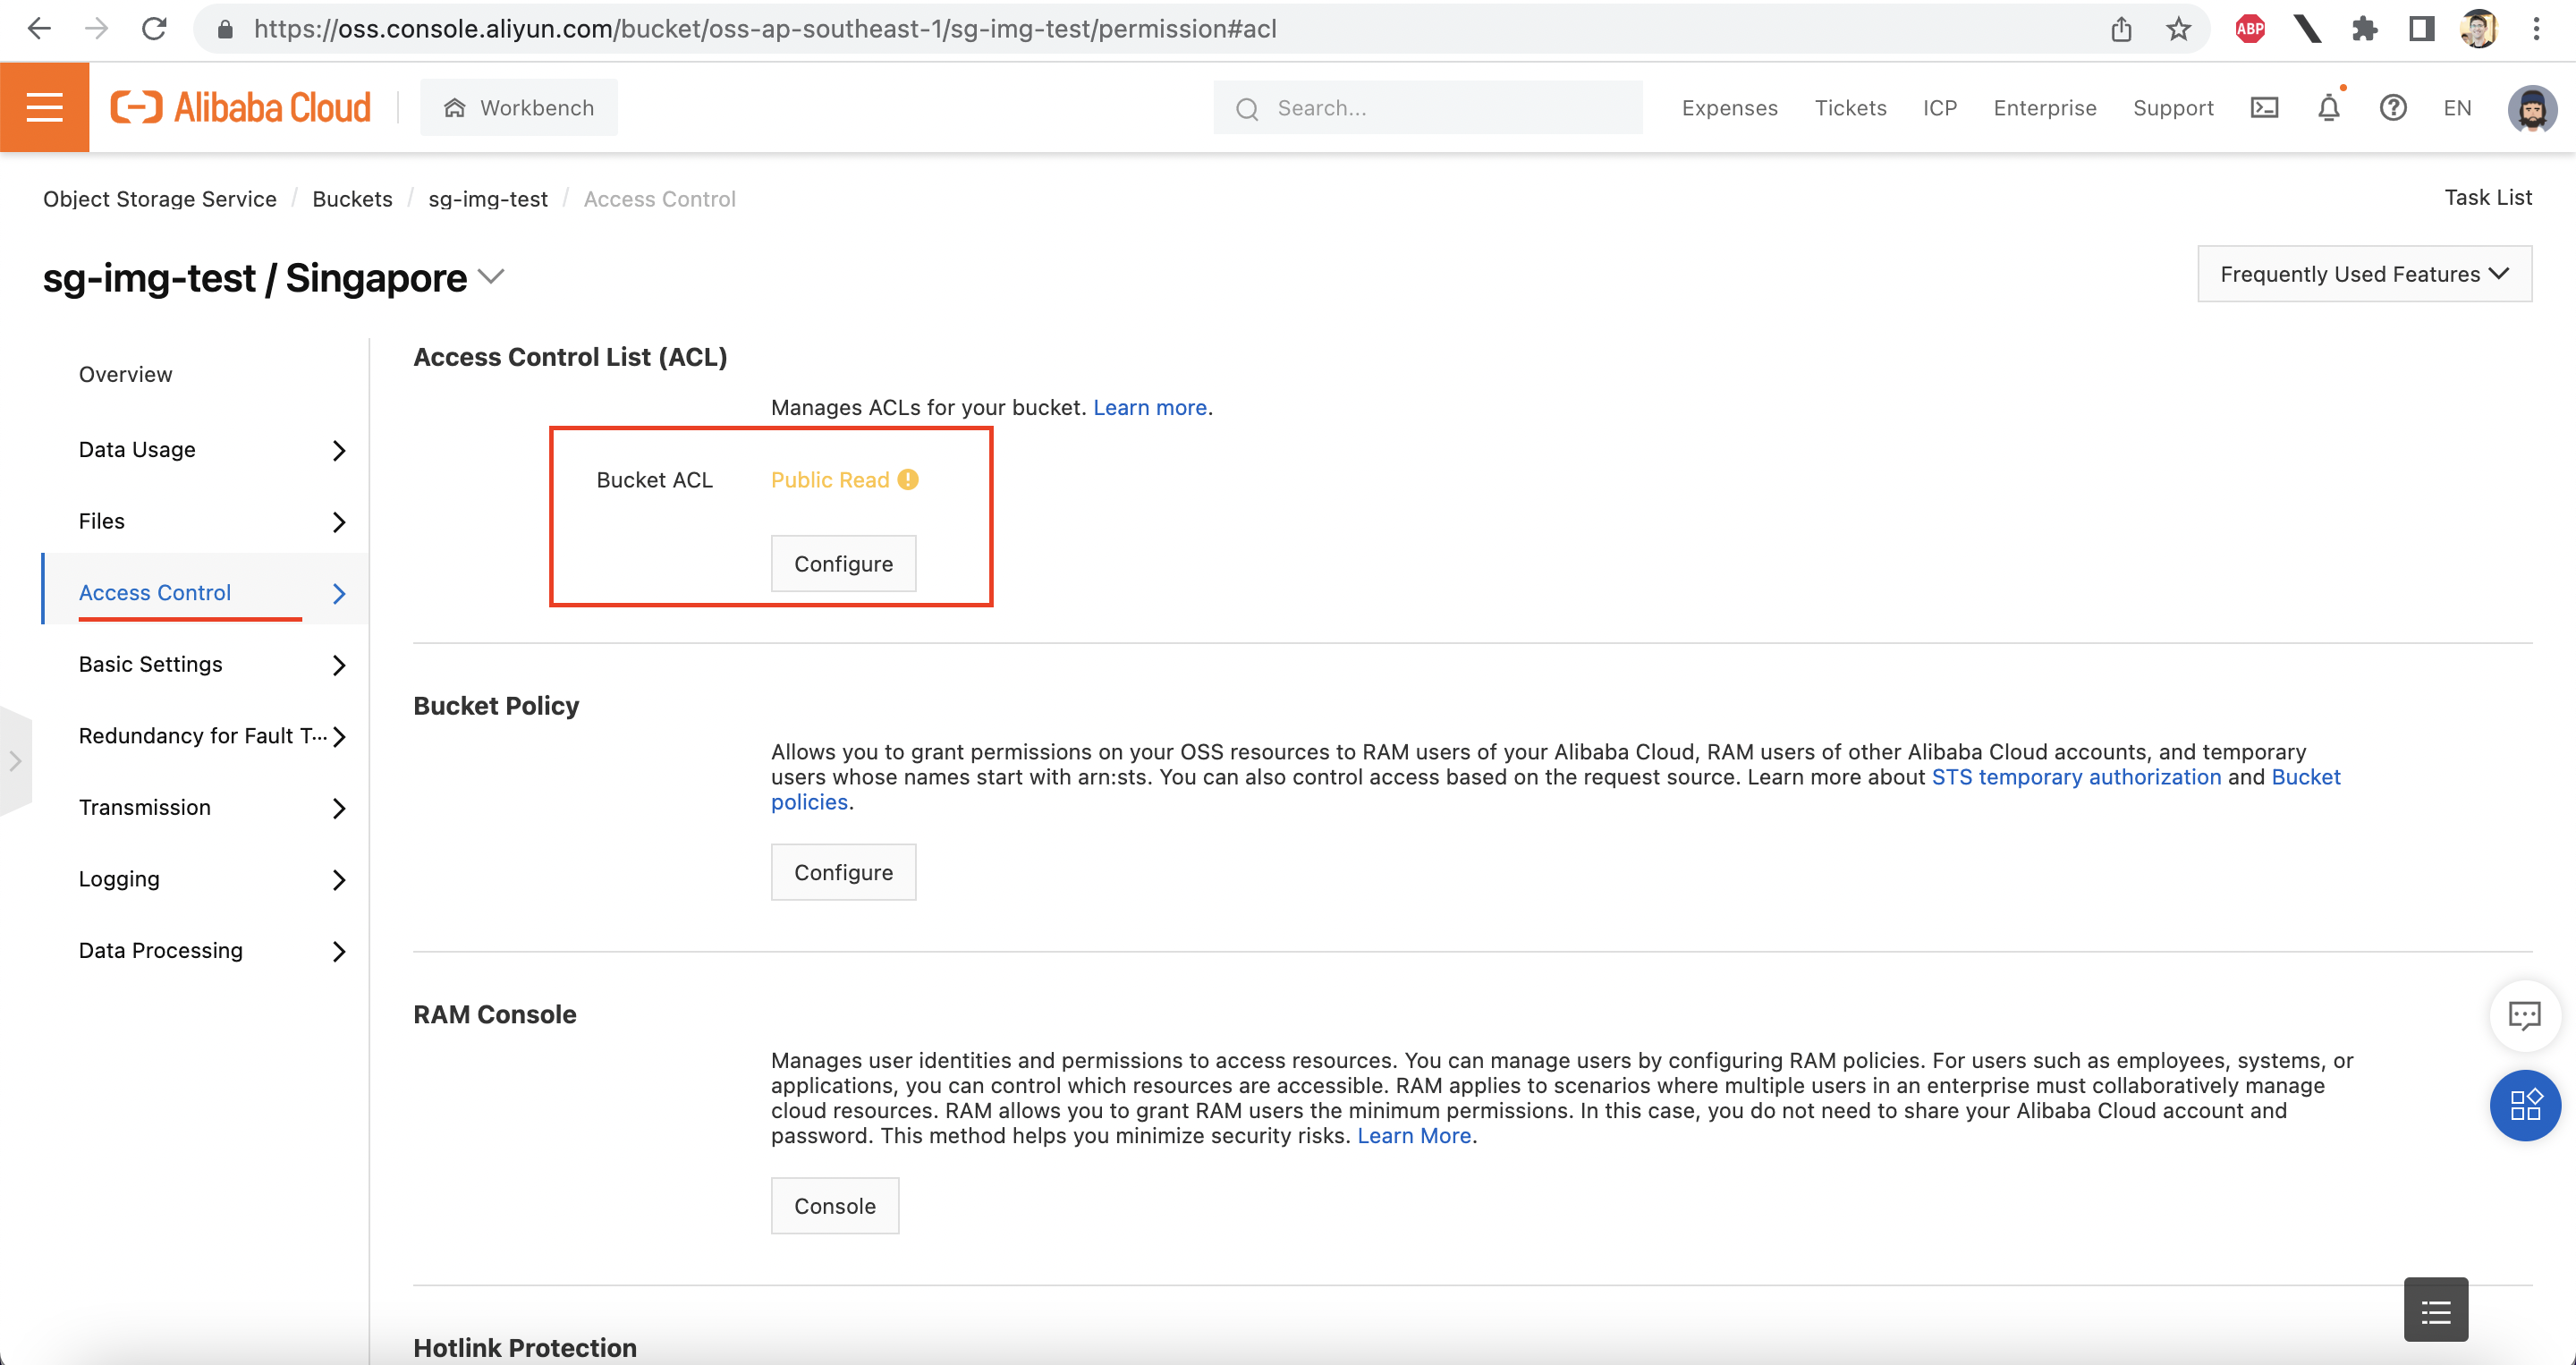
Note: You should make sure your bucket's ACL policy is set to "Public Read" so we can access the images from the Internet without a signing key. You can do this from "Access Control":
OSS image processing is done by adding URL parameters to the end of the OSS URL which points to your image.
For example, let's assume you start with this image (a photo of a dog, as used in the OSS documentation):
https://image-demo.oss-cn-hangzhou.aliyuncs.com/example.jpgTo use OSS's built-in image processing features, we would need to add the URL parameter ?x-oss-process= to the end of the URL. We then specify one or more operations to perform, such as resize. Here, we resize the image's width to 500 pixels:
https://image-demo.oss-cn-hangzhou.aliyuncs.com/example.jpg?x-oss-process=image/resize,w_500,limit_0Let's break down the URL parameters at the end of the URL (?x-oss-process=image/resize,w_500,limit_0):
?x-oss-process= tells OSS that we want to perform image processingimage/ indicates that we will be using one of OSS's built-in image processing primitives (in this case, resize). It is also possible to combine multiple image processing steps into a "style". We'll talk about that later.resize is the name of the operation we want to perform (there are many others, such as blur, watermark, and crop)resize, are parameters for the resize function. All these parameters follow the format <parameter name>_<value>. So w_500 means "resize the image to a width of 500 pixels". The parameter limit_0 tells OSS that we should scale the image up, if its new width or height is larger than the original image file.There is also an m parameter that sets the "mode". This tells OSS's image processing engine what to do in cases where the new image has a different width-to-height ratio than the original. Should the image be cropped? Padded? Scaled and then cropped? Let's play with this a little bit, using one of our sample images.
The image of the bridge (see above) which I uploaded to OSS has an original size of 2014x1120. It's a PNG file.
Let's try forcing the width down to 200 pixels. To do this, I append ?x-oss-process=image/resize,w_200,limit_0 to the object URL, which gives me:
https://sg-img-test.oss-ap-southeast-1.aliyuncs.com/outdoors.png?x-oss-process=image/resize,w_200,limit_0And a corresponding "tiny" image:
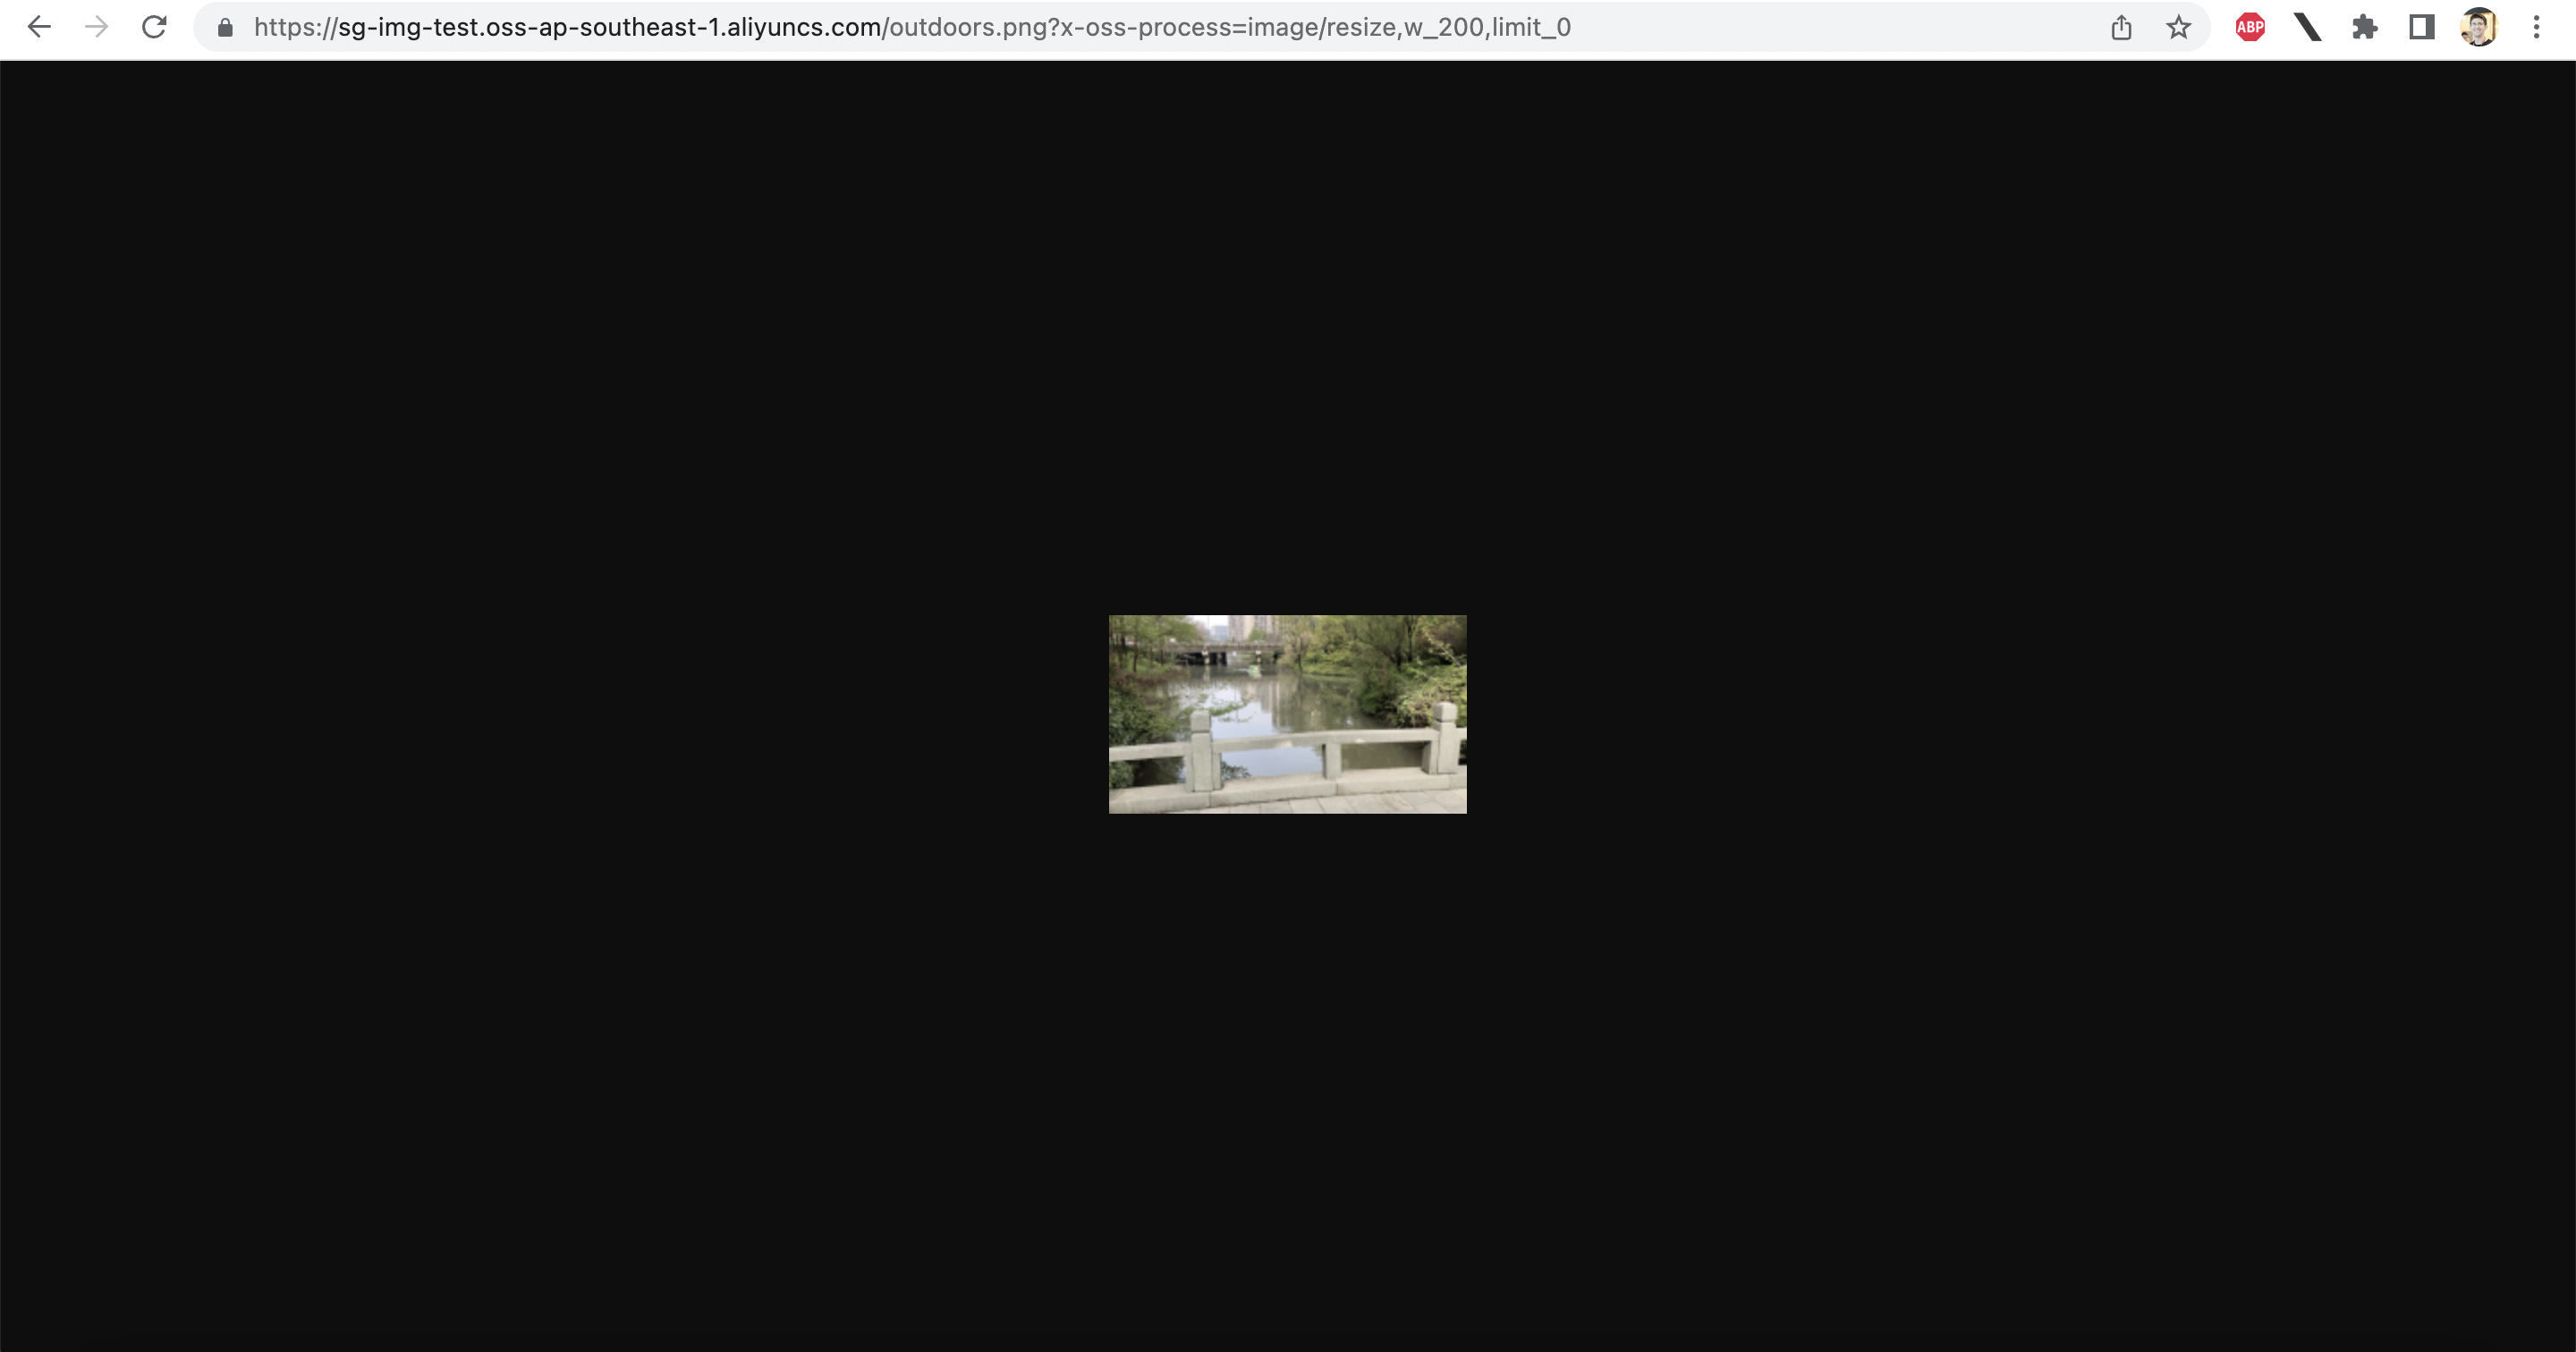
I can add an h_ parameter to scale the height of my image as well. Let's see what happens when I set both width and height to "500":
https://sg-img-test.oss-ap-southeast-1.aliyuncs.com/outdoors.png?x-oss-process=image/resize,w_500,h_500,limit_0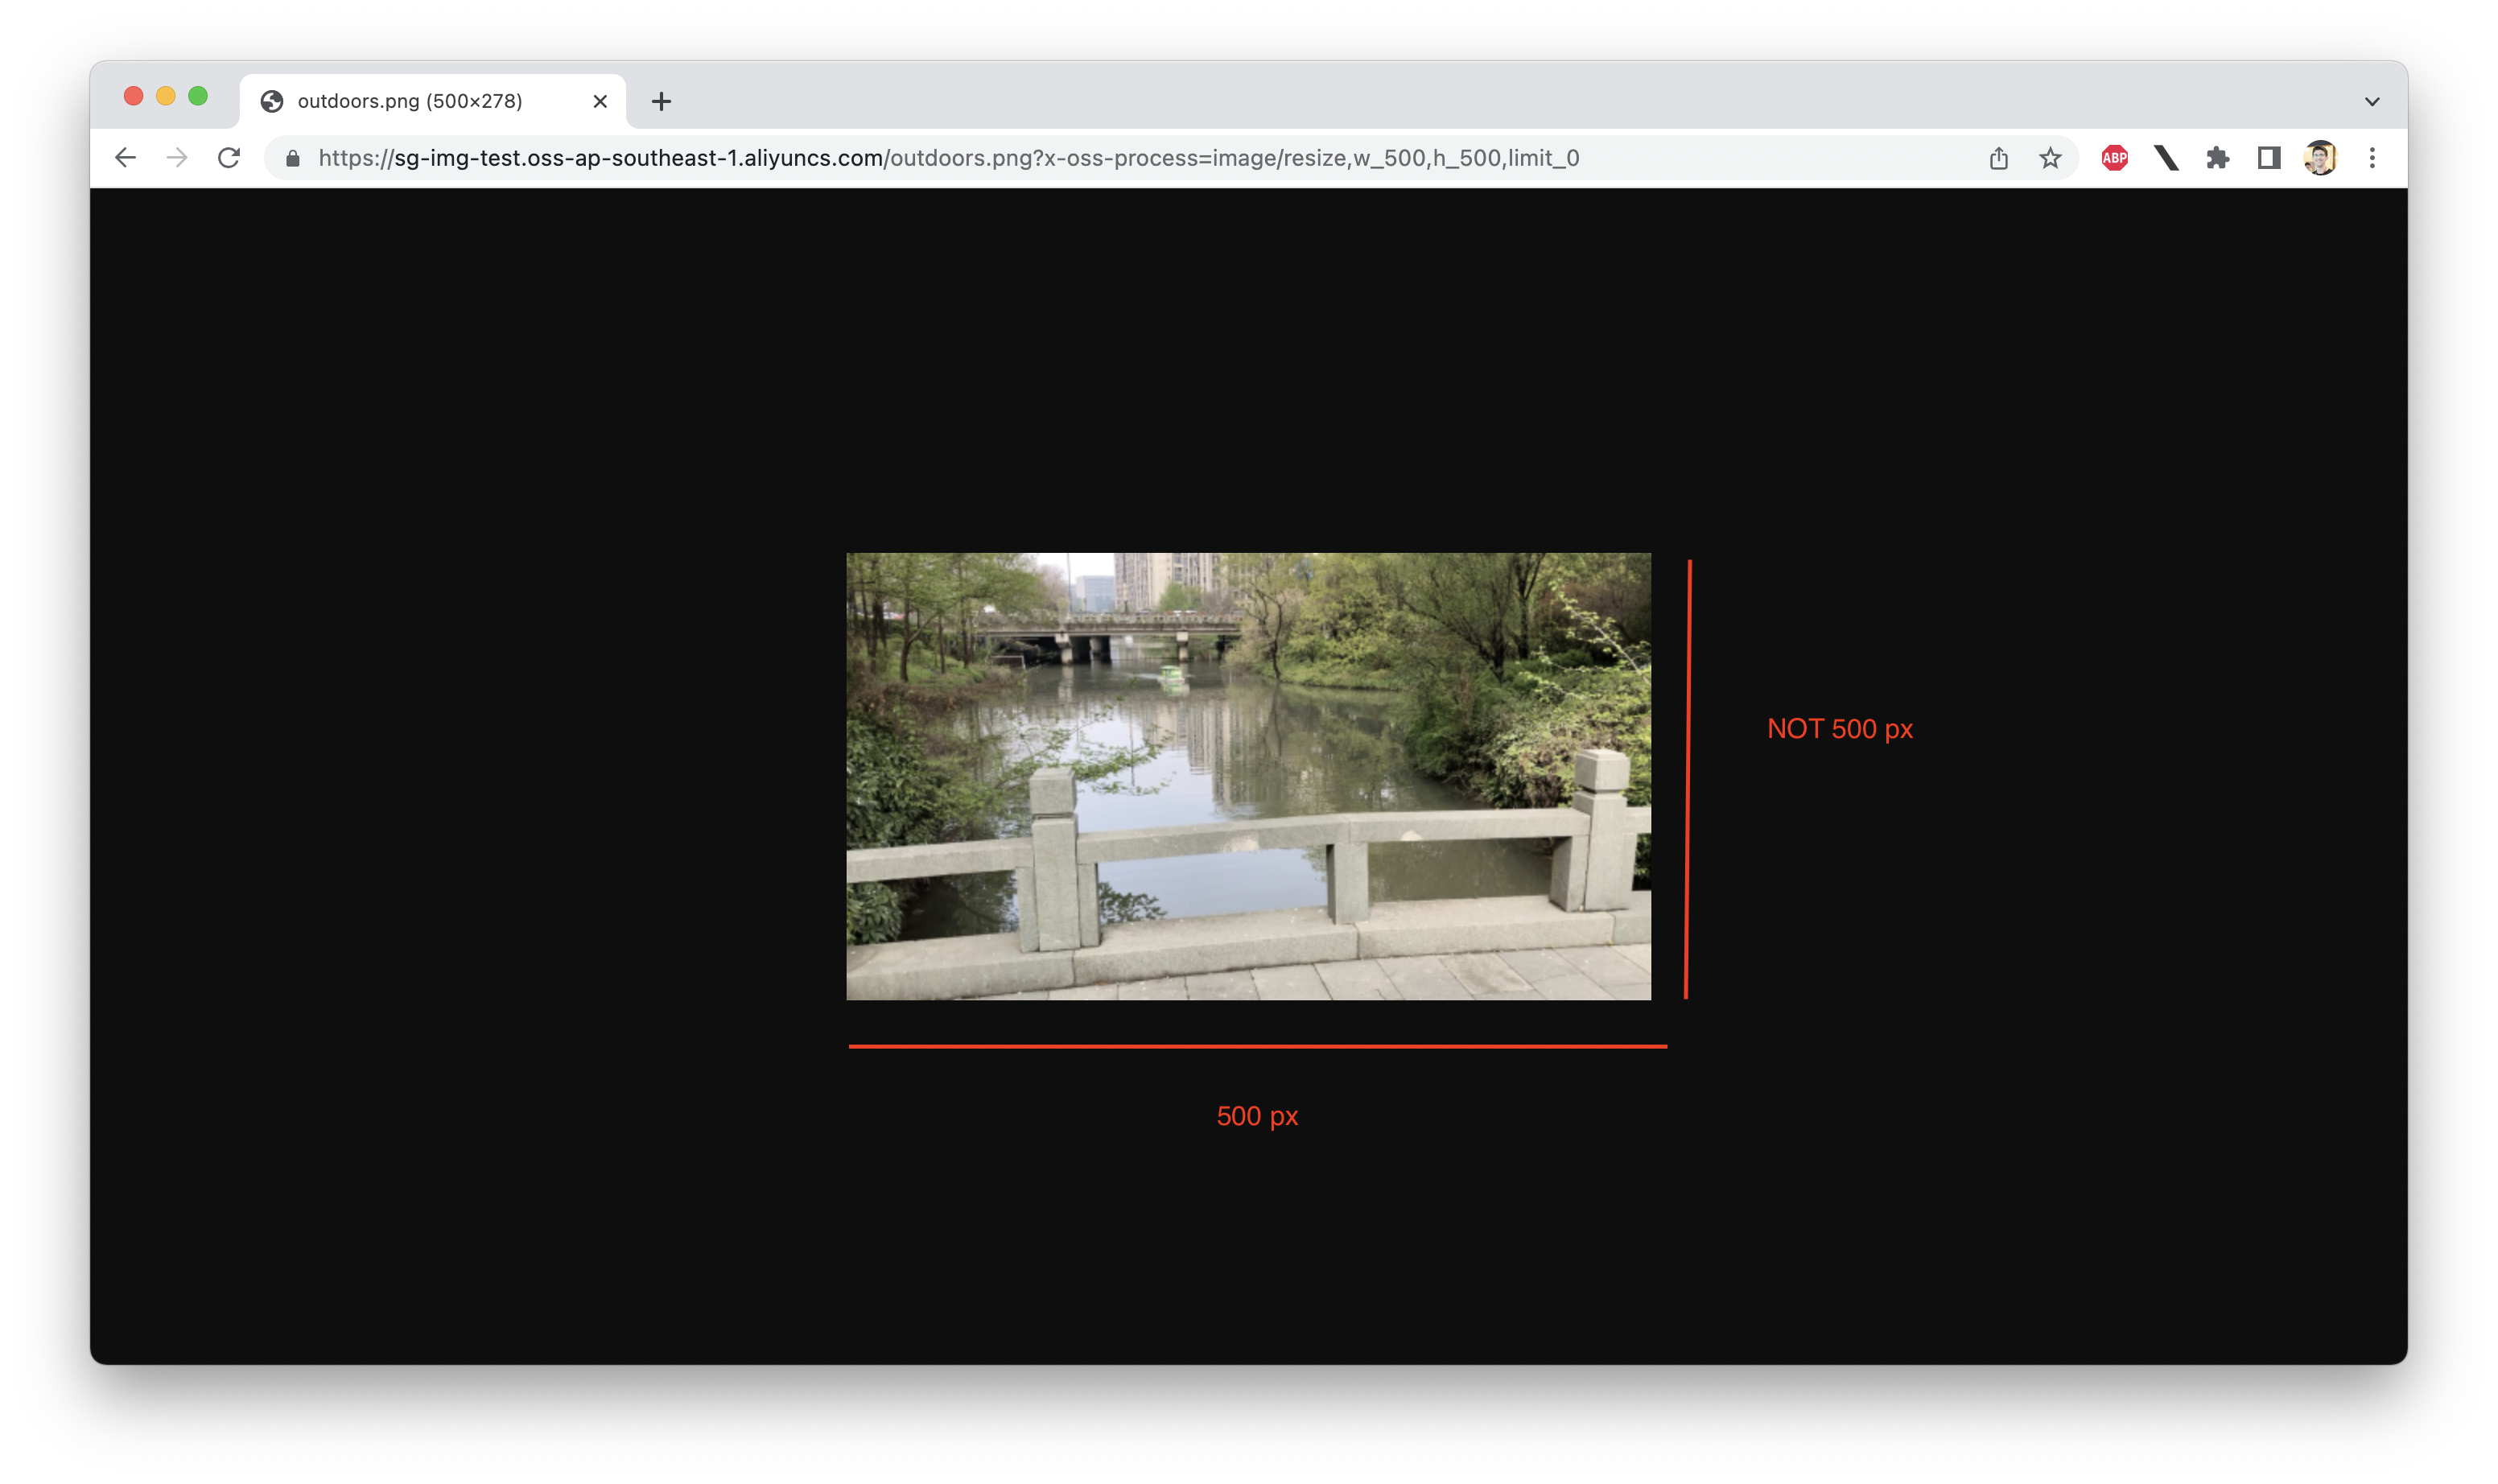
If you look closely, you'll realize that OSS seems to be ignoring the h_500 parameter.
Why is this? OSS has several different "modes" which can be used to resize images. The default mode is "lfit" (all the modes are documented here). They are a bit tricky to explain, but I'll do my best. The default mode is "lfit".
Very roughly explained, the modes are:
w_ or h_) produces the smallest final imagehttps://sg-img-test.oss-ap-southeast-1.aliyuncs.com/outdoors.png?x-oss-process=image/resize,w_600,h_600,limit_0,m_lfit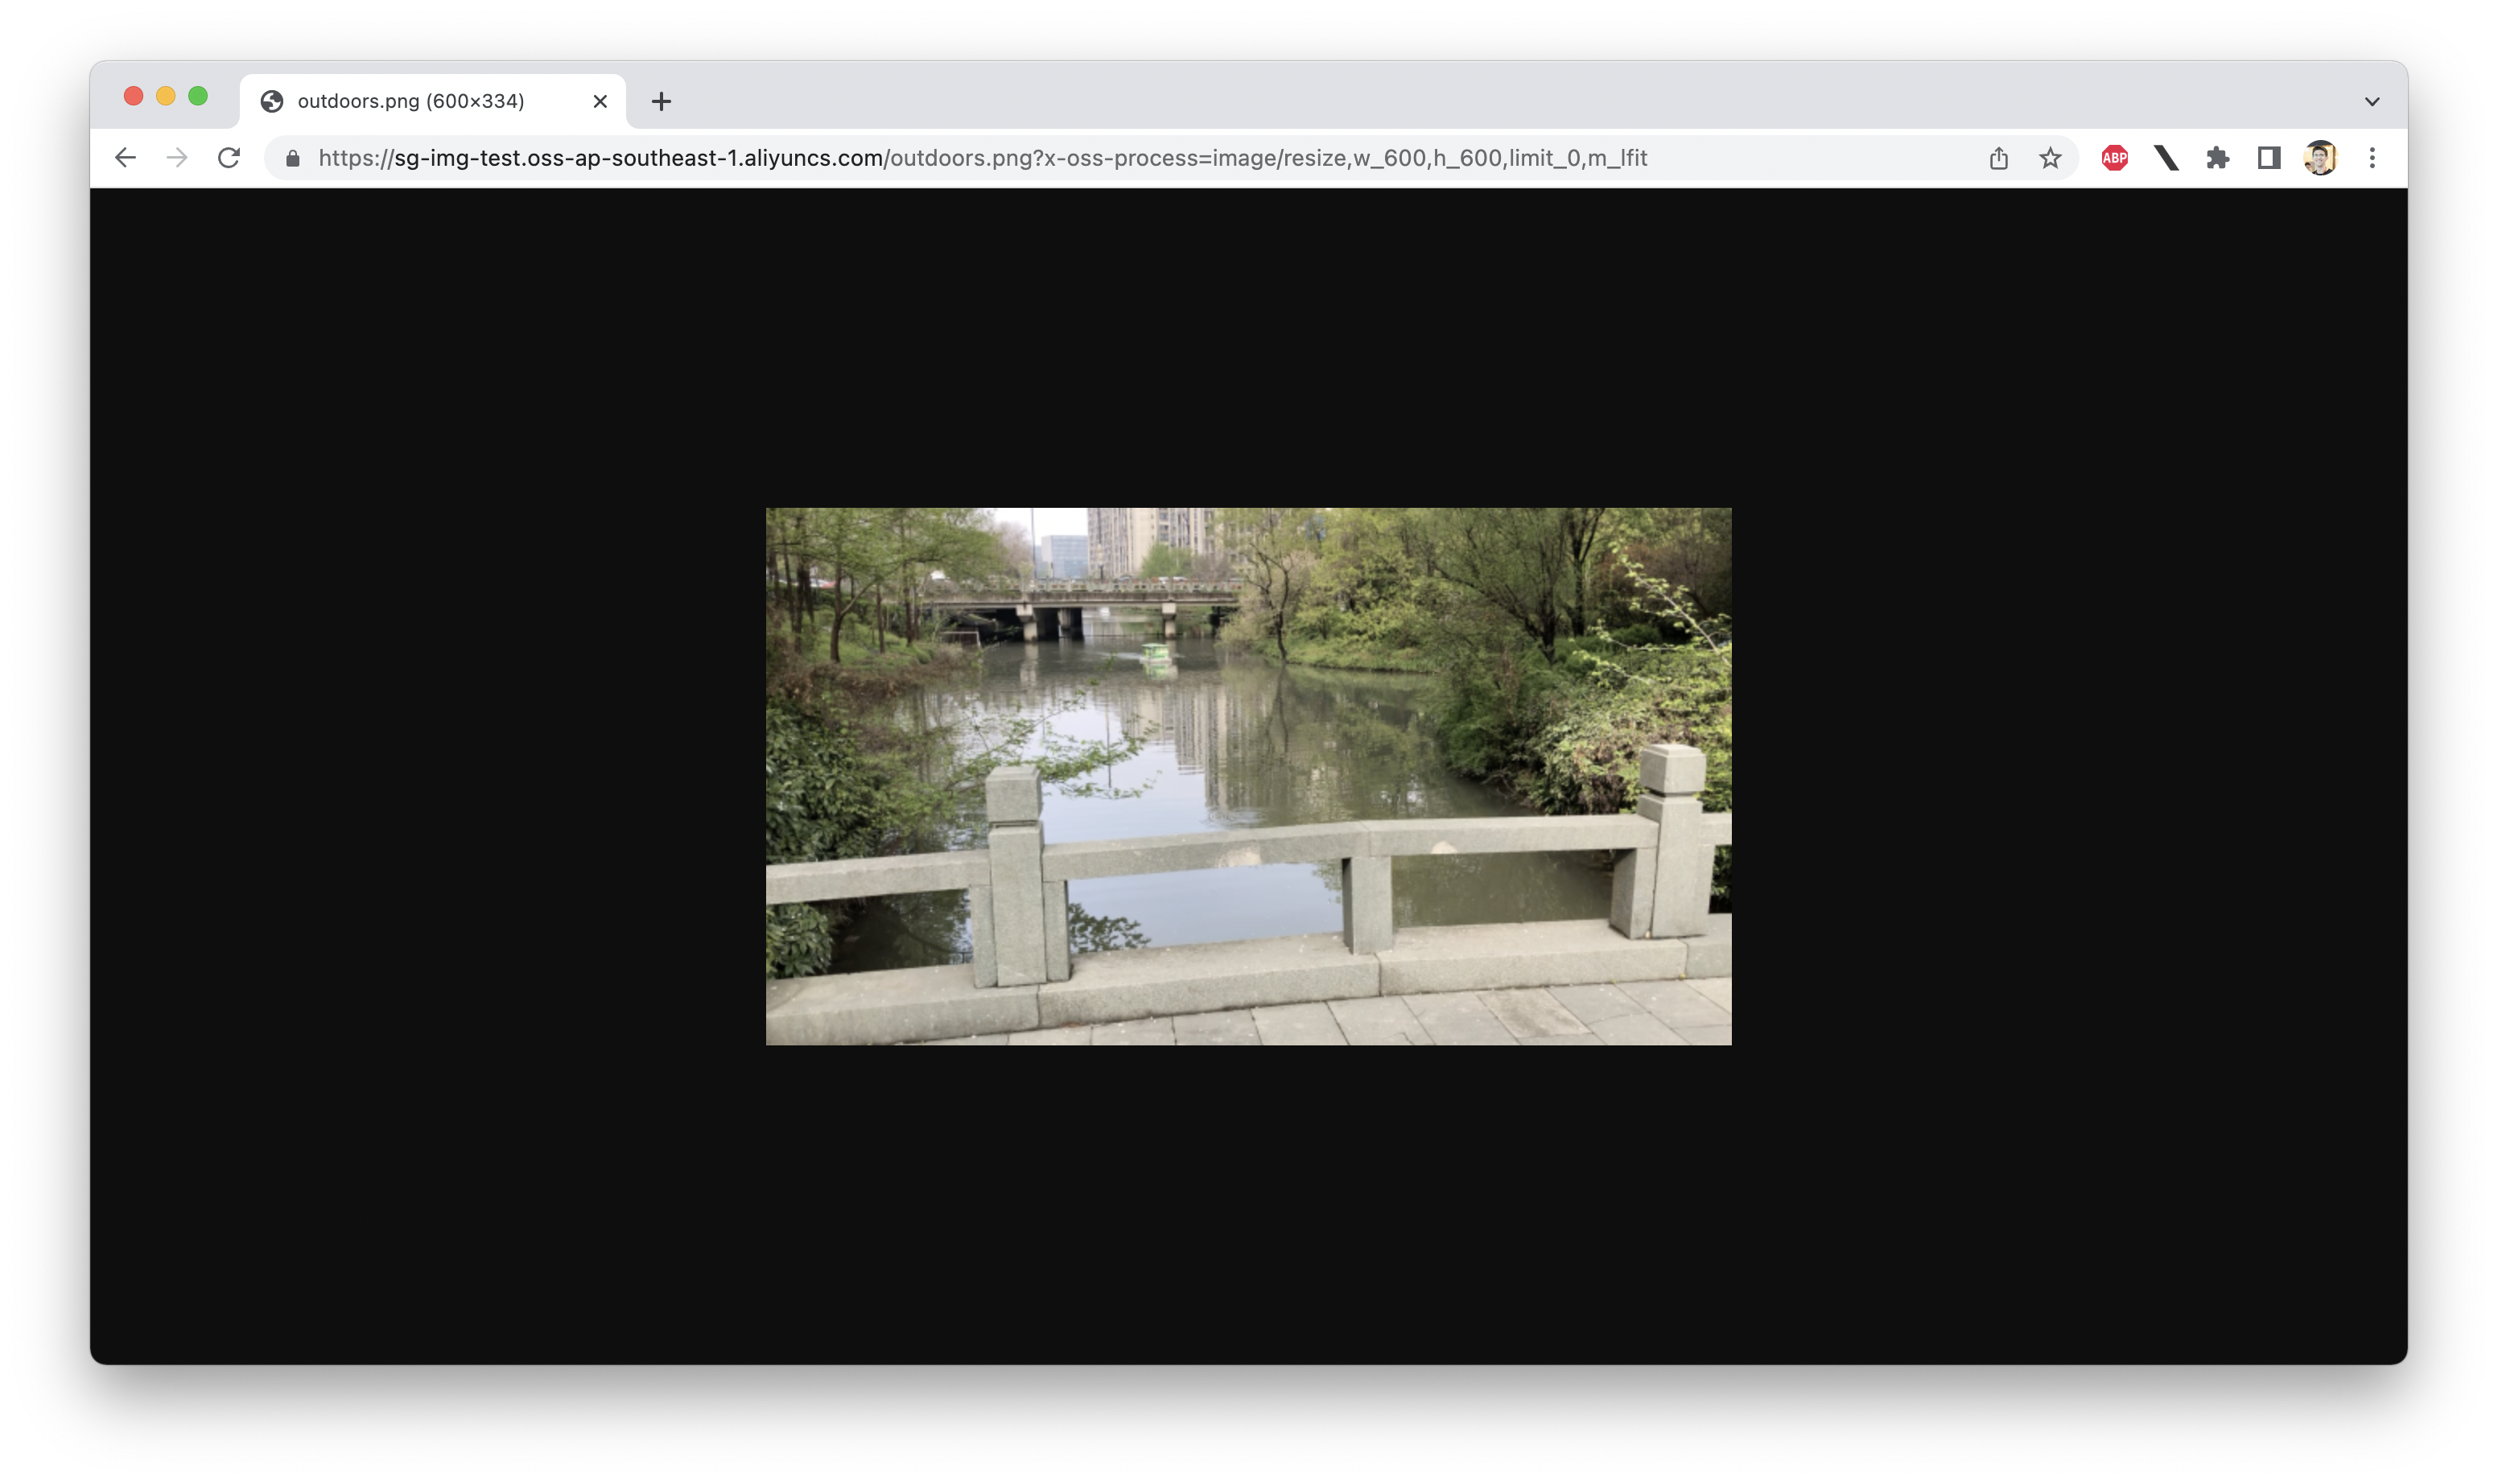
w_ or h_) results in the biggest final imagehttps://sg-img-test.oss-ap-southeast-1.aliyuncs.com/outdoors.png?x-oss-process=image/resize,w_600,h_600,limit_0,m_mfit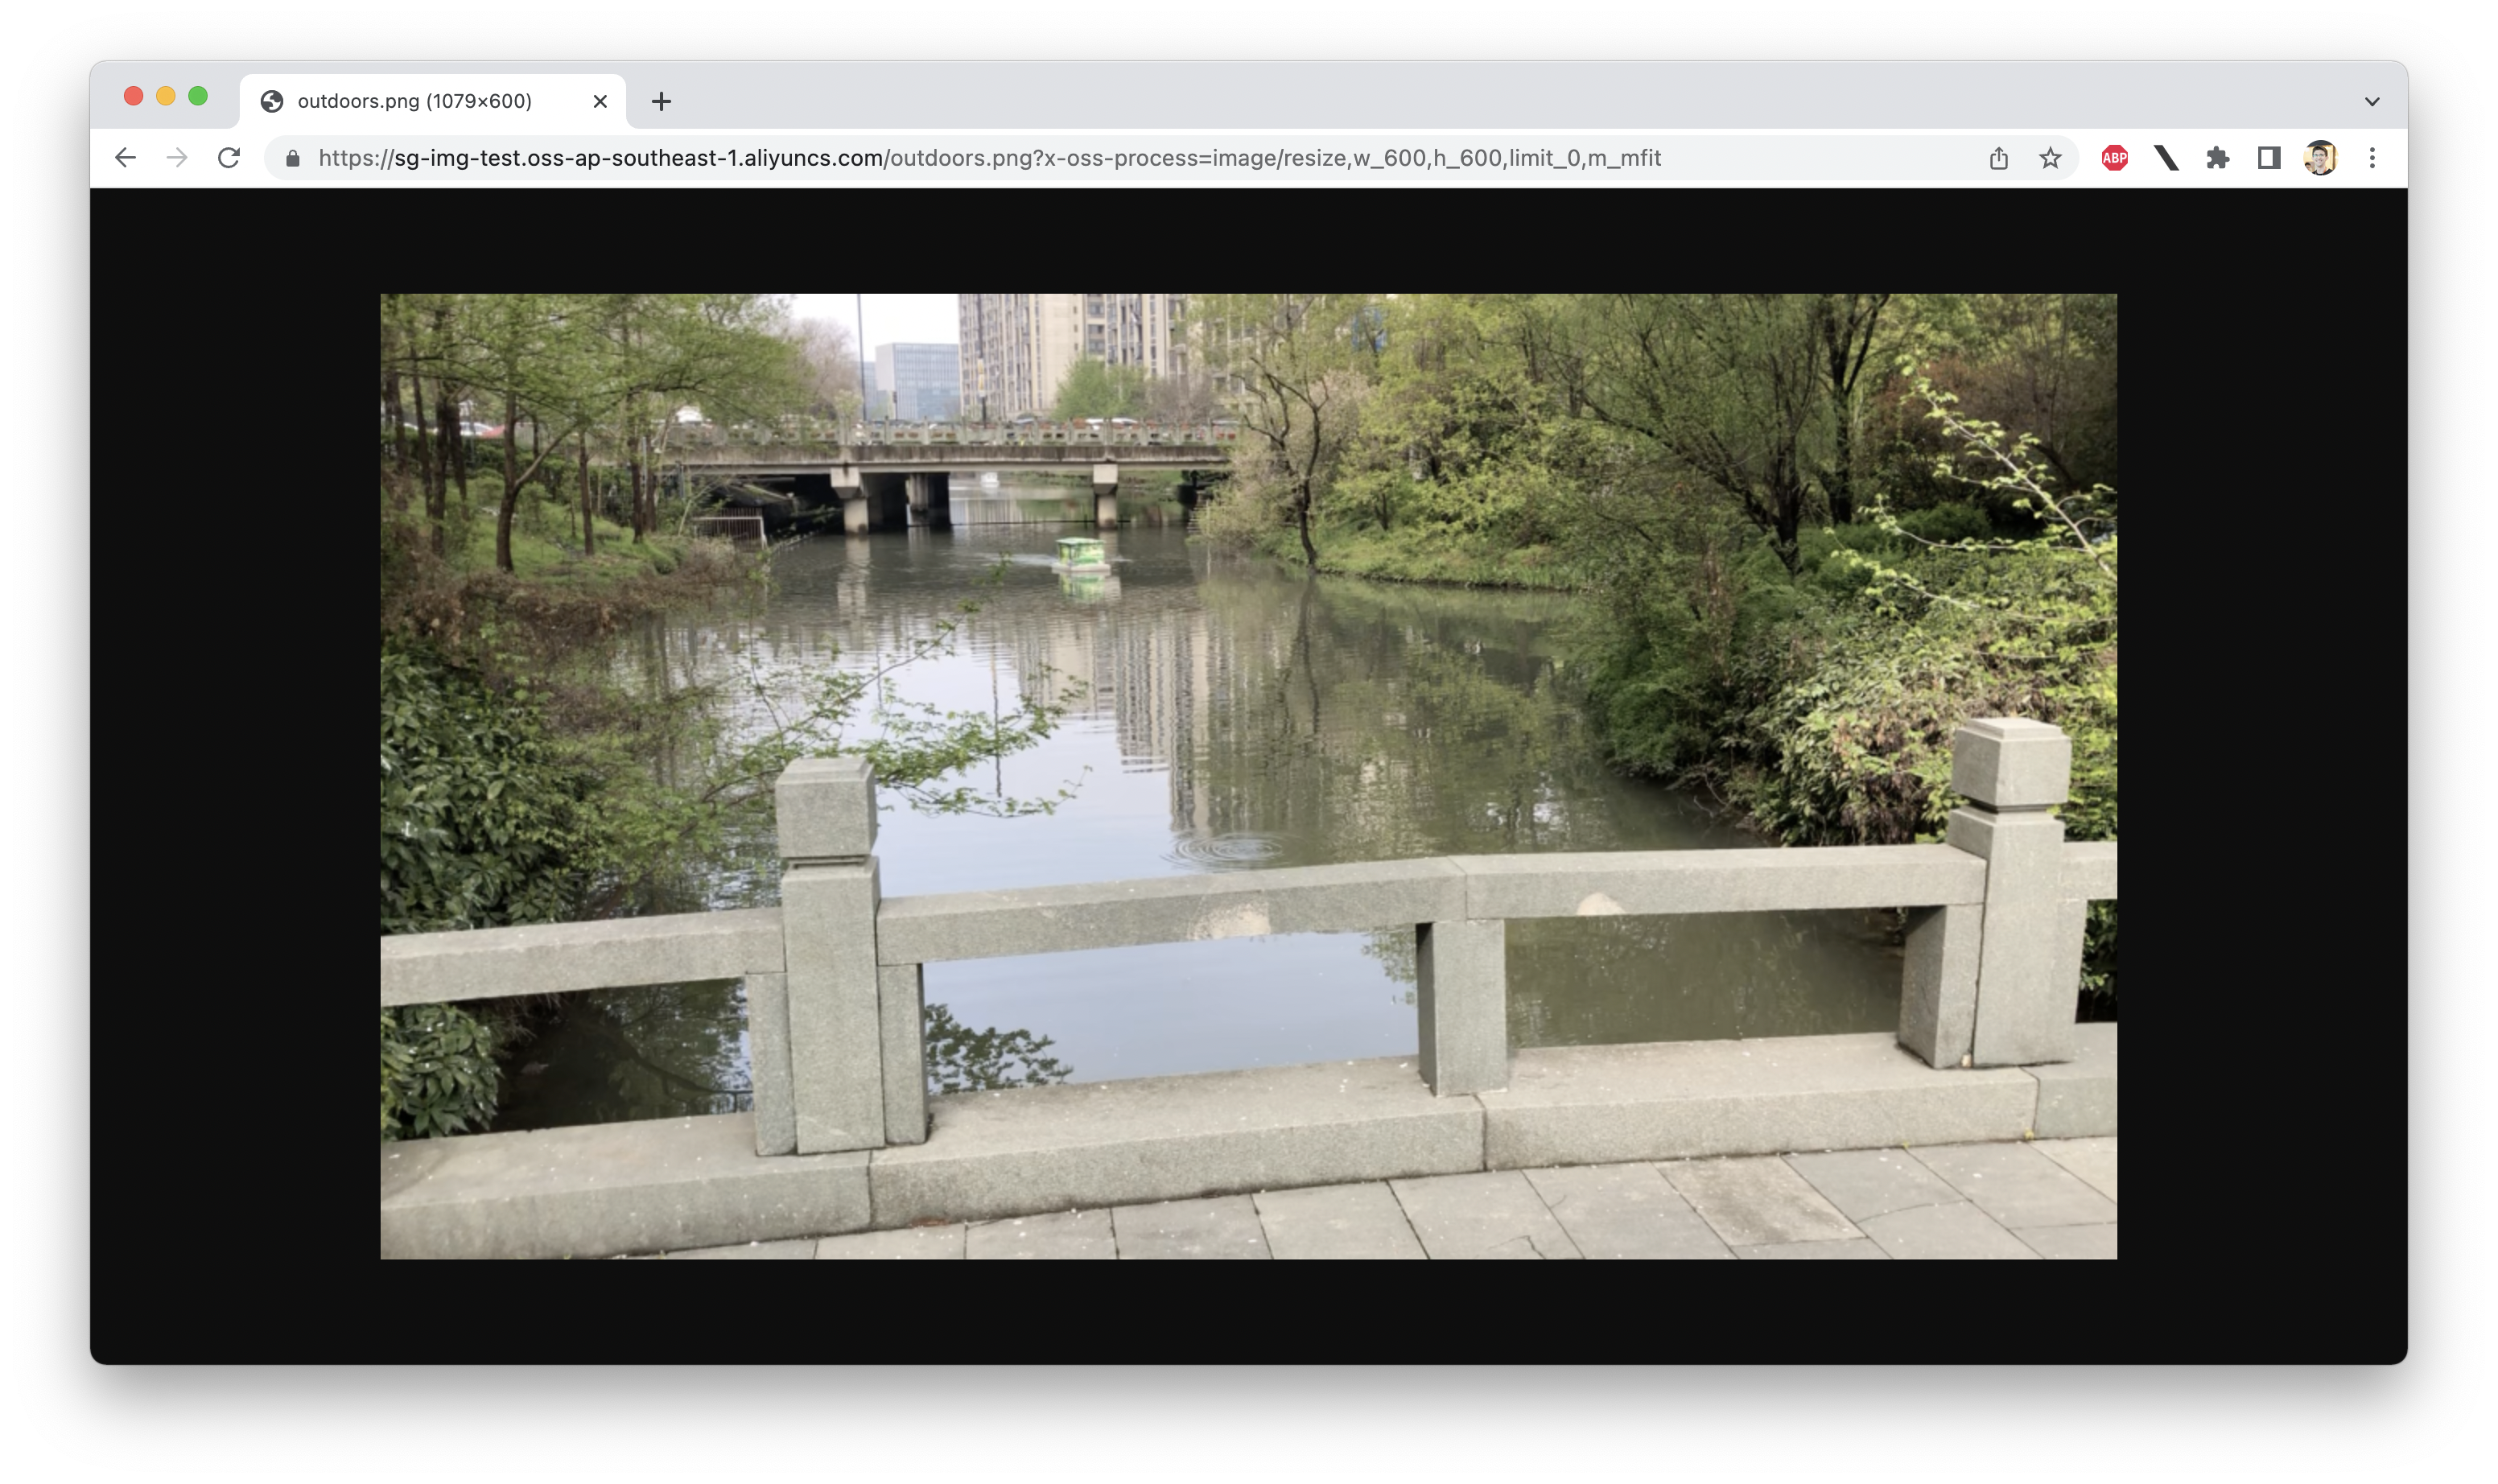
"fill": Do not preserve the width-to-height ratio. Instead, scale the image as-needed, and crop to fit the w_ and h_ parameters:
https://sg-img-test.oss-ap-southeast-1.aliyuncs.com/outdoors.png?x-oss-process=image/resize,w_600,h_600,limit_0,m_fill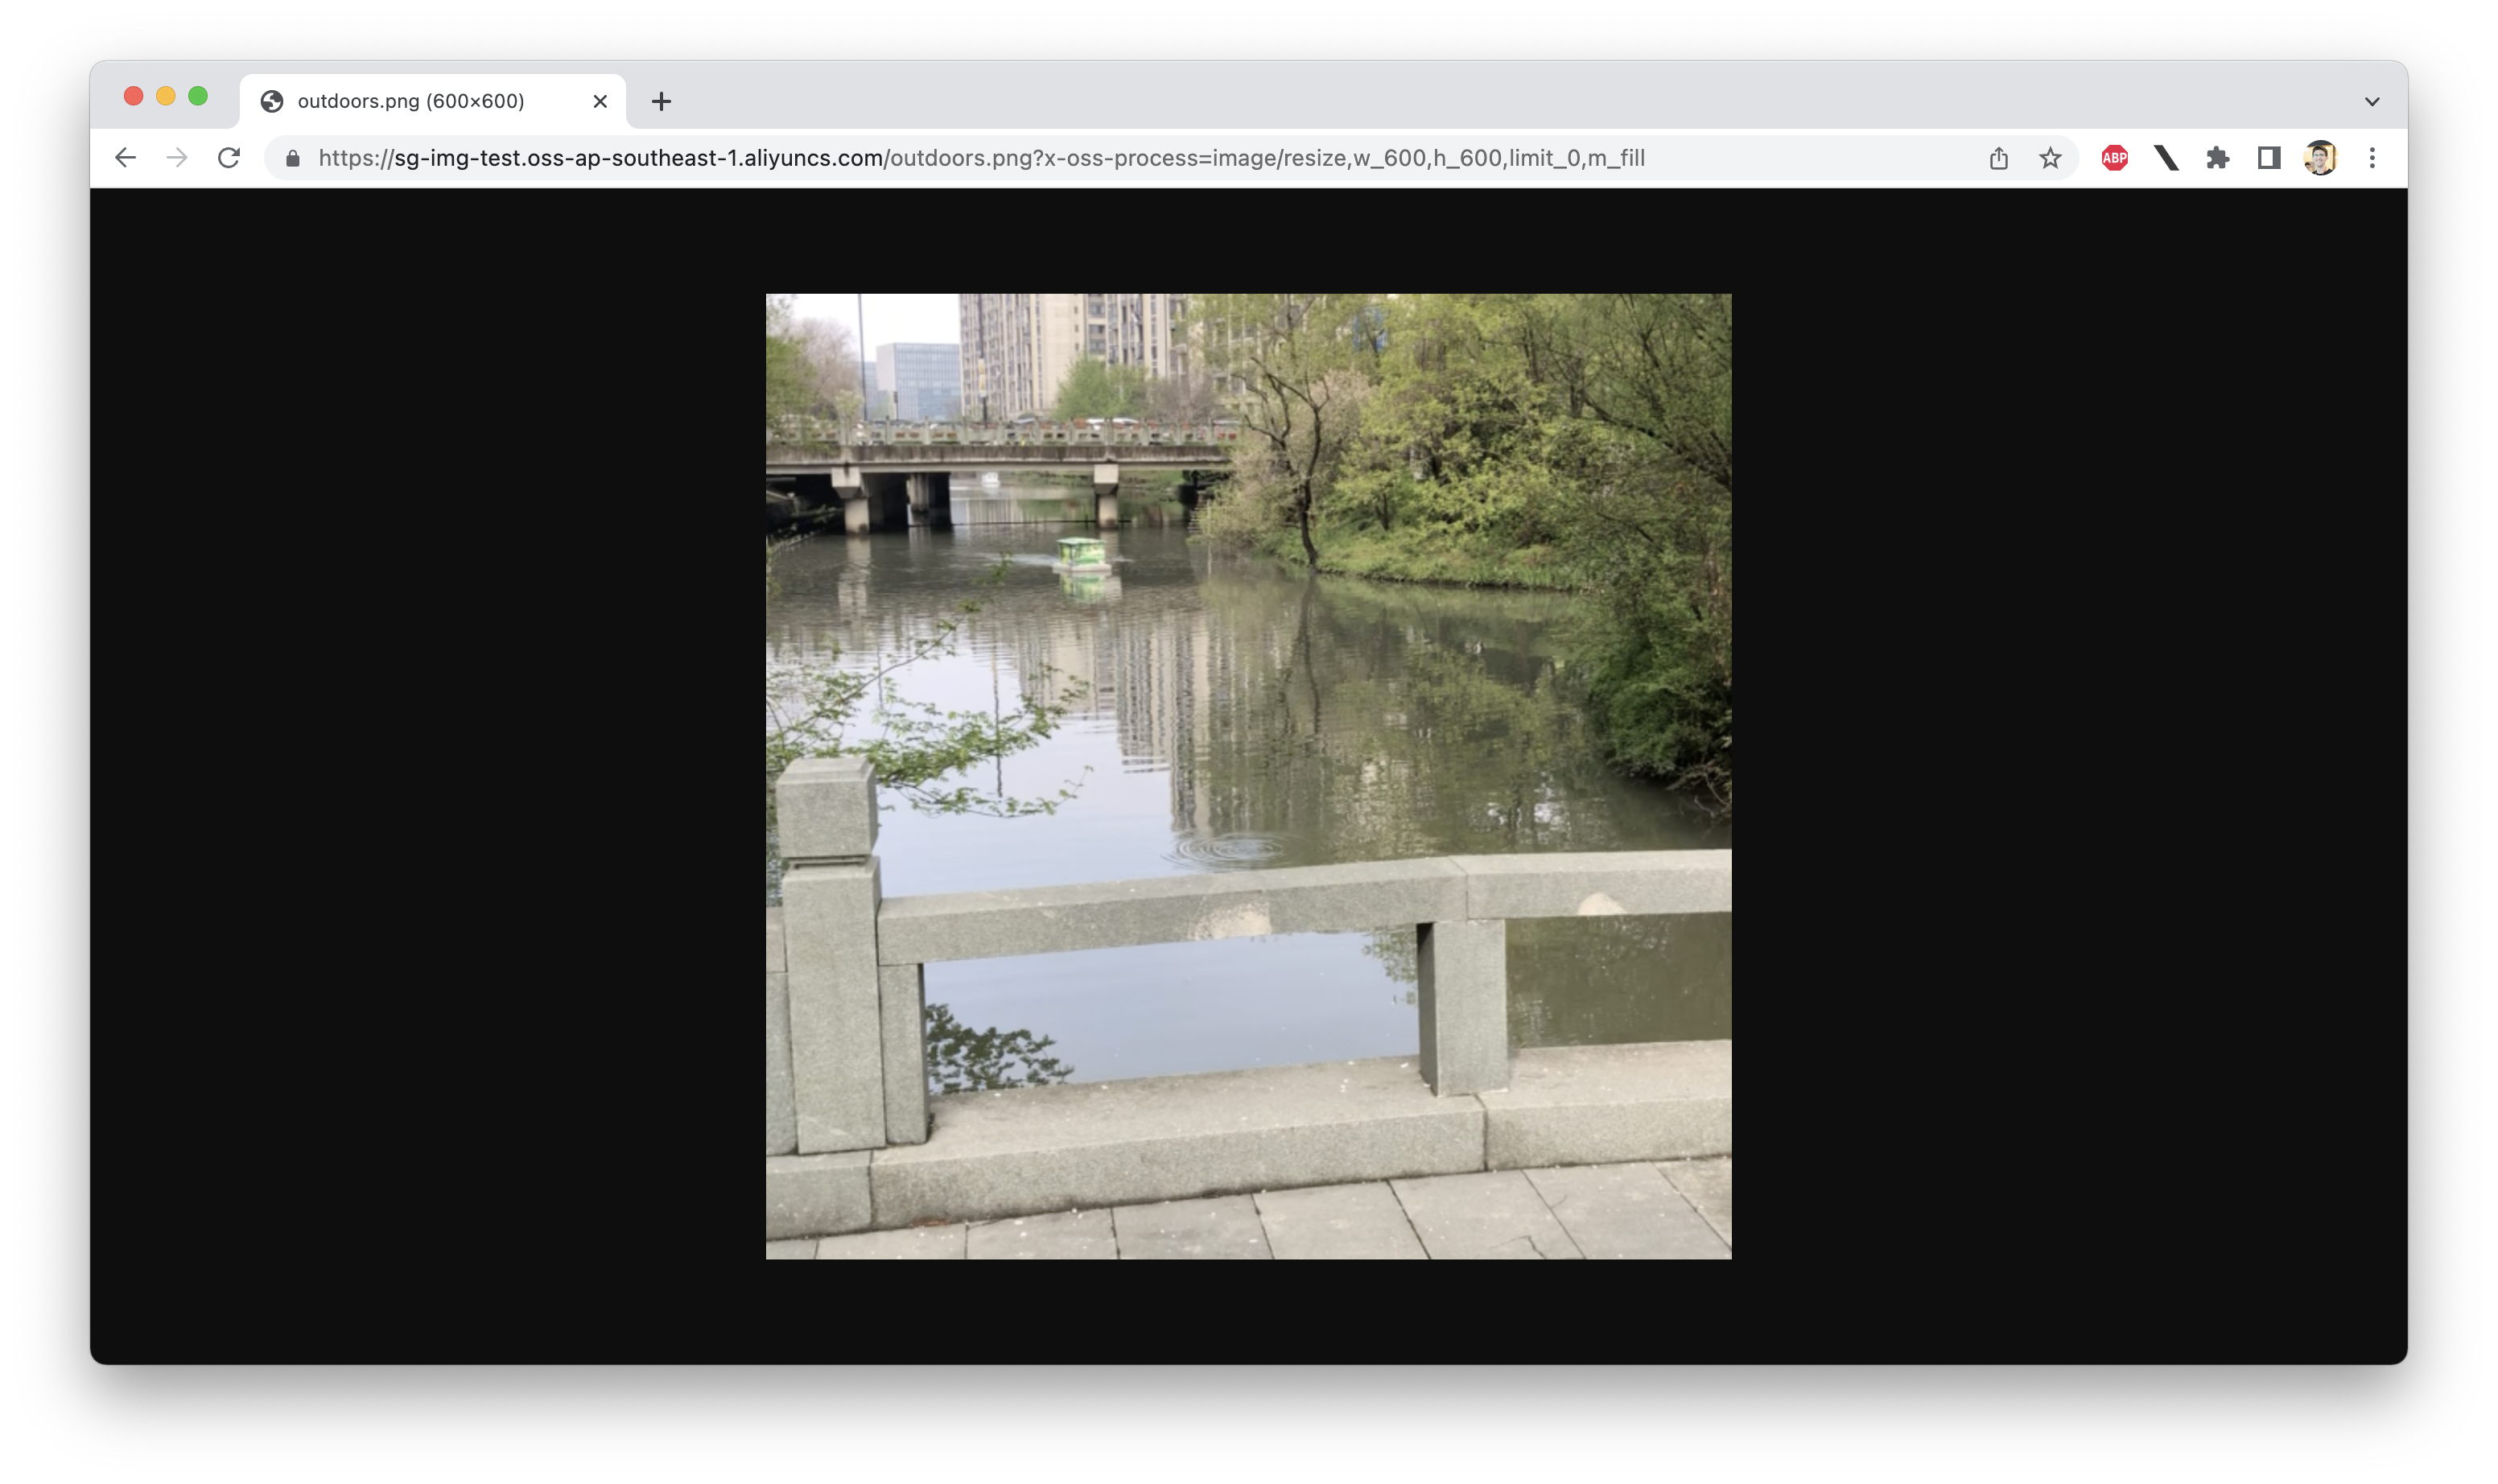
w_ and h_ given while preserving its width-to-height ratio, then fill the extra space with padding:https://sg-img-test.oss-ap-southeast-1.aliyuncs.com/outdoors.png?x-oss-process=image/resize,w_600,h_600,limit_0,m_pad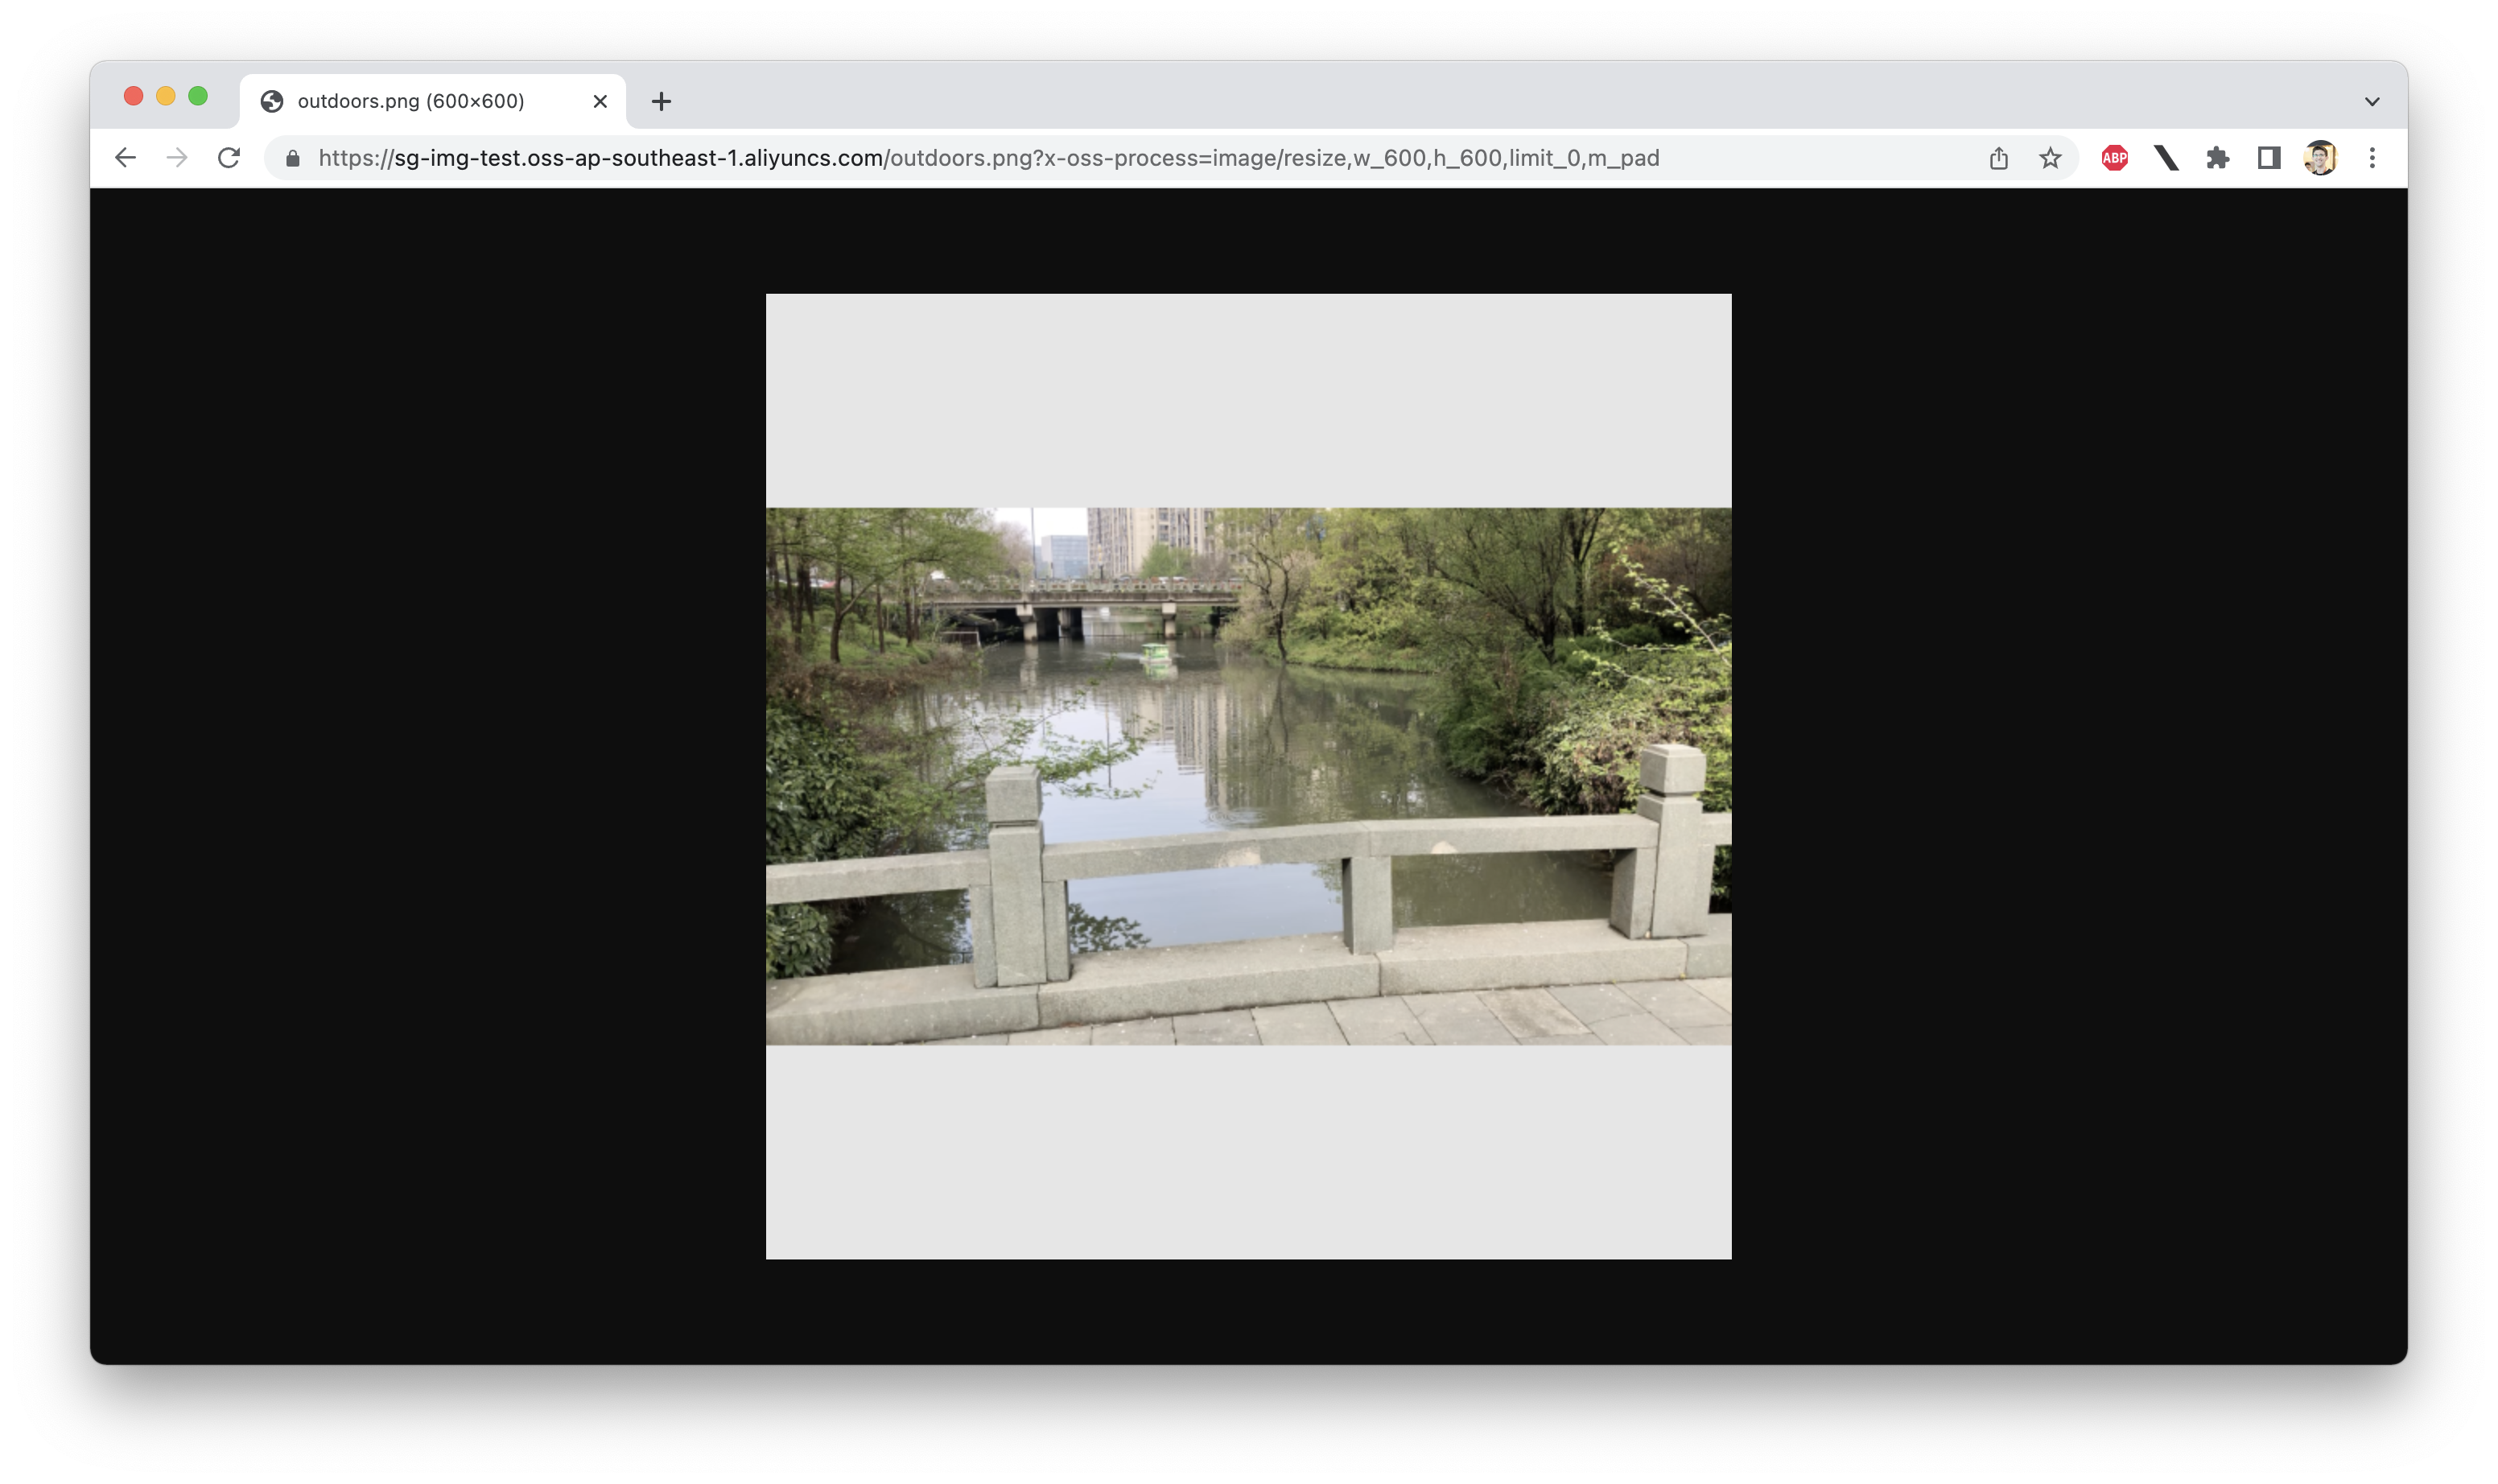
Optionally, the padding color can be controlled with a color parameter that accepts hexadecimal color values, so adding color_FF0000 would pad the image with red.
w_ and h_ parameters are supplied.https://sg-img-test.oss-ap-southeast-1.aliyuncs.com/outdoors.png?x-oss-process=image/resize,w_600,h_600,limit_0,m_fixed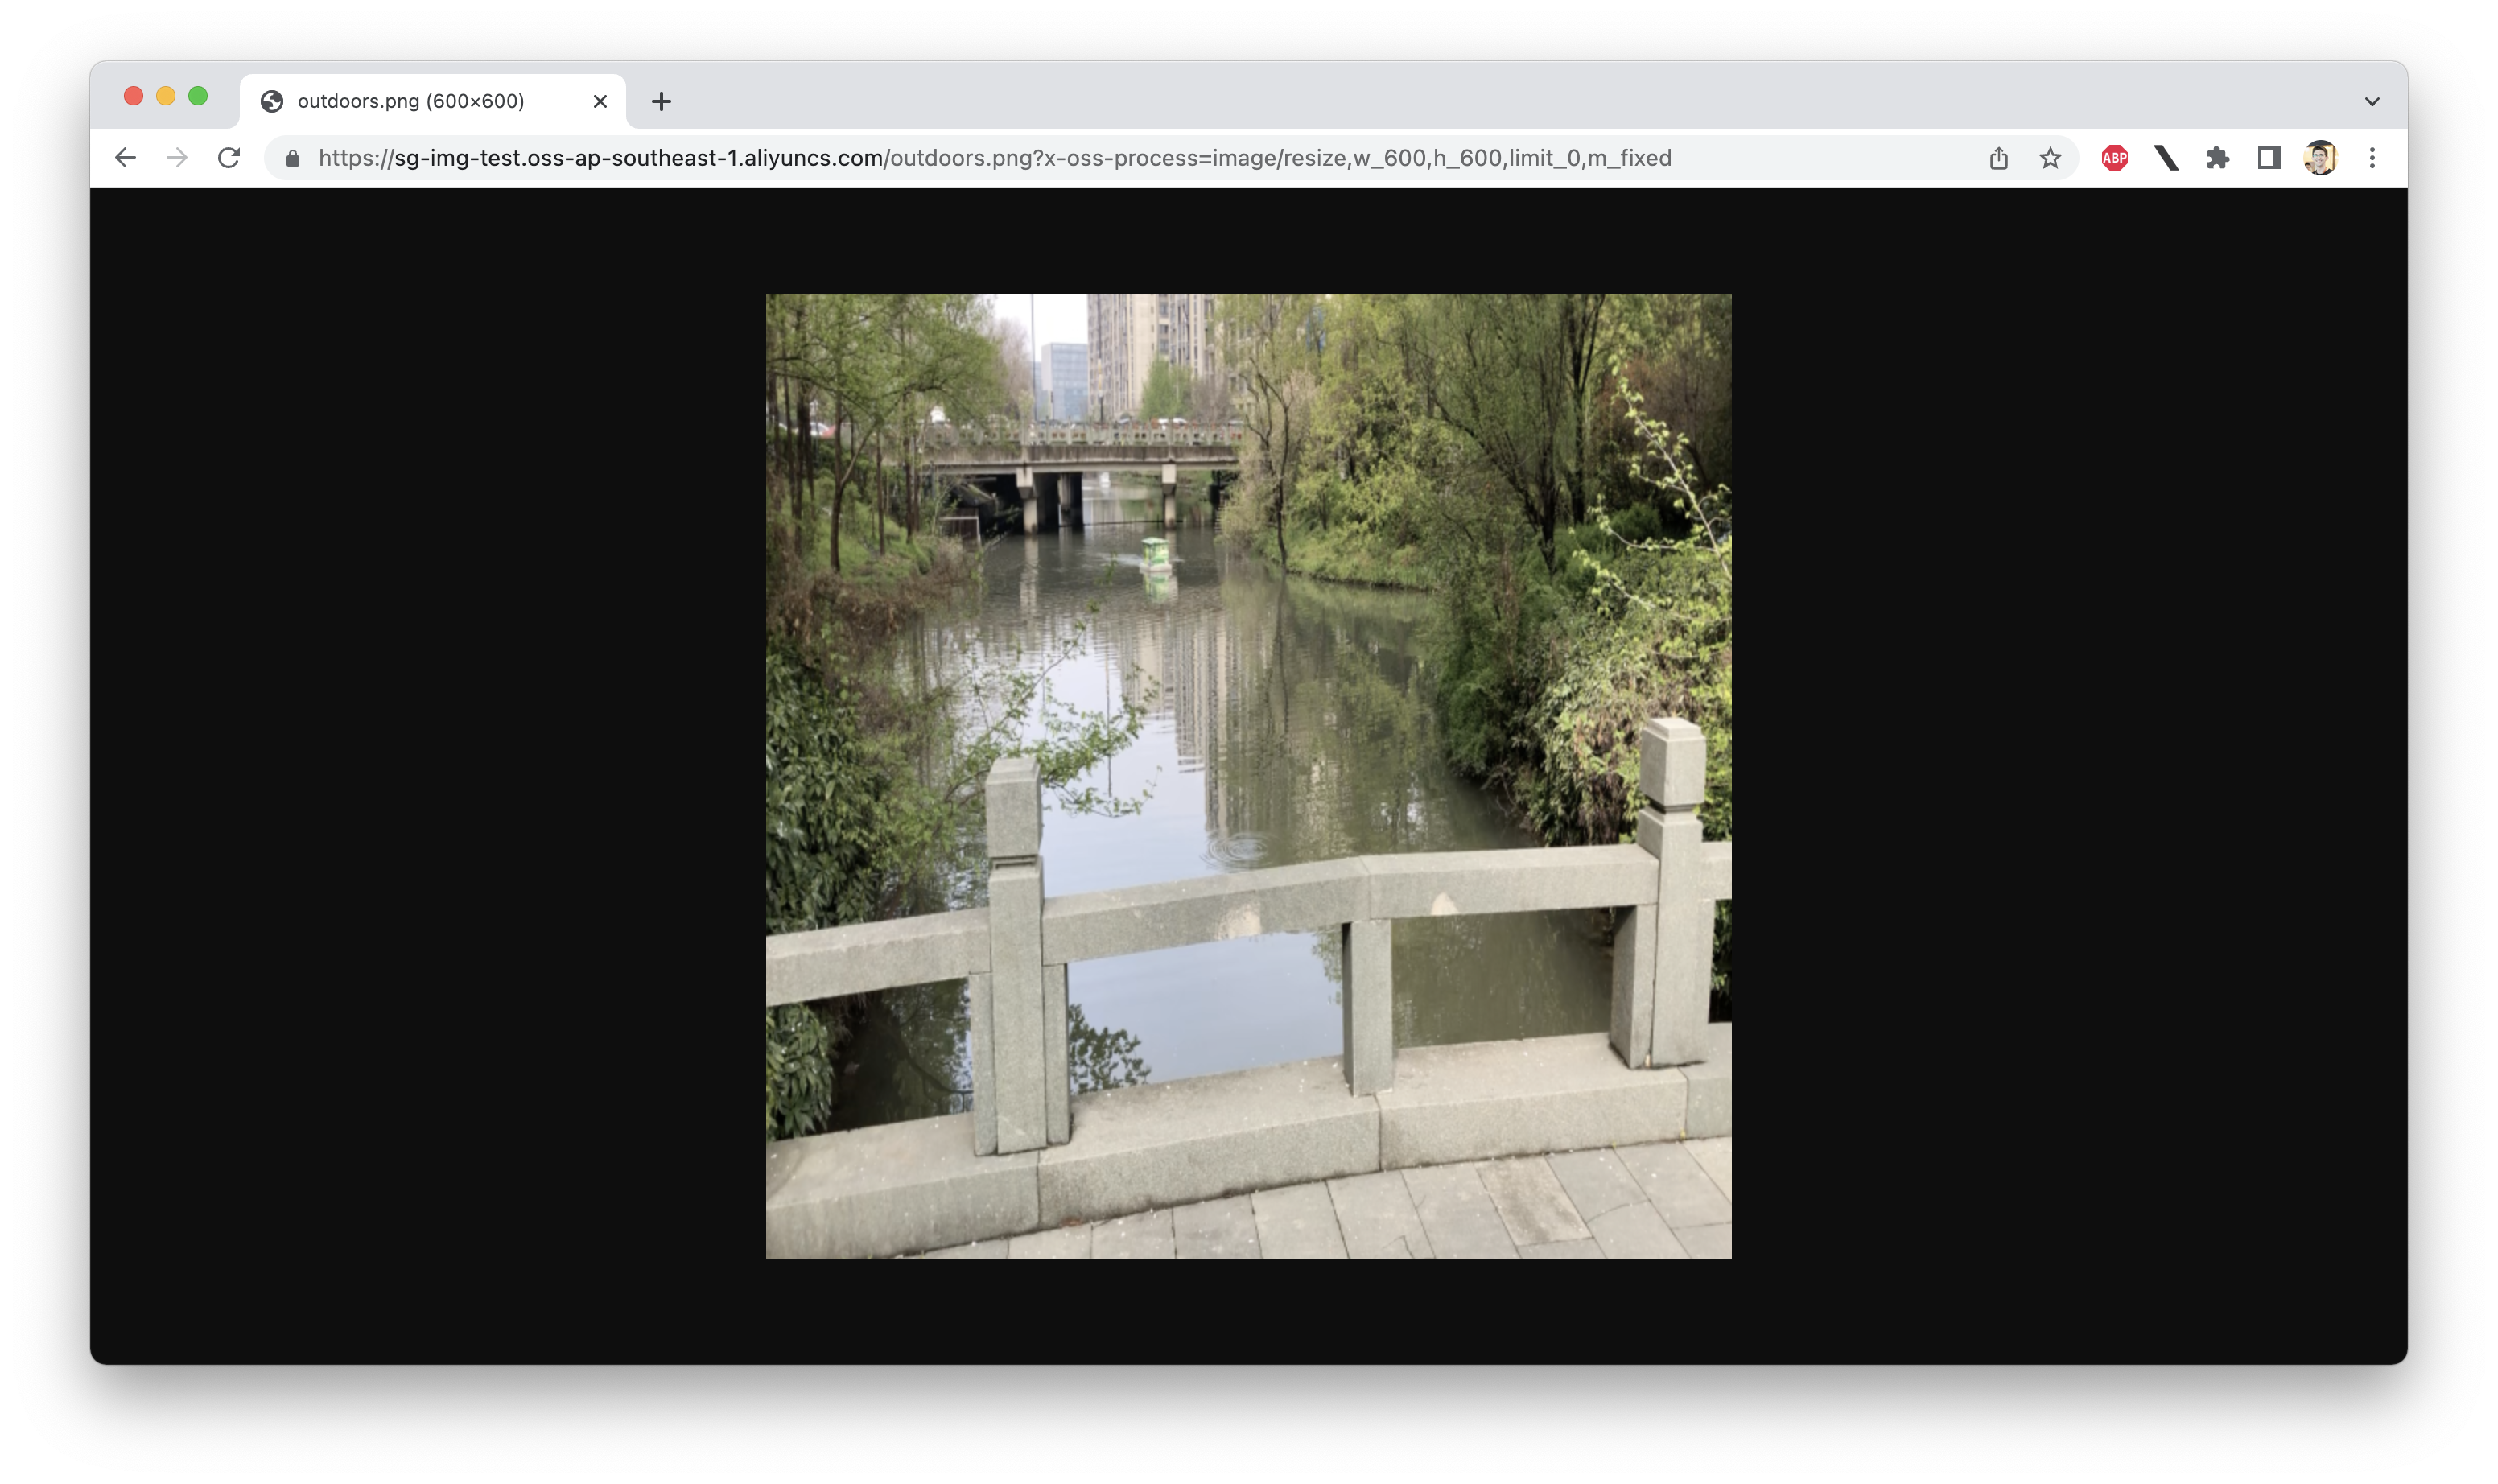
OSS also lets us rotate images, by specifying a number of degrees (0,360) by which to rotate the image in the clockwise direction. Let's rotate our bridge by 30 degrees:
https://sg-img-test.oss-ap-southeast-1.aliyuncs.com/outdoors.png?x-oss-process=image/rotate,30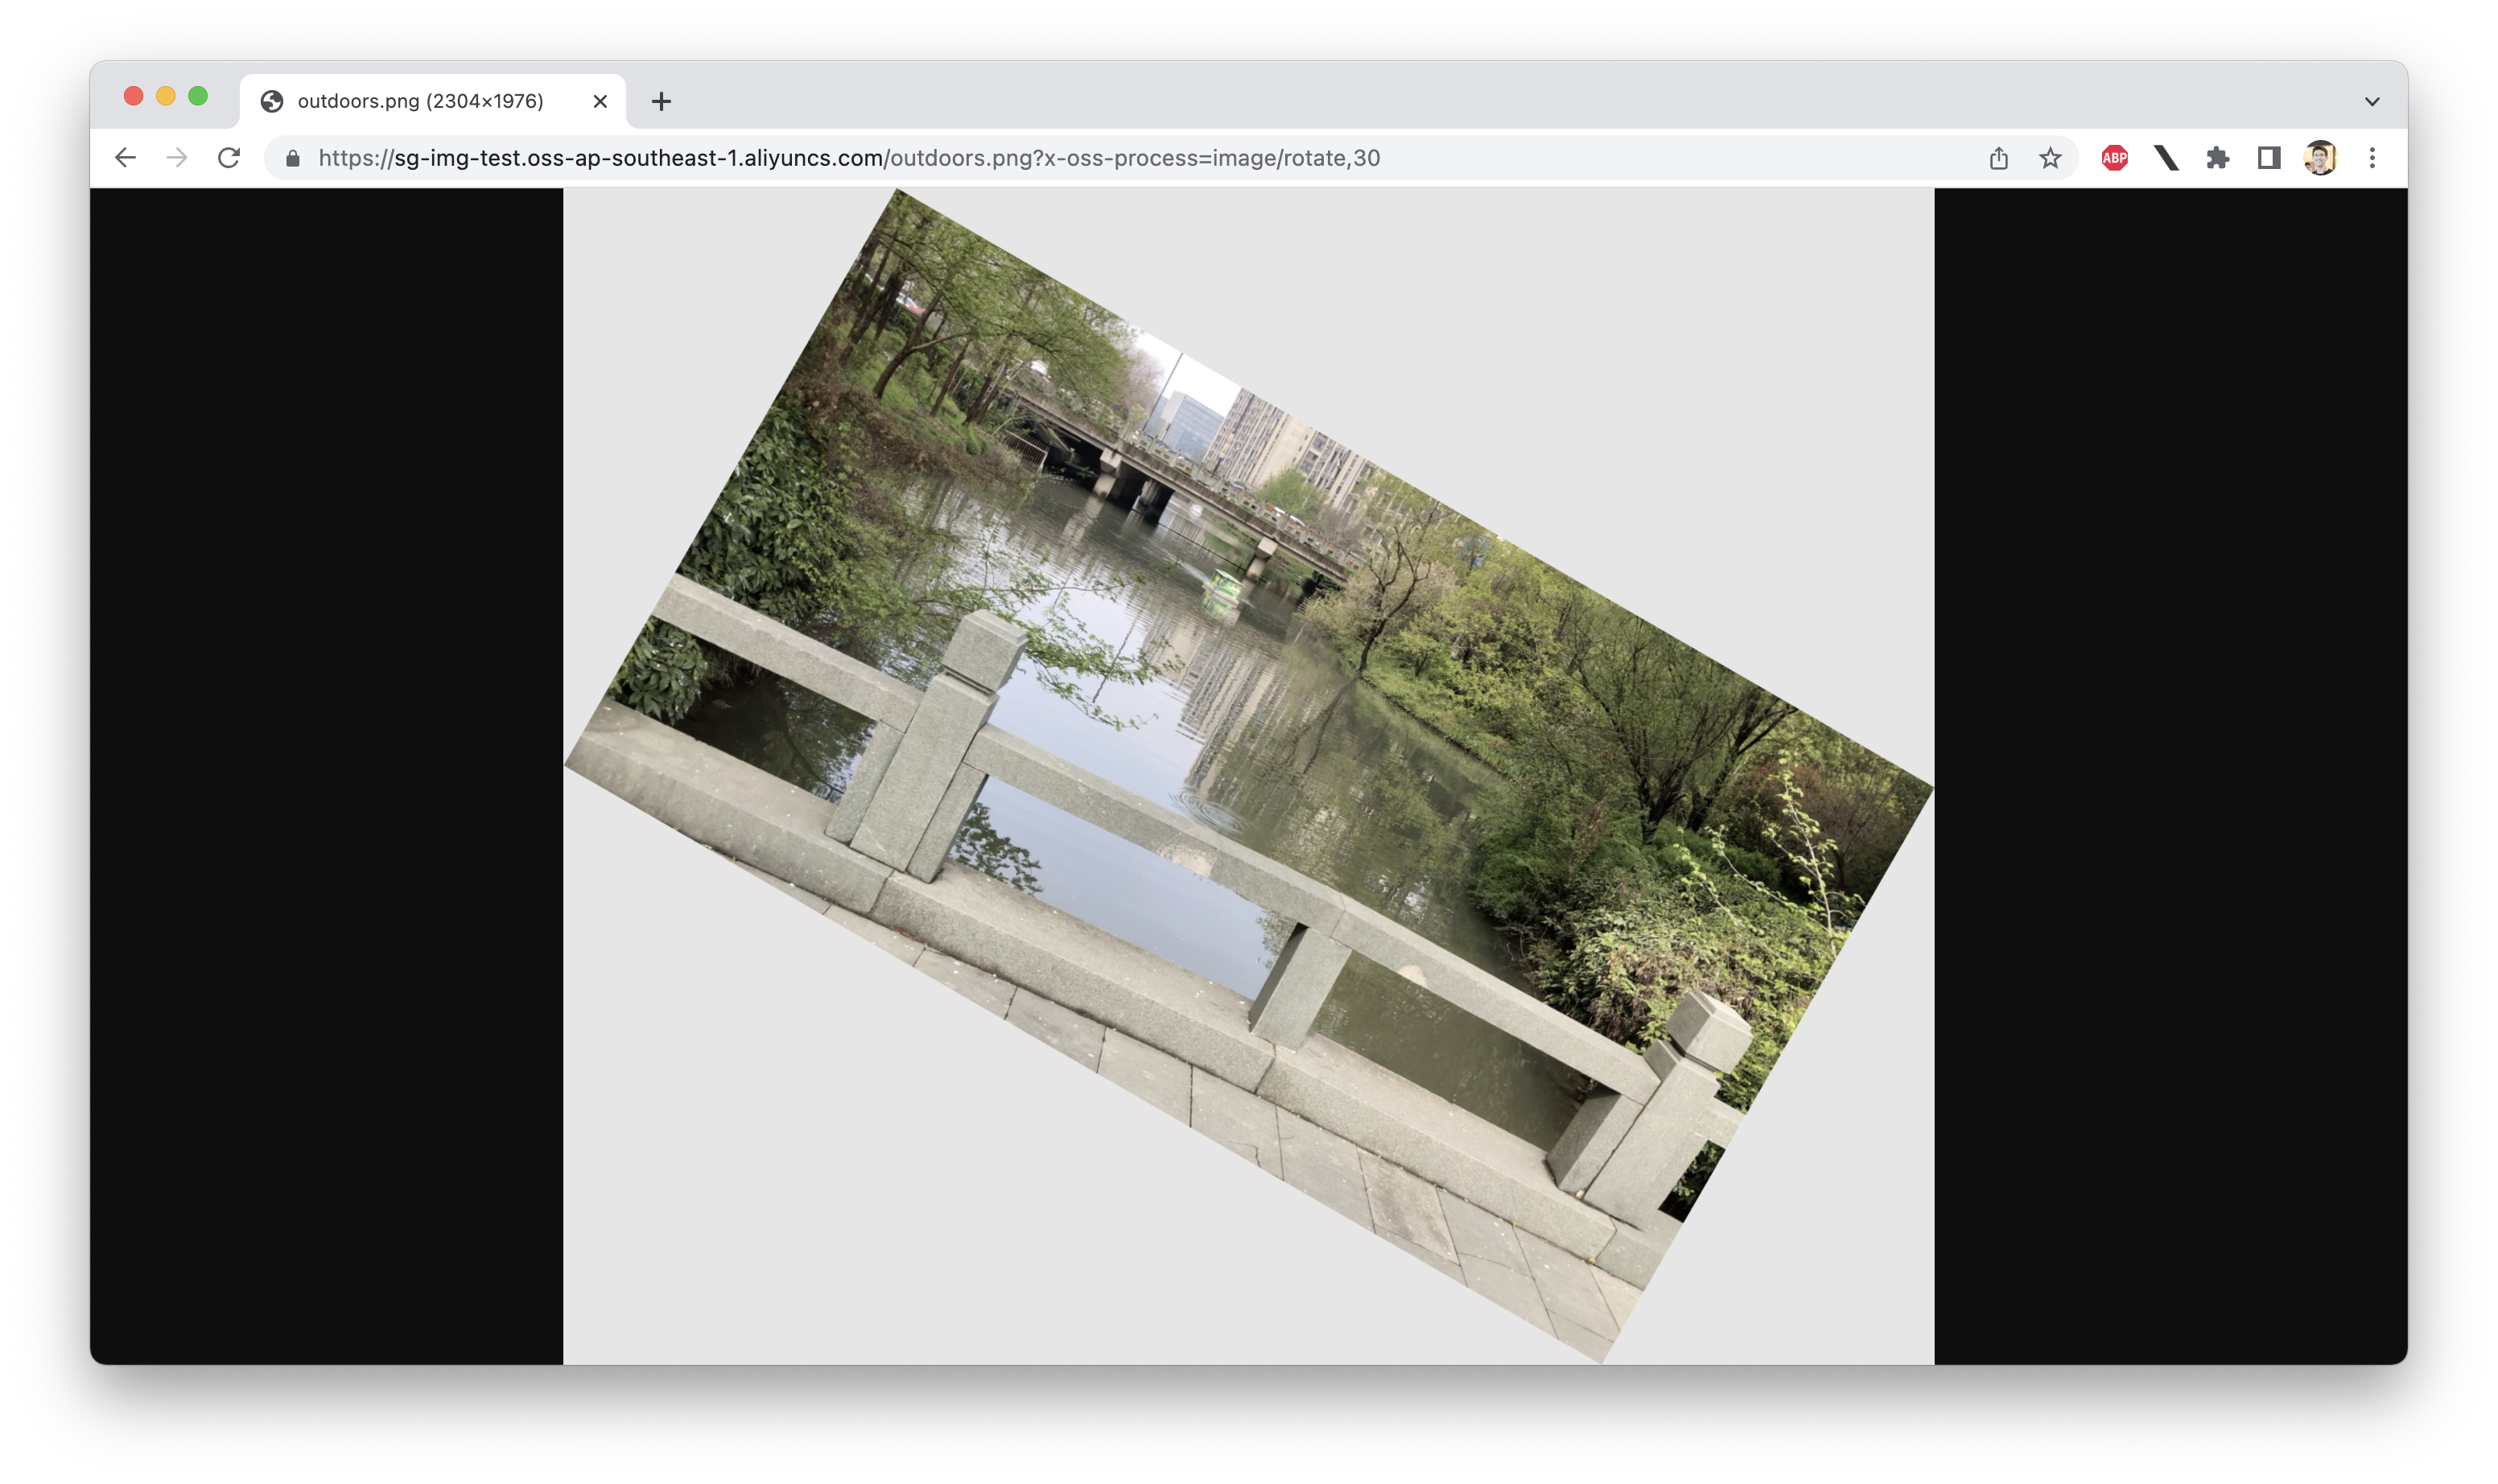
Note that the space around the image will be padded (as above).
There's a long list of other operations OSS can handle for us, including:
See the OSS documentation for a complete list! It's far too much to cover in a single blog post.
What happens if you need to apply multiple operations to an image? One way to handle this would be to append more operations to the end of our URL parameters, like this:
https://sg-img-test.oss-ap-southeast-1.aliyuncs.com/outdoors.png?x-oss-process=image/resize,w_600,h_600,limit_0,m_pad,image/rotate,30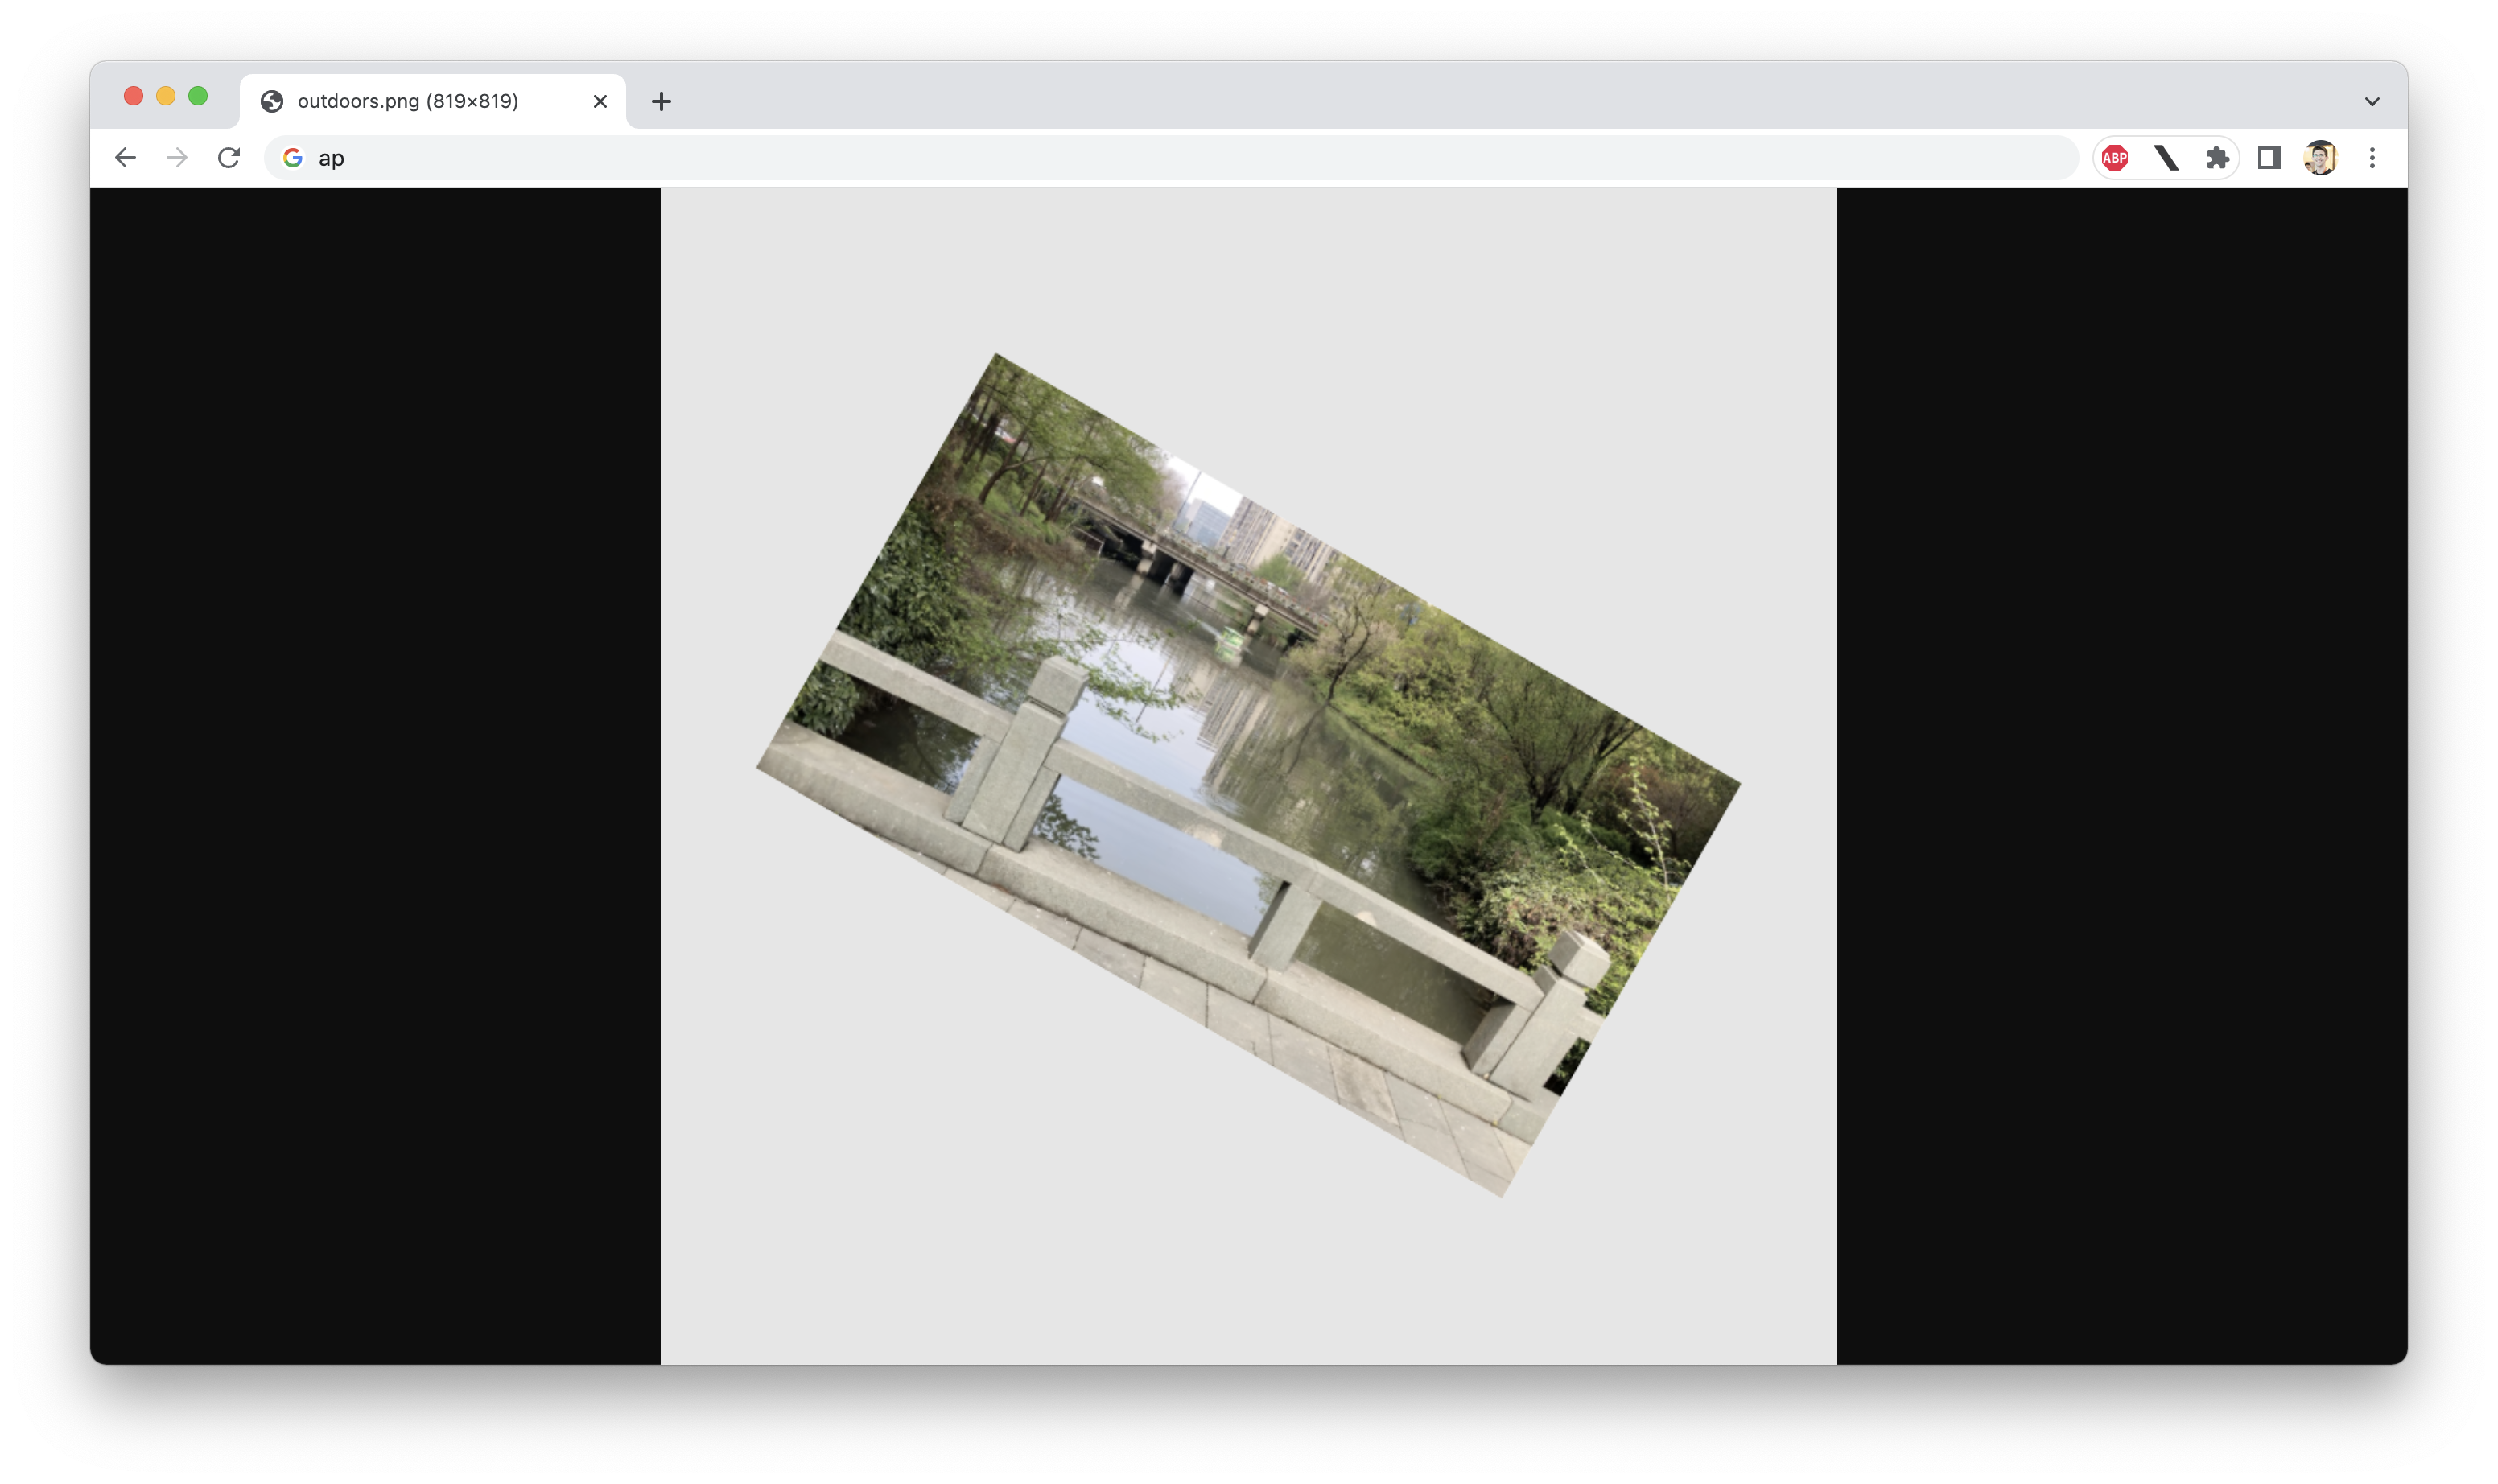
This works, but "stacking" operations in this way quickly becomes complex (and results in some very messy looking URLs).
A better way to apply multiple operations at once is to group them into a "style". You can create styles from your bucket's "Data Processing" settings:
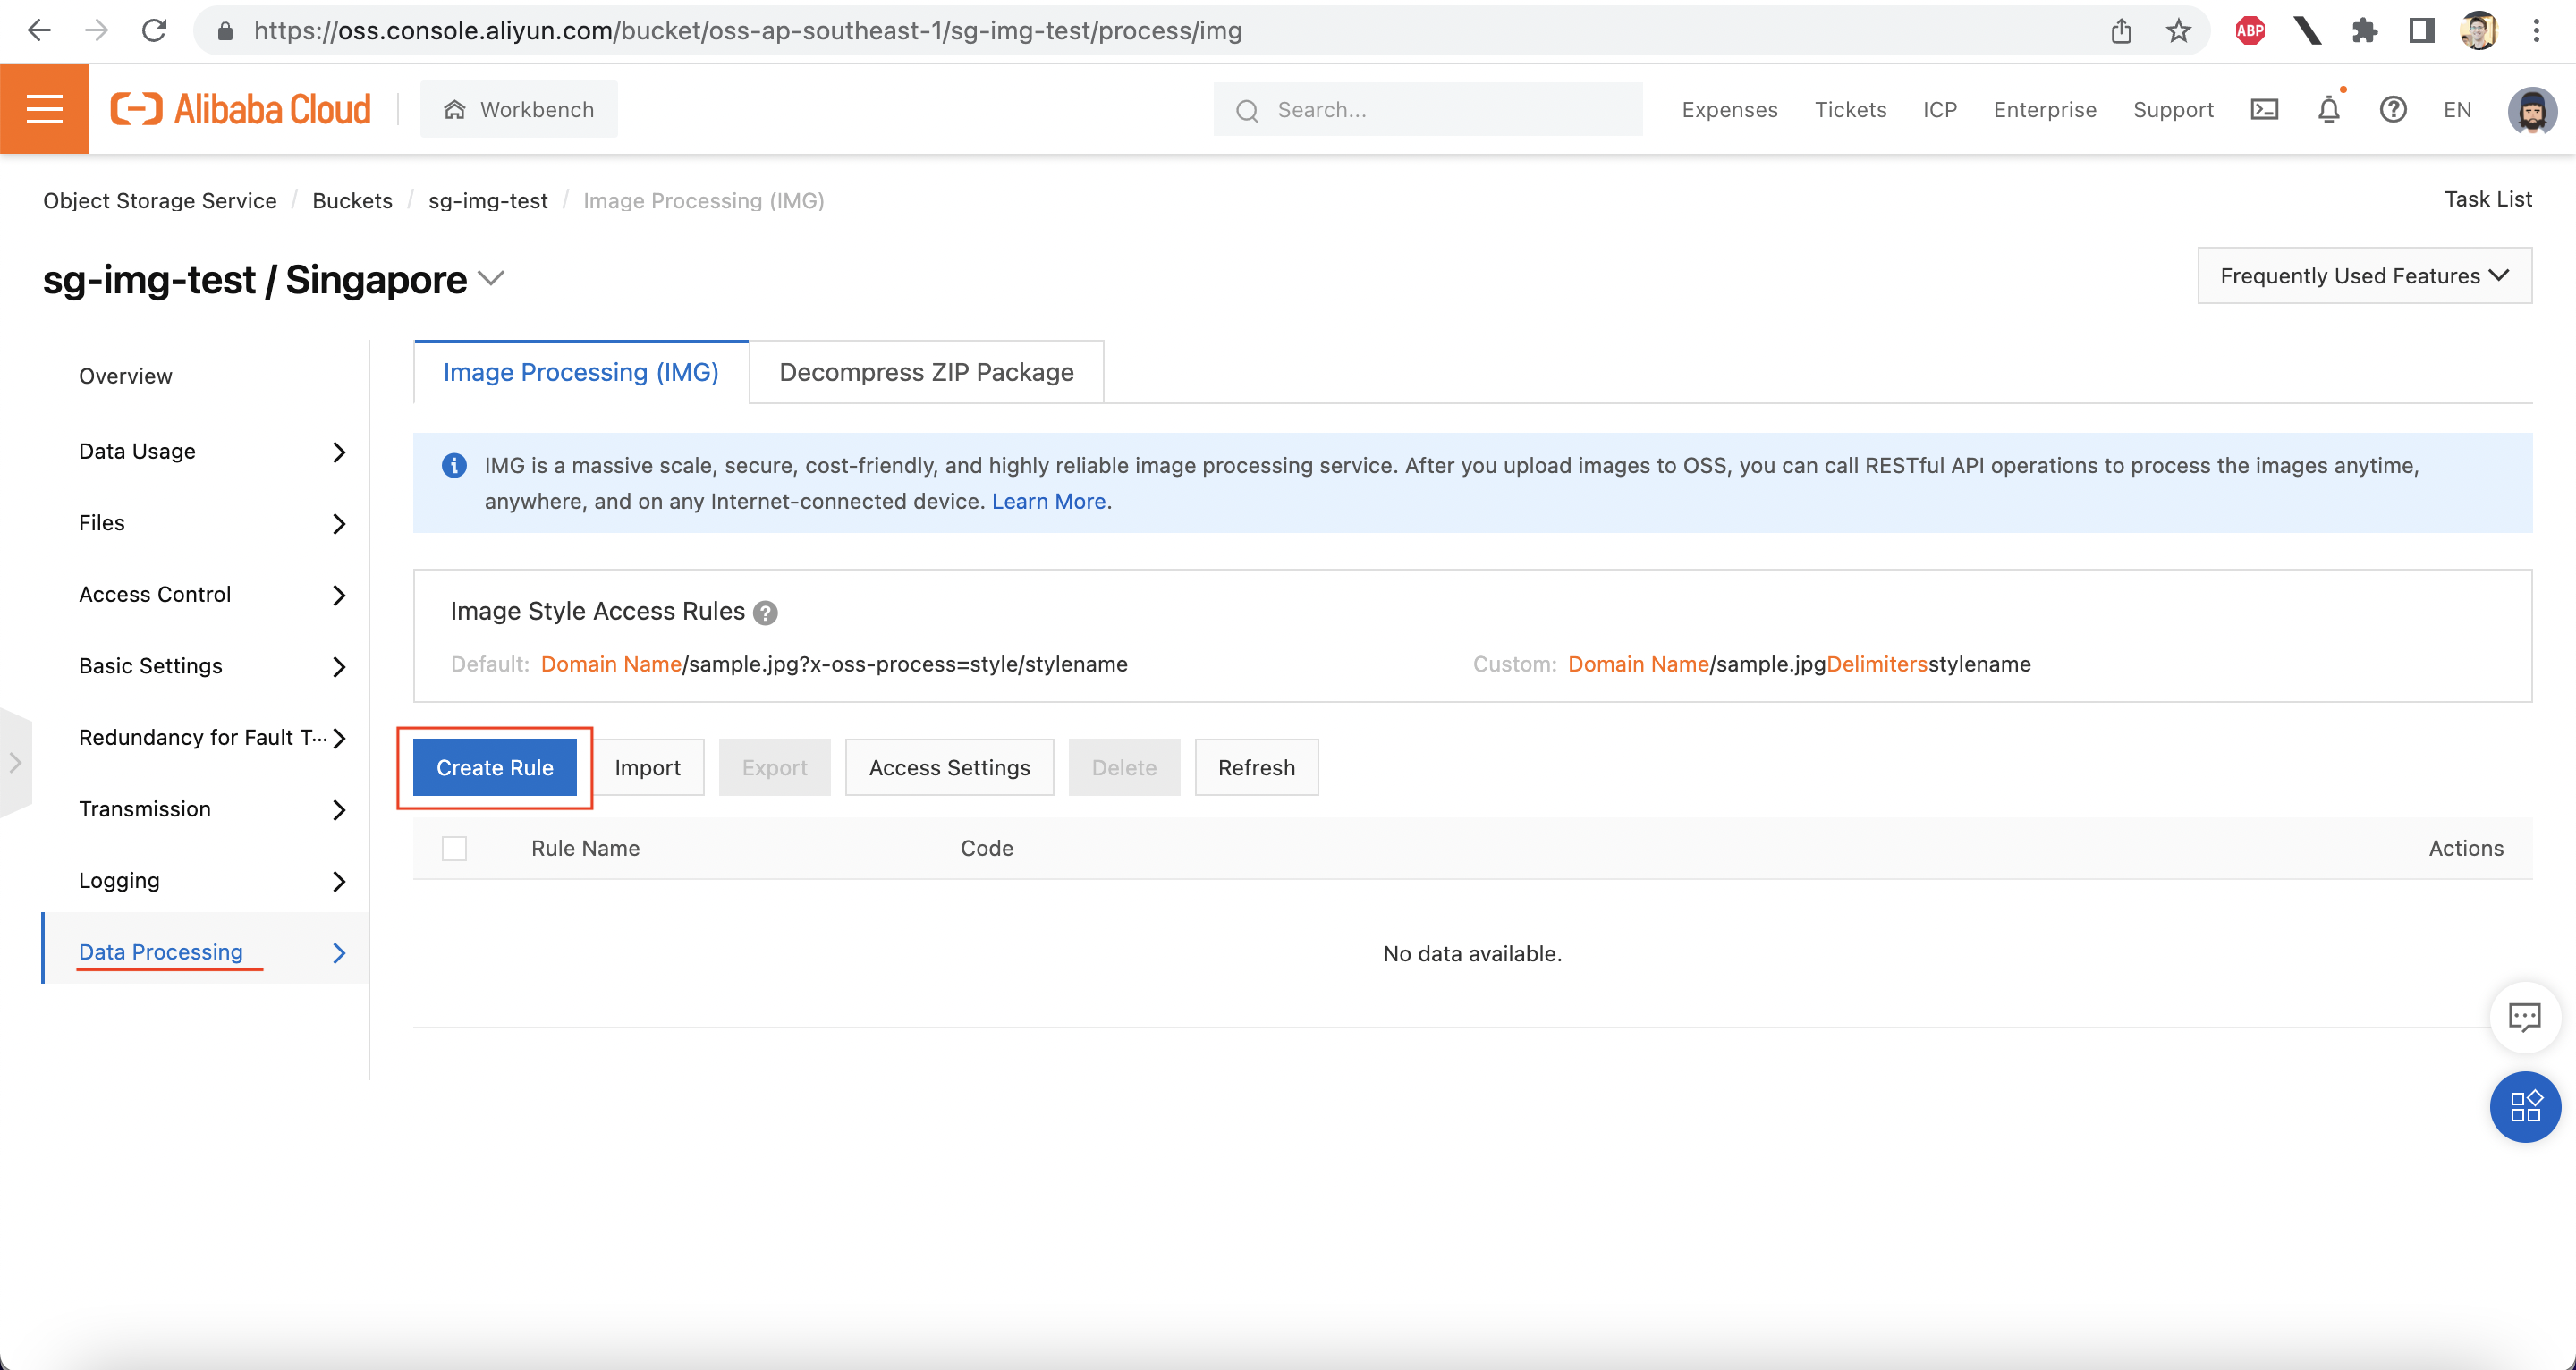
Let's try making one ourselves!
Let's create a style that applies the following operations:
First, open up the "Create Rule" dialog:
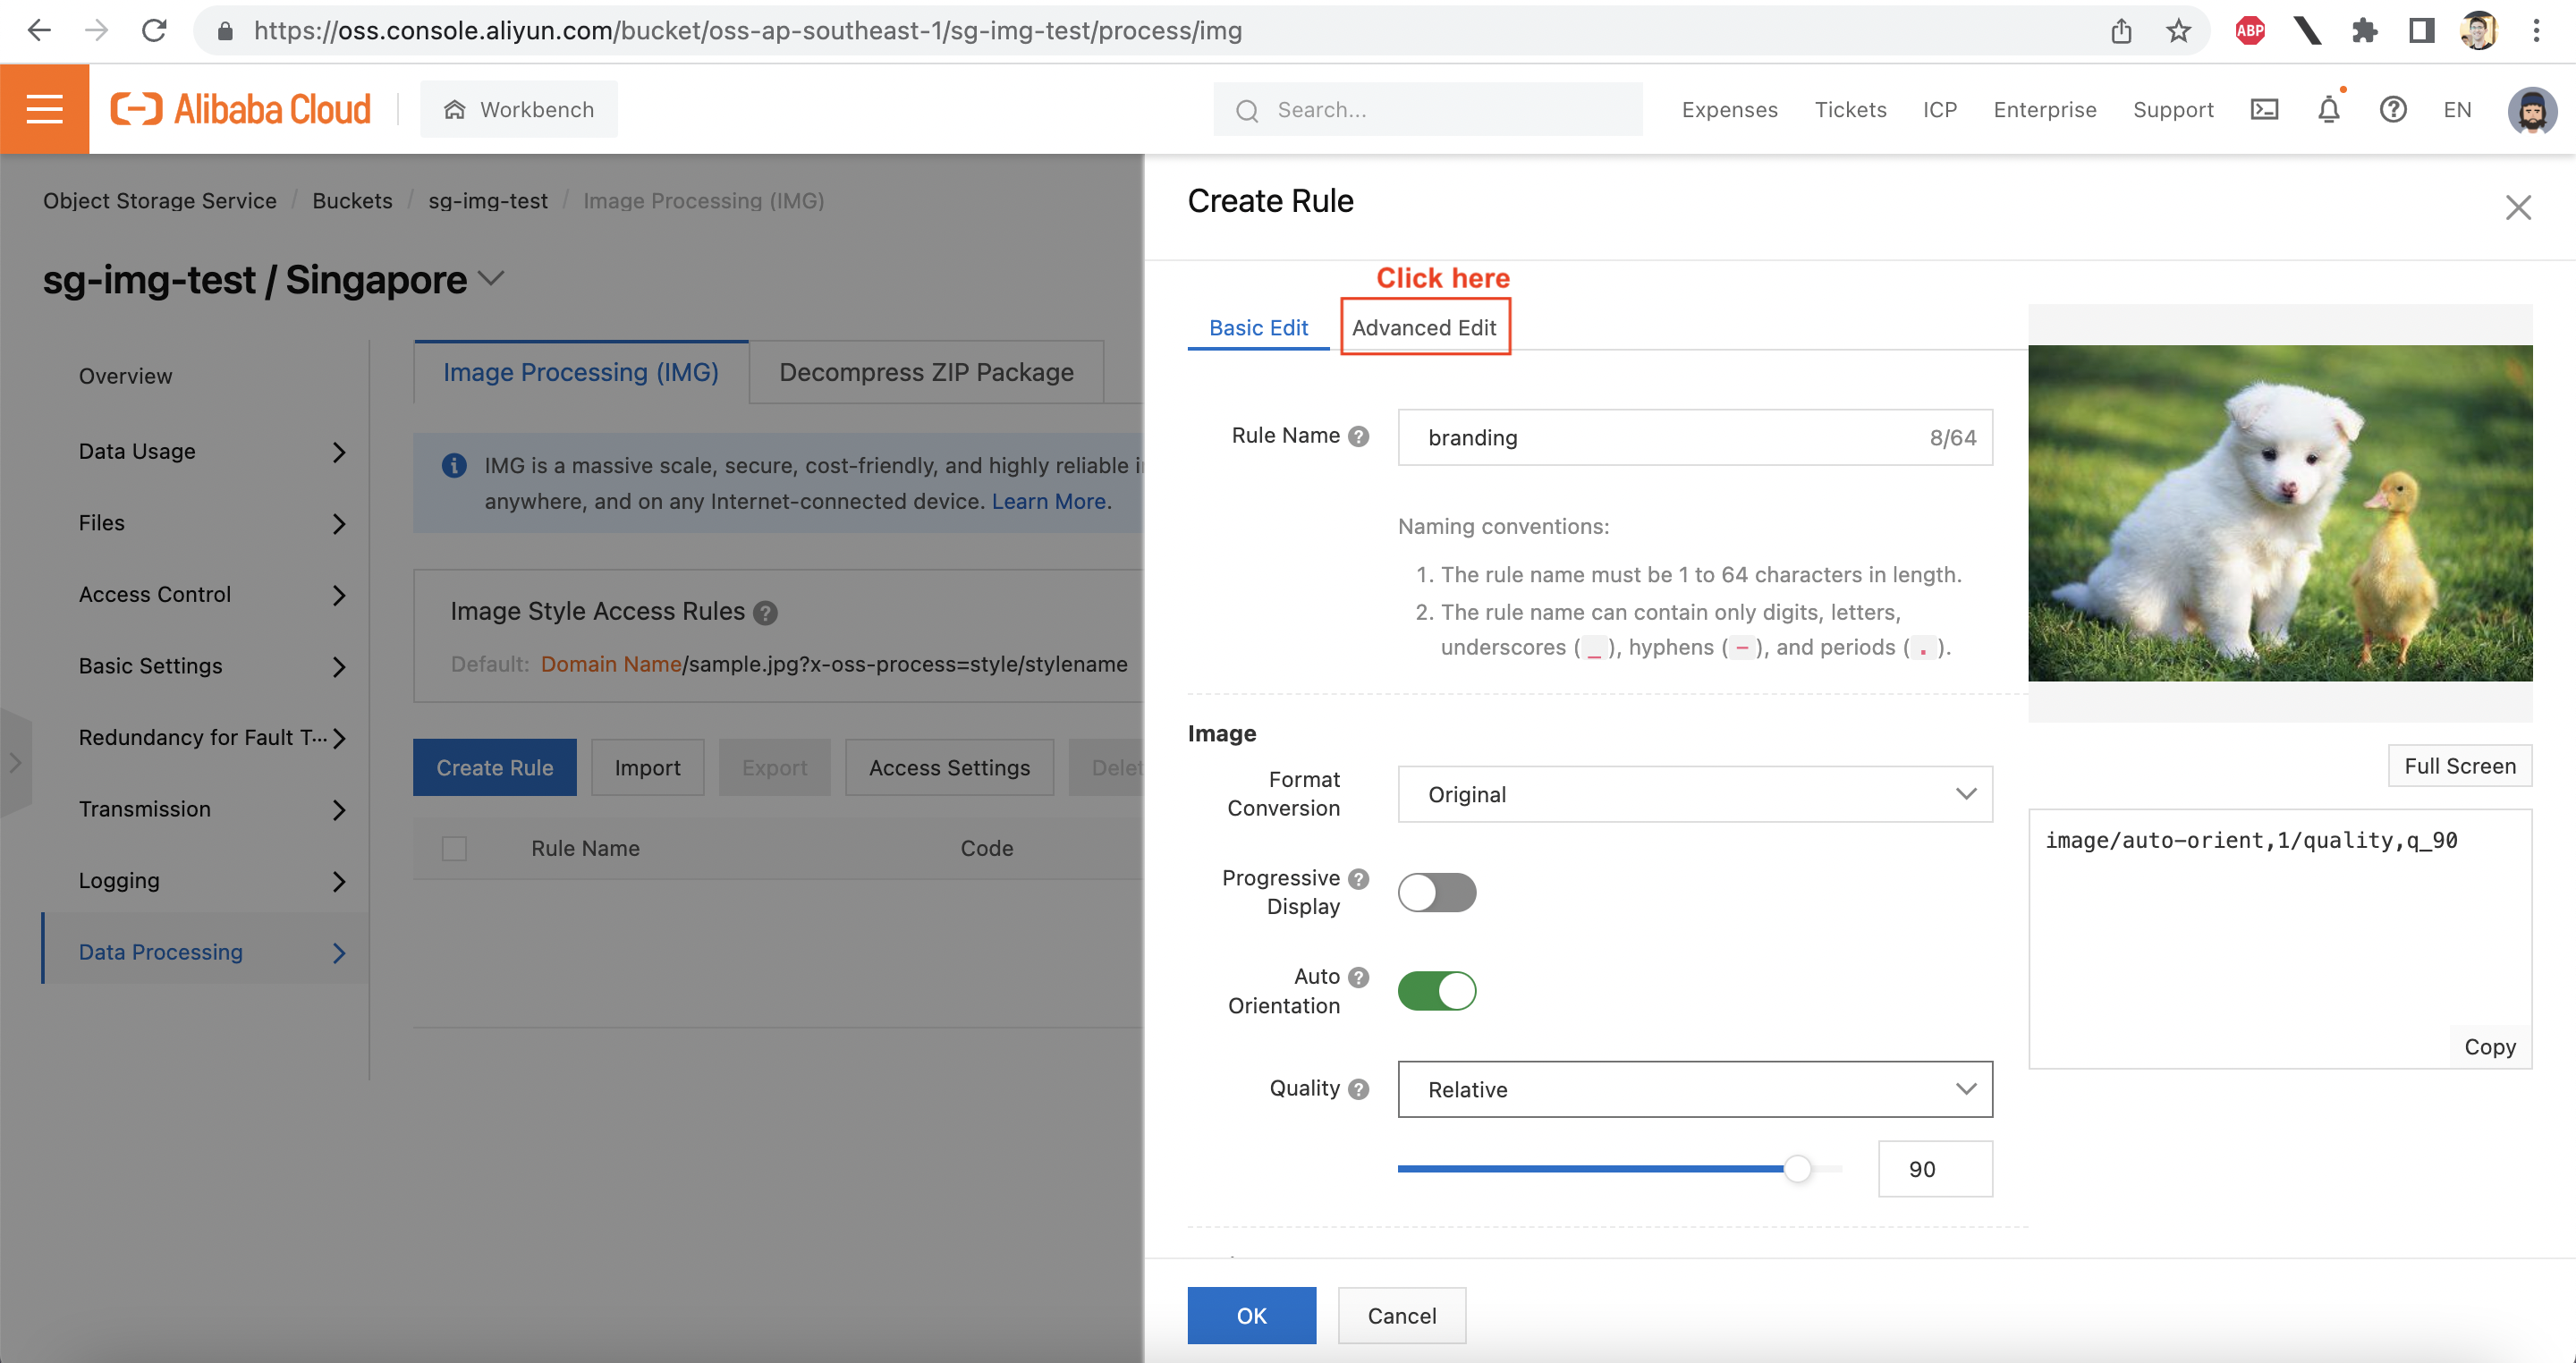
Then, switch to "Advanced Edit" and paste in the following:
image/auto-orient,1/quality,q_90/contrast,10/watermark,text_QWxpYmFiYSBDbG91ZA,color_FFFF00,size_40,g_se,x_10,y_10/resize,w_1000,h_500,m_pad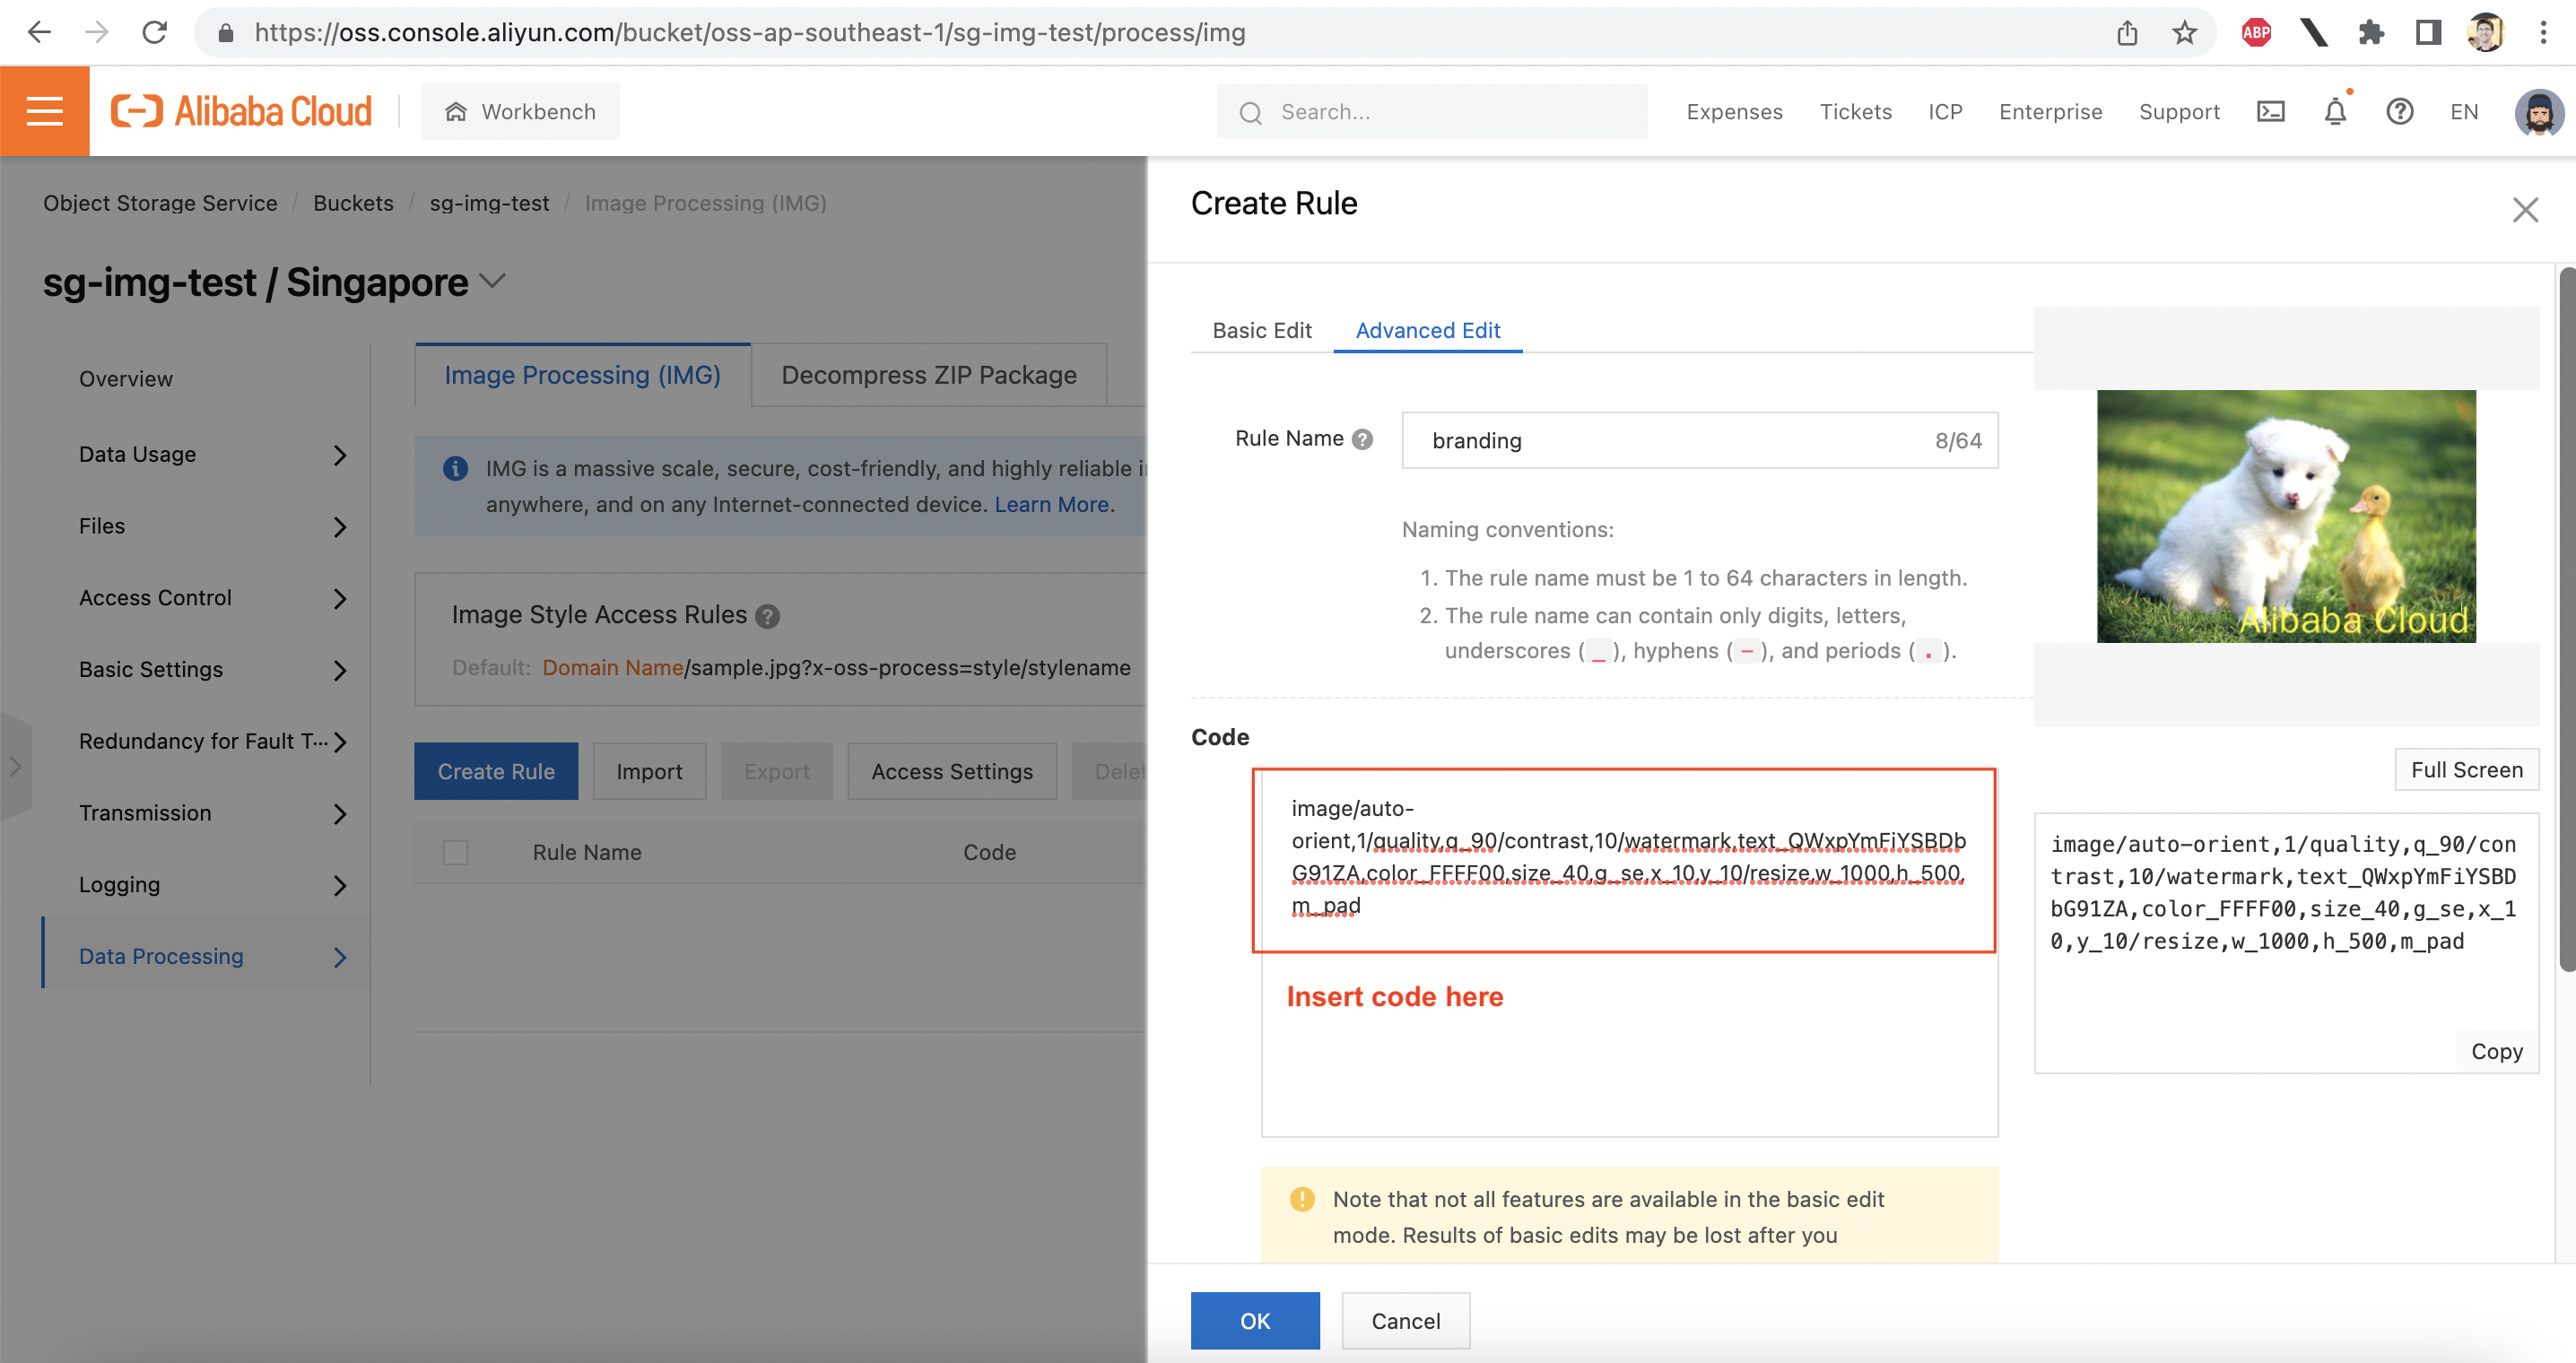
Click "OK" to save the new style, which will now appear in the list of image processing rules:
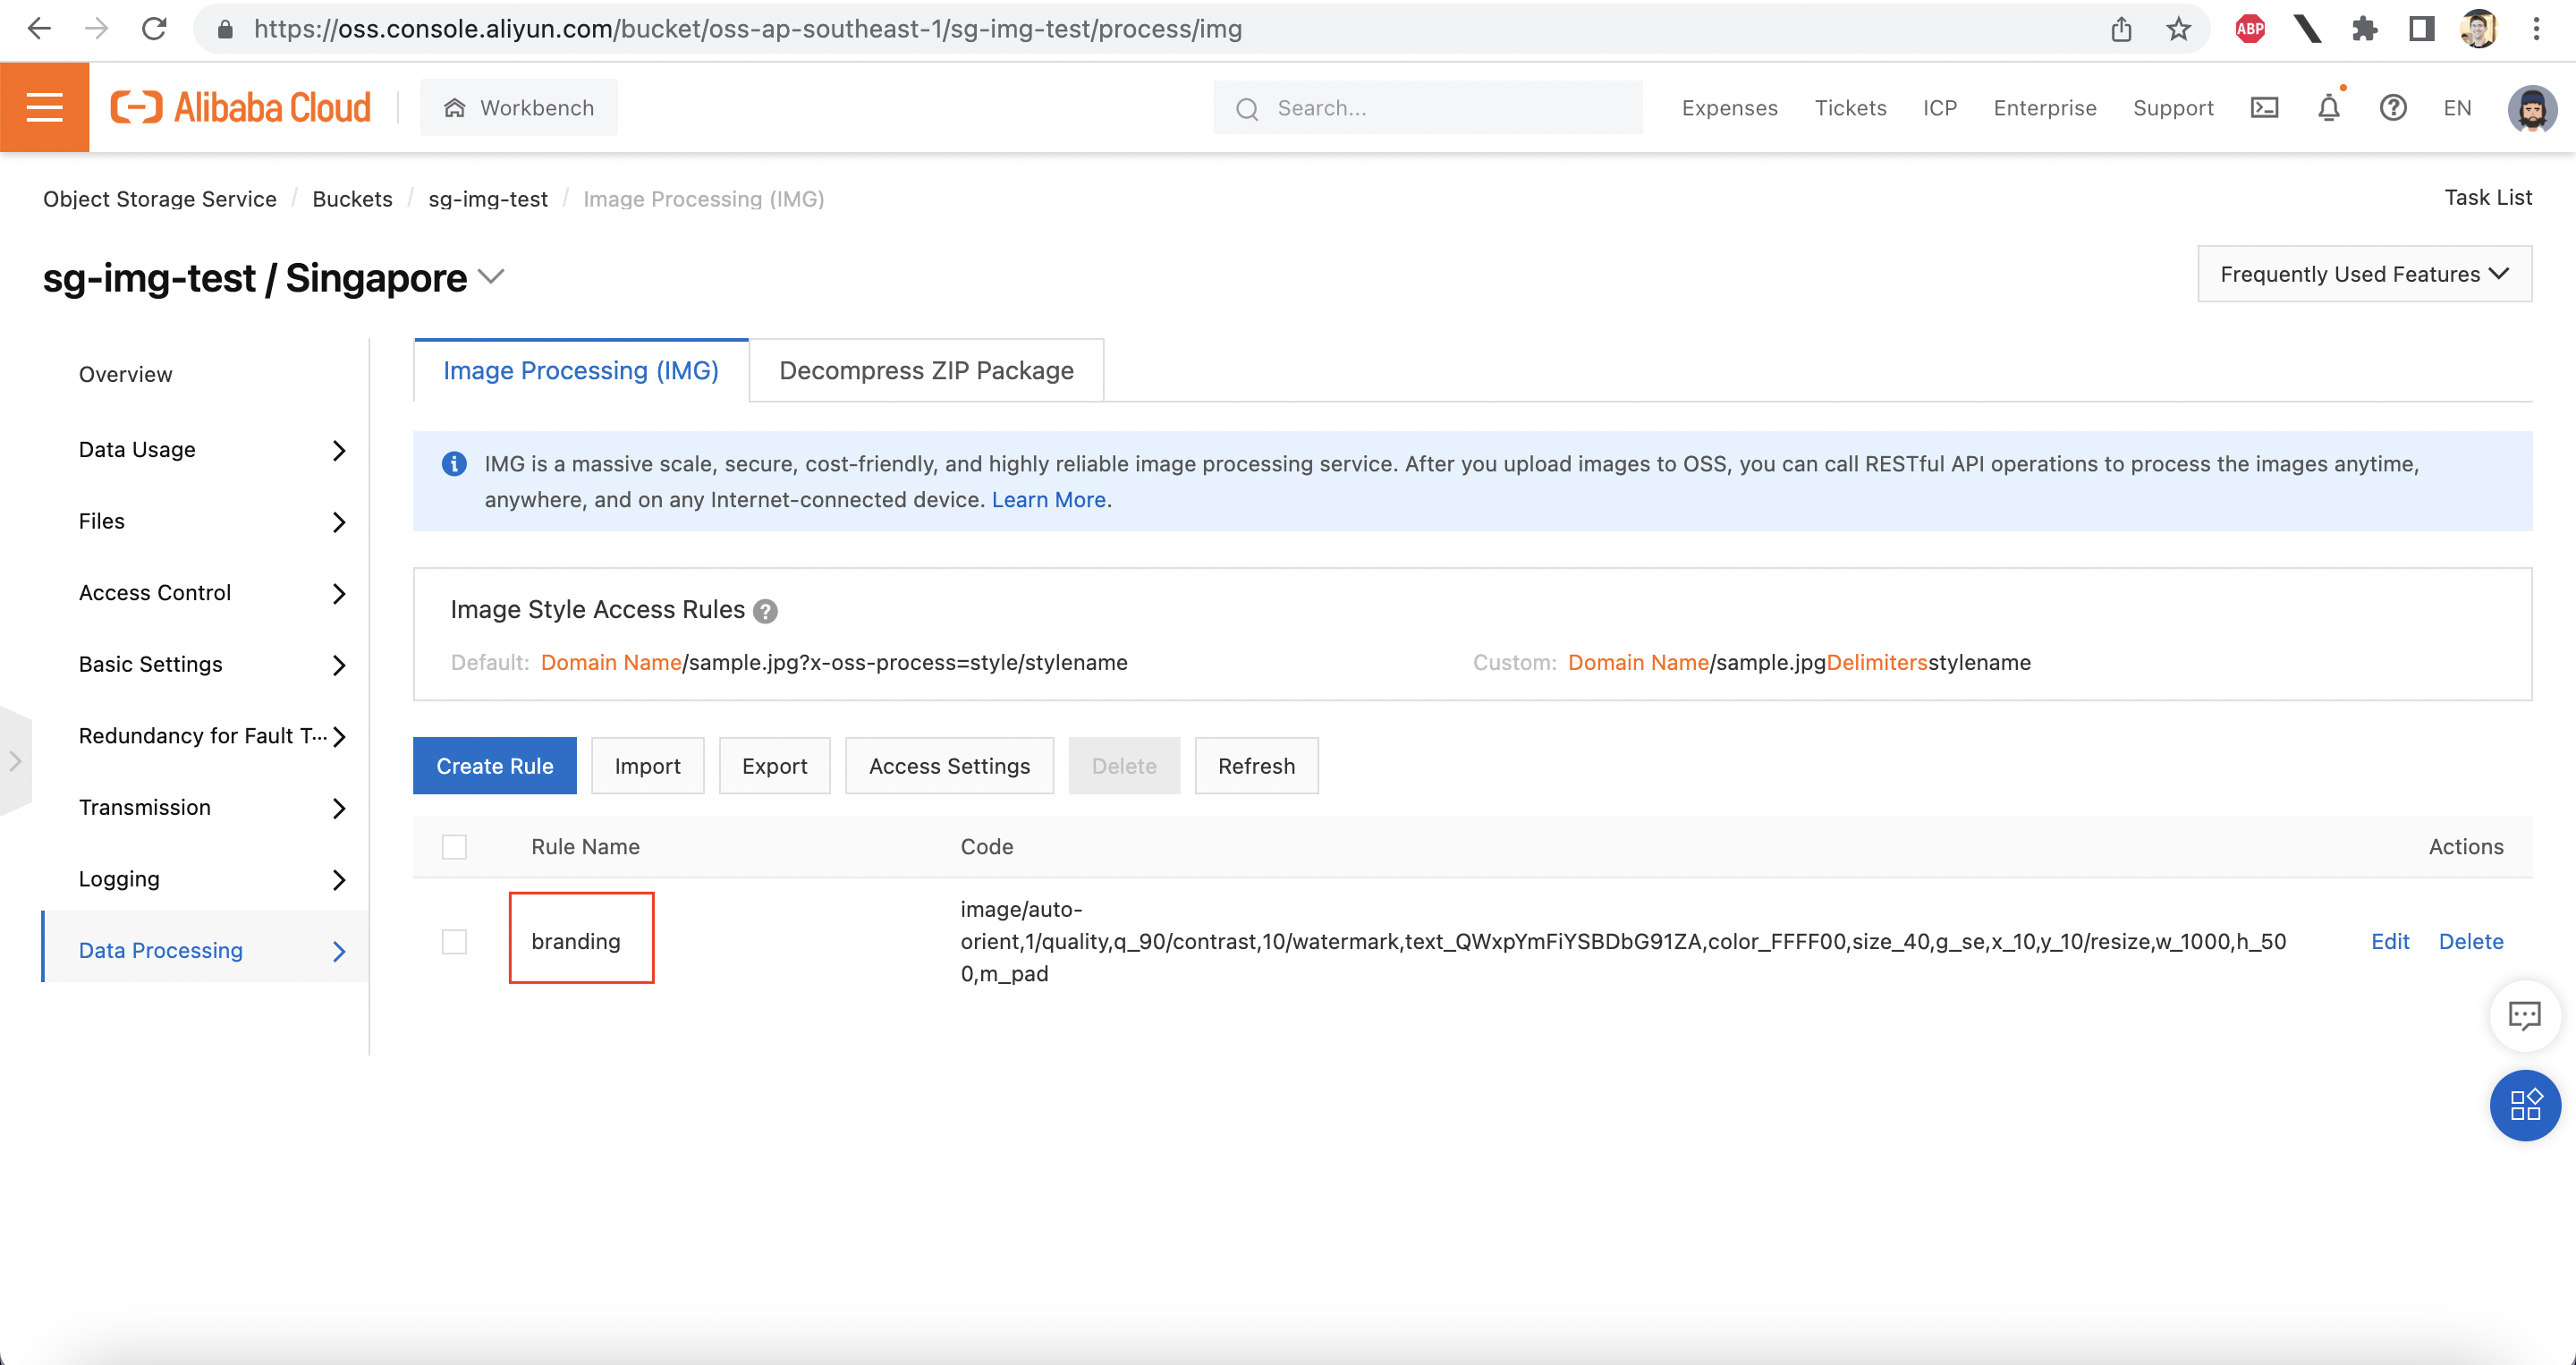
Now we can easily use the new style just by adding ?x-oss-process=style/branding to the end of image URLs, like this:
https://sg-img-test.oss-ap-southeast-1.aliyuncs.com/printer.png?x-oss-process=style/branding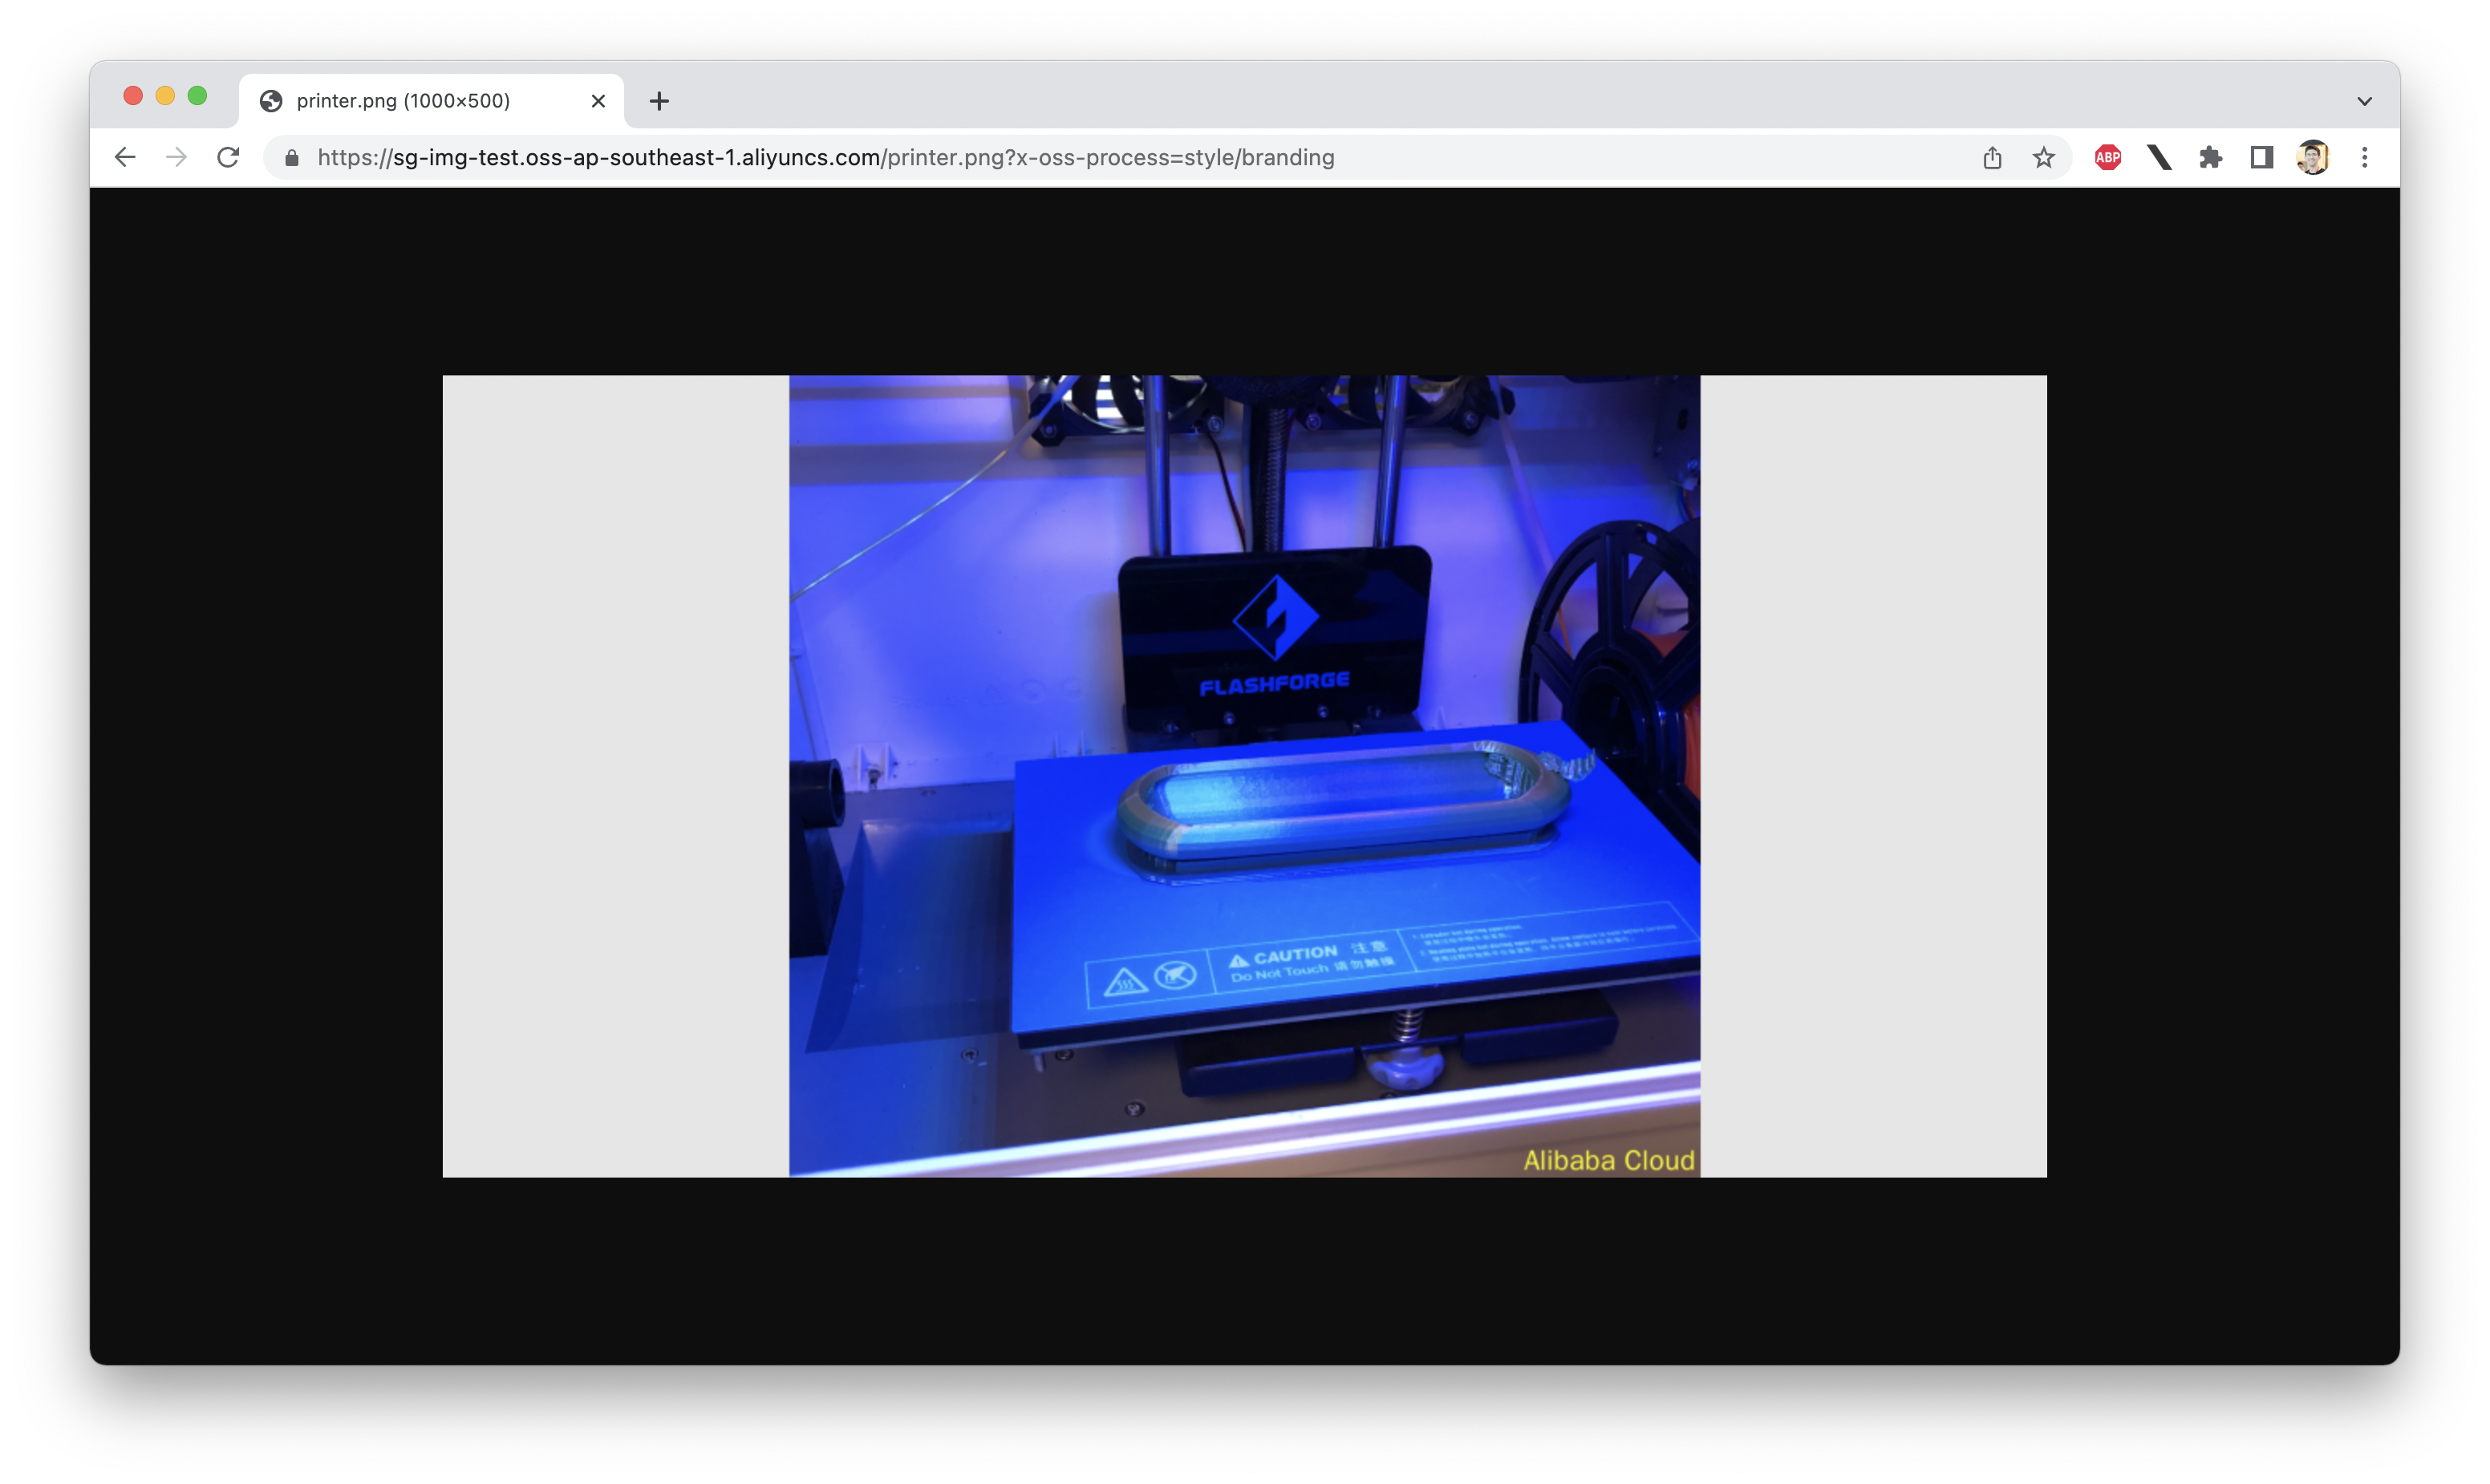
Easy!
Be sure to check out the full list of OSS image processing features. I highly recommend playing around with the image processing features on your own, to get a feel for what's possible!
Great! Reach out to me at jierui.pjr@alibabacloud.com and I'll do my best to answer in a future Friday Q&A blog.
You can also follow the Alibaba Cloud Academy LinkedIn Page. We'll re-post these blogs there each Friday.
How Hard Is It To Do Cross-Border Networking? - Friday Blog, Week 52
Protecting ECS Instances with Bastionhost - Friday Blog, Week 54
JDP - October 15, 2021
JDP - March 26, 2021
JDP - April 23, 2021
JDP - March 3, 2022
JDP - April 9, 2021
JDP - June 18, 2021
 Alibaba Cloud Academy
Alibaba Cloud provides beginners and programmers with online course about cloud computing and big data certification including machine learning, Devops, big data analysis and networking.
Learn More Offline Visual Intelligence Software Packages
Offline SDKs for visual production, such as image segmentation, video segmentation, and character recognition, based on deep learning technologies developed by Alibaba Cloud.
Learn More CT Image Analytics Solution
This technology can assist realizing quantitative analysis, speeding up CT image analytics, avoiding errors caused by fatigue and adjusting treatment plans in time.
Learn More Media Solution
An array of powerful multimedia services providing massive cloud storage and efficient content delivery for a smooth and rich user experience.
Learn MoreMore Posts by JDP